ASP.NET Core: Deploying a web app in Azure App Service using Visual Studio
We present you the fourth part of a series of articles devoted to working with ASP.NET Core. This material is a detailed instruction on how to deploy a web application in Azure App Service using Visual Studio.

1. ASP.NET Core on Nano Server .
2. Creating the web service front end for the application .
3. Create the first web API using ASP.NET Core MVC and Visual Studio .
4. Deploy a web app in Azure App Service using Visual Studio .
5. Your first application on a Mac using Visual Studio Code .
1. Install the current version of the Azure SDK for Visual Studio 2015 . When you install it, Visual Studio 2015 is also installed (if this has not been done before).
')
Note: SDK installation can take more than 30 minutes if you need to install a large number of additional components.
2. Install .NET Core + Visual Studio Toolkit .
3. Check your Azure account . You can create a free Azure account or activate benefits for Visual Studio subscribers .
On the Visual Studio start page, click New Project ...

A new project can also be created using the menu. Choose File> New> Project ...

Select the project type in the New Project window:

In the New ASP.NET Core Web Application (.NET Core) :
This problem can be fixed in two ways:
The application displays the email address used when registering a new user and the Log off item.
Right-click the project in Solution Explorer and select Publish ...

In the Publish window, select Microsoft Azure App Service .

Select New ... to create a new resource group. Creating a new resource group will simplify the deletion of all Azure resources that you create when performing the steps in this tutorial.
Create a new resource group and application service plan:
1. Click New ... to create a resource group and enter its name.
2. Click New ... to create an application service plan and select the nearest location. You can save the default name.
3. Select Explore additional Azure services to create a new database.

4. Click the green + icon to create a new SQL database.

5. Click the New ... button in the Configure SQL Database window to create a new database server.

6. Enter the username and password for the administrator, then click OK . Remember the username and password indicated at this stage. You can save the default server name ( Server Name ).

Note: “admin” cannot be used as a username.
7. Click the OK button in the Configure SQL Database window.

8. In the Create App Service window, click Create .

9. In the Publish window, click Next .

10. At the Settings stage in the Publish window:
11. Click the Publish button and wait for Visual Studio to publish your application.

Visual Studio will publish your application in Azure and launch the cloud application in your browser.
Check the operation of the About and Contact items and register a new user.

Open the Razor
For example:
Right-click on the project and select Publish ...

After publishing the app, make sure your changes are available in Azure.
After testing the application, go to the Azure portal and delete the application. To do this, select the Resource groups option, then select the created resource group.

Next, in the Resource group panel, click Delete .
Enter the name of the resource group and click Delete . This app and all other resources created within this tutorial are now removed from Azure.
The first cycle of articles on ASP.NET Core
1. ASP.NET Core on Nano Server .
2. Creating the web service front end for the application .
3. Create the first web API using ASP.NET Core MVC and Visual Studio .
4. Deploy a web app in Azure App Service using Visual Studio .
5. Your first application on a Mac using Visual Studio Code .
Preparing the development environment
1. Install the current version of the Azure SDK for Visual Studio 2015 . When you install it, Visual Studio 2015 is also installed (if this has not been done before).
')
Note: SDK installation can take more than 30 minutes if you need to install a large number of additional components.
2. Install .NET Core + Visual Studio Toolkit .
3. Check your Azure account . You can create a free Azure account or activate benefits for Visual Studio subscribers .
Creating a web application
On the Visual Studio start page, click New Project ...
A new project can also be created using the menu. Choose File> New> Project ...
Select the project type in the New Project window:
- In the left pane, select Web .
- In the center pane, select ASP.NET Core Web Application (.NET Core) .
- Click OK .
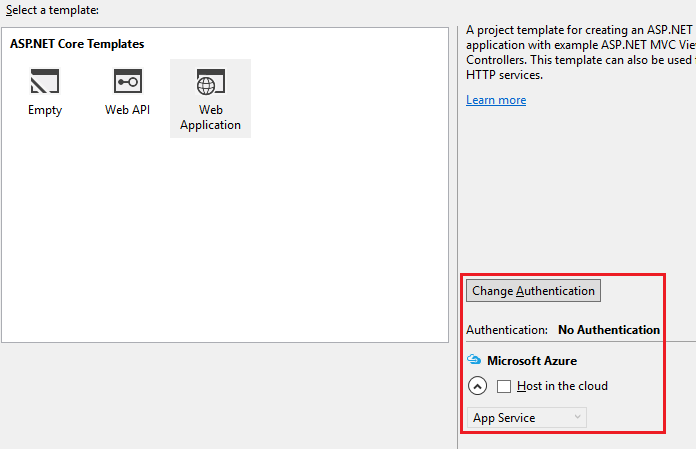
In the New ASP.NET Core Web Application (.NET Core) :
- Select Web Application .
- Make sure that the Authentication field is set to Individual User Accounts .
- Make sure the Host in the cloud option is not selected.
- Click OK .
Local Application Testing
- Press Ctrl – F5 to launch the application locally.
- Select About , then Contact . Depending on the screen resolution of the device, you may need to click on the navigation icon to display the menu.
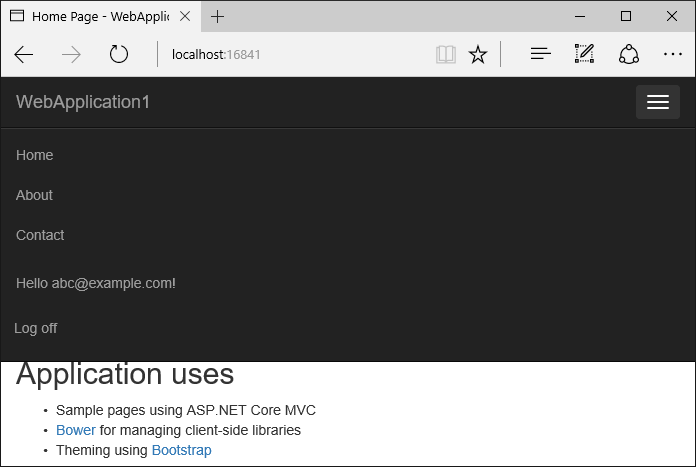
- Click Register and register a new user. You can use a non-existent email address. After confirming the entered data, the following error message will appear:
This problem can be fixed in two ways:
- Click Apply Migrations , wait for the action to complete, then refresh the page.
- Run the following command at a command prompt in the project directory:
dotnet ef database update
The application displays the email address used when registering a new user and the Log off item.
Deploy an application to Azure
Right-click the project in Solution Explorer and select Publish ...
In the Publish window, select Microsoft Azure App Service .
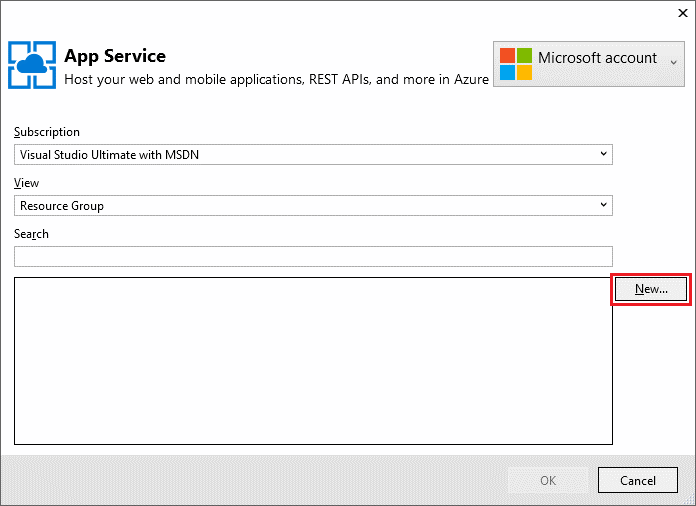
Select New ... to create a new resource group. Creating a new resource group will simplify the deletion of all Azure resources that you create when performing the steps in this tutorial.
Create a new resource group and application service plan:
1. Click New ... to create a resource group and enter its name.
2. Click New ... to create an application service plan and select the nearest location. You can save the default name.
3. Select Explore additional Azure services to create a new database.
4. Click the green + icon to create a new SQL database.
5. Click the New ... button in the Configure SQL Database window to create a new database server.
6. Enter the username and password for the administrator, then click OK . Remember the username and password indicated at this stage. You can save the default server name ( Server Name ).
Note: “admin” cannot be used as a username.
7. Click the OK button in the Configure SQL Database window.
8. In the Create App Service window, click Create .
9. In the Publish window, click Next .
10. At the Settings stage in the Publish window:
- Expand the Databases section and select the Use this connection string at runtime option.
- Expand the Entity Framework Migrations section and select the Apply this migration on publish option.
11. Click the Publish button and wait for Visual Studio to publish your application.
Visual Studio will publish your application in Azure and launch the cloud application in your browser.
Testing your application in Azure
Check the operation of the About and Contact items and register a new user.
Update application
Open the Razor
Views/Home/About.cshtml and edit its contents.For example:
@{ ViewData["Title"] = "About"; } <h2>@ViewData["Title"].</h2> <h3>@ViewData["Message"]</h3> <p>My updated about page.</p> Right-click on the project and select Publish ...
After publishing the app, make sure your changes are available in Azure.
Deletion
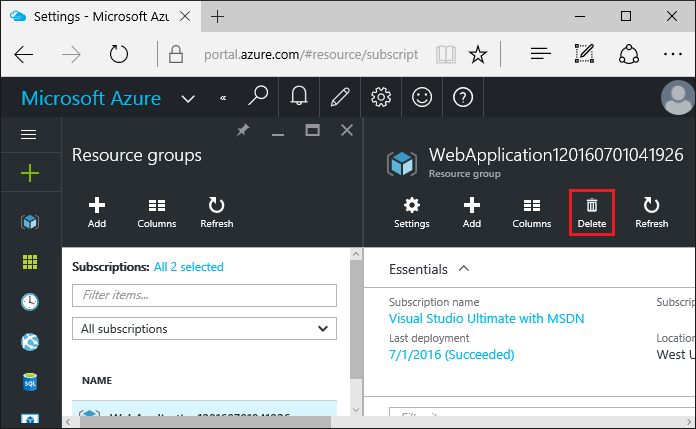
After testing the application, go to the Azure portal and delete the application. To do this, select the Resource groups option, then select the created resource group.
Next, in the Resource group panel, click Delete .
Enter the name of the resource group and click Delete . This app and all other resources created within this tutorial are now removed from Azure.
Source: https://habr.com/ru/post/314252/
All Articles