Xcode Build System: advanced tutorial
The project configuration in Xcode looks like a remote control spacecraft. Often, people understand how the assembly system works, but they confuse the terms. In this article, we will go through the project structure, targets, configuration settings, and work space. Go!
Not to say that the topic is fresh - Apple covered it back in 2011 on wwdc . And again this year .
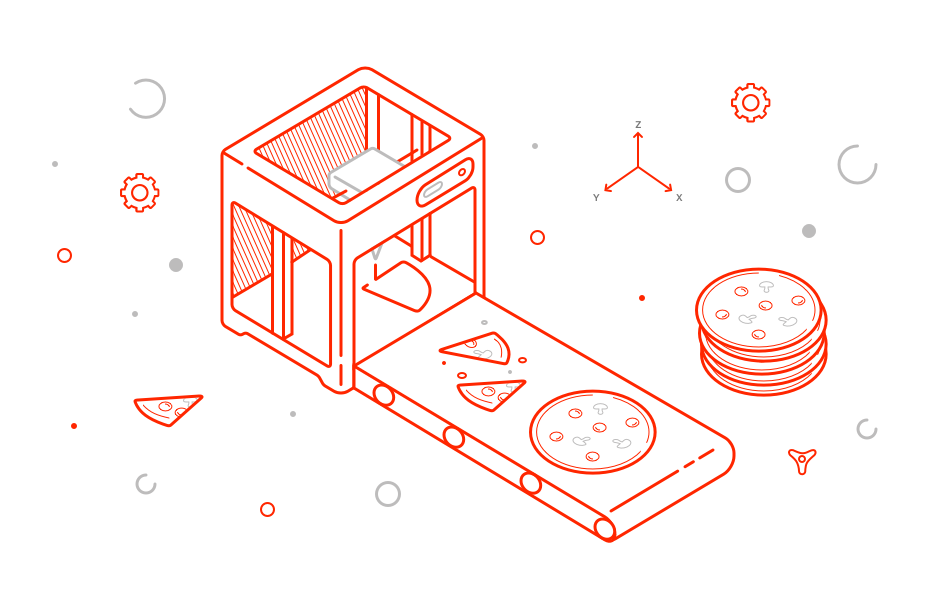
Therefore, in order to add freshness to the article, we use as an analogy some fashionable technology. For example, imagine that Xcode is a 3d printer capable of printing food. And we decided to use it as a kitchen for a catering point.
We will understand in order, below it will be about:
- Project
- Target
- Build settings
- Build configuration
- Workspace
Project
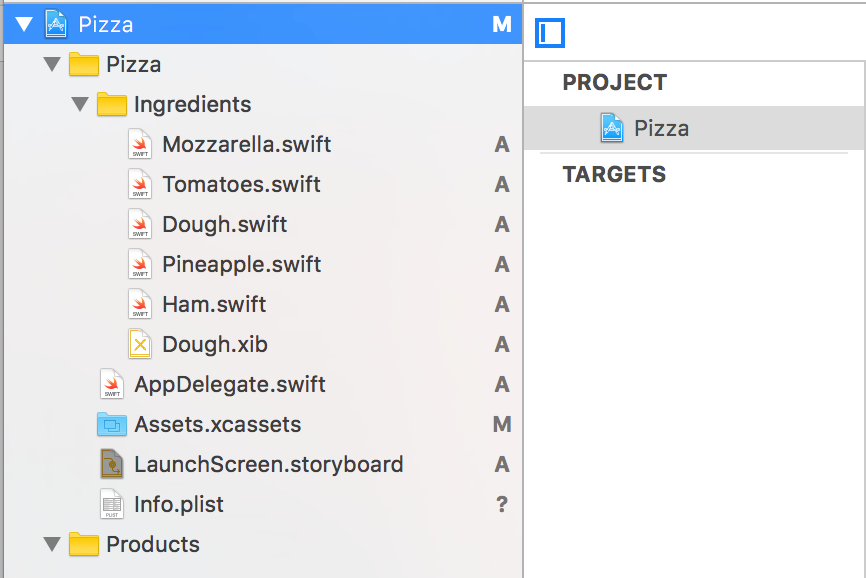
For example, we want to feed people with pizza and therefore we create a special module for our 3d printer, Pizza.project, which contains information on how to make abstract pizza (shape, cooking time, possible ingredients, etc.).
')
Documentation:
Project is a repository for files and resources needed to build a software product. The project contains all the elements used to assemble your products and maintains the links between these elements. The project determines the default settings for all the targets in the project.
Project's functions:
- Contains links to source files, libraries and frameworks, images, Interface Builder files (ksibki, storyboards).
- Describes groups for structuring files in Project Navigator (these are confusing pseudo-folders that have nothing to do with the structure of a project on disk).
- Describes the build configuration (more on that later)
- Contains a description of the target (this is also further)
Under the hood
The file with the .xcodeproj extension is a folder that we can open in the file and see how Project implements the functions assigned to it.
Like this:

Inside we can see the following:
Like this:
Inside we can see the following:
- .Pbxproj file. A rare iOS developer did not have to fail it. We all know that this is a hefty file that is constantly changing because it contains almost all the information about the project. Links to sources and resources, description of file grouping, list of targets, target dependencies, project build configurations, target configuration builds and more. In general, the description of the functions and the internal structure of this file is worthy of a separate article .
- Folder xcuserdata. It contains information about the state of the project (which file is open, which target is selected, etc.), breakpoint and schemes for the current Xcode user. This folder should be added to your .gitignor file, if you have not already done so.
- Xcshareddata folder As the name suggests, the folder differs from the previous one in that it stores settings (schemes and breakpoints) that we want to share with our app development companions.
- To share breakpoint: you need to go to breakpoint navigator, right-click on the breakpoint you want to share, and click Share Breakpoint.
- To share a schema, go to Product -> Scheme -> Manage schemes and tick the Shared column in front of the schema you want to share.
- File .xcworkspace (internal workspace).
Target
Since nobody buys an abstract pizza from us, we need to additionally load several models of specific pizzas into our 3d printer, which, based on our Pizza.project, will describe the 3d printer how to print a specific pizza (which ingredients to use, what temperature keep at cooking, what should be the size). This model will be targeted.
Documentation:
Target determines exactly which product will be assembled, and contains instructions for assembling a project from a set of files of a workspace or project.
As you might guess from the title, the target describes the goal to which we are moving in our work. This can be an application for one of the four axes, a library or framework, extension or widget, a set of tests. In Swift, each Xcode target is presented as a separate module that can be imported and accessed through its public API. The most important thing: we can have several targets on the same code base, which can use the same source code and resources. Depending on the type of the final product and the operating system on which it will work, the target may have a different set of responsibilities.
Target functions:
- Defines the set of sources and resources used to build the product. We can include in the project and exclude from it a specific resource or source file (in the Compile Sources section of the Build Phases, or in the File Inspector by selecting the desired file).
- Stores project build settings. We can change some settings for some product without changing the settings for assembling other products.
- Describes the assembly phase. This is a set of ordered actions (like copying files into a bundle, linking frameworks, building resources and sources) that xcode will perform to get the product. We can change this order, as well as add our own phases in the form of shellscript'ov. Often it is necessary to choose the right place for your script in the order of execution of the phases, for example, if we want to modify some file from the bundle, we need to apply the corresponding script after Xcode copies the files into the bundle.
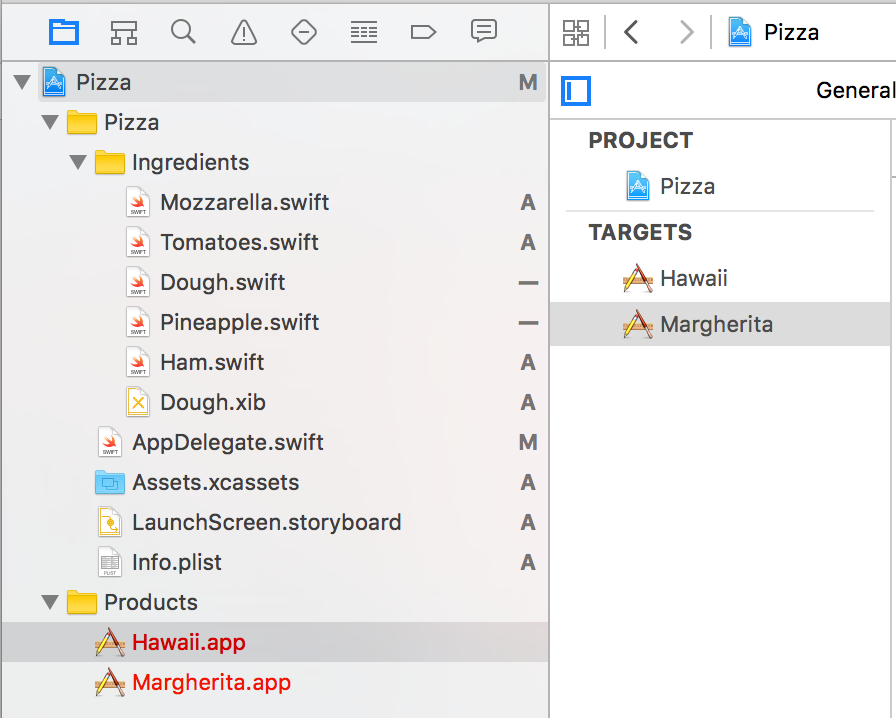
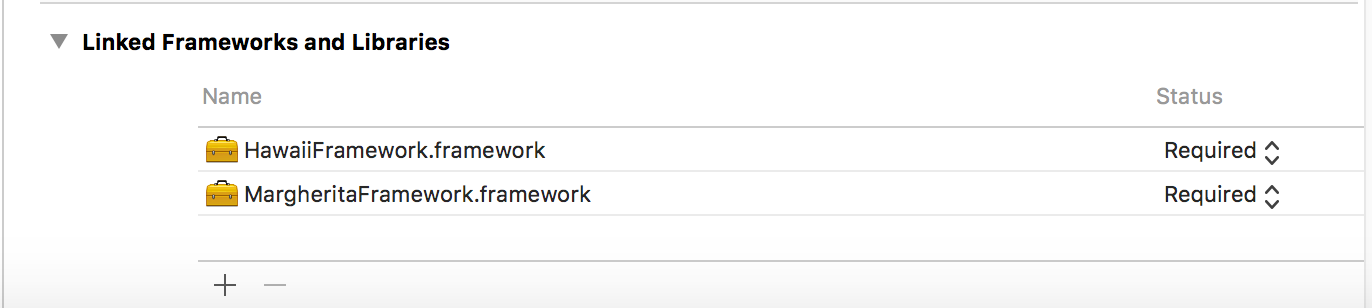
We can also add dependencies to the target, helping Xcode determine the build order of products. Returning to our example of pizza, we can offer our customers a combo of two pizzas by adding Target PizzaCombo.
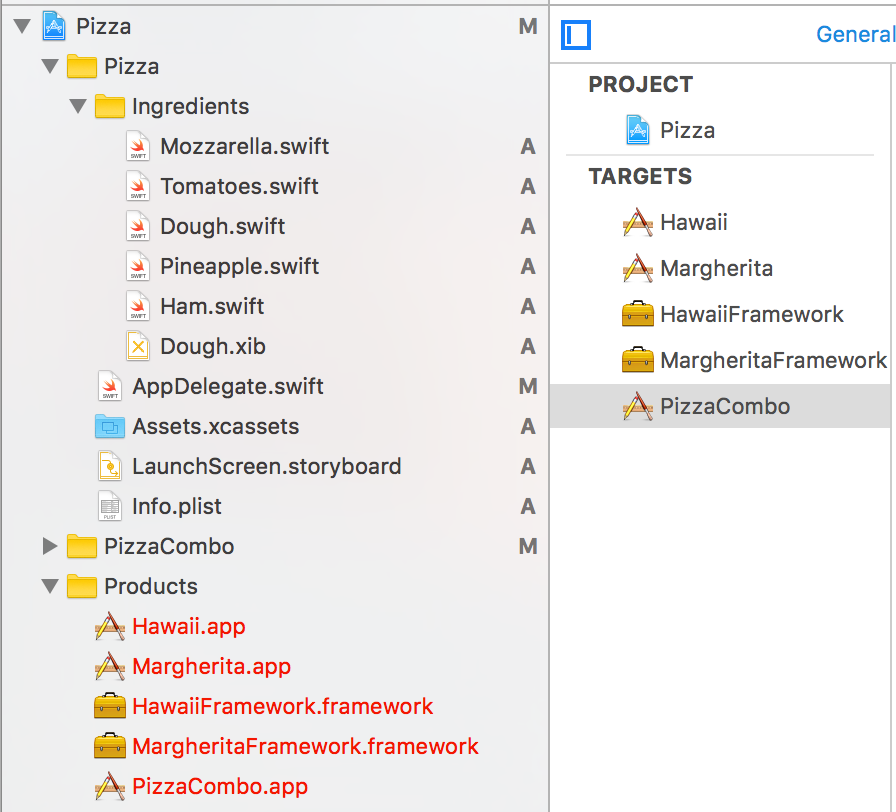
As can be seen in the screenshot, for this we had to create targats for Hawaiian pizza and margarita as frameworks. Now we just have to add them as dependencies to the target PizzaCombo, and we can use these products inside another product.
Build settings
In addition to the right ingredients for making the right pizza, our 3d printer must follow a number of rules. Some of them are specific to the pizza project in general (for example, all pizzas should be printed of the same form), some are specific to a particular pizza (for example, Hawaiian pizza should be cooked at a different temperature than Margarita, otherwise the pineapples will be dry).
Documentation:
Build customization is a variable that contains information about how a particular aspect of the build process should be performed.
When I first looked into the Build Settings section, my first association was:
However, fortunately, we do not need to know in our daily development all the available settings and their keys, but we constantly use only a few.
Each setting consists of a key, a value, and a header for a key in a human-readable format (so that you can fit in the Build Settings tab).
The value for setting can be set both at the project level and at the target level. If at any of the levels the value for the setting was not set, it inherits the value from the previous level.
Inheritance is carried out in the following order (from the smallest to the largest):
- Baseline for platform
- Value from the project xcconfig file
- The value set in the project
- Value from the xcconfig file of the target
- The value set in the target
To understand at what level the value is set for a particular setting in Xcode, use the Levels button in the Build Settings section. Green will mark the value that will be installed during assembly.

It is important to know that we can add our User-Defined settings and use them, for example, in the assembly phases or in the Info.plist file (albeit with some restrictions).
Also worth mentioning is the possibility of setting conditional settings. That is, to have different values for the same setting depending on the platform for which the product will be assembled. For a more "smart" and flexible separation of settings, we should use the assembly configurations.
Build configuration
For example, we decided that each pizza will be presented in the usual and dietary form. Dietary version of the pizza will not be so roasted, fried ham will be replaced with boiled, the dough will be without salt. Then two variants of the same pizza will differ in the whole set of settings of our printer. In order not to create new tags for each of the existing pizzas, but to apply only different sets of settings for printing, we use the configuration of the assembly.
Documentation:
The configuration of the assembly determines the set of assembly settings used to assemble the product of the target in a certain way.
By default, Xcode creates two Debug and Release configurations for us, however we can add as many configurations as we need.
Thus, by creating configurations for a conventional and dietetic pizza, we can set two values for each differing setting corresponding to each configuration, and when assembling, simply set the configuration that is currently needed.
So it is possible, for example , to separate application assemblies for working with test and productive servers.
We can take configurations of the assembly into xcconfig files to remove one of the responsibilities of the .pbxproj file and ease the merge while changing the settings. This can be done, for example, using this tool .
Workspace
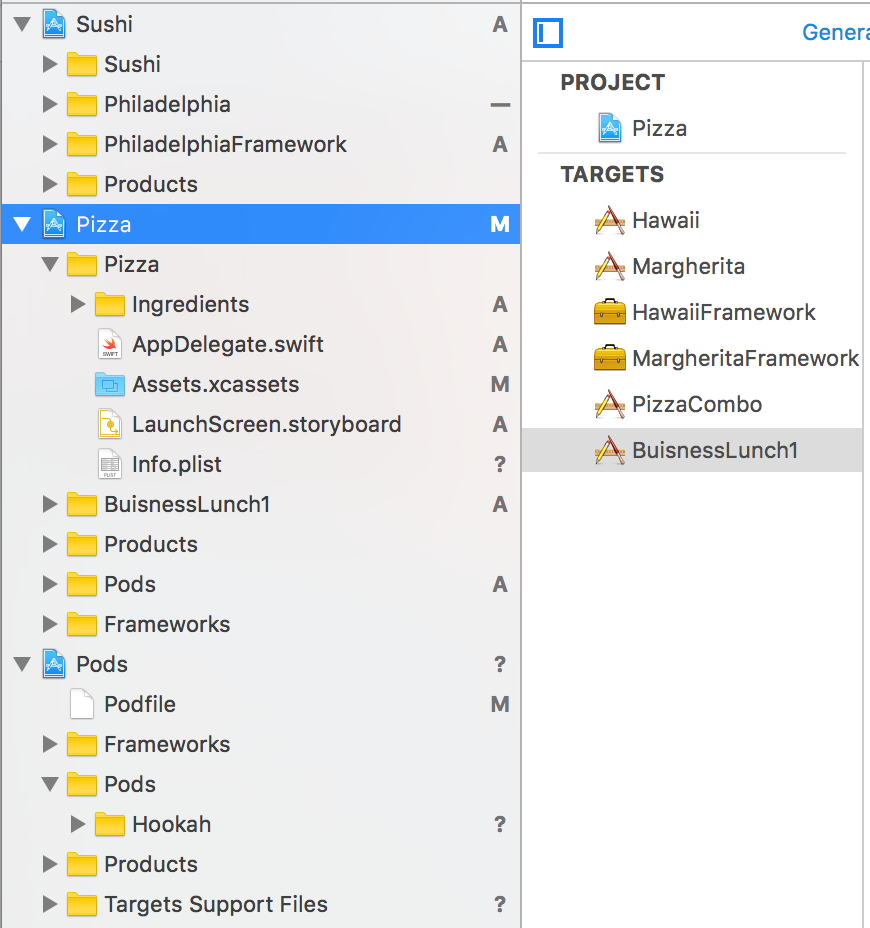
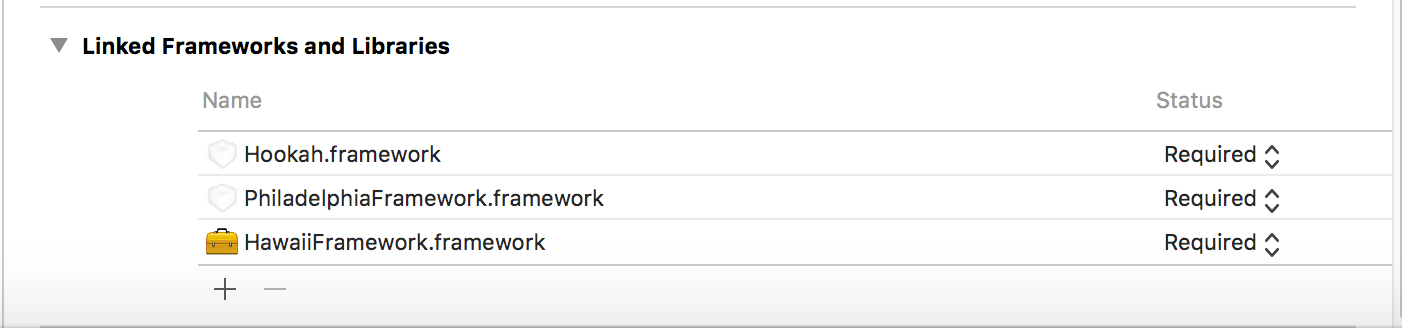
So we started to print our pizza, added a couple of pizza options, collected feedback from our customers and it turned out that most of them like our pizza, but they would like to eat it along with rolls. We won't be able to roll on the basis of Pizza.project, so we add the Sushi.project project to our 3d printer and create a couple of models (targets) for specific rolls on its basis. Now we can print both pizza and rolls, but since our customers want to eat them together, we will make them an offer. We create Pizza.workspace, which includes a project from sushi. Now we can form the target for combined business lunches, which will include both a specific pizza and a specific roll. Also in this project we can include a third-party hookah printing library, which we will use when printing pizza, and when printing rolls, and when printing combined business lunches. For example, let the first version of a business lunch include Hawaiian pizza, Philadelphia rolls and a hookah from a third-party library:
Documentation:
Workspace is an Xcode document that groups projects and other documents for working with them as a whole.
Simply put, workspace allows us to combine any number of projects and related files into a single container. What does this give us?
Functions workspace'a:
- Provides access to every file in every included project.
- Expands scope. Due to this, autocompletion, search and transition to definition work on all projects included in the workspace.
- Helps Xcode resolve dependencies of targets and collects projects in the appropriate sequence. For example, we can import the Swift-module target of one project in another project, if these projects lie in one workspace.
Under the hood
Vorkspace - package with the extension .xcworkspace.
Let's take a look inside .xcworkspace, as we did with .xcodeproj. First of all we will see the contents.xcworkspacedata there - an XMLku, describing the projects and files included in the workspace.
We can also see the familiar folders .xcuserdata and .xcshareddata. We can decide for ourselves where, for example, to keep the scheme: at the project level or at the level of workspace. Depending on our choice, it will appear either in one of the folders in the .xcodeproj, or in one of the folders in the .xcworkspace.
What is the result
Today we learned that a project is a repository for project files, targets, configurations and basic settings. That a target is a set of instructions for building a product based on the project to which this target belongs. That assembly settings are key-value pairs that describe some aspect of the assembly and can be set at the project level as well as at the target level. That build configuration is a set of values for each build setting, united by some common idea. And finally, that workspace is a container for convenient sharing of several projects. I hope, having read this article, you will not be confused in terminology and remember who is responsible for the assembly phases: workspace or target?
Source: https://habr.com/ru/post/313706/
All Articles