Installing Jenkins and Bonobo Git Server under Windows for building Android applications
Good day. Not having time to dig into Linux Faced with gaps in information when searching online for instructions on installing and configuring a Jenkins server for Android for continuous use on Windows, the Git server and their integration decided to share information about what I did.
You can install JDK, Git for Windows and Android SDK Tools from the very beginning with default settings.
A simple and easy git server for itself requires the installation of IIS and ASP.MVC that includes MS SQL Server Express 2008
There is nothing unusual here, we add the role of Web Server (IIS):
')
The main thing on the following form is not to miss adding ASP.NET 4.5 to the Feature:
Run the distribution:
Along the way, MS SQL Server 2008 Express will be installed and we will be asked for the password for UZ sa. I hope without need it is no longer required:
After installing MVC, you need to go over the settings of server roles (not features, but earlier) and add ASP.NET4.5 support to the web server. Prior to installing ASP.NET MVC 4 of this subsection (Application Development) in the components of IIS was not!
Everything, now you can go directly to the deployment of the git server. Unzip the distribution in the wwwroot of the IIS server and grant the rights of IIS_IUSERS UZ to modify the App_Data directory:
Launch IIS Manager and convert it to BonoboGitServer application:
If everything went as it should to the right in IIS Manager in Action click Browse: *: 80 (http) and get (if you did not change the name and port) to localhost / BonoboGitServer:
Username and password for the first login admin / admin. The server has not so many settings (in any case via the web interface), for example, you can change the interface language:
and create new users, such as developer and jenkins. Under the first we will work ourselves, the second is needed by the future build server.
Let's create a new repository and give the developer and builder the rights to it (ultrasound jenkins, not on the screenshot, but it should be there if you do everything in order ...)
An example of a repository page with a cherished .git address. Since I logged in to the server from a browser on the same machine, I have localhost in the address, but you may have a normal DNS server name or IP.
You can create a project in Android Studio and specify the address of our repository as a remote branch. I’ll skip all this local part.
Jenkins is installed from msi and doesn’t specifically ask about anything, at the end of the installation a page with the address where we need to copy from the initialAdminPassword file and insert the password automatically opens:
In the future, password UZ admin can also be changed.
It's time to install the necessary plugins and configure the server. Go to Manage Jenkins - Manage Plugins - Avaliable and note:
After restarting Jenkins, you need to go to the Manage Jenkins - Configure System section and set the path to the Android SDK in two places:
And at the very bottom of the same page in the Android SDK root:
If this parameter does not appear something wrong with the Android Emulator Plugin, maybe it just is not installed.
Next, go to the Manage Jenkins - Global Tool Configuration configuration page, check and, if necessary, specify the paths to the components:
It seems everything?
In the main Jenkins sidebar, click New Item, invent a task name with the “Freestyle project” type and click OK, we’re in the task configuration. Do not forget to tick Discard old builds, and then our server will soon be filled with successful builds of all versions:
In the Source Code Management section, specify the URL of the git repository of our project. Looking ahead, we do not start and do not substitute any credentials to access the repository:
We will collect the master branch. You can also configure automatic assembly, in particular, polling the repository every minute and starting the assembly in case of new commits. Mark Poll SCM and write * * * * * *:
In the build section, click Add build step and configure the Gradle assembly. The gradle version should be the one that we specified in the Global Tools Configurations. We write a simple Task - “clean build”. These are the tasks available to us in gradlew.bat tasks at the root of the project. You can call other tasks of the collector here, incl. with keys.
Also we add one Post-build Action - we will save our APK-shniki - Android applications. So we write:
Save and run the build and see something like that, hang for 10 minutes and can't reach the repository:
We have not logged in to the git repository! Adding the Login / Password pair to the Jenkins repository (where we left -none- in Source Code Management) didn't work, no matter how I tried. We must try to look for other ways.
The command line is launched on behalf of the KS session, Jenkins on behalf of the System and does not know anything about it, in the Credential Manager repository, it looks like it will not happen either. Those. This will not help:
An additional search on the network gave some tips:
To do this, we need PsExec.exe from the PsTools utility suite. With it, we can run cmd.exe from under the System. Run cmd.exe with elevated rights and execute:
In the new console, all that needs to be done is to knock on the repository we need, for example, try to redo it on the command line. credentials will be requested:
With the help of which Jenkins will be able to access this repository. This is the same UZ that we created when setting up Bonobo Git Server along with developer. If you later need to change these credentials have to go through the procedure again.
It may happen that the SDK will not have any modules and the console build to issue messages of a similar nature:
In this case, you need to run the SDK Manager with elevated permissions and install the missing components:
Everything, after all shamanism, the assembly was successful!
You can breed a team of Android-developers.
PS You can even more automate the process, with the help of the corresponding plug-in, set up automatic publishing of the apk'shnik on the Google Play Store, but I will write about this another time if there are any difficulties.
Distributions
- In the role of the OS we will be Windows Server 2012 R2 Standard x64
- Jenkins for Windows is in a separate msi
- Bonobo Git Server
- JDK
- ASP.NET MVC 4
- Android SDK tools at the very bottom of the page, not Wednesday but only the SDK
- Git for windows x64
Last preparations
You can install JDK, Git for Windows and Android SDK Tools from the very beginning with default settings.
Bonobo Git Server
A simple and easy git server for itself requires the installation of IIS and ASP.MVC that includes MS SQL Server Express 2008
IIS Server
There is nothing unusual here, we add the role of Web Server (IIS):
')
IIS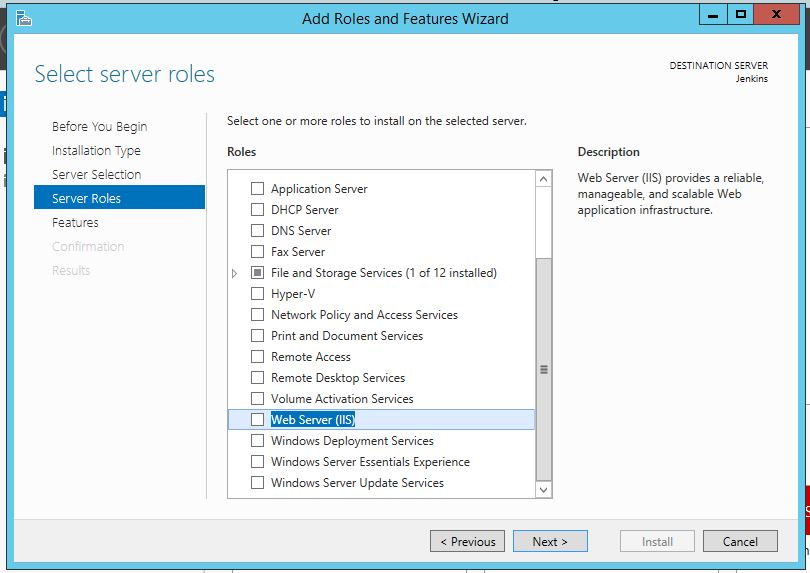
The main thing on the following form is not to miss adding ASP.NET 4.5 to the Feature:
Feature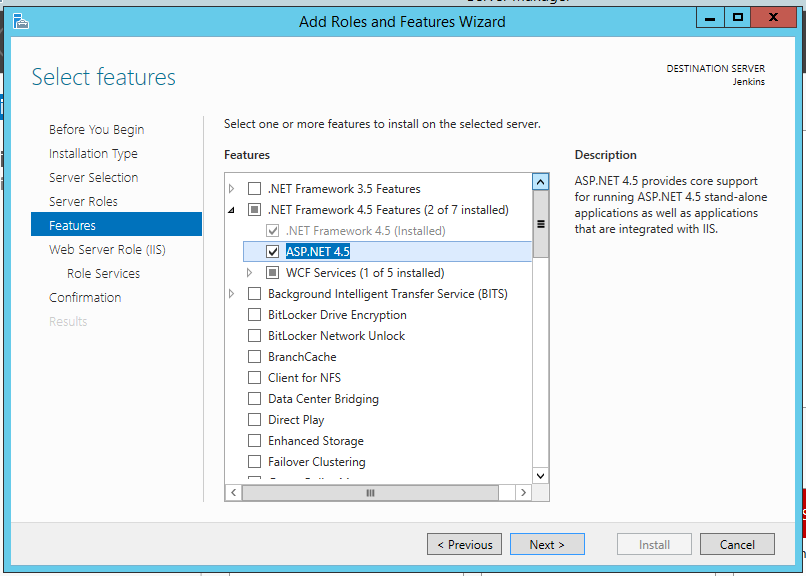
ASP.NET MVC4
Run the distribution:
ASP.NET MVC4 Install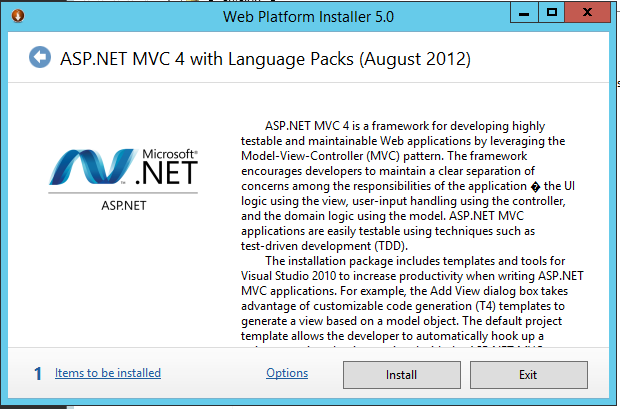
Along the way, MS SQL Server 2008 Express will be installed and we will be asked for the password for UZ sa. I hope without need it is no longer required:
MS SQL Server installation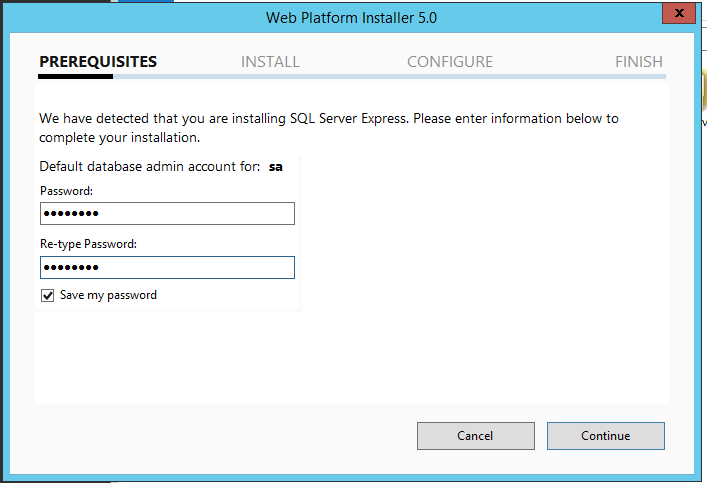
After installing MVC, you need to go over the settings of server roles (not features, but earlier) and add ASP.NET4.5 support to the web server. Prior to installing ASP.NET MVC 4 of this subsection (Application Development) in the components of IIS was not!
Server Roles - IIS - Web Server - Application Development - ASP.NET 4.5
Bonobo Git Server
Everything, now you can go directly to the deployment of the git server. Unzip the distribution in the wwwroot of the IIS server and grant the rights of IIS_IUSERS UZ to modify the App_Data directory:
IIS wwwroot and UI IIS_IUSERS rights to the App_Data directory
Launch IIS Manager and convert it to BonoboGitServer application:
IIS Manager Convert to Application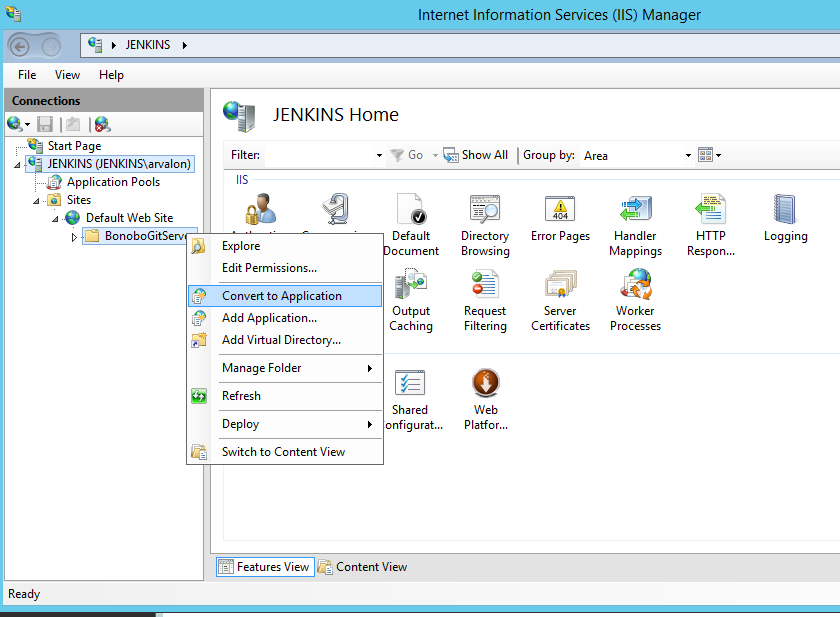
If everything went as it should to the right in IIS Manager in Action click Browse: *: 80 (http) and get (if you did not change the name and port) to localhost / BonoboGitServer:
Bonobo Git Server login page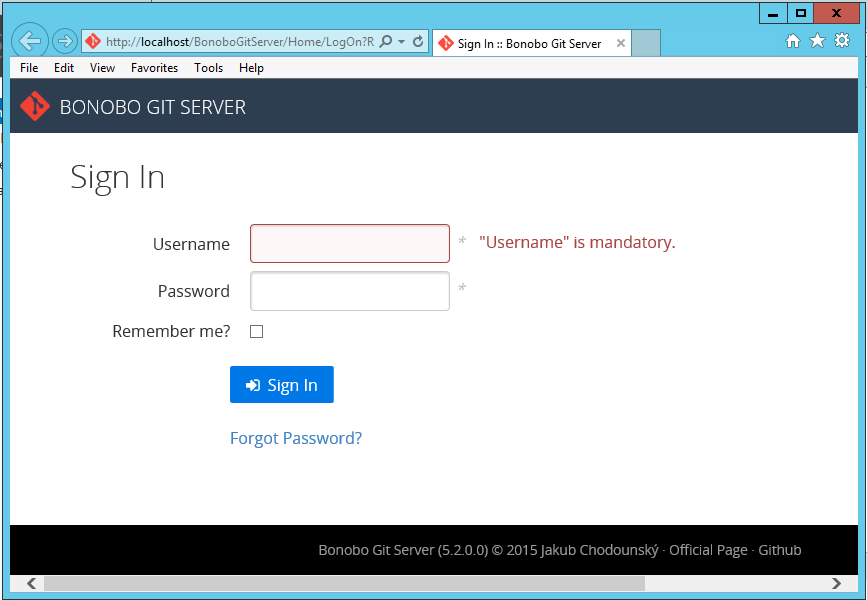
Username and password for the first login admin / admin. The server has not so many settings (in any case via the web interface), for example, you can change the interface language:
Bonobo language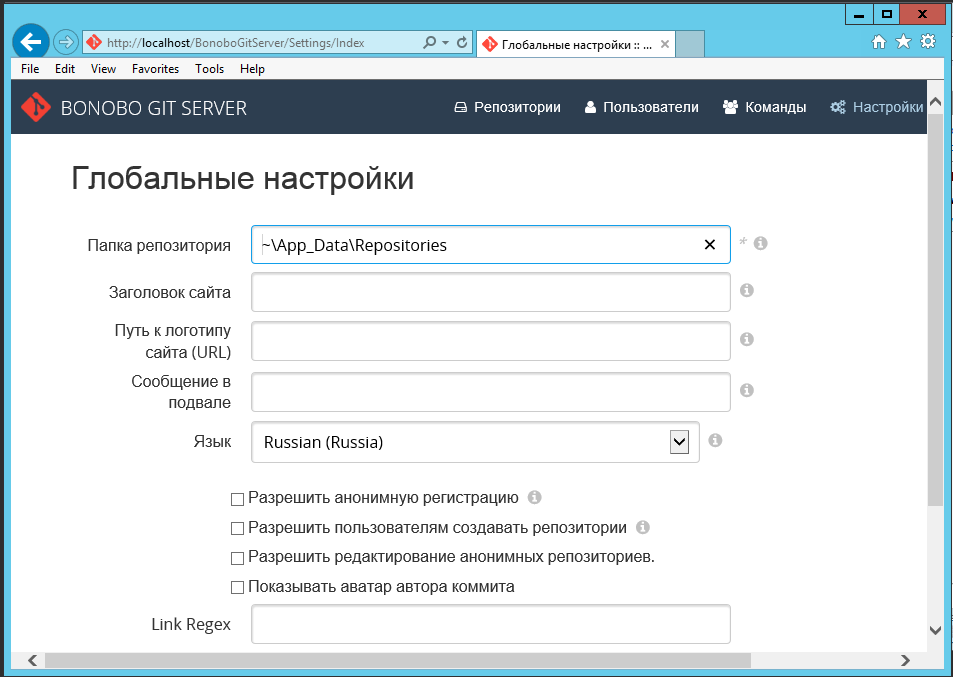
and create new users, such as developer and jenkins. Under the first we will work ourselves, the second is needed by the future build server.
New user Bonobo Git Server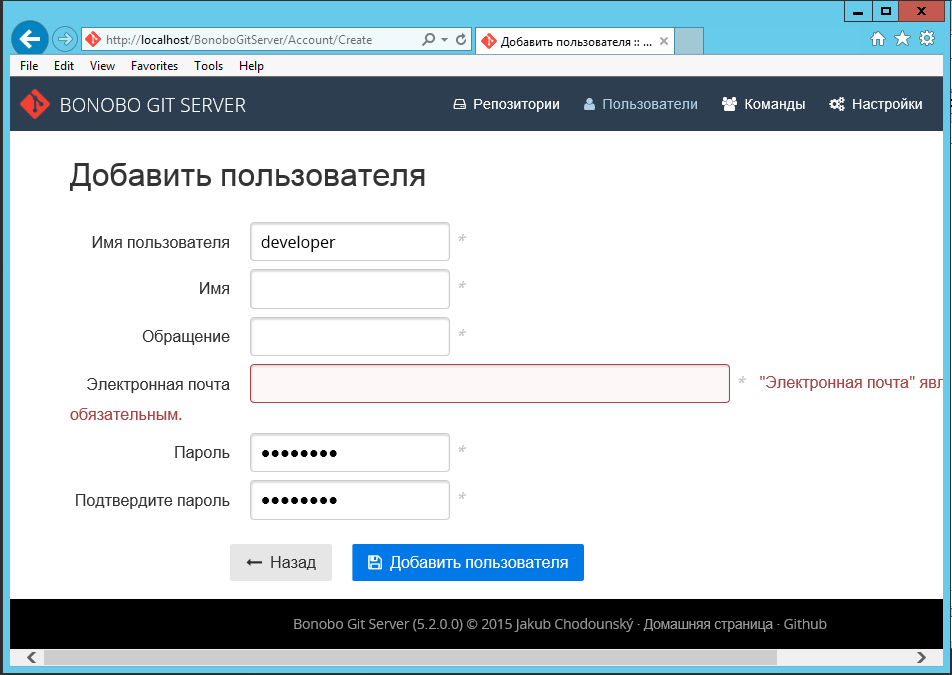
Let's create a new repository and give the developer and builder the rights to it (ultrasound jenkins, not on the screenshot, but it should be there if you do everything in order ...)
New repository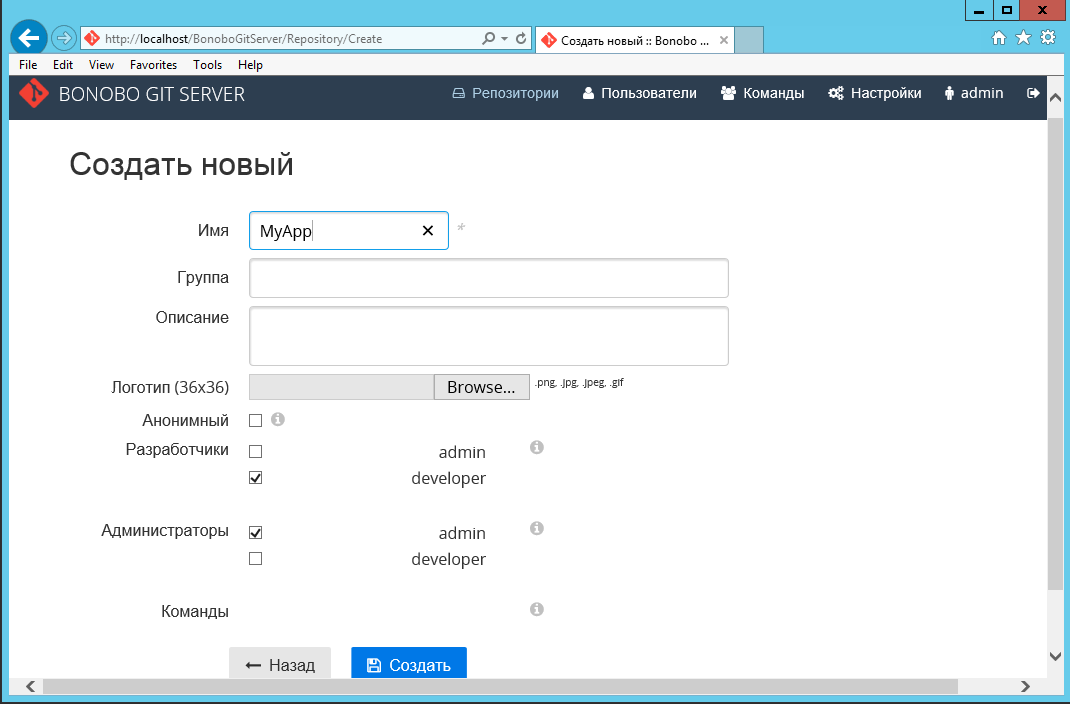
An example of a repository page with a cherished .git address. Since I logged in to the server from a browser on the same machine, I have localhost in the address, but you may have a normal DNS server name or IP.
Repository Address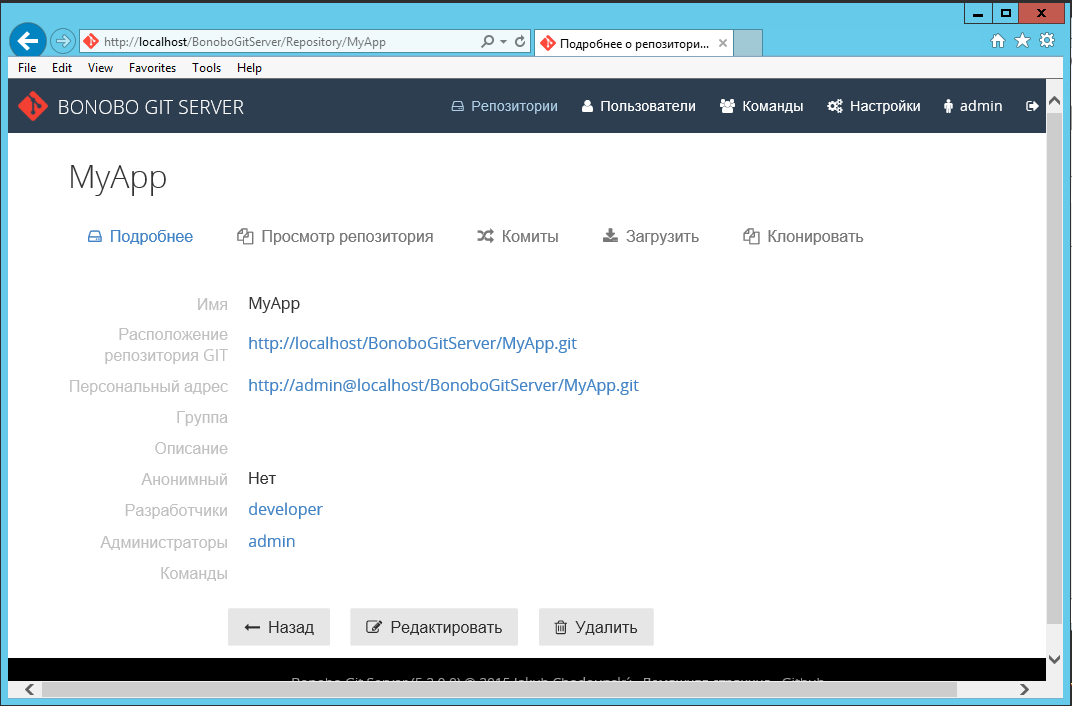
You can create a project in Android Studio and specify the address of our repository as a remote branch. I’ll skip all this local part.
Remote repository available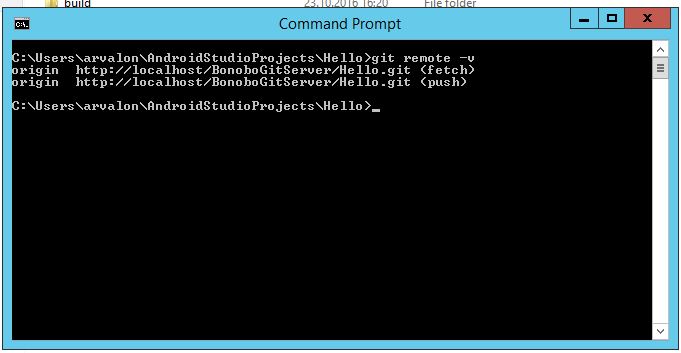
Jenkins
Jenkins is installed from msi and doesn’t specifically ask about anything, at the end of the installation a page with the address where we need to copy from the initialAdminPassword file and insert the password automatically opens:
Unlock jenkins
In the future, password UZ admin can also be changed.
It's time to install the necessary plugins and configure the server. Go to Manage Jenkins - Manage Plugins - Avaliable and note:
- JDK Parameter Plugin
- Git plugin
- Android Emulator Plugin
- Gradle plugin
Jenkins plugins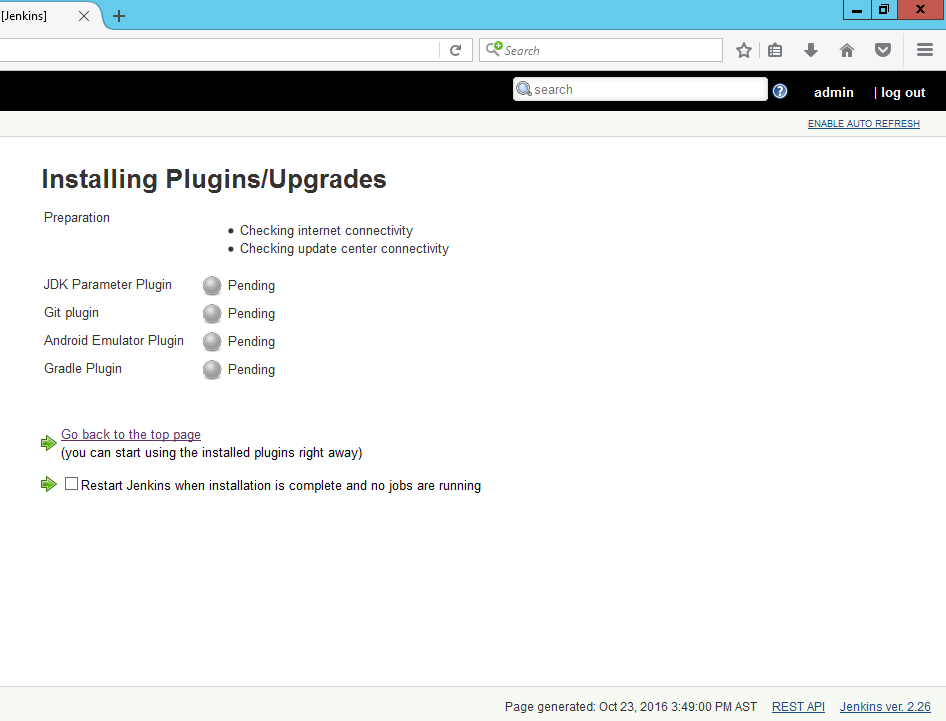
After restarting Jenkins, you need to go to the Manage Jenkins - Configure System section and set the path to the Android SDK in two places:
ANDROID_HOME in Environment variables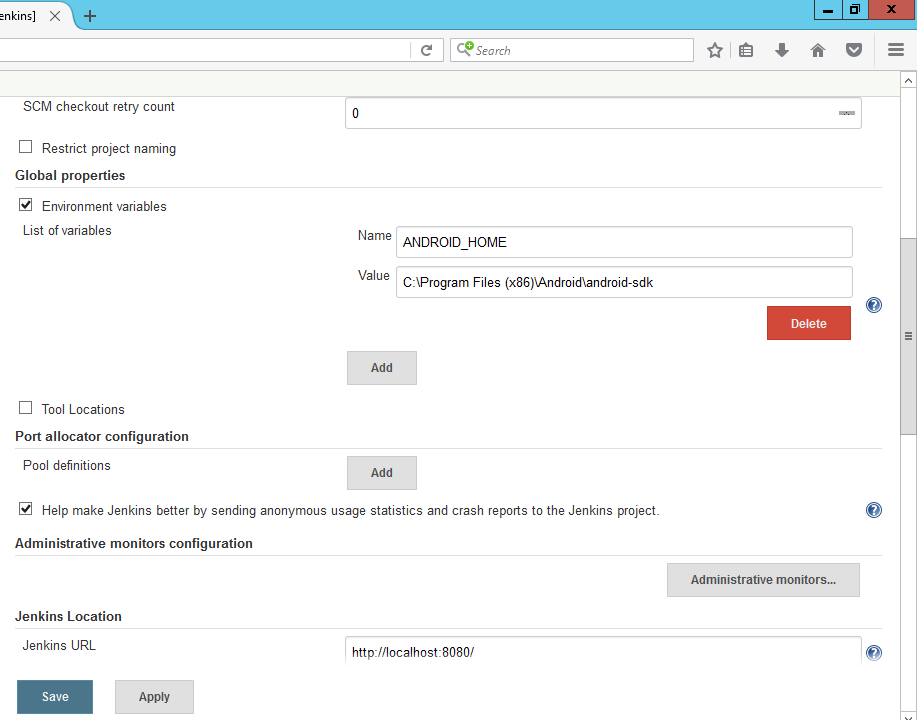
And at the very bottom of the same page in the Android SDK root:
Android SDK root
If this parameter does not appear something wrong with the Android Emulator Plugin, maybe it just is not installed.
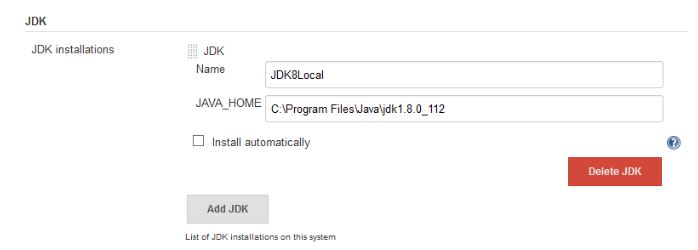
Next, go to the Manage Jenkins - Global Tool Configuration configuration page, check and, if necessary, specify the paths to the components:
Global Tool Configuration
With JDK, everything is simple:
Git can not be touched if the path variable contains the path to the git executable file and it is available on the command line, and Jenkins can use it:
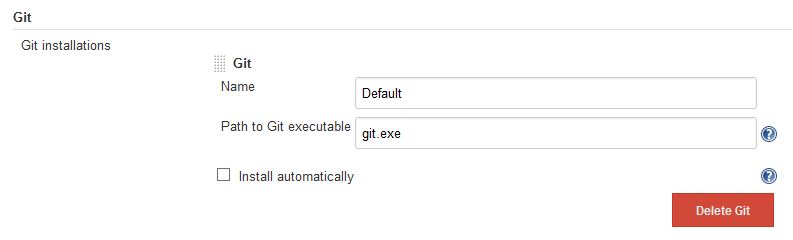
And let Gradle download automatically. In principle, the same trick could be done with the JDK, but when installing the Android SDK it requires a JDK registered in the system, and where Jenkins downloads the JDK I didn’t dig.

Git can not be touched if the path variable contains the path to the git executable file and it is available on the command line, and Jenkins can use it:
And let Gradle download automatically. In principle, the same trick could be done with the JDK, but when installing the Android SDK it requires a JDK registered in the system, and where Jenkins downloads the JDK I didn’t dig.
It seems everything?
Creating an automatic build task
In the main Jenkins sidebar, click New Item, invent a task name with the “Freestyle project” type and click OK, we’re in the task configuration. Do not forget to tick Discard old builds, and then our server will soon be filled with successful builds of all versions:
General
In the Source Code Management section, specify the URL of the git repository of our project. Looking ahead, we do not start and do not substitute any credentials to access the repository:
Source code management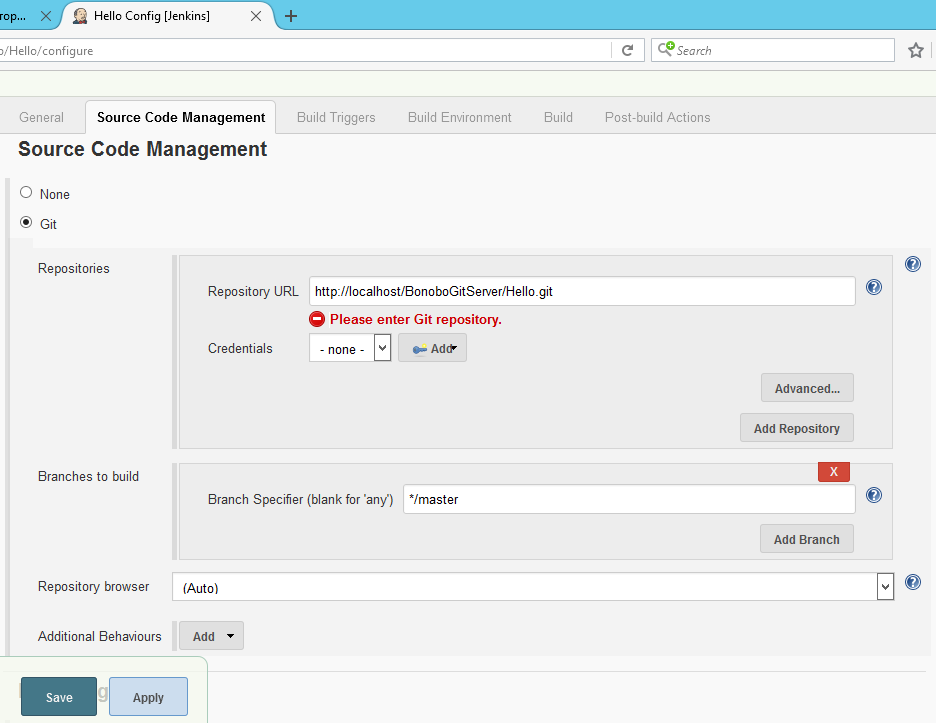
We will collect the master branch. You can also configure automatic assembly, in particular, polling the repository every minute and starting the assembly in case of new commits. Mark Poll SCM and write * * * * * *:
Build triggers
In the build section, click Add build step and configure the Gradle assembly. The gradle version should be the one that we specified in the Global Tools Configurations. We write a simple Task - “clean build”. These are the tasks available to us in gradlew.bat tasks at the root of the project. You can call other tasks of the collector here, incl. with keys.
Gradle
Also we add one Post-build Action - we will save our APK-shniki - Android applications. So we write:
**\*apk: Post-build action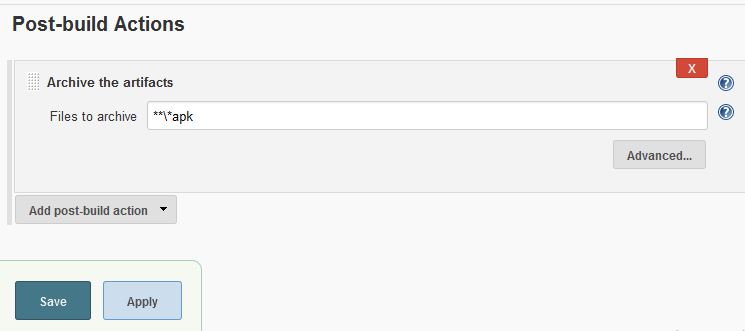
Assembly
Save and run the build and see something like that, hang for 10 minutes and can't reach the repository:
git.exe fetch --tags --progress http://localhost/Hello.git +refs/heads/*:refs/remotes/origin/* We have not logged in to the git repository! Adding the Login / Password pair to the Jenkins repository (where we left -none- in Source Code Management) didn't work, no matter how I tried. We must try to look for other ways.
The command line is launched on behalf of the KS session, Jenkins on behalf of the System and does not know anything about it, in the Credential Manager repository, it looks like it will not happen either. Those. This will not help:
Credential manager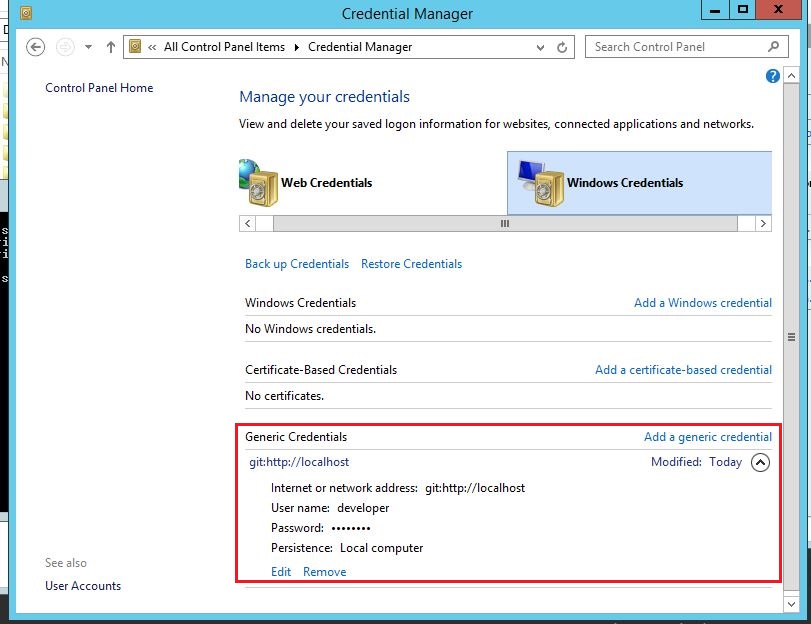
An additional search on the network gave some tips:
- Transferring ssh-keys from the ultrasound session to the system, which I could not find;
- The second method (git authorization), which worked.
Git authorization
To do this, we need PsExec.exe from the PsTools utility suite. With it, we can run cmd.exe from under the System. Run cmd.exe with elevated rights and execute:
PsExec.exe -i -s cmd.exe In the new console, all that needs to be done is to knock on the repository we need, for example, try to redo it on the command line. credentials will be requested:
Git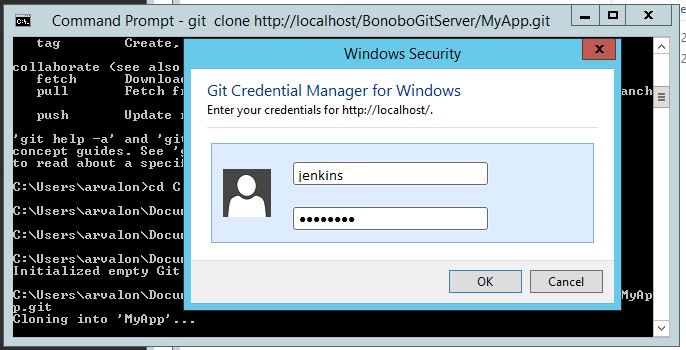
With the help of which Jenkins will be able to access this repository. This is the same UZ that we created when setting up Bonobo Git Server along with developer. If you later need to change these credentials have to go through the procedure again.
Lack of components and acceptance of licenses for Android SDK components
It may happen that the SDK will not have any modules and the console build to issue messages of a similar nature:
A problem occurred configuring project ':app'. You have not accepted the license agreements of the following SDK components: [Android SDK Platform 24, Android SDK Build-Tools 24.0.1]. In this case, you need to run the SDK Manager with elevated permissions and install the missing components:
Android SDK Manager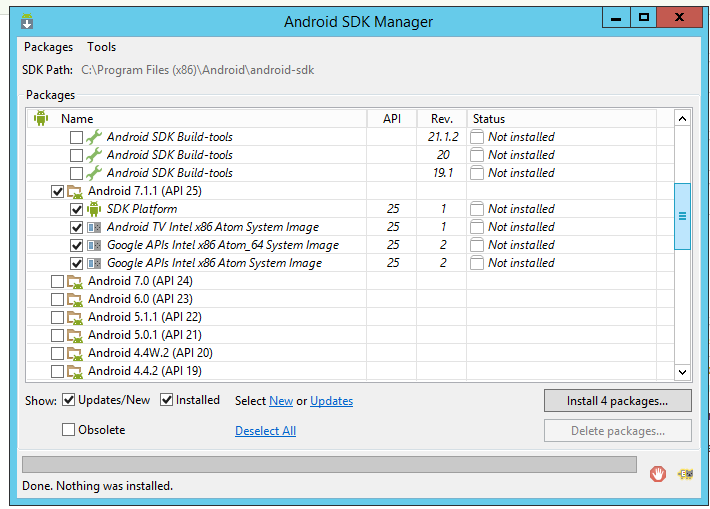
Everything, after all shamanism, the assembly was successful!
Successful build!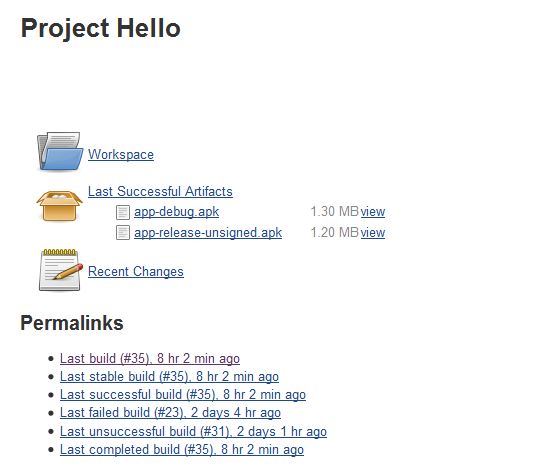
You can breed a team of Android-developers.
PS You can even more automate the process, with the help of the corresponding plug-in, set up automatic publishing of the apk'shnik on the Google Play Store, but I will write about this another time if there are any difficulties.
Source: https://habr.com/ru/post/313564/
All Articles