ISO release of the 3CX image for Debian and the virtual PBX 3CX in the Google Cloud infrastructure
This week we only had good news - the release of the 3CX ISO image for Debian Linux and the launch of 3CX in the Google Cloud infrastructure.
We are pleased to present a handy tool for quick installation of PBX - ISO image 3CX for Debian Jessie 8. We have tried to keep the original image as far as possible, without modifications. The Debian version without a graphical interface is used because it is not needed for the system to work.
The main advantage of the ISO image of 3CX for Debian, as you understand, is that it already contains the pre-installed 3CX system, which significantly simplifies the launch. Updates for 3CX and Debian are installed automatically on Sundays at 4 am.
')
Download ISO image from here .
You can deploy an ISO image to Oracle Virtualbox, or other similar virtualization software. To do this, check out the tutorial: Testing Debian for 3CX on Virtualbox .
Now you can use PBX on demand in a secure Google Cloud infrastructure! This is very convenient if your IT infrastructure is virtualized, or you are a partner of 3CX, which provides the system for its customers.

To create virtual machines in the Google cloud, you need to create an account on the Google Cloud Platform:
Install Google Cloud SDK on a Windows computer. This will allow you to run scripts designed for your Google Cloud account:

Make sure the installed modules work correctly:
Now you can run the script and generate the Google Cloud cloud entity to install 3CX. The script creates a Debian Linux virtual machine.

Inside the zip archive also contains a script createinstance24h.bat, which creates a virtual machine for only 24 hours.
Attention: after deleting a virtual machine, the public IP address allocated to it remains in your Google account. If you do not delete it, the system will debit your funds, even if the address is not used!
Google Compute Engine does not allow outgoing connections to ports 25, 465 and 587. To send outgoing messages using the 3CX system (located on the Google virtual machine), you must configure your mail server to send mail through a non-standard SMTP port. More information is available at https://cloud.google.com/compute/docs/tutorials/sending-mail/ .
ISO image 3CX for Debian Linux
We are pleased to present a handy tool for quick installation of PBX - ISO image 3CX for Debian Jessie 8. We have tried to keep the original image as far as possible, without modifications. The Debian version without a graphical interface is used because it is not needed for the system to work.
The main advantage of the ISO image of 3CX for Debian, as you understand, is that it already contains the pre-installed 3CX system, which significantly simplifies the launch. Updates for 3CX and Debian are installed automatically on Sundays at 4 am.
')
Download ISO image from here .
You can deploy an ISO image to Oracle Virtualbox, or other similar virtualization software. To do this, check out the tutorial: Testing Debian for 3CX on Virtualbox .
3CX PBX in Google Cloud Infrastructure
Now you can use PBX on demand in a secure Google Cloud infrastructure! This is very convenient if your IT infrastructure is virtualized, or you are a partner of 3CX, which provides the system for its customers.
Create a Google Cloud account
To create virtual machines in the Google cloud, you need to create an account on the Google Cloud Platform:
- Sign in to your Gmail account
- Go to https://cloud.google.com
- Connect to the “Try it Free” program and sign up.
Install Google Cloud SDK
Install Google Cloud SDK on a Windows computer. This will allow you to run scripts designed for your Google Cloud account:
- Download the SDK at https://cloud.google.com/sdk/docs/quickstart-windows
- Complete the installation and initialization of the SDK.
- Attention: during the initialization of “init”, the project “default” is set for the created Google Cloud account. The project ID of the project ID is visible in the Google Cloud Platform Management Console. Verify that the ID is the same as the one that was previously configured.
Verifying the installation of the Google Cloud SDK
Make sure the installed modules work correctly:
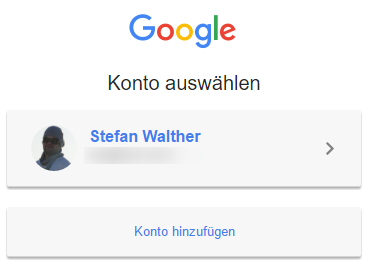
- Open the command line CMD and enter: gcloud auth login
- A browser window will open prompting you to choose a Google account. The selected account must be the owner or administrator of the created project!
- After that, your computer will be authorized by Google and Cloud SDK will be able to perform actions in the Google Cloud Service under your account.
Creating a Google Cloud Entity
Now you can run the script and generate the Google Cloud cloud entity to install 3CX. The script creates a Debian Linux virtual machine.
- Download the script and unzip the contents of the archive.
- Run createinstance.bat
- The script will ask for the name of the virtual machine.
- Select the region closest to you to create the car:
- USA Central
- USA East
- USA West
- Europe (West)
- Asia (East)
- Specify the power of the virtual machine. The Small machine is suitable for installations on 8/16 simultaneous calls. For 32 calls, use the Standard machine. For large-scale installations, use the High machine.
- The script will create a virtual machine, assign it a public IP address, launch it, configure the firewall rules and install the 3CX system. It takes about 2-4 minutes.
- When everything is ready, the script will launch your browser. Continue to configure 3CX using the 3CX Initial Configuration Utility .
Inside the zip archive also contains a script createinstance24h.bat, which creates a virtual machine for only 24 hours.
Attention: after deleting a virtual machine, the public IP address allocated to it remains in your Google account. If you do not delete it, the system will debit your funds, even if the address is not used!
Sending outgoing mail from 3CX
Google Compute Engine does not allow outgoing connections to ports 25, 465 and 587. To send outgoing messages using the 3CX system (located on the Google virtual machine), you must configure your mail server to send mail through a non-standard SMTP port. More information is available at https://cloud.google.com/compute/docs/tutorials/sending-mail/ .
Additional Information
- Read the 3CX Installation Guide on OVH Hosting .
- Read the 3CX Installation Guide for Debian Linux 8 (Jessie) .
- Read the V15 Administrator Guide .
- For more information, read the important 3CX setup technical documentation .
Source: https://habr.com/ru/post/313528/
All Articles