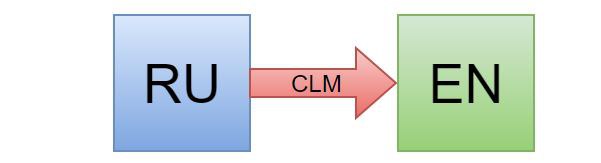
Caché Localization Manager or i18n in InterSystems Caché
Caché Localization Manager
If in two words, then CLM is a utility that can be useful when localizing / internationalizing / adding multilingual projects to InterSystems Caché.
Imagine you have a finished project, where all the content is in Russian, and now it has become necessary to add English-language localization. You wrap all the lines into resources, translate the lines into English and call the necessary resource for Russian or English. In principle, nothing complicated. And what if there are many lines and there are mistakes in Russian (or English)? And what if you need to localize not into one language, but ten? It is in such projects that CLM should be used. He in one click localizes all the project content into the desired language with the possibility of correcting incorrect translation.
CLM features:
- Adding new localization.
- Deleting localization.
- Export localization.
- Import localization
- Ability to view two tables at the same time.
- Convenient transition to areas.
- Spellchecking.
Let's now look under the hood
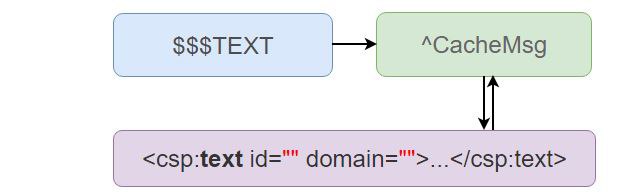
Caché has a standard approach for implementing I11N using the $$$ TEXT macro.
$$$TEXT("Text", "Domain", "Language") Where:
Textis the text that will be used for localization in the future.Domainare modules in your applications.Languageis the language in which "Text" is written.
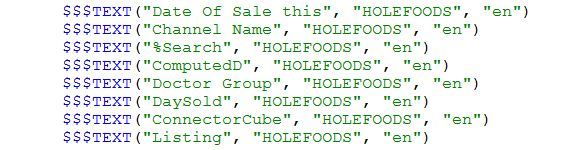
When using $$$ TEXT in COS code, data is compiled into global ^ CacheMsg when compiling classes. CLM works with this global.
In ^ CacheMsg, everything is the same as $$$ TEXT , only the "ID" is added in the form of a text hash.
^CacheMsg("Domain", "Language", "ID") = "Text" 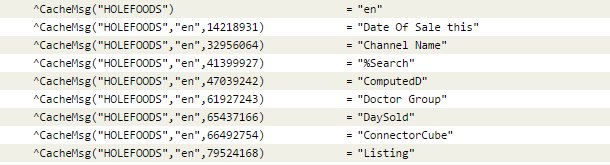
If you are using CSP , then using $$$ TEXT in CSP will look like this:
<csp:text id="14218931" domain="HOLEFOODS">Date Of Sale</csp:text> Installation
The first step is to download the Installer class from GitHub and import it into any convenient area in Caché. I will use the USER area. After that, open the terminal and go to the USER area. To start the installation, just enter one command:
USER> do ##class(CLM.Installer).setup() 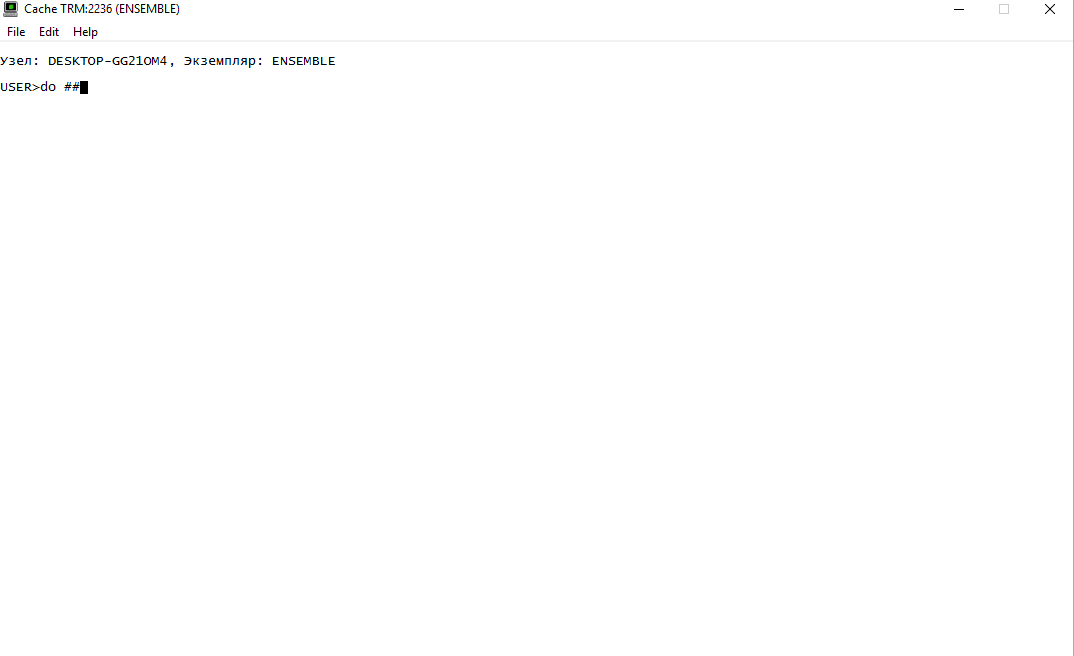
Check whether the application is installed correctly by clicking the link http: // localhost: 57772 / csp / clm / index.csp (localhost: 57772 - the path to your server).
')
Customization
Next you need to get Yandex API key . Just with the help of Yandex CLM and performs localization.
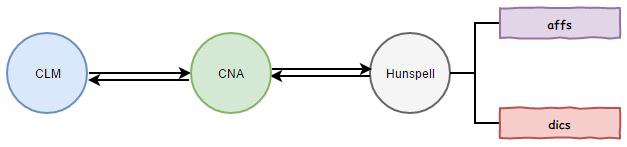
Now let's deal with spell checking. In CLM, Caché Native Access was used to implement SpellCheck . CNA was written to call external functions from dynamic libraries, such as .dll or .so . SpellCheck itself works with the Hunspell library. Hunspell requires two files to check spelling. The first file is a dictionary containing words, the second is an affix file, which defines the meanings of special labels (flags) in the dictionary.
How does the word test:
All words are packed from CLM, sent via CNA to Hunspell, where CNA converts them to Hunspell understandable language. Hunspell checks each word, finds the initial form of the word and all possible variations, and returns it. Where to take all these dictionaries and libraries?
- CNA: use the ready release of this library or build it yourself.
- Hunspell: all the same, there is a ready release and source for self-assembly.
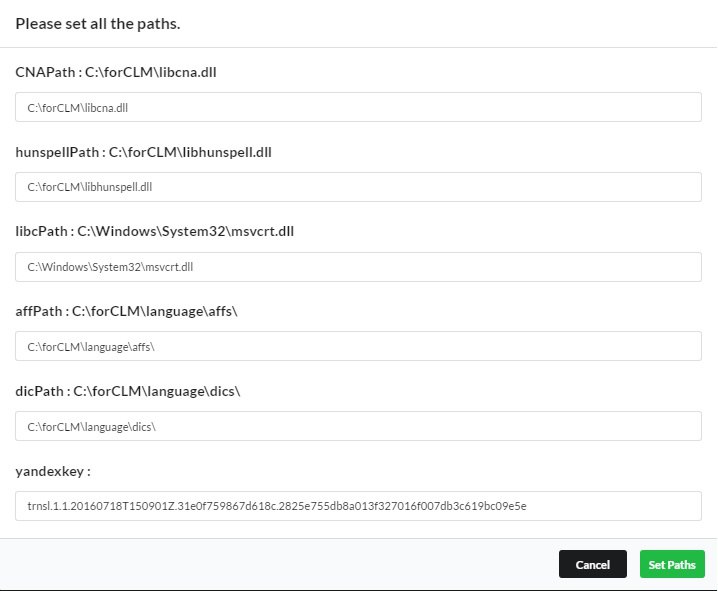
- Also, we need the standard C language library. On windows, it is located at C: \ Windows \ System32 \ msvcrt.dll .
- Download dictionaries here .
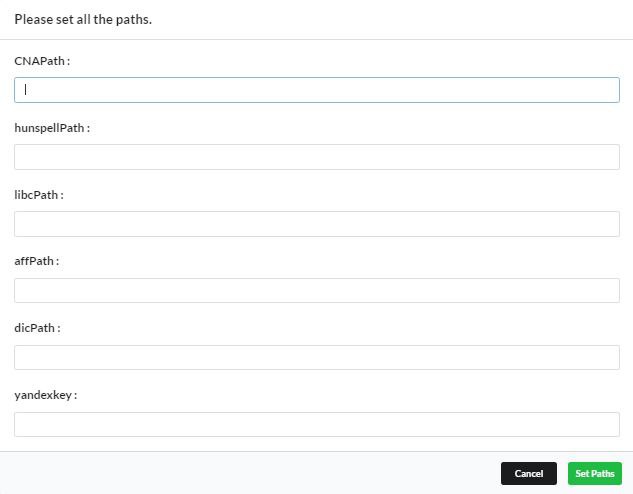
Albanian Arabian Armenian Azeri Belarusian Bosnian Basque Bulgarian Catalan Croatian Czech Chinese Danish Dutch English Estonian Esperanto Finnish French Georgian German Greek Hebrew Hungarian Icelandic Indonesian Italian Japanese Kazan Korean Latin Latvian Lithuanian Macedonian Malay Maltese Norwegian Polish Portuguese Brazil Romanian Russian Spanish Serbian Slovak Slovenian Swedish Thai Turkish Ukrainian Vietnamese The entire setup process is reduced to entering the paths of all that was received earlier. Open CLM in the browser. In the upper right corner there is a button "Set Paths". Clicking on it you will see the following window. Use it to enter paths.
Demonstration of localization of a simple form for registration
Criticism, comments, suggestions - are welcome.
All source code and instructions are also available on github under the MIT license.
Source: https://habr.com/ru/post/313206/
All Articles