QEMU / KVM and Windows installation
Whether we like it or not, programs for which Windows is needed have not disappeared from offices anywhere. In a situation where there is no alternative to using them, it is better to have a virtual OS, for example, in order to connect to an audio conference via Skype for Business.
In this article, I will tell you how to install the guest Windows OS on the QEMU hypervisor using the virt-manager GUI with minimal cost. We will map all the pitfalls and reefs, and carefully place the bugs in the bank.
Training
The very first step is to configure the kernel parameters. Support for KVM and vhost-net , support for tunnel interfaces [1] and network bridge [2] is desirable. Full listing on the Gentoo QEMU wiki page .
Prepare disk space. I allocated 70 GiB, and Windows 8.1 for a couple of months used almost 50 GiB so that I did not have enough disk space to upgrade to the 10th version.
Next, we need a set of virtio-win Redhat drivers. If you have RedHat installed, just run
[root@server ~]# yum install virtio-win and the iso image will be written to the /usr/share/virtio-win/ directory. You can also download it from the Fedora repositories .
Ensure that hardware virtualization support is enabled in BIOS / UEFI . Without this, KVM will not be activated , and virt-manager will produce just such an error.

As a test, you can read the device file.
(2:506)$ ll /dev/kvm crw-rw----+ 1 root kvm 10, 232 9 02:29 /dev/kvm If the file is not found, and the kernel options are set correctly, then it’s about the BIOS/UEFI settings.
Install the necessary packages.
(5:519)$ sudo emerge -av qemu virt-manager For RedHat 7, it is enough to install only virt-manager , since QEMU installed by default.
[root@server ~]# yum install virt-manager Debian users need to install the qemu package.
root# aptitute install qemu You can now proceed to the installation.
Launch and installation
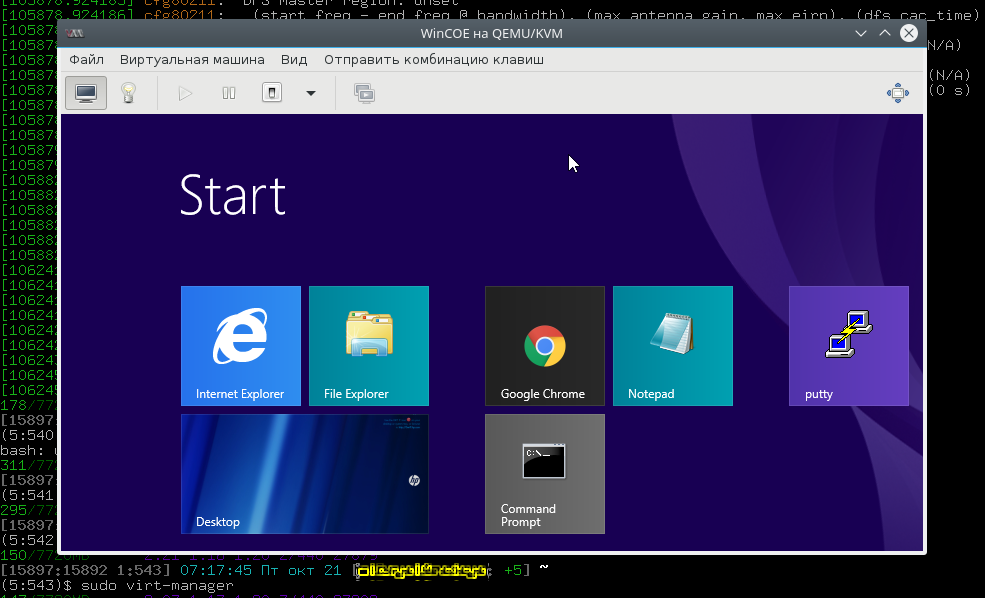
Run virt-manager and create a new virtual machine from local storage.

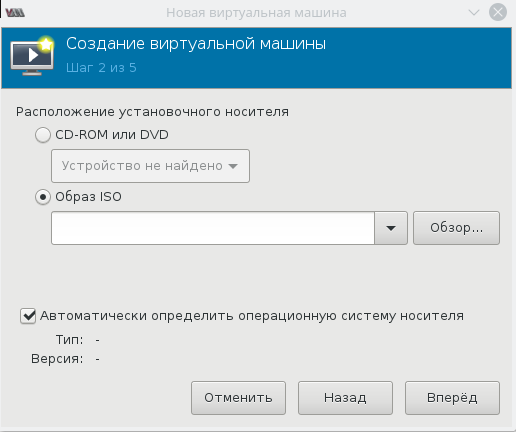
Specify the path to the installation iso image of Windows.
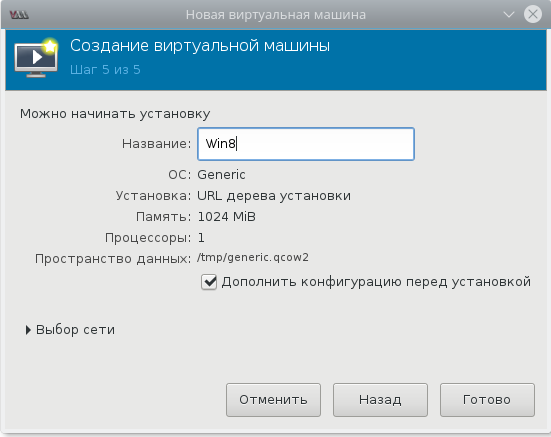
Next, at the 3rd and 4th step there will be a choice of the number of CPUs, the amount of RAM and the size of the disk space, then at the 5th step you should select additional configurations before tuning .
The advanced settings window is needed in order to perform a feint with your ears. Its meaning is to add a virtual flopar with drivers from the virtio-win . This will make it possible to change the type of hard disk: remove the disk with the IDE bus and add it the same, but with the VirtIO bus . In detail, in the docks of RedHat .

Register the driver /usr/share/virtio-win/virtio-win.vfd and add a virtual floppy disk. Then go to the [] № tab [] № and make a feint with the replacement of the tire bus: delete with the IDE and add with VirtIO.

I almost forgot to say why this trick is needed. Experts say that with the VirtIO bus, disk performance is significantly higher .
In principle, it is already possible to start the installation, but we forgot to add a CD-ROM with virtio-win drivers, and they will be useful to us when the device manager flashes yellow icons of the question mark.

Well, now you can start the installation.

Well, we started the installation. What if the Windows installer asks you to change the disk ? Because of this, I had to interrupt a couple of times and start the whole carousel again, but this will not happen to you .
(qemu) change ide1-cd0 /tmp/windows_8.1_x64_disk2.iso Drivers and tweaks
At the end of the installation process, the device manager will miss some of the drivers. Presumably, these may be:
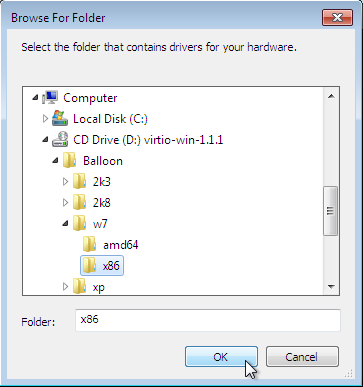
Ethernet Controller PCI Simple Communication Controller SCSI Controller You need to feed them the driver from the virtio-win kit, which is connected via the IDE CD-ROM in the previous section.

This is done standardly: right-click on the yellow question mark, update the driver, the path to the files.
Here is the entire list, and this is the next page of RedHat docks , where the driver installation is shown in more detail.
- Balloon , controller of the balloon driver in the System devices group.
- Vioserial , the serial driver, affects the PCI Simple Communication Controller in the System devices group.
- NetKVM , the network driver, affects the Network adapters group. This driver is only available if a virtio NIC is configured. In the E, NetKVM Driver Parameters.
- viostor , the block driver, affects the Disk drives group. This driver is only available if a virtio disk is configured.
Equipment
Here the area of endless possibilities and 101 ways to do it in its own way gradually begins, so I will show how it works for me, and you can customize it more precisely to fit your needs.
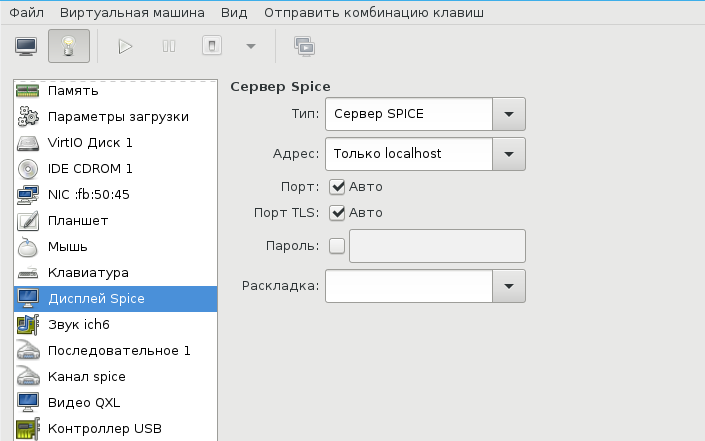
I have the Spice display and the ich6 sound device ich6 . No, of course, if you have a lot of time and a desire to figure everything out to the very subtleties - dare and try alternative approaches, but my sound took off, rather vibrated, only with such settings. In the second part, devoted to walking around the rake and catching bugs, I will tell about it in more detail. In the video tab, I put QXL , because with this option, thanks to the magic driver , I managed to achieve a normal screen resolution.
Connect to the VM can be varied.
- Through the virt-manager GUI
- Select the VNC server display and connect via the vnc client
- Install Spice client and connect through it
- You can connect to Windows via rdp if the terminal server is enabled.
I have option 3, for Gentoo, this is spice-gtk
$ eix spice-gtk [I] net-misc/spice-gtk : 0.31 ~0.32-r1 ~0.32-r2 **9999 {dbus gstaudio gstreamer gstvideo gtk3 +introspection libressl lz4 mjpeg policykit pulseaudio python sasl smartcard static-libs usbredir vala webdav PYTHON_SINGLE_TARGET="python2_7 python3_4" PYTHON_TARGETS="python2_7 python3_4"} : 0.31(16:05:41 18.06.2016)(gtk3 introspection pulseaudio python usbredir -dbus -gstreamer -libressl -lz4 -policykit -sasl -smartcard -static-libs -vala -webdav PYTHON_SINGLE_TARGET="python2_7 -python3_4" PYTHON_TARGETS="python2_7 python3_4") : http://spice-space.org https://cgit.freedesktop.org/spice/spice-gtk/ : Set of GObject and Gtk objects for connecting to Spice servers and a client GUI Network
The network for the VM can be configured differently, on Habré, the craftsmen have already written about this . I tried several ways, and at the end simplicity again took up. The VM itself is launched from under the root [3] , but the spice-gtk graphical interface is launched from the usual unprivileged user. This allows us to solve the dilemma: for network options, root rights are needed, and for the pulseaudio sound daemon, the root is prohibited. I tried to hang all the rights to a regular user, but nothing worked, the pulse does not pulsate, the network is not created, there is a lot of information and there is little. In the end, decided so pleased. I would be glad if the best way is found in the comments.

This simple selection of network options gives you superior results. 3 additional network interfaces are created: virbr0, virbr0-nic, vnet0 .
$ ip addr ... 4: virbr0: <BROADCAST,MULTICAST,UP,LOWER_UP> mtu 1500 qdisc noqueue state UP group default qlen 1000 link/ether 52:54:00:cc:2a:1e brd ff:ff:ff:ff:ff:ff inet 192.168.102.1/24 brd 192.168.102.255 scope global virbr0 valid_lft forever preferred_lft forever 5: virbr0-nic: <BROADCAST,MULTICAST> mtu 1500 qdisc pfifo_fast master virbr0 state DOWN group default qlen 1000 link/ether 52:54:00:cc:2a:1e brd ff:ff:ff:ff:ff:ff 11: vnet0: <BROADCAST,MULTICAST,UP,LOWER_UP> mtu 1500 qdisc pfifo_fast master virbr0 state UNKNOWN group default qlen 1000 link/ether fe:54:00:fb:50:45 brd ff:ff:ff:ff:ff:ff inet6 fe80::fc54:ff:fefb:5045/64 scope link valid_lft forever preferred_lft forever In iptables , a set of rules is created, here are the main ones:
$ sudo iptables -L ... Chain FORWARD (policy ACCEPT) target prot opt source destination ACCEPT all -- anywhere 192.168.102.0/24 ctstate RELATED,ESTABLISHED ACCEPT all -- 192.168.102.0/24 anywhere Windows VM:
C:\Users\user>ipconfig Windows IP Configuration Ethernet adapter Ethernet 2: Connection-specific DNS Suffix . : Link-local IPv6 Address . . . . . : fe80::90c3:a458:6645:7b9a%7 IPv4 Address. . . . . . . . . . . : 192.168.102.203 Subnet Mask . . . . . . . . . . . : 255.255.255.0 Default Gateway . . . . . . . . . : 192.168.102.1 Tunnel adapter isatap.{BD8F0DA4-92A8-42BD-A557-23AC89AED941}: Media State . . . . . . . . . . . : Media disconnected Connection-specific DNS Suffix . : Tunnel adapter IPHTTPSInterface: Connection-specific DNS Suffix . : IPv6 Address. . . . . . . . . . . : 2620:0:a13:8a7:51af:79ae:92b8:828a Temporary IPv6 Address. . . . . . : 2620:0:a13:8a7:b49d:81fe:e509:16e7 Link-local IPv6 Address . . . . . : fe80::51af:79ae:92b8:828a%15 Default Gateway . . . . . . . . . : I repeat, libvirtd creates all this on its own, no need to do anything for it . As a result, we have normal routing between the host and the VM, we can exchange files via ssh / scp . You can go ahead and create a ball on Windows, and on a Linux host, configure samba, but this seemed redundant to me.
In conclusion
It’s hard to tell in one article about all aspects of Windows + QEMU / KVM, so let's end with the next. And there will be the most gusto, command interface, screen resolution a maximum of 1024x768, Scylla pulseaudio and Charybdis network, the virsh command and VM setup from the config file, file with tpm , binary device syntax and other quiet joys.
')
Source: https://habr.com/ru/post/313144/
All Articles