Configure the LoRaWAN gateway and create our first IoT application
The article “ Multi-Tech Base Stations Allowed to Deploy a LoRaWAN Network in a Couple of Clicks ” talked about how easy it is to create an IoT network using Multi-Tech equipment. Now it's time to launch our first application.

So, we will need:
We will connect the PC via Ethernet to the gateway and use it to configure / configure the latter.
')
The Conduit gateway is essentially the same base station, but for indoor use (indoor version):

To begin, we will need to configure LoRaWAN Network Server , and then create our application in a Node-Red graphical environment. The application will receive messages from LoRaWAN terminals and send them back (echo mode), simultaneously displaying received messages in the Node-Red interface.
So let's get started.
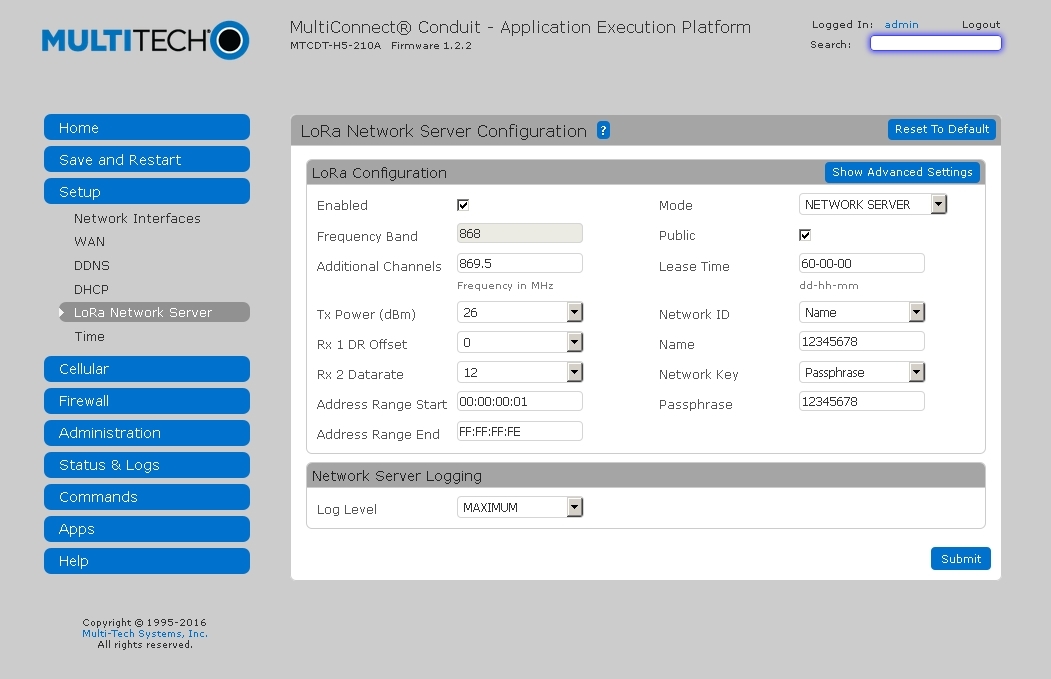
The default gateway is fixed IP 192.168.2.1, login is admin, password is admin . After successfully entering the password, immediately go to the menu item Setup -> LoRa Network Server and see the following image:
Let's see what is responsible for what:
After configuring the LoRaWAN server, you need to remember to click Save and Restart to apply the changes.
This is such an easy setup. Everything, now you can log in again and go to the menu item Apps -> Node-Red to create a demo application.
After re-entering the username / password admin / admin (this is to access the Node-Red), we get to the Node-Red :
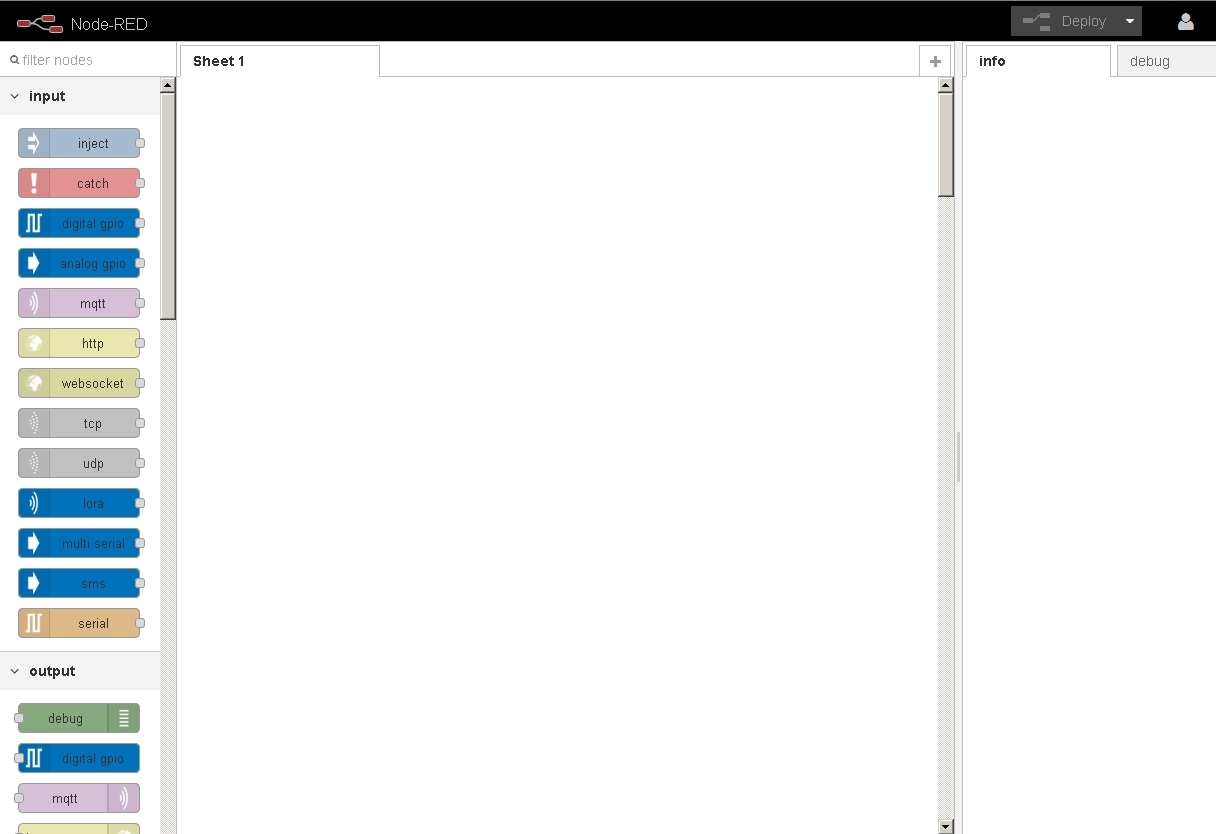
In the left part are the nodes that we can drag to the main field and connect with each other with the mouse. For our example, we take the lora node from the Input section , and the debug and lora nodes from the Output section, and connect them as shown in the picture:
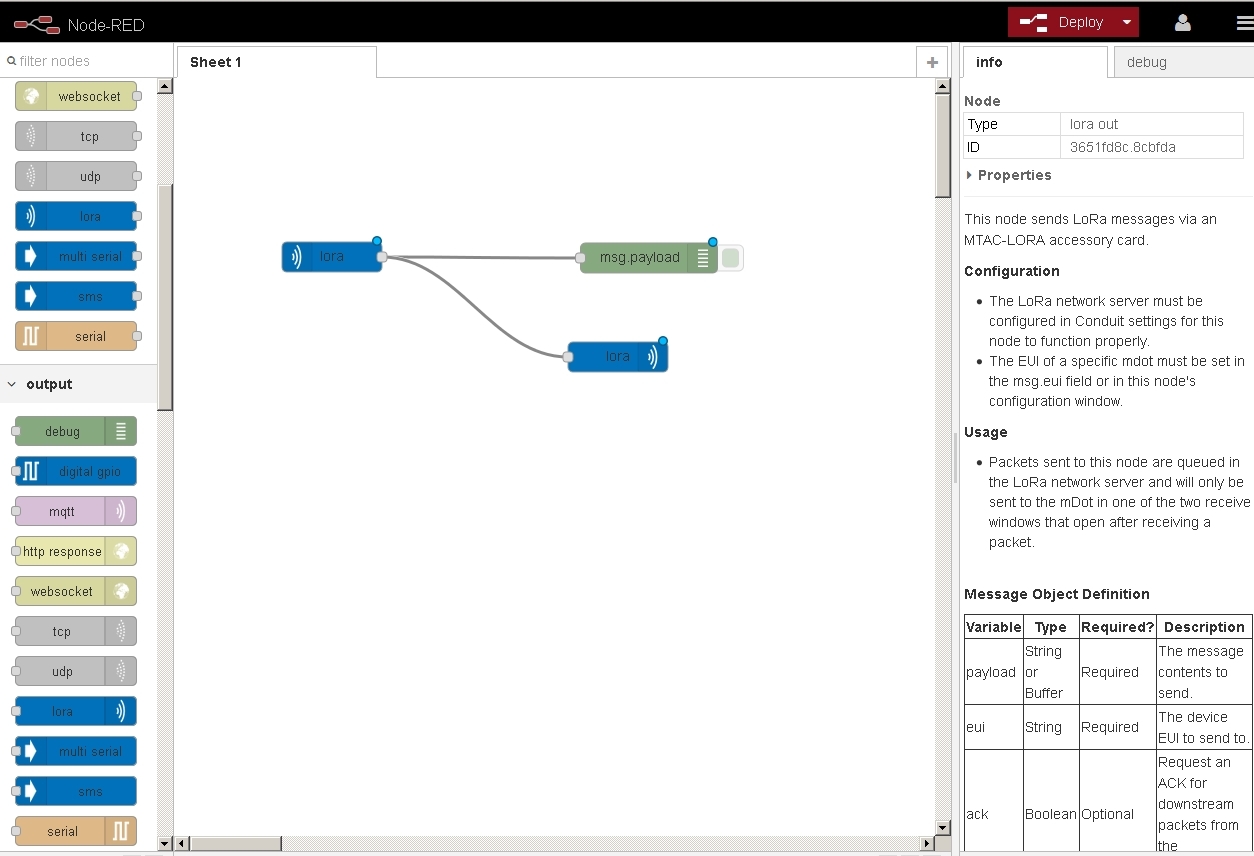
Click the Deploy button in the upper right corner of the Node-Red window - that's all, the application is ready!
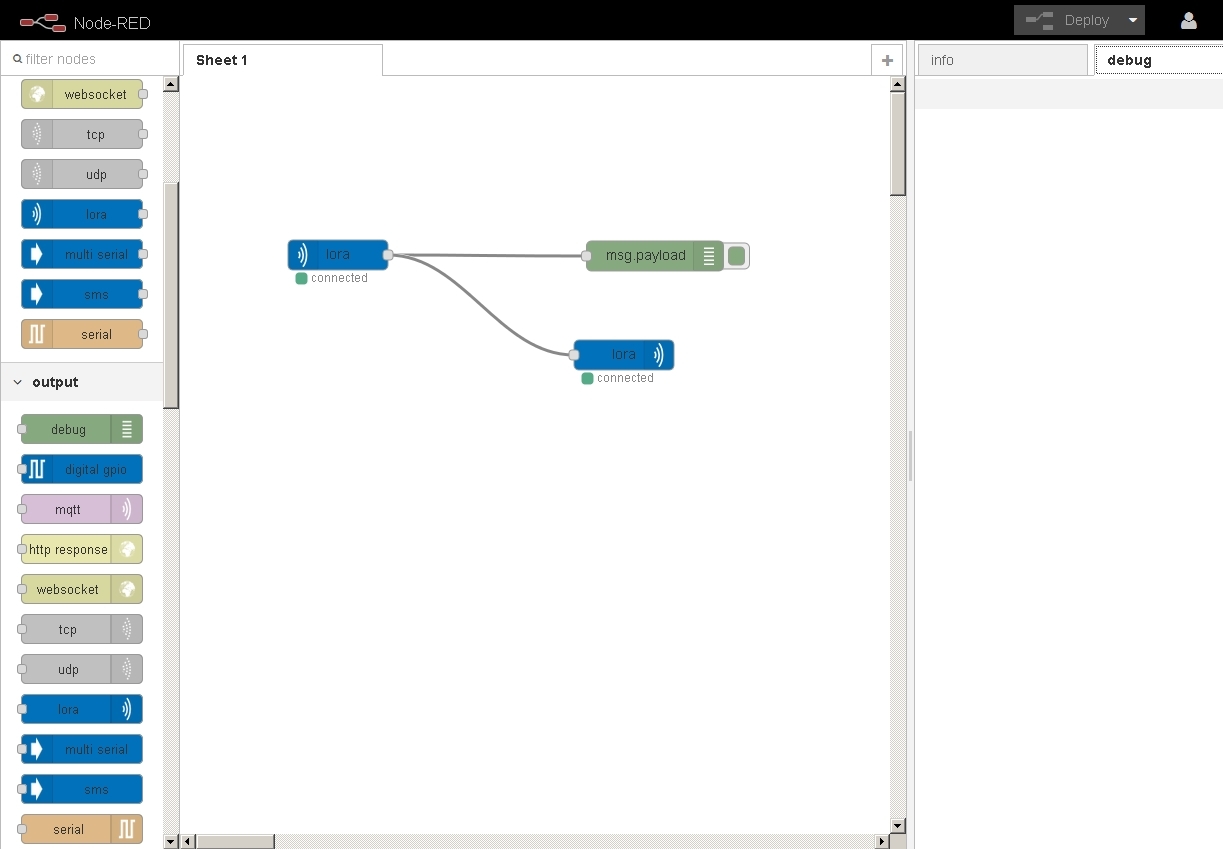
Now you can see what happens when sending messages from a LoRaWAN device to the Conduit gateway. After successfully receiving a message from the device, we should receive a response message to the same device, and we can also see this message (Hello_Habroworld!) In the debug tab on the right side of the Node-Red window (thanks to the connected debug node):

In our demo example, the received messages are echoed back, in the actual configuration, they can be sent without additional efforts to certain TCP / UDP ports of the remote server, sent as MQTT, SMS, e-mail, saved to a file, shared on Twitter, processed on the gateway / BS, etc.
Of course, in the same way you can transfer data in the opposite direction.
In this way, you can create IoT applications very quickly and show them to your favorite customers.
So, we will need:
- Conduit Gateway (AEP) with mCard module installed (MTAC-LORA-868)
- 868 MHz antenna
- computer (pc)
We will connect the PC via Ethernet to the gateway and use it to configure / configure the latter.
')
The Conduit gateway is essentially the same base station, but for indoor use (indoor version):
To begin, we will need to configure LoRaWAN Network Server , and then create our application in a Node-Red graphical environment. The application will receive messages from LoRaWAN terminals and send them back (echo mode), simultaneously displaying received messages in the Node-Red interface.
So let's get started.
The default gateway is fixed IP 192.168.2.1, login is admin, password is admin . After successfully entering the password, immediately go to the menu item Setup -> LoRa Network Server and see the following image:
Let's see what is responsible for what:
- To enable the server, check Enabled .
- The gateway has 3 fixed 125 kHz channels configured (center frequencies 868.1, 868.3 and 868.5 MHz), and five additional 125 kHz channels can be configured with a center frequency of 200 kHz. These additional channels are configured by setting the center frequency of the additional band in the Additional Channels field. For example, if in the Additional Channels field we set the value to 869.3, then we receive additional channels with the following center frequencies: 868.9; 869.1; 869.3; 869.5; 869.7 MHz.
The ranges of acceptable values in the Additional Channels field are 863.5-867.5 and 869.1-869.5 (MHz). - The Mode field can take two values: NETWORK SERVER and PACKET FORWARDER . If we plan to use the LoRaWAN Network Server on the gateway itself, then we leave the value of NETWORK SERVER, and if, say, in the cloud, then PACKET FORWARDER. In our case, leave the NETWORK SERVER .
- Public tick refers to the type of network - Public or Private . If the Private type is used (the daw is not installed), then the terminal devices are connected to the LoRaWAN network faster (1-2 sec.), And you can also disable encryption of the payload if you wish.
- The most important are the Network ID and Network Key fields. In fact, they correspond to the AppEUI and AppKey values of the LoRaWAN specification, but since the use of sufficiently long (8 and 16 bytes, respectively) hexadecimal values is not always convenient, Multi-Tech decided to give users the right to choose. In gateways / BS, Conduit AppEUI and AppKey can be set in two ways:
a) human - loving - in the Network ID field, select Name and write the human-readable network name below (the gateway will translate our name to AppEUI );
b) according to the LoRaWAN specification - in the Network ID field, select EUI and write the hexadecimal value AppEUI .
The values of the AppEUI and AppKey in the gateway / BS must match the values programmed in the LoRaWAN terminals. - Other settings leave unattended
After configuring the LoRaWAN server, you need to remember to click Save and Restart to apply the changes.
This is such an easy setup. Everything, now you can log in again and go to the menu item Apps -> Node-Red to create a demo application.
After re-entering the username / password admin / admin (this is to access the Node-Red), we get to the Node-Red :
In the left part are the nodes that we can drag to the main field and connect with each other with the mouse. For our example, we take the lora node from the Input section , and the debug and lora nodes from the Output section, and connect them as shown in the picture:
Click the Deploy button in the upper right corner of the Node-Red window - that's all, the application is ready!
Now you can see what happens when sending messages from a LoRaWAN device to the Conduit gateway. After successfully receiving a message from the device, we should receive a response message to the same device, and we can also see this message (Hello_Habroworld!) In the debug tab on the right side of the Node-Red window (thanks to the connected debug node):
In our demo example, the received messages are echoed back, in the actual configuration, they can be sent without additional efforts to certain TCP / UDP ports of the remote server, sent as MQTT, SMS, e-mail, saved to a file, shared on Twitter, processed on the gateway / BS, etc.
Of course, in the same way you can transfer data in the opposite direction.
In this way, you can create IoT applications very quickly and show them to your favorite customers.
Source: https://habr.com/ru/post/313042/
All Articles