Creating scenes from Star Wars to Unreal Engine 4
All images in the article are clickable
Introduction
Hi, my name is Jason Lewis. I think that I can be called the leader of this group project. I am the main environmental artist at Obsidian Entertainment . Other artists who have worked with me on this project also work in Obsidian. These are the assistants of the main artist, middle class artists and juniors. Even people from the QA department have added their artistic skills to the scene. In total, 17 people contributed to the work to varying degrees. It was our personal project, we created it only because we are all big Star Wars fans. Looking at the modern work on Star Wars, we decided that it was time to participate and create a high-quality fan art project. In addition to being Star Wars fans, some of us wanted to explore Unreal 4 under a good pretext.

')


I myself have been working in the gaming industry for over 20 years, and have visited many studios, from small startups at the beginning of my career to the largest publishers and developers, such as Sony and EA. During these years, I created many games, the most notable of which were Enter the Matrix and The Matrix Path of Neo [Shiny Entertainment], SOCOM 4 [Zipper Interactive and Sony Computer Entertainment], Medal of Honor Warfighter, DLC Battlefield 4 [EA] and Armored Warfare [Obsidian Entertainment]. In 1999 and 2000, I had a little rest from the games, having worked on the television animated series Starship Troopers. As I said above, other artists worked on the project, most of them have more than 10 years of experience. I want to mention some of them. This is Terry Hess, another main artist who has worked on several Call of Duty games. He also created the Medal of Honor and Battlefield 4 in EA. Craig Marschke, also the main artist of the Call of Duty series from the long-remembered Novalogic era. Ken LeSaint and Thad Clevenger, two more major artists from various industries. Brian Leleux ( Brian Leleux ), one of the main lighting artists in Obsidian, and others.

Star Wars Project
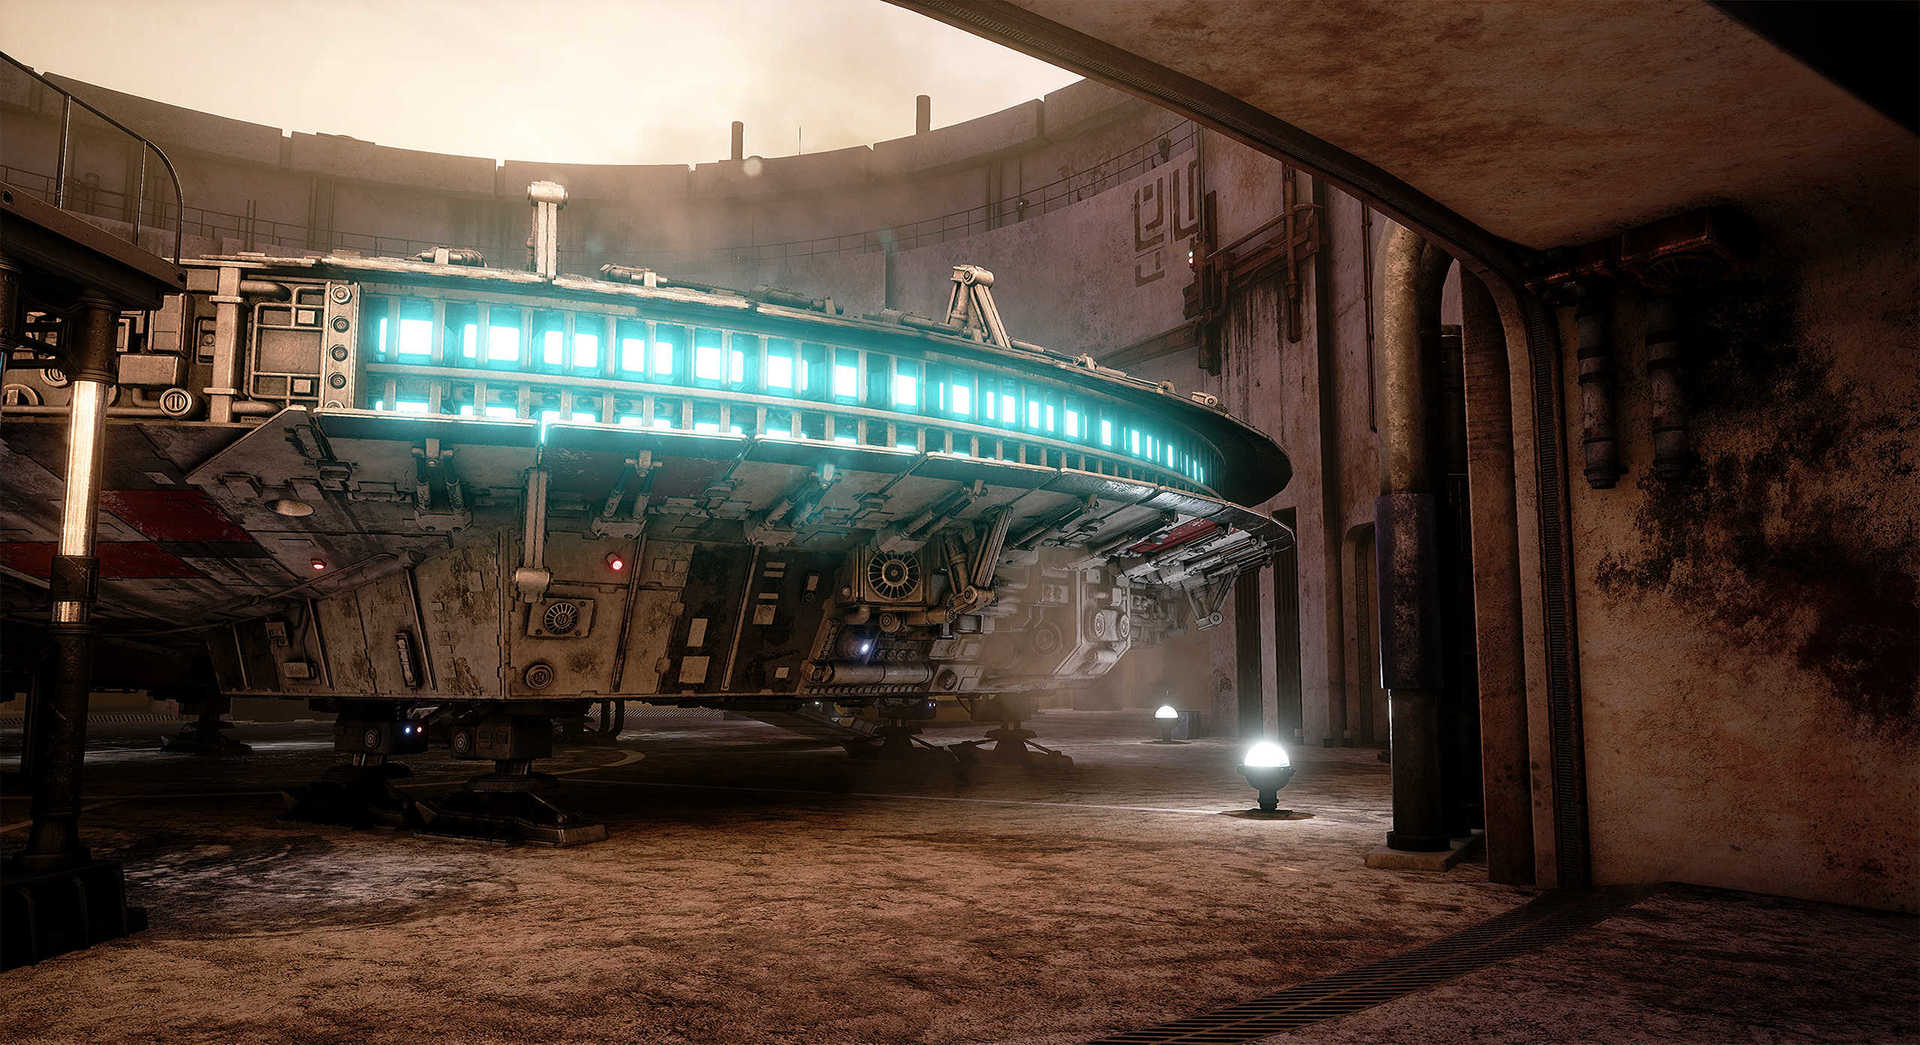
Our Star Wars scene began with the fact that I just wanted to recreate the 3D Millennium Falcon in 3D. I’m a big Star Wars fan, and I always wanted to model Falcon in computer graphics, but until recently I hadn’t had that opportunity. At first he was a simple 3ds Max model, but then I thought it would be nice to look at him in real time. Then I had no experience with Unreal 4, and I decided that this would be a great project for exploring UE4. Therefore, my goal was to create the most highly detailed model of the Falcon in real time, and I think I did it. An exception may be the model from the latest VR-demo ILM X-Labs, shown at GDC a few months ago. Perhaps their scene is a little more detailed, or our scenes go nose to nose, but as far as I can tell from the video on the Internet, their ship more closely follows the original model. I allowed freedom in the details to make the model look better in the scene.


First, the Millennium Falcon had to simply stand in the docking bay 94 so that the player could move around in real time. Then I thought that it would be nice to add the interior of the compartment, and, perhaps, part of the city of Mos-Eisley surrounding it. After that, I thought that you could add their bar from Mos Eisley. At this point, I realized that with such a project volume I could not complete it alone, so I invited several artists working with me at Obsidian to help with my project in my free time. Having received many enthusiastic responses, I divided the work among the volunteers based on the estimated time and labor costs.
Now we have completed the project by about 90%, our goal is to complete the project and put it on the Internet for free download. This is not really a game, but rather an interactive art object. The user can run around the neighborhood with a blaster (or with a secret weapon to find). We were not able to enlist the help of artists by characters, so the only characters in the environment, besides you, are a bunch of mechanic droids and a few power droids. We are also working on a VR version, because some members of the group have already become familiar with Oculus and Vive VR devices. We decided that it would be great to create a version that works in VR, so now we are trying to complete it too.

Creating scenes from Star Wars
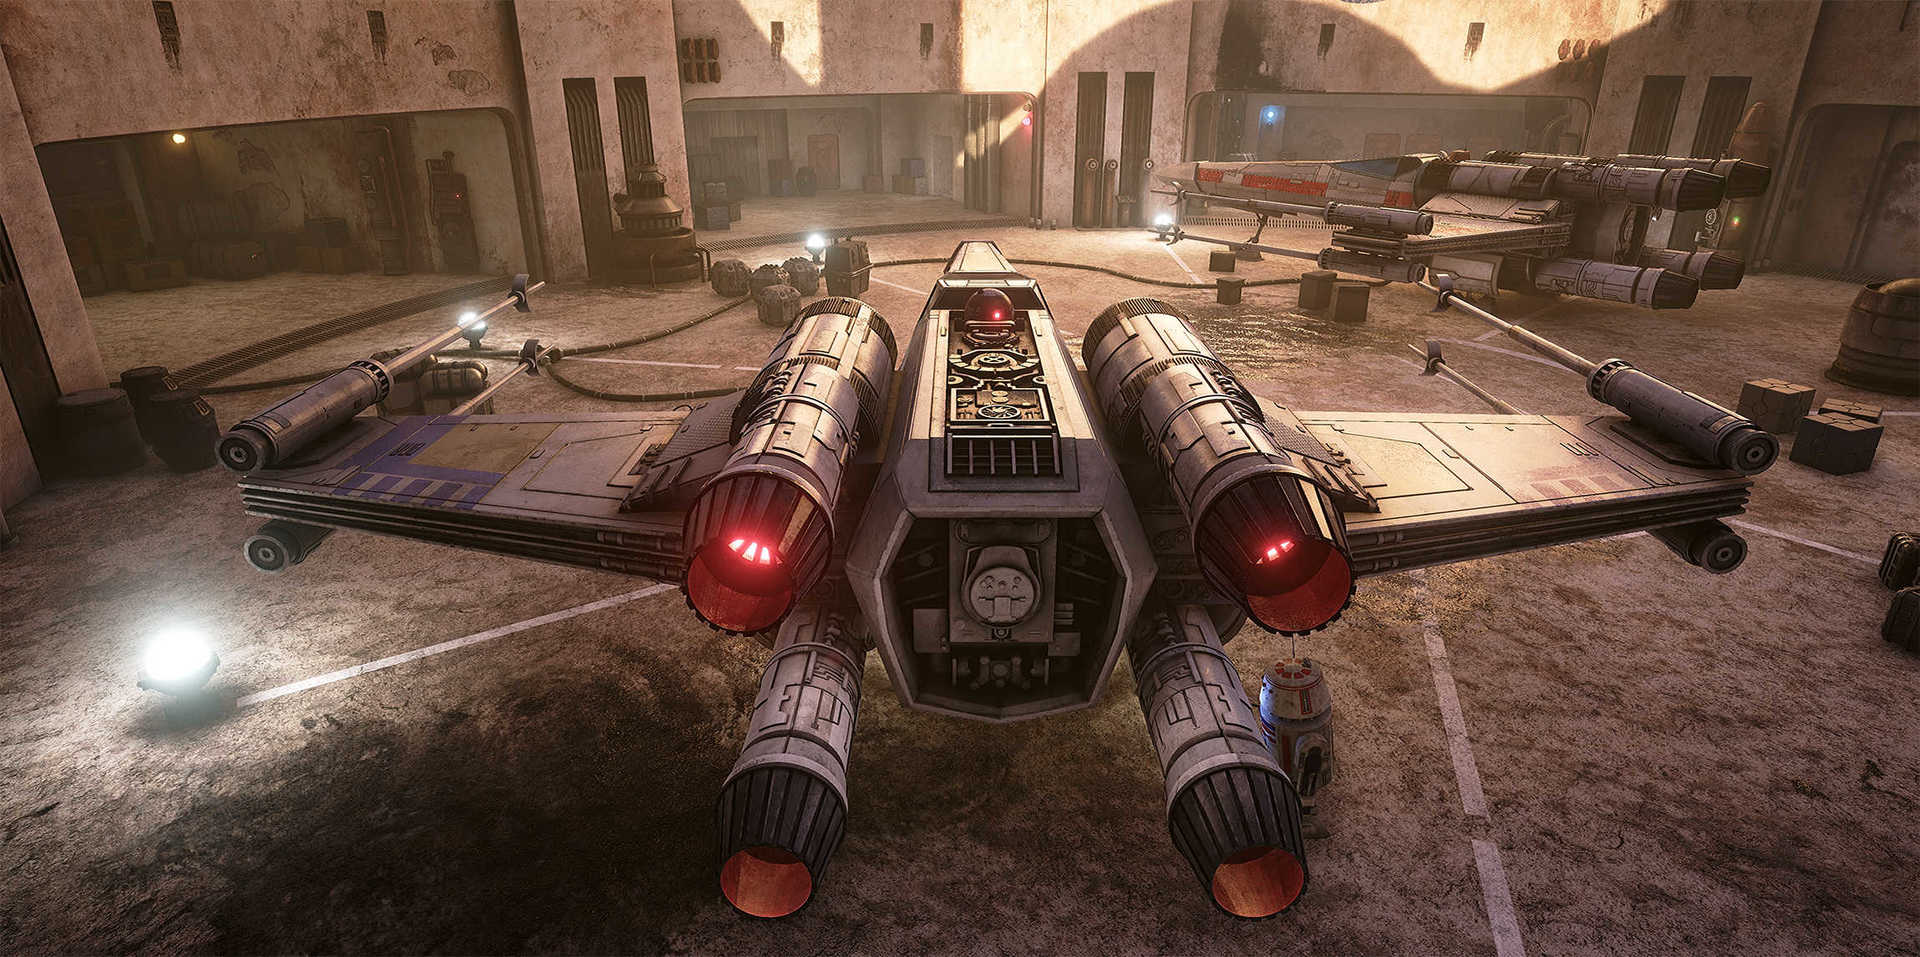
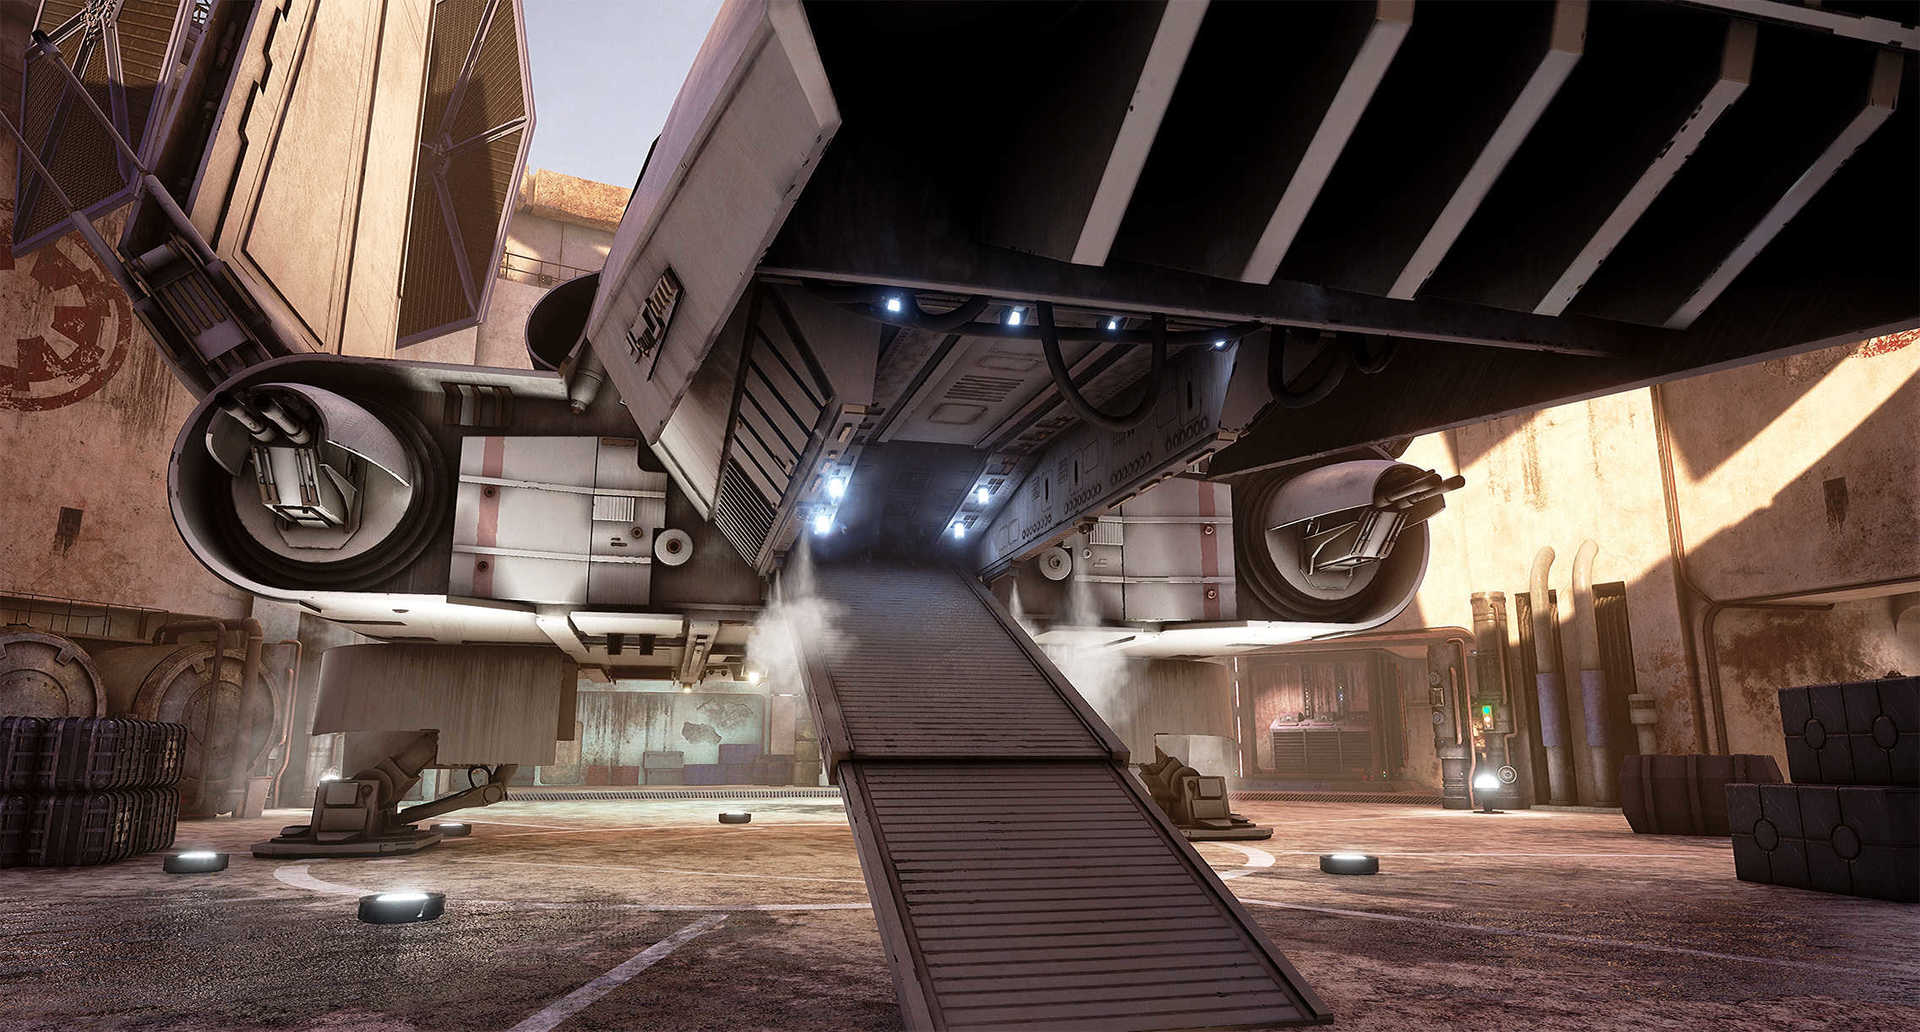
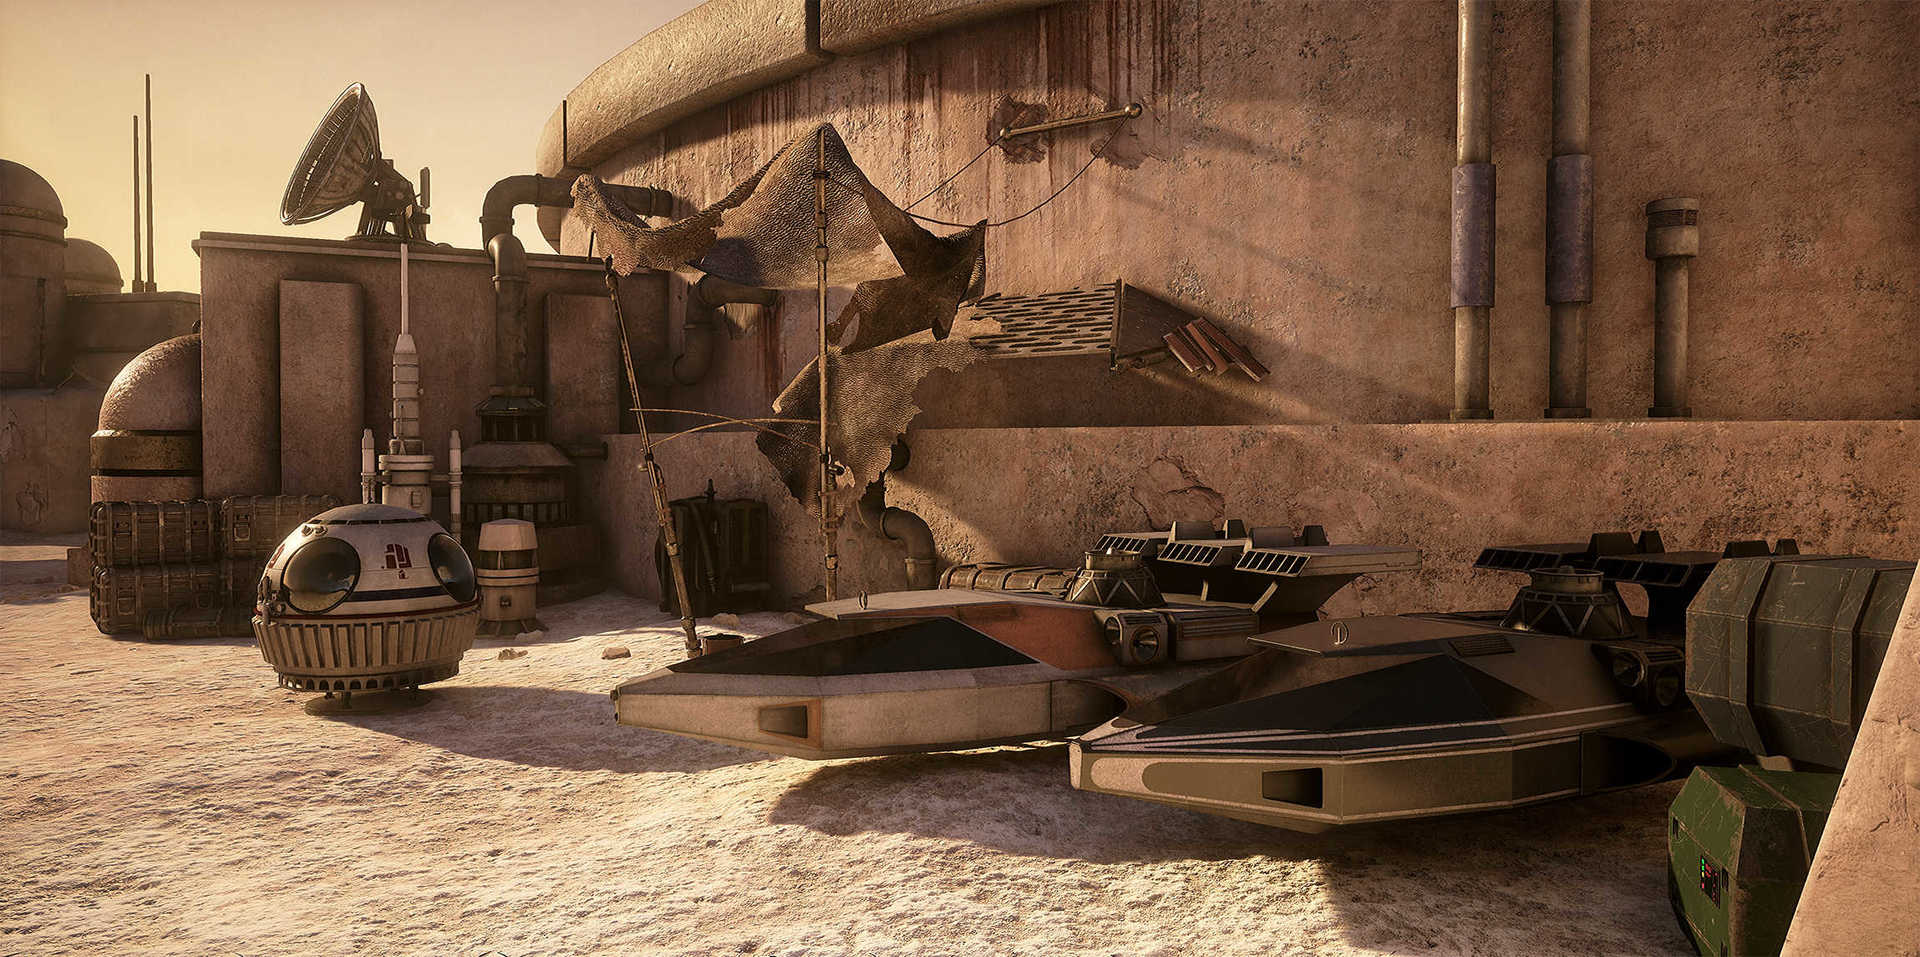
This scene is a real experiment that shows how detailed scenes (in terms of polygon detailing and textures) can be run on modern computer graphics equipment with an acceptable frame rate. As a result, we managed to achieve a fairly high number of polygons and texture sizes. We applied modularity, but at the macro level. Buildings are instances of objects, the entire docking bay is reused three times in a level, several props are used several times, but we did not create modules at the micro level (no sets of walls, ceilings, stairs, etc.), almost all assets are unique. To create the composition, we studied several scenes from the fourth episode of Star Wars and tried to copy them as best as possible, taking into account the restrictions imposed by real-time free navigation. But the main focus in the environment we did on the docking compartments and the ships inside.

From the point of view of resource consumption, the scene is rather “heavy”. One of my "Falcon" "weighs" about 700,000 triangles, about 500,000 more went to the docking compartment and the surrounding props. There are several parts of the city in which the number of polygons exceeds one million. While we tested the use of RAM graphics cards with a capacity of up to 4.1 GB with the maximum settings. Due to time constraints, we did not have enough time to create LOD, so we transfer data from memory and to memory in small pieces (chunks) based on the position of the player. Despite the large number of polygons and the size of the textures, the scene worked quite well with all the graphics processors tested. Now we get 45-60 FPS on the GeForce GTX 970, 980 and Titan X. If you reduce the size of the memory pool and provide a more “aggressive” mip-texturing, you can achieve an acceptable frame rate on the GTX 760 with 2 GB.
We did not perform the prototyping stage in the traditional sense. First, we created the entire scene without textures, but did not make low-detail versions of assets for a rough layout of the level. From the very beginning, we built all the models in the final level of detail, then completed the basic layout, and proceeded to create lighting and materials / textures. In the process of creation, there were still several iterations, but we decided that skipping the modeling stage will allow us to move faster. There was a moment when the scene grew too large, and we had to scale it a little so that we had enough time and hands.

Assets
Our scene contains a huge number of assets, and it seems to me that thanks to this it looks so unique and exciting. We split assets into three categories: buildings and structures, ships, and propses. As I said, we divided them among volunteers, taking into account the time and effort they want to invest in the work. For the assets of the props, I prepared the workflow from the very beginning in order to achieve a high-quality result with a small investment of time. Most of the participants took advantage of my process. Almost all of us use 3ds Max, so the process briefly looked like this:
- Create the final low poly mesh.
- Creating a high poly mesh for baking (high poly grids were usually used only to generate bevel faces in normal maps. Small details of micro-normal maps were drawn or sculpted in Zbrush , Quixel or Substance Painter ).
- Baking Tangent Space normal maps / Ambient Occlusion and Curvature Maps.
- Adding microdetails to normal maps, AO and Curvature Maps.
- The final texturing pass (most of us use Quixel Suite, some - Substance Painter)
Buildings and large structures were modeled in the final low-poly state and were imported into UE4 without baking, because they were mostly superimposed with repetitive (tileable) textures of plaster or metal. Most building materials use textures projected in the space of the world, which eliminates the time-consuming work with UV. All that is needed is a quick and easy UV pass for baking lighting.
With the Millennium Falcon a completely different story. First, we needed to break this famous ship into several parts, each of which had its own unique material. The final "Falcon" consists of 50 unique grids. Due to the large size and high level of detail, the texturing processes described above are not suitable here, because repetitive materials will not provide the desired level of clarity, which I tried to achieve. However, overlaying each of these 50 parts with a unique texture would quickly load the graphics processor even with 4 GB or 6 GB of memory, because all of them must have 4K resolution so that the density of texels does not collapse when the player’s camera is close to the ship. To solve these problems, I decided to try using the Unreal 4 layer system. If you are unfamiliar with the Layered Material system, I will explain: it allows you to create basic materials with repeating textures that define different types of surfaces. In a single base material, it is possible to combine and mix such base materials through masks in the 0-1 UV mesh space. This solves the GPU memory problem by using repetitive 1K textures to define all types of surfaces, and one 4K texture mask for each Falcon part instead of three 4K textures for each ship part. The overlay of repetitive materials in layers with blending masks provides a much better level of clarity compared to the results of using traditional repetitive materials. The lack of a system of layers of materials is a larger waste of resources per pixel compared to the traditional setting of materials, which leads to an increase in the load on the graphics processor.


Materials
Above, I slightly touched the creation of materials, and now we will look at it in more detail. The process of working on materials mainly depends on the category of its grid (structures / ships / prop). For buildings and structures we use repetitive materials with textures in the space of the world. The system of binding in the space of the world UE4 works quite well and allows us to create such assets faster. It does not waste time on complex UV, which require very careful adjustment, so that when applying there are not many seams. Projection in the space of the world perfectly mixes curved surfaces. Of course, occasional stitches sometimes occur, but they do not cause problems. The speed advantages far outweigh the occurring stitches or projection errors. In addition to repeating materials, all textures are also mixed with the global normal map and the AO map, which define the basic shape and silhouette of each of the structures.


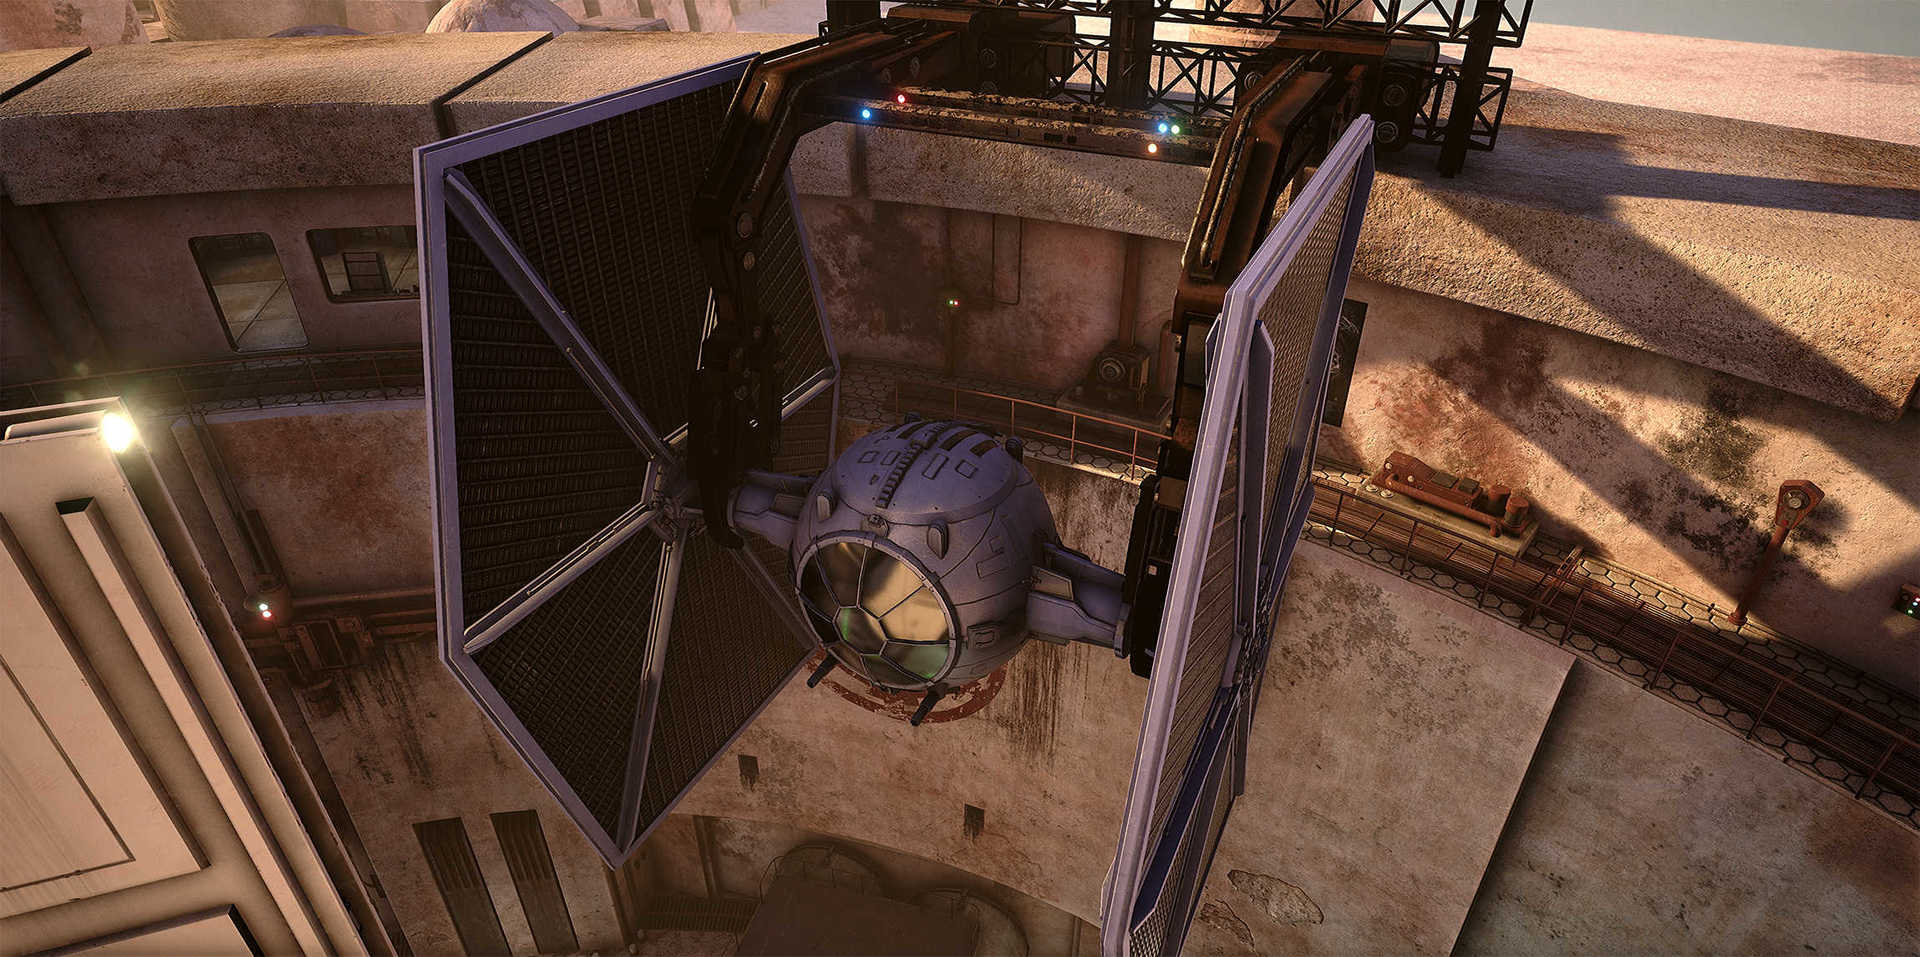
The largest ship in the environment, the Millennium Falcon, uses the aforementioned layer system of materials. I tried experimenting with the use of a system of layers for smaller props assets, but I realized that the time to configure and the additional load on the graphics processor from such a system do not justify themselves. For assets that are less than a set of parts of our main character, such a system is not needed. The artist who created the imperial shuttle first planned to use the material layer system, as in the Falcon, but he spent a lot of time on his model, so he decided to perform a standard workflow with diffuse maps, normal maps, roughness and metallic luster. The material layer system, although very effective, takes a little more time compared to the traditional texture setting.
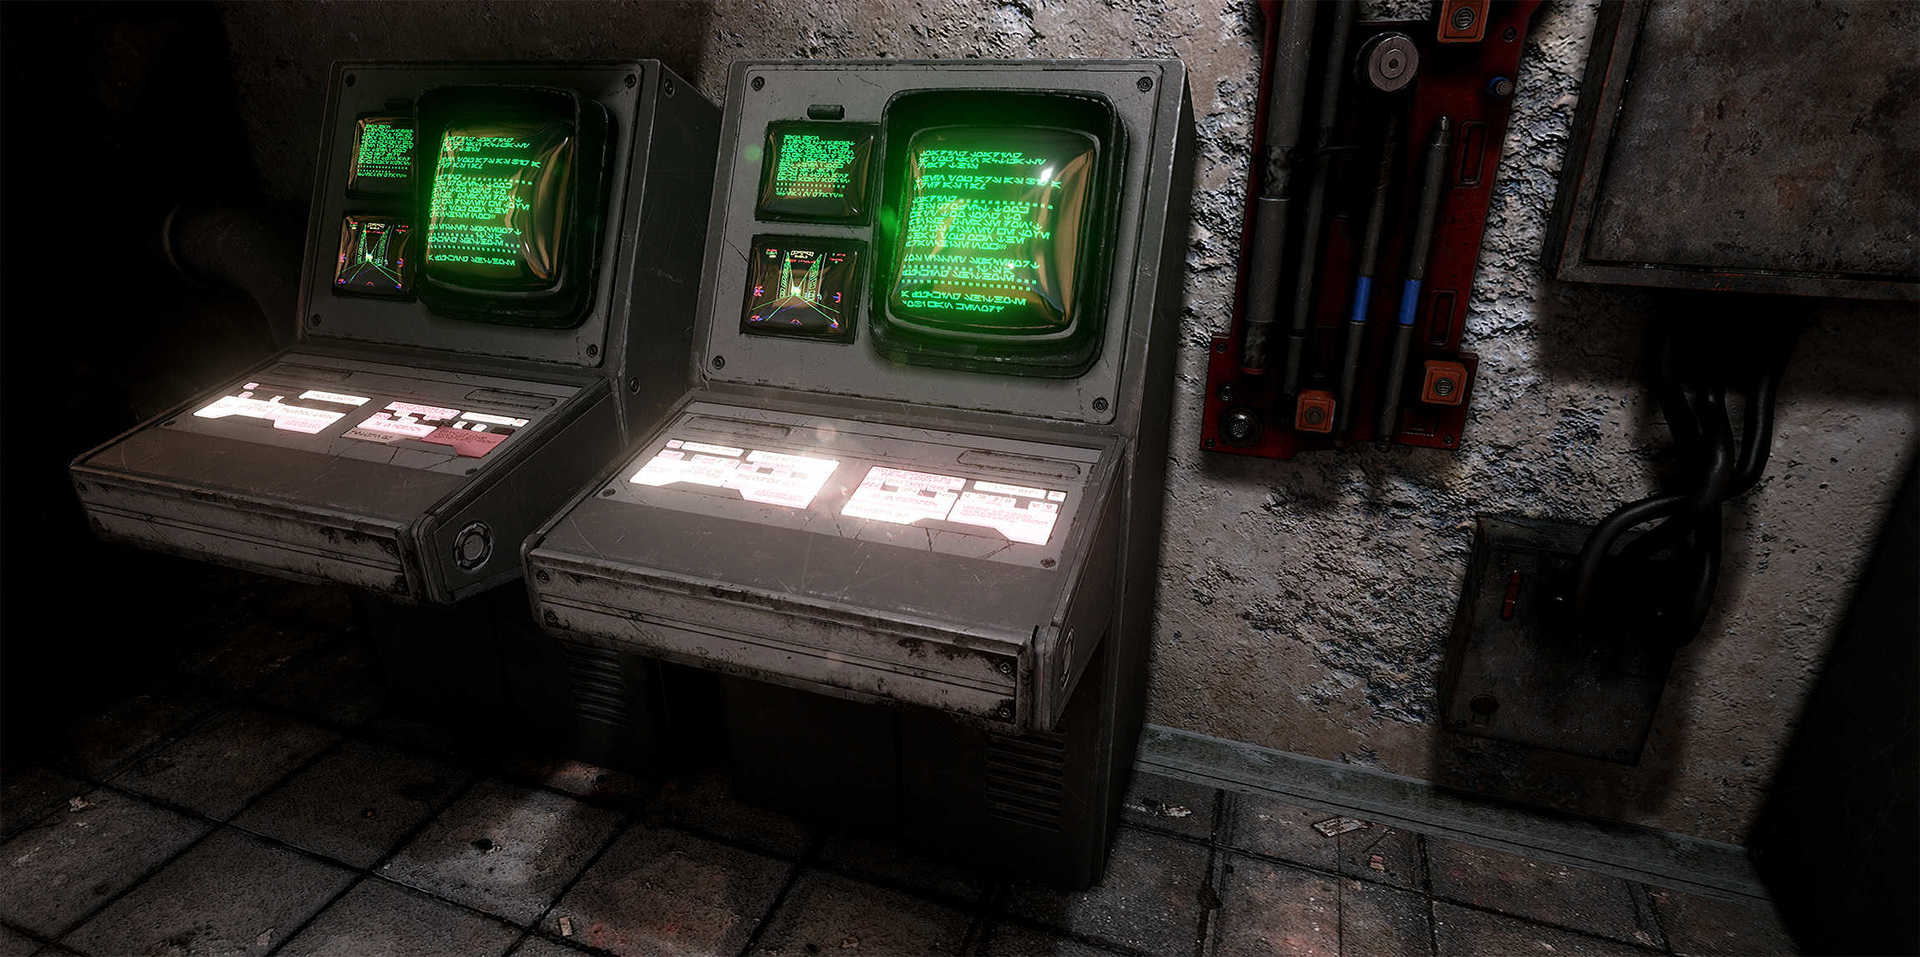
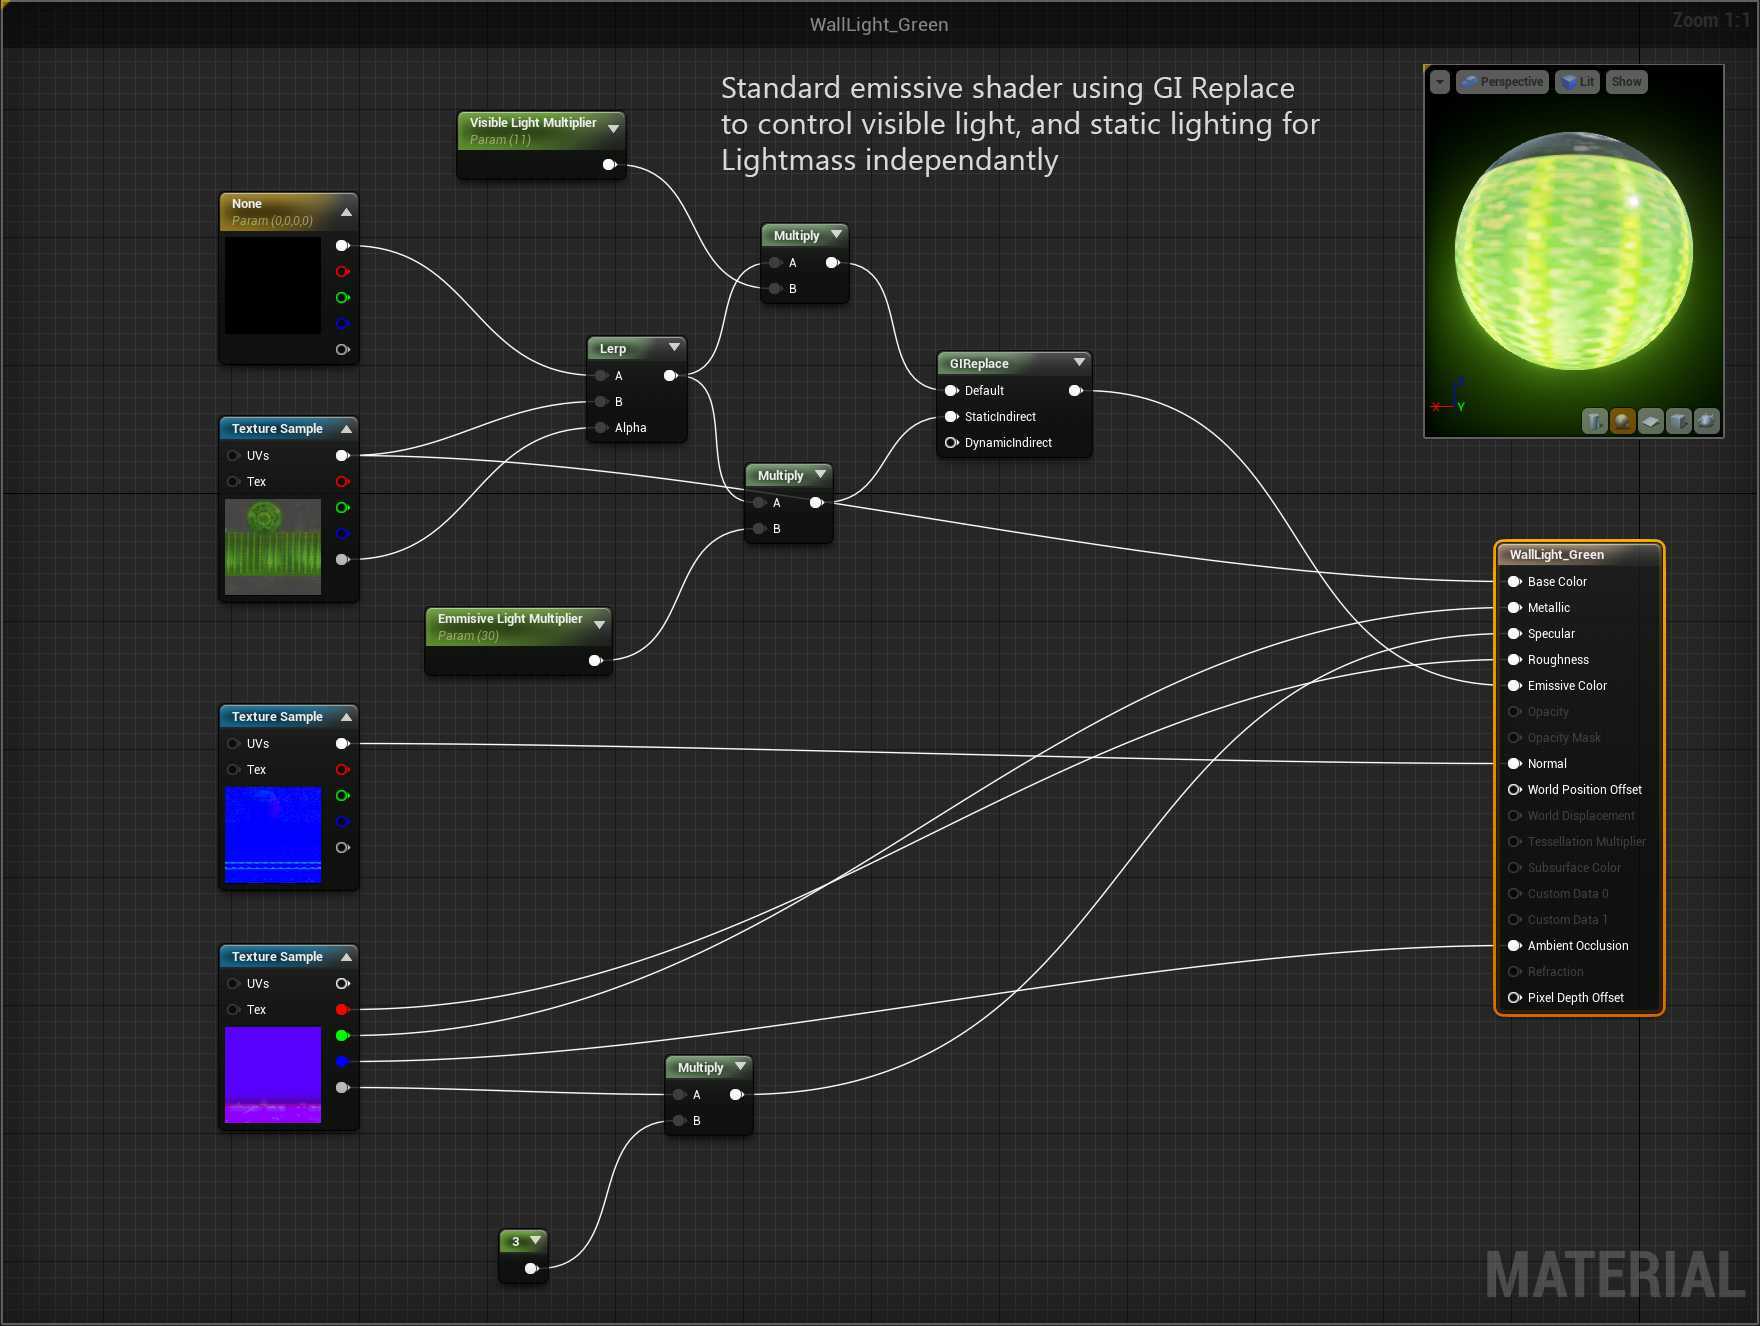
The prop prop assemblies use fairly simple material settings: a basic diffuse / normal map and one gray gradient texture for roughness, metallic luster, AO, and reflection maps. In the shader, we put multipliers for reflections and roughness to adjust the matte values / glossiness of any texture without returning to texture processing. In addition, we use at the level of many emitting materials that create beautiful areas of bright light that complement the actual lighting. Also for materials, we often used the flipbook UE4 trick. You can create a texture atlas of animated sprites, tell the flipbook how many rows and columns are in the atlas, and it will cycle through these sprite frames. Using the multiplication node, you can adjust the playback speed of these sprites with a flipbook node. I used a flipbook for all the animated lighting on control panels and consoles.

Basically, our textures were created procedurally using the Quixel Suite (and a little using the Substance Painter). Most of us own Quixel well, because we use it in Obsidian. Some volunteers did a set of pre-configured smart materials for the Mos-Eisley scene, which we shared with the rest of the team in order to further speed up the creation of textures. Approximately 70% of the textures are made in Quixel / Substance, the rest are photo textures from the Internet and personal collections. Most repetitive textures for surfaces such as building walls, plaster, dirt, sand, and earth are taken from photographic maps.
Lighting
After the first rough passage of lighting in this scene, I quickly realized that creating lighting for this environment would be quite a big task. So when one of our lighting artists at Obsidian suggested we take on the light, I immediately transferred all the work on lighting to him. Here is what he can say about the lighting in the Mos-Eisley scene:
Small sources of light in the Falcon, aisles, panels, etc. use the material node to control the power of the bloom and the baked global illumination (GI) of each material separately. Therefore, the lighting along the aisles can have a greater force of reflection of light compared with the light sources on the panels. Their bloom value is also underestimated for enhanced bloom during post-processing of large sources such as the sun and the lights of the docking compartment.

In the rest of the scene, since it is 95% open-air (or is interiors with openings), I worked with one dominant directional light, aiming for the meaning of lighting the real world with accurate color temperatures *. As soon as the dominant light source was set up, I switched to working with Lightmass settings (I used many settings from forum topics about architectural visualization, from the editor and without changing the .ini files). Having made the first baking, I looked at where I needed to place additional lighting to increase the illumination in the corners, and where I needed even more global lighting. After completing the environment, I began working on the interiors. The main part of the light sources in the scene for the environment was static, because I needed only their color information (without reflections) for additional GI or to highlight different areas. All light sources affecting the player are static for additional baked elements, but with dynamic shadows for those assets that require them. Dynamic GI or AO were not used because they were quite problematic when I started working with lighting. The fog was created using both types of fog available in UE4. Atmospheric fog works well when you need to give a static skybox more depth and color associated with the time of day. Mist based on height (fog) gives a feeling of a dusty scene located in a valley. This fog is not attached to anything and is used throughout the scene, as well as in a couple of volumes of some interior spaces. The global fog made changes in graininess, bloom, chromatic aberration, vignetting, tone compression and exposure. In separate interior volumes, the same settings were used with minor changes in color and exposure.
* The method of borrowing lighting values from the real world in UE4 is not always perfect, because some of the lighting values cannot be recreated in the editor. There are also other factors that make changes to measurements, such as cubic maps, fog and other lighting, so the lighting level changed during the development of the level. But I still liked to start with measurements of basic lighting, because usually it quickly creates the right impression and allows you to artistically change it later, during the final pass.
Recommendations
You can give a lot of useful advice to less experienced people, if they do not know where to start or what to focus on, starting a large or small project. Here is a set of tips collected by me and other volunteers working on this project:
- To get the job done quickly and maintain a good pace, focus on the big picture first. With broad brush strokes create shapes and composition, and only then proceed to the fine details. It is easy to get confused in details, and starting with them, you will slow down the development process and will delay in time the realization of your goals! Find production methods suitable for you. I have seen a lot of forum posts about right and wrong ways of working, but better ignore them. There is nothing right or wrong in the work. Be open to other methods you are taught because they can enhance your skills. But in the end, if the process is right for you and the result has the quality level you need, you will understand that you did everything right!
- Understanding physically correct rendering (PBR) can make everything much easier when assembling a scene. Using any of the modern texturing tools (such as DDO or Substance Designer / Painter) will significantly speed up the texturing process and allow you to quickly get fairly accurate materials. Unifying and adjusting materials for the stage will help you when it comes time to work with lighting. It is also an extremely important aspect of the environment (but here I can be biased). Do not be afraid to immerse yourself in the technical side of creating environments. Awareness of the influence of lighting on materials, the difference between two projections of cubic maps, three types of light sources and the various types of shadow maps created by them will make working with lighting much less painful. Knowledge of color theory also helps in creating lighting, because it allows you to improve the scene by using the color ratio in the existing texture assemblies. The desired mood of the scene can be achieved simply by a combination of colors without changing the intensity of the lighting.


- We do not advise beginners to start with projects of this magnitude. He can only crush them. Start with small projects, work with friends and colleagues to distribute tasks. Even if everyone adds one or two assets to the scene, try to take the maximum from each element. Understand the process of creating real PBRs and use versatile materials decorated with decals to breathe life into them. Inefficient structure can save you time, but then the project will be harder to run on a mid-level computer. Quality and speed are always in different sides of the spectrum, so make a choice at the very beginning of the project and plan your work accordingly.
- Quote by the artist working on the imperial shuttle: “I worked on the Lambda shuttle and decided to make it a little different from all the others. I did more traditional high poly and low poly baking. Looking back, I am sure that you can completely skip the high poly stage and work on the final grid from the very beginning. ” Saving time is worth it if you do not plan to show a beautiful high-poly model in your portfolio. To obtain good bevels, usually achieved by baking high-poly models, you can use various other techniques. In Maya and Max there are ways to use a shader to get rounded corners of hard surfaces, which will save you a lot of time. There are also amazing new tools that allow you to simply create bevels of all solid edges and quickly produce high-poly objects.
- Make sure the proportions are accurate. If they do not match, the asset will look wrong. Even if the player cannot say exactly what the error is, he will realize that something is wrong with the asset.
Let your assets be History. It is necessary not just to make the door and paint it red. Think what happened to this door. What color was it before? How many times has it been repainted? Who or what used this door? Was their clothing made of metal or fabric? Did the door open with a kick or neatly? All this creates a history of the door. It will make your asset infinitely more interesting. In this case, assets together will create a much better composition.
Thank you for taking the time to get acquainted with our project. If you're wondering how the project evolved from the very beginning, we have a polycount article about it showing how the project looked at the early stages.
If you want to download it, the links are presented below.The project is quite demanding of the system: for acceptable FPS, we recommend at least 16 GB of system RAM and a graphics card no worse than the Nvidia GTX760 (or a similar AMD version). For large FPS and resolutions up to 2560 x 1440 or 2560 x 1600, we recommend using at least Nvidia GTX970 and higher (or their equivalent manufactured by AMD).
The project can be downloaded here:
A set of screenshots in ultra-high resolution can be downloaded here .
Source: https://habr.com/ru/post/312730/
All Articles