“Hi, Siri. Turn on the heaters "- Integration of NooLite smart home with Apple HomeKit
In my first article I described the background to the emergence of a remote heating control system in a country house through a Telegram bot, which my family and I have used for a long time.
With the release of iOS 10, Apple introduced the Home application to users - its implementation of the smart home control interface via HomeKit . I was very interested in this topic and, having spent several evenings studying the available material, I decided to implement the integration of this product with my system. In the article I will detail the process of its installation and configuration, as well as share the video with the results of what happened in the end.
Content
- Introduction
- Installing and configuring OpenHab
- Connecting NooLite to OpenHab
- Install and configure HomeKit for OpenHab
- Setting up the Home application
- Result
- Conclusion
Introduction
To understand the source data and the initial configuration of the smart home, I advise you to read the first article .
The first task was the search for ready-made free solutions in home automation with the support of HomeKit. Then I immediately remembered several articles on the open source product OpenHab. After reading the documentation and a little googling, I really found an addon to support the HomeKit protocol. At the moment, the second version of OpenHab is being prepared for release and active beta testing is underway. The latest available version at that time was beta4 , which I decided to use.
The integration process can be divided into 4 stages:
- Installing and configuring OpenHab
- Connecting NooLite to OpenHab
- Install and configure HomeKit for OpenHab
- Customize the Home app
The result would be the following scheme:
Installing and configuring OpenHab
OpenHab 2 has quite detailed documentation , where in addition to the main platforms there is also a tutorial on installing on the Raspberry Pi. I will not copy all the steps here, since there were no problems with the installation.
After installation, the OpenHab web interface was available in the browser at the address: http: // <device_address_c_openhab>: 8080 .
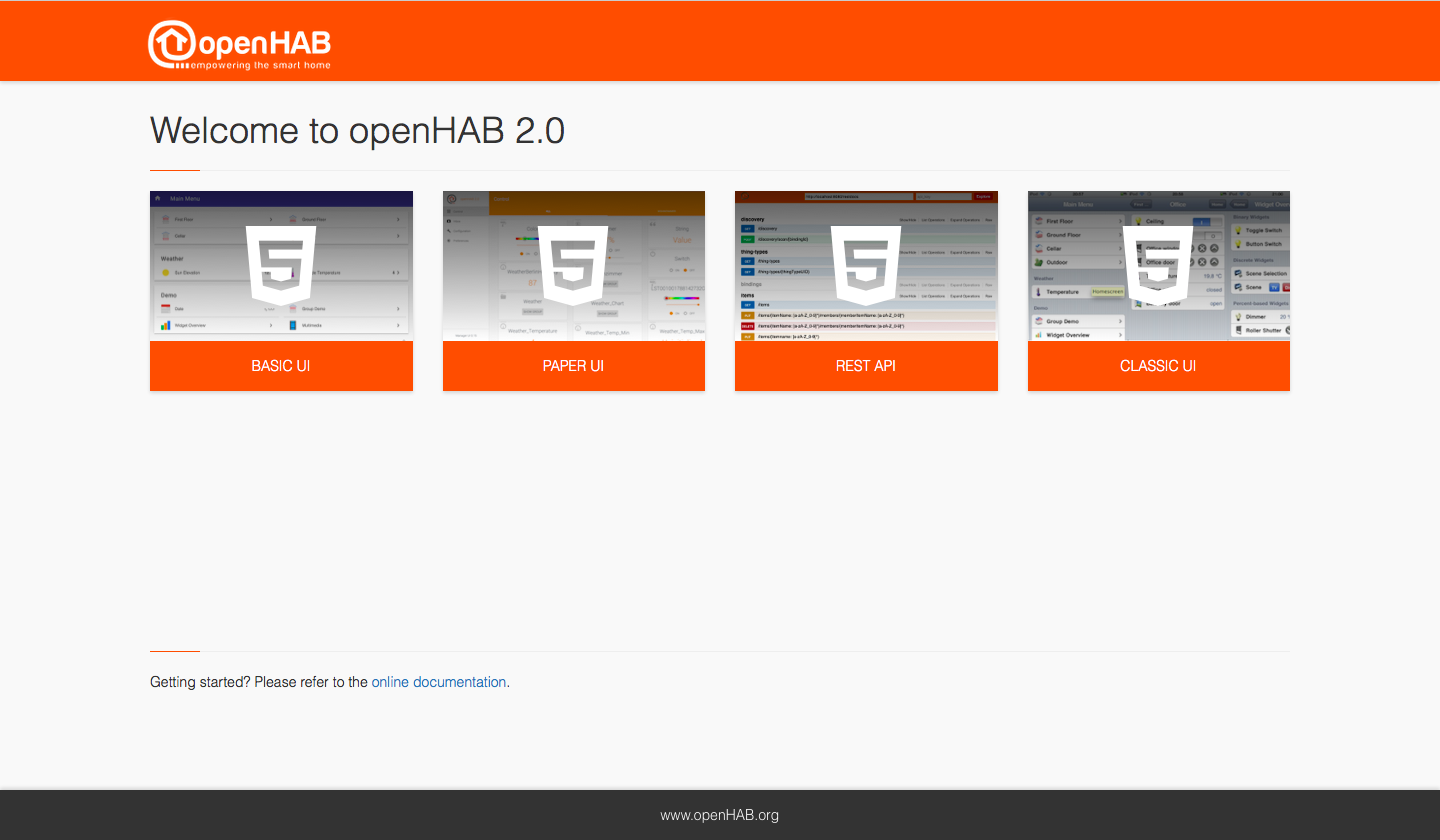
Immediately available:
- Basic UI, Classic UI - control panels for devices connected to OpenHab
- Rest API - rest API itself
- Paper UI - OpenHab admin interface, through which it can be configured
While the Basic UI was empty:

Connecting NooLite to OpenHab
Based on the documentation, to connect a new device to OpenHab, it was necessary:
- Add it to items
- Add to sitemap so that it is displayed in the OpenHab smart home control panel (Basic UI, Classic UI). You can skip this step, it does not apply to working with HomeKit, but with its help you can check that OpenHab sees NooLite and works with it correctly.
- Add rules to rules if you need automation or additional event processing logic
Items
In items, we describe the final managed devices, for example, the NooLite power unit and "teach" OpenHab to work with it:
itemtype itemname ["labeltext"] [<iconname>] [(group1, group2, ...)] [{bindingconfig}] Where:
- itemtype - device type (Switch, Dimmer, etc.)
- itemname - device name
- labeltext - text display. For example, for the sensor: "Temperature [% .1f ° C]", for the unit simply "Heaters"
- iconname - the displayed icon
- group1 - groups
- bindingconfig - how to manage this device
The most interesting thing here is binding. How the interaction with the managed device will be performed. After a bit of searching for information on how OpenHab works with NooLite, I found a ready - made version . But it was written to work with the NooLite USB adapters of the PC and RX series. In my own system, the management of the power units worked through the PR1132 ethernet gateway, so it was necessary to look for other options for work.
Looking at the available binders, I found universal Http binding and Exec binding , with the help of which it was possible to realize communication with NooLite:
- Http binding allows you to perform a network request when an event occurs (on / off, receiving information from the sensor). Using the API in PR1132 , you could implement OpenHab direct communication with NooLite.
- Exec binding - any command is executed for the event.
At that time, I thought that additional pre / post processing logic for requests to NooLite would be needed, so I chose the second option.
NooLite CLI
When developing a Telegram bot, a previous implementation of the interface for communicating with a smart home, I already wrote a simple wrapper class above the API calls to NooLite:
""" NooLite API wrapper """ import requests from requests.auth import HTTPBasicAuth from requests.exceptions import ConnectTimeout, ConnectionError import xml.etree.ElementTree as ET class NooLiteSens: """ , """ def __init__(self, temperature, humidity, state): self.temperature = float(temperature.replace(',', '.')) if temperature != '-' else None self.humidity = int(humidity) if humidity != '-' else None self.state = state class NooLiteApi: """ NooLite""" def __init__(self, login, password, base_api_url, request_timeout=10): self.login = login self.password = password self.base_api_url = base_api_url self.request_timeout = request_timeout def get_sens_data(self): """ xml :return: NooLiteSens :rtype: list """ response = self._send_request('{}/sens.xml'.format(self.base_api_url)) sens_states = { 0: ' , ', 1: ' ', 2: ' ', 3: ' ' } response_xml_root = ET.fromstring(response.text) sens_list = [] for sens_number in range(4): sens_list.append(NooLiteSens( response_xml_root.find('snst{}'.format(sens_number)).text, response_xml_root.find('snsh{}'.format(sens_number)).text, sens_states.get(int(response_xml_root.find('snt{}'.format(sens_number)).text)) )) return sens_list def send_command_to_channel(self, data): """ NooLite NooLite url data :param data: url :type data: dict :return: response """ return self._send_request('{}/api.htm'.format(self.base_api_url), params=data) def _send_request(self, url, **kwargs): """ NooLite url kwargs :param url: url :type url: str :return: response NooLite """ try: response = requests.get(url, auth=HTTPBasicAuth(self.login, self.password), timeout=self.request_timeout, **kwargs) except ConnectTimeout as e: print(e) raise NooLiteConnectionTimeout('Connection timeout: {}'.format(self.request_timeout)) except ConnectionError as e: print(e) raise NooLiteConnectionError('Connection timeout: {}'.format(self.request_timeout)) if response.status_code != 200: raise NooLiteBadResponse('Bad response: {}'.format(response)) else: return response # NooLiteConnectionTimeout = type('NooLiteConnectionTimeout', (Exception,), {}) NooLiteConnectionError = type('NooLiteConnectionError', (Exception,), {}) NooLiteBadResponse = type('NooLiteBadResponse', (Exception,), {}) NooLiteBadRequestMethod = type('NooLiteBadRequestMethod', (Exception,), {}) Using it, in a few lines of python code, I sketched the NooLite CLI , with the help of which the opportunity to manage NooLite from the command line appeared:
""" NooLite PR1132 command line interface """ import os import json import logging import argparse import yaml from noolite_api import NooLiteApi SCRIPT_PATH = os.path.dirname(os.path.realpath(__file__)) # Logging config logger = logging.getLogger() formatter = logging.Formatter( '%(asctime)s - %(filename)s:%(lineno)s - %(levelname)s - %(message)s' ) stream_handler = logging.StreamHandler() stream_handler.setFormatter(formatter) logger.addHandler(stream_handler) def get_args(): """ :return: {: } . :rtype: dict """ parser = argparse.ArgumentParser() parser.add_argument('-sns', type=int, help=' ') parser.add_argument('-ch', type=int, help=' ') parser.add_argument('-cmd', type=int, help='') parser.add_argument('-br', type=int, help=' ') parser.add_argument('-fmt', type=int, help='') parser.add_argument('-d0', type=int, help=' 0') parser.add_argument('-d1', type=int, help=' 1') parser.add_argument('-d2', type=int, help=' 2') parser.add_argument('-d3', type=int, help=' 3') return {key: value for key, value in vars(parser.parse_args()).items() if value is not None} if __name__ == '__main__': # config = yaml.load(open(os.path.join(SCRIPT_PATH, 'conf_cli.yaml'))) # NooLite noolite_api = NooLiteApi( config['noolite']['login'], config['noolite']['password'], config['noolite']['api_url'] ) # args = get_args() logger.debug('Args: {}'.format(args)) # sns, if 'sns' in args: sens_list = noolite_api.get_sens_data() send_data = sens_list[args['sns']] print(json.dumps({ 'temperature': send_data.temperature, 'humidity': send_data.humidity, 'state': send_data.state, })) else: logger.info('Send command to noolite: {}'.format(args)) print(noolite_api.send_command_to_channel(args)) The arguments have the same names as in the API of the PR1132 ethernet gateway , the only thing added is the sns argument for receiving information from the sensors.
# $ python noolite_cli.py -h usage: noolite_cli.py [-h] [-sns SNS] [-ch CH] [-cmd CMD] [-br BR] [-fmt FMT] [-d0 D0] [-d1 D1] [-d2 D2] [-d3 D3] optional arguments: -h, --help show this help message and exit -sns SNS -ch CH -cmd CMD -br BR -fmt FMT -d0 D0 0 -d1 D1 1 -d2 D2 2 -d3 D3 3 # , 0 $ python noolite_cli.py -ch 0 -cmd 2 OK # , 0 $ python noolite_cli.py -ch 0 -cmd 0 OK # , 0 $ python noolite_cli.py -sns 0 {"state": " , ", "temperature": 21.1, "humidity": 56} # - RGB- SD111-180 (3 ) # : d0 - , d1 - , d2 - $ python noolite_cli.py -ch 3 -cmd 6 -fmt 3 -d0 247 -d1 255 -d2 247 Now I could describe all the NooLite power units in items:
# /etc/openhab2/items/noolite.items Number FFTemperature " [%.1f °C]" <temperature> {exec="<[python noolite_cli.py -sns 0:5000:JSONPATH($.temperature)]"} Number FFHumidity " [%d %%]" <temperature> {exec="<[python noolite_cli.py -sns 0:5000:JSONPATH($.humidity)]"} Switch Heaters1 "" { exec=">[OFF:python noolite_cli.py -ch 0 -cmd 0] >[ON:python noolite_cli.py -ch 0 -cmd 2]"} Switch Light1 "" { exec=">[OFF:python noolite_cli.py -ch 2 -cmd 0] >[ON:python noolite_cli.py -ch 2 -cmd 2]"} Color RGBLight " " <slider> Where:
- FFTemperature, FFHumidity - temperature and humidity of the sensor of the first floor. OpenHab performs
python noolite_cli.pyevery 5 seconds with the -sns 0 parameter and extracts temperature values from the json response. Similarly for moisture - Heaters1 is a ground floor heater line. To enable (the "ON" command) OpenHab should execute
python noolite_cli.py -ch 0 -cmd 2, to disable (the "OFF" command)python noolite_cli.py -ch 0 -cmd 0. - Light1 - outdoor searchlight, commands similar to heaters, only on the second channel-ch 2
- RGBLight - LED strip.
Rules
The LED strip control no longer fit into one command, as additional logic was needed to obtain the brightness values of each of the RGB channels. Therefore, I described the handling of state changes in rules:
# /etc/openhab2/rules/noolite.rules import org.openhab.core.library.types.* var HSBType hsbValue var String redValue var String greenValue var String blueValue rule "Set RGB value" when Item RGBLight changed then val hsbValue = RGBLight.state as HSBType val brightness = hsbValue.brightness.intValue val redValue = ((((hsbValue.red.intValue * 255) / 100) * brightness) / 100).toString val greenValue = ((((hsbValue.green.intValue * 255) / 100) * brightness) / 100).toString val blueValue = ((((hsbValue.blue.intValue *255) / 100) * brightness) / 100).toString var String cmd = "python noolite_cli.py -ch 3 -cmd 6 -fmt 3 -d0 " + redValue + " -d1 " + greenValue + " -d2 " + blueValue executeCommandLine(cmd) end I described one rule that worked when the state of RGBLight changed, where I got the values of each channel (0-255), formed the string python noolite_cli.py -ch 3 -cmd 6 -fmt 3 -d0 redValue -d1 greenValue -d2 blueValue and executed it .
Sitemap
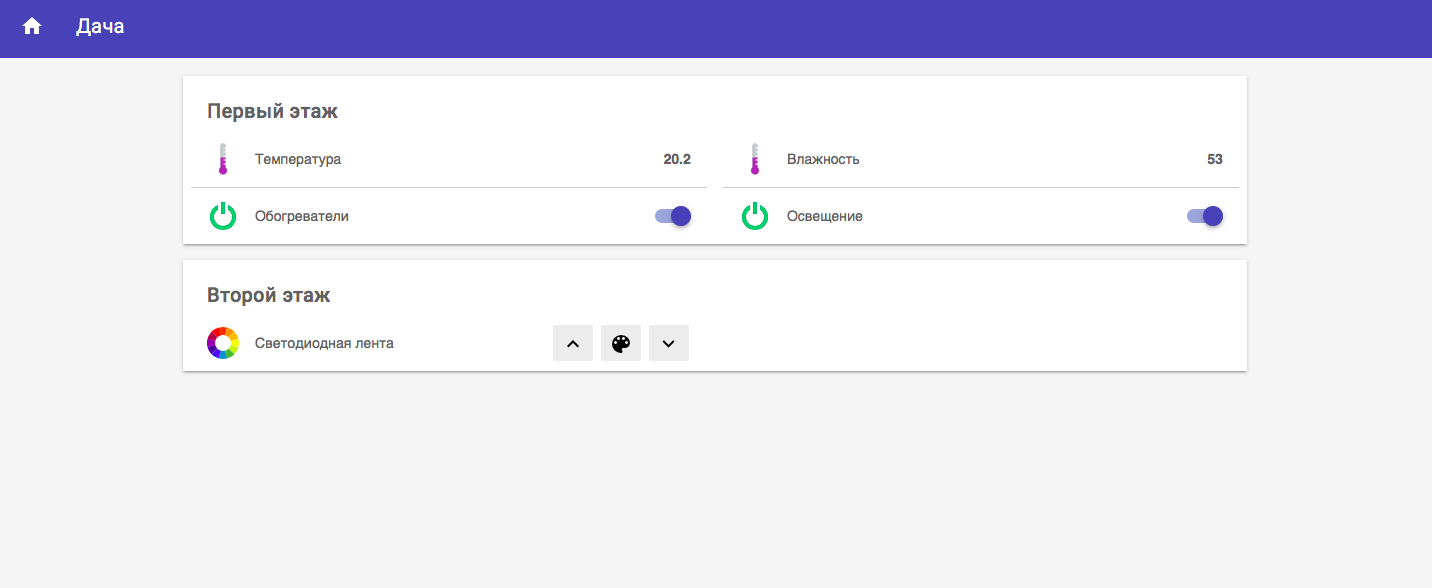
Now, when OpenHab "saw" all my power units and knew how to control them, it remained to describe how to display them in the OpenHab control panel (Basic UI, Classic UI). This is done in the sitemap:
# /etc/openhab2/sitemap/noolite.sitemap sitemap noolite label="" { Frame label=" " { Text item=FFTemperature Text item=FFHumidity Switch item=Heaters1 Switch item=Light1 } Frame label=" " { Colorpicker item=RGBLight icon="colorwheel" label=" " } } After saving this file, all devices appeared in the Basic UI:
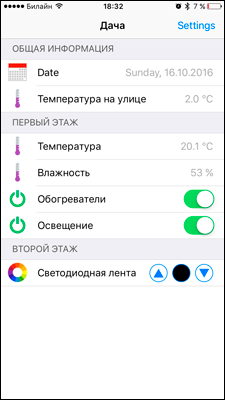
I also tested working with a smart home through the OpenHab application for iOS devices, where everything also worked fine:

Install and configure HomeKit for OpenHab
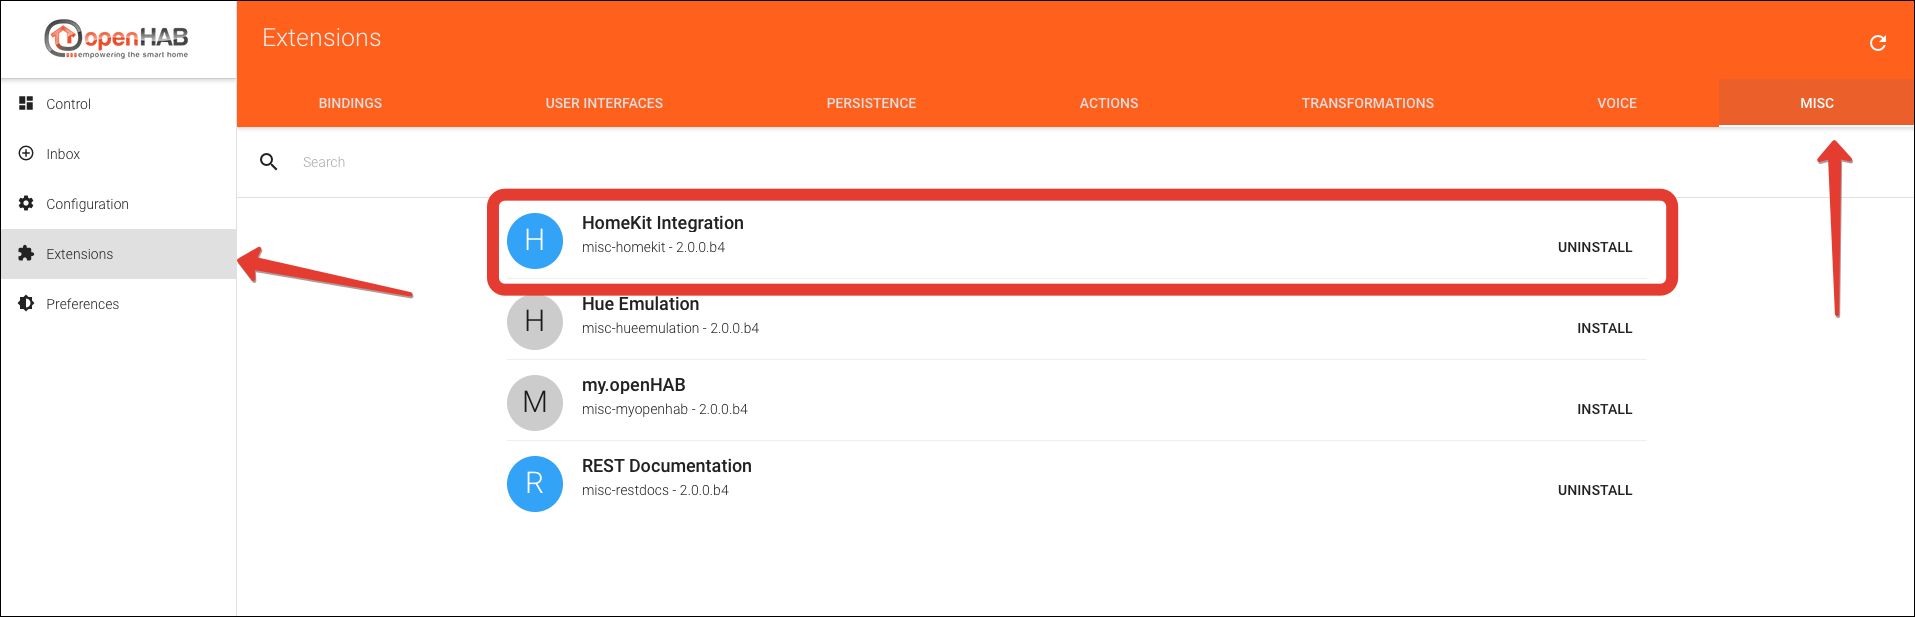
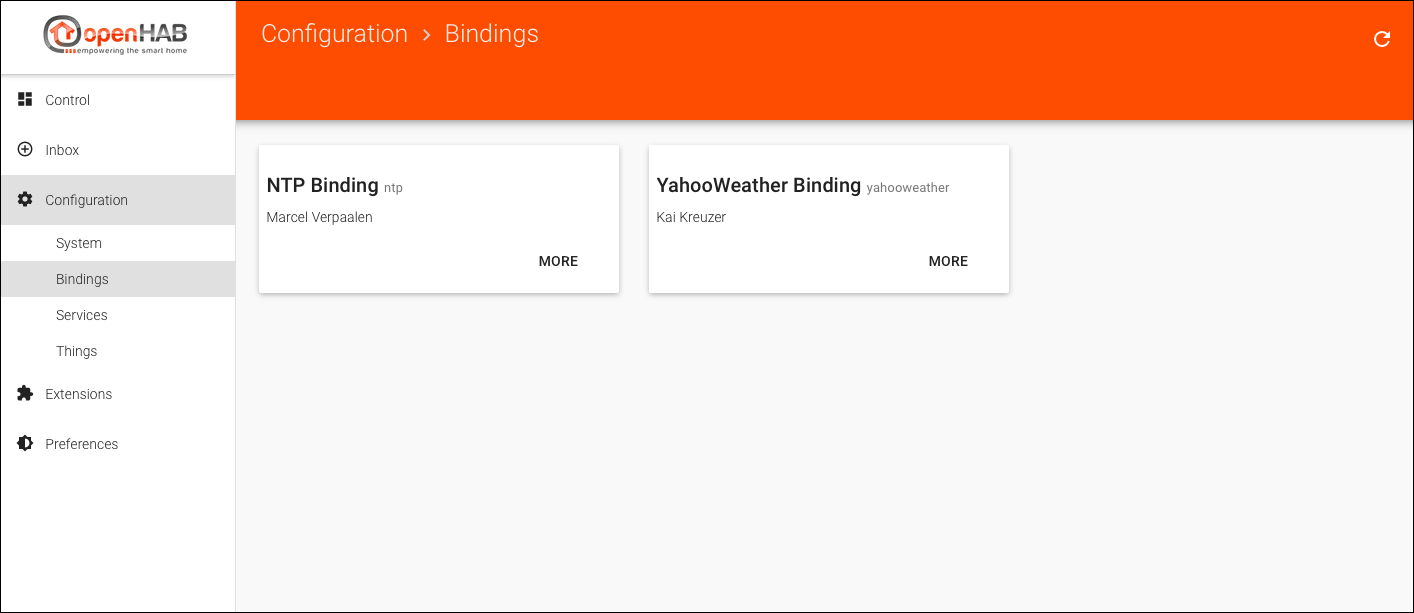
I installed the HomeKit add-on for OpenHab in a couple of clicks through the Paper UI (administration interface):
For its correct operation, following the documentation, for each element of the items I registered the type (Lighting, Switchable, CurrentTemperature, CurrentHumidity, Thermostat). After that, the noolite.items file had the following form:
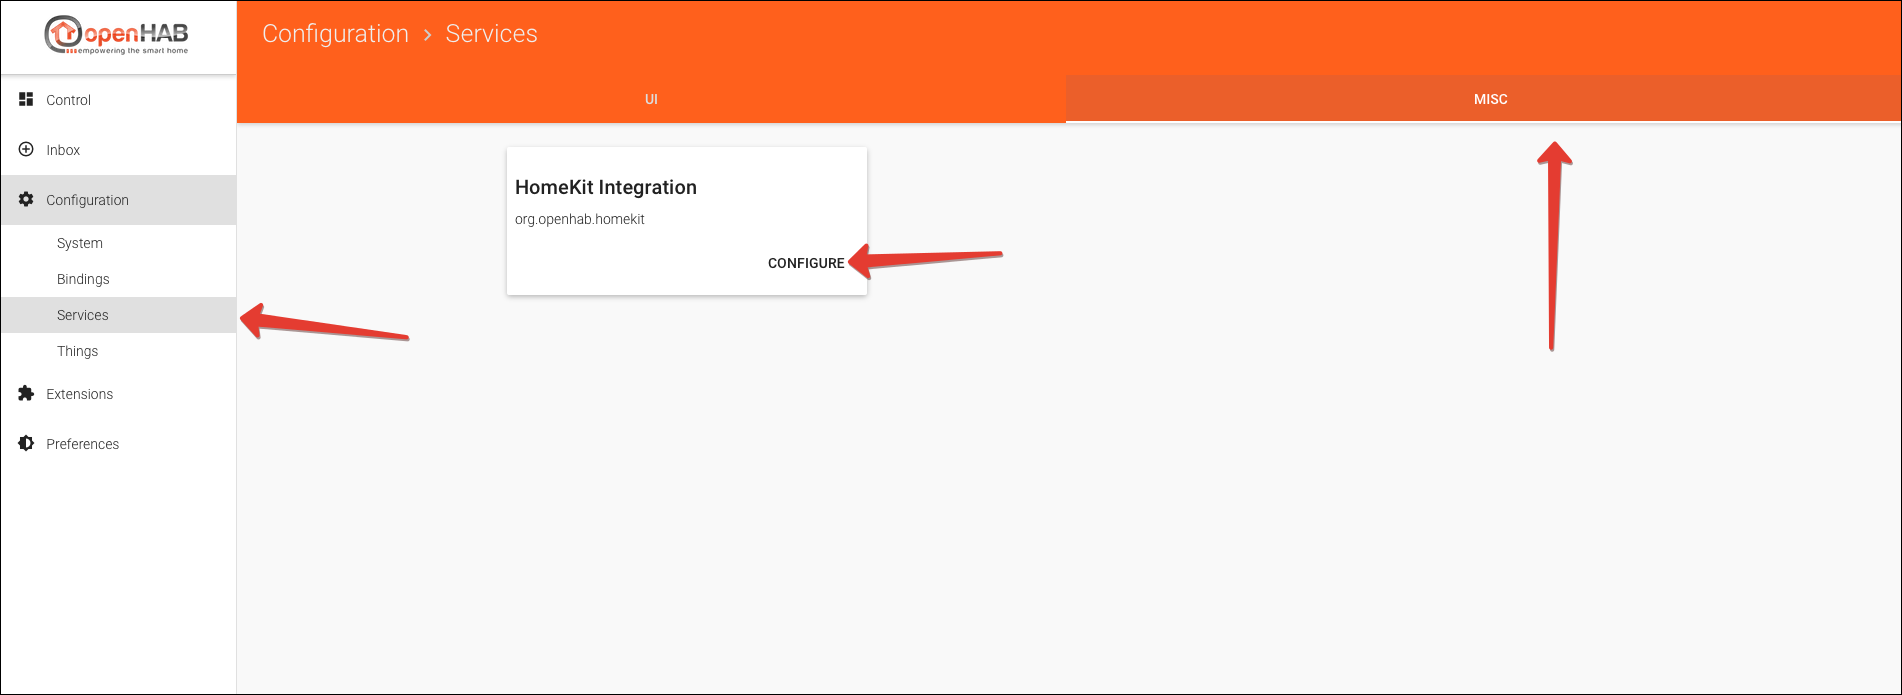
Number FFTemperature " [%.1f °C]" <temperature> [ "CurrentTemperature" ] {exec="<[python noolite_cli.py -sns 0:5000:JSONPATH($.temperature)]"} Number FFHumidity " [%d %%]" <temperature> [ "CurrentHumidity" ] {exec="<[python noolite_cli.py -sns 0:5000:JSONPATH($.humidity)]"} Switch Heaters1 "" [ "Switchable" ] { exec=">[OFF:python noolite_cli.py -ch 0 -cmd 0] >[ON:python noolite_cli.py -ch 0 -cmd 2]"} Switch Light1 "" [ "Switchable" ] { exec=">[OFF:python noolite_cli.py -ch 2 -cmd 0] >[ON:python noolite_cli.py -ch 2 -cmd 2]"} Color RGBLight " " <slider> [ "Lighting" ] Then, in the add-on settings, I registered the local address of the device with OpenHab (in my case, Raspberry Pi) and looked at the pairing pin-code:
')

After that, the OpenHab settings were completed, and I proceeded to configure the smart home on the iphone in the application "Home".
Setting up the Home application
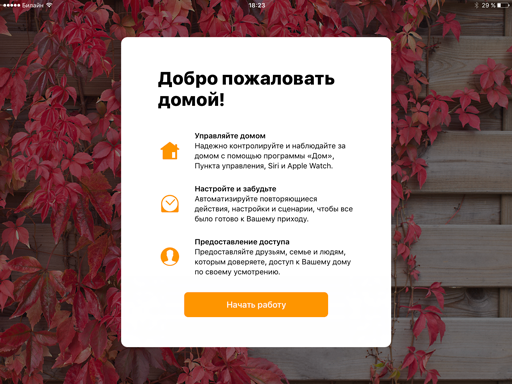
The first launch of the application "Home"
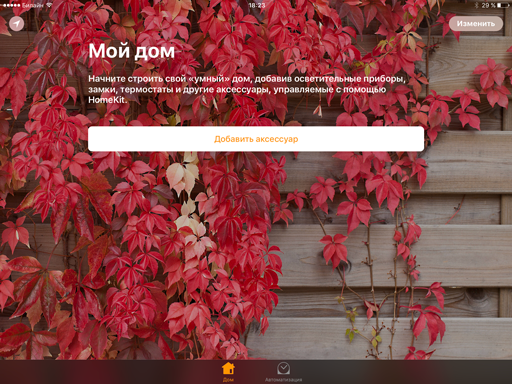
Clicked "Add Accessory"
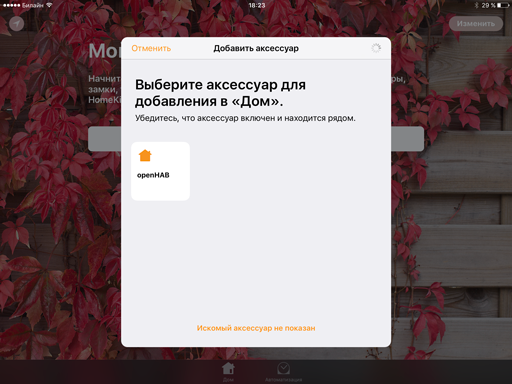
iPhone saw a device on the local network with HomeKit support
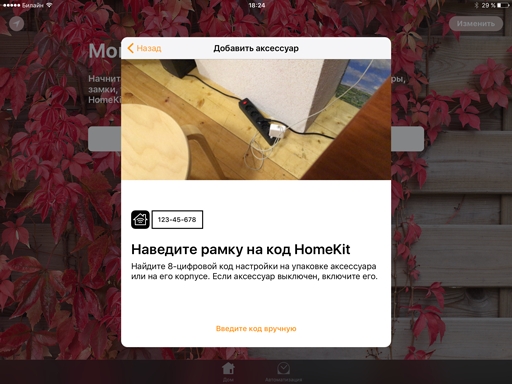
Enter code manually
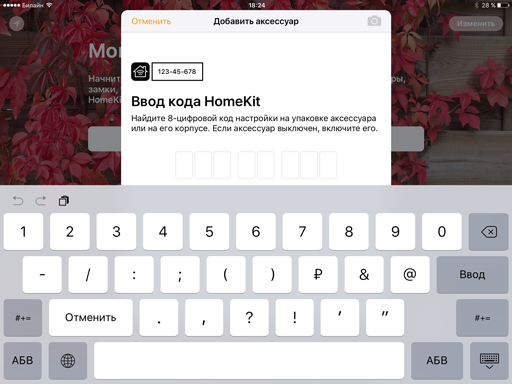
When adding the specified pin code from the settings of HomeKit addon
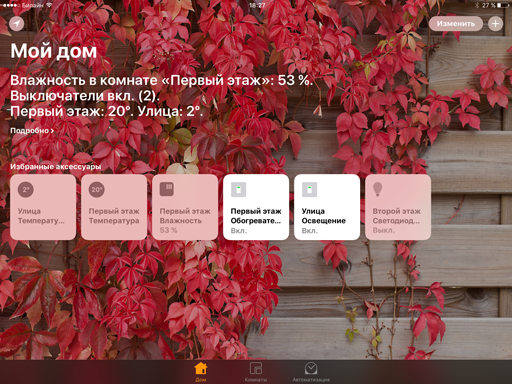
All devices
The iPhone saw all of my devices described in items. Next, I renamed some devices, created "rooms" (first floor, second floor, street) and scattered all the devices on them.
Here I want to clarify one point. In the screenshot above, you can see the element "Outdoor temperature" (the first element with a 2 degrees index), located in the "Street" room. This element is implemented using the YahooWeather Binding Binding - essentially just a yahoo weather forecast for a specific location.
It does not belong to NooLite, so I did not mention the details of its installation and configuration. This can be done again through Paper UI, all described in detail in the documentation .
Remote access and automation
In my local network was Apple TV, which, without additional settings, was itself defined as the "Home Center". As I later found out, the home center is needed for remote access to the smart home and automation settings (scheduled actions, actions based on your geo-location, etc.). Apple TV of the 3rd or 4th generation can act as a home center (in the 3rd generation only remote access works, 4th generation is necessary for automation) or an iPad with iOS 10. This device must be constantly turned on and located in the local network of the smart home.
It was pleasantly pleased that I did not make any additional settings with Apple TV. All you need is to log in to iCloud with your account.
Result
Most clearly the work process can be shown using video. Below are some examples of the work of the application "Home" and voice control via Siri:
In the dashboard 2 extreme right places are hired contactors, controlled by power units NooLite series SL. Through them are connected lines of heaters on the first and second floor of the house. On the video you can hear them click on / off. Unfortunately, there is no more visual indication of their work.
At the beginning of the next video, I disconnect from the dacha Wi-Fi network and all further work with the smart home takes place via 3G mobile Internet.
Conclusion
Integration with HomeKit allowed us to add to the smart home a convenient management interface with iOS devices through the Home application, and also expanded its functionality:
- full remote control of all devices at home, instead of Telegram-bot
- voice control
- automation based on: time of day, geolocation, sensor readings (for example, motion detection)
- Convenient addition of users to smart home management via invitations (you need an iOS device and an Apple account) with differentiated access rights
A detailed overview of the Home application itself and its applications for home automation is already beyond the scope of this topic and I think it deserves a separate article. But for me the most interesting is geolocation, on the basis of which you can implement interesting automation scenarios. For example, when all users at home leave it, you can turn off the light everywhere. If users have retired even further (left for the city), then turn off some consumers, for example, sockets and electricity in the basement (I have a pump station there).
The work on this article allowed to look at the country house management system from the side and note the places that will be refined in the near future:
- To simplify the system, instead of using the PR1132 ethernet gateway and managing NooLite blocks via the HTTP API, you can use RX and PC series USB adapters and issue commands directly
- as far as I know, in the near future NooLite plans to release a new USB receiving-transmitting adapter and power blocks with feedback. It will be very interesting to try them in action.
References:
- NooLite CLI GitHub
- NooLite system
- OpenHab 2 documentation
- Promo page home application
Source: https://habr.com/ru/post/312668/
All Articles