Developing a game in Unity3D under a gamepad
To work on the competition, the task was set: to design a small game about space, which the children will take about 8 minutes. And there was one thing. Children should be interesting!
Since it was too pity to donate the keyboard to the control (and it is not so interesting), all management was planned to be done through the gamepad. About how to fasten the gamepad in Unity3d and will be discussed.

Little about the project

The first thing that came to mind about space was a controlled robot. Developing this idea further, the game became about a robot that must find a battery on the Moon in order to charge the laser station and escape from the approaching comet. Of course, everything had to be done on time (up to 8 minutes).
(Surprisingly, the children liked the game, including management, but more on that below).
Cartography
To create a map with small back streets and a great match to the Moon, the map is the Terrain element, with mountains that are needed as obstacles and level limits.
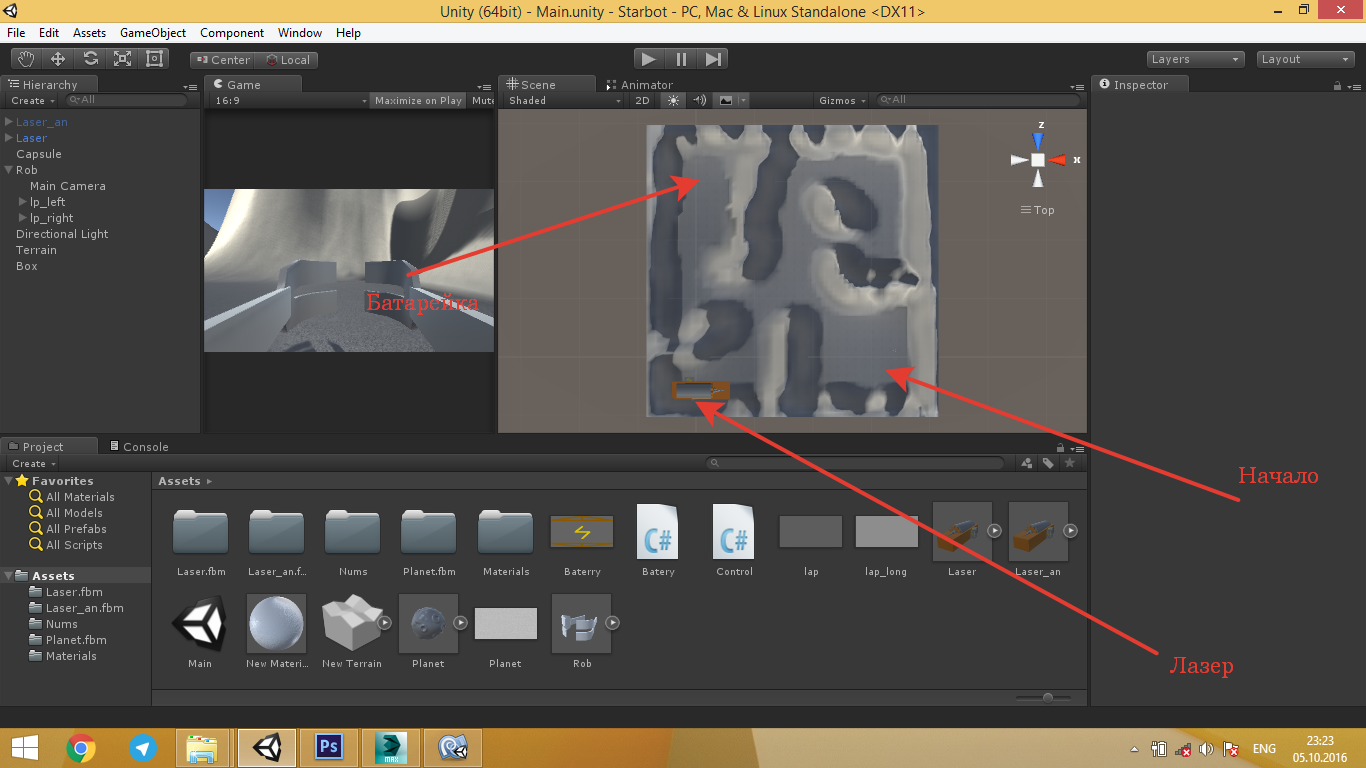
To keep the level long enough, the robot is in the opposite corner from the battery, which is extremely small to see from afar. The size was not chosen randomly, because it does not allow to see the battery in advance from a distance.
Control
Hand control
Since the robot has two hands, as well as the number of "fungi" in the gamepad, it is wise to use it.
And here begins the complexity. The fact is that the first "fungus" works (albeit with a creak) in the same way as "Mouse X" and "Mouse Y", but the second one didn’t respond by pressing. Then, having sat down for Google, read about how Unity receives the input control data. There lies the answer to the question of how to make the second (right) fungus work.
Go to Edit → Project Settings → Input
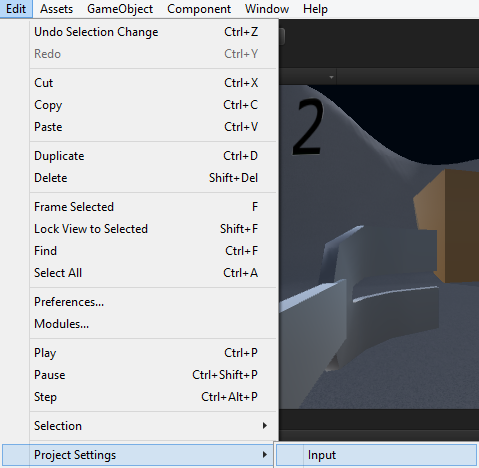
Clicked? Then the InputManager should appear in the Inspector window.
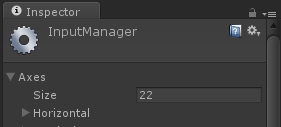
At the beginning there will be 18 input parameters, but we need more. Therefore, I have 22 (on the X axis and the Y axis for the second “fungus” of the gamepad, and two more to isolate the name of the reference to the first “fungus”).
Further, by analogy with the mouse movement (Mouse X), we fill in and rename the new input values (the name is extremely important, since you refer to it in the program).

lp_right.transform.Rotate (0, Input.GetAxis ("Hor2_j"), 0);
yr + = Input.GetAxis ("Hor2_j");
lp_right.transform.Rotate (Input.GetAxis ("Vert2_j"), 0, 0);
xr + = Input.GetAxis ("Vert2_j");
lp_left.transform.Rotate (0, Input.GetAxis ("Hor_j"), 0);
yl + = Input.GetAxis ("Hor_j");
lp_left.transform.Rotate (Input.GetAxis ("Vert_j"), 0, 0);
xl + = Input.GetAxis ("Vert_j");
Movement
It is worth remembering that moving along the coordinates will have a bad effect on the game, since the map is built on Terrain. Therefore, it was decided to use physics. This increases the interest of passage on the one hand, and on the other hand solves several problems at once (uneven movement, jumps, departure over fences).
So, you need a Rigidbody, which you need to put on the robot, and then to your taste (the project has a weight of 100, the rest remains untouched).
There will be only two foci in the code. The first is GetComponent () to work with Rigidbody and Addforce. The second is mathematical. It is necessary not only to know where the robot wants, but also to know where it is looking. To do this, we turn to transform.eulerAngles.y, translate into radians and take the cosine and sine for the x and z coordinates, respectively.
y=bot.transform.eulerAngles.y*(Mathf.PI/180); if(Input.GetKey(KeyCode.JoystickButton4)||Input.GetKey(KeyCode.JoystickButton0)) { s="Go_to"; bot.GetComponent<Rigidbody>().AddForce(new Vector3(Mathf.Cos(y),0,-Mathf.Sin(y))*15); } if(Input.GetKey(KeyCode.JoystickButton5)||Input.GetKey(KeyCode.JoystickButton2)) { s="Go_back"; bot.GetComponent<Rigidbody>().AddForce(-new Vector3(Mathf.Cos(y),0,-Mathf.Sin(y))*15); } if(Input.GetKey(KeyCode.JoystickButton6)||Input.GetKey(KeyCode.JoystickButton3)) { s="Turn_left"; bot.transform.Rotate(0,-0.5f,0); } if(Input.GetKey(KeyCode.JoystickButton7)||Input.GetKey(KeyCode.JoystickButton1)) { s="Turn_right"; bot.transform.Rotate(0,0.5f,0); } As you can see, there are two buttons in each action. This is done in case the bumper (L1, L2, R1, R2) breaks / sticks during repeated use.
Time
To clarify the current time in Unity, you can use System.DateTime.Now to calculate in seconds how much time has passed since the beginning of the day. This method of time limitation has a drawback - the clock transitions from 23:59 to 00:00, but since the game is played once and the competition will take place during the day, it can be neglected
Two councils
- Count along with the day, month and year. When I saw this function in TurboC ++, which gives the number of seconds since January 1, 1970
- Read about timers and caller functions in C #.
The time limit can then be considered as the time difference after the script is run (void Start ()) and what is now (Update)
void Start () { time = System.DateTime.Now.Hour * 3600 + System.DateTime.Now.Minute * 60 + System.DateTime.Now.Second; } void Update () { win = PlayerPrefs.GetInt ("win"); lose = PlayerPrefs.GetInt ("lose"); t = System.DateTime.Now.Hour * 3600 + System.DateTime.Now.Minute * 60 + System.DateTime.Now.Second; if((win+lose)==0) PlayerPrefs.SetInt("time",480-(t-time)); if((480-(t-time))==0) PlayerPrefs.SetInt ("lose",1); Afterword
The children liked the game, as the robot moved with acceleration, which everyone enjoyed using.
It was especially interesting to catch the battery before you bump into it, since it, too, Rigidbody and get the direction of movement. In combination with the slow movement of hands, it turned out very well.
I hope that this article will help you not to sit until late at night, screwing the gamepad to your project!
PS Assembled, made and tested for Unity3d 5.0. You can download the link
')
Source: https://habr.com/ru/post/311962/
All Articles