Modding: Steampunk Keyboard.
Modding: Steampunk Keyboard.
I am a big fan of Steampunk (Eng. Steam + punk, steam + punk), starting with my acquaintance with the game Arcanum . There are many books, movies, works of art dedicated to the era of steam engines .
Today I will introduce you to a person who creates wonderful things and, moreover, leads a website that tells about products made in the spirit of the 19th century.
His name is Jake von Slatt, and here is his blog .
')
Jake wanted to make a stylish retro keyboard, convenient for everyday work. For his project, he chose a robust IBM Model M Clickly keyboard . This keyboard, manufactured in 1989, was included with the IBM PowerStation 530.


First, it was necessary to separate the base of the key from the "cap". At first, Jake tried to cut the warp out of the key, thereby spoiling one of them. After several attempts, Jack decided to extrude the base with a red-hot rod and he received the intact bases needed for further work.
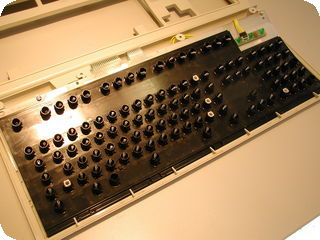
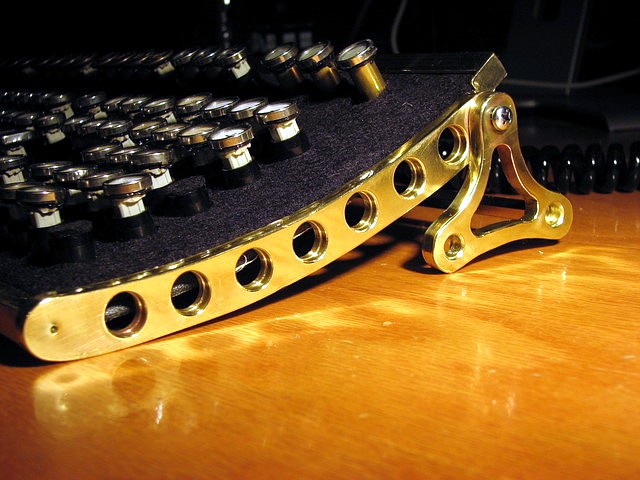
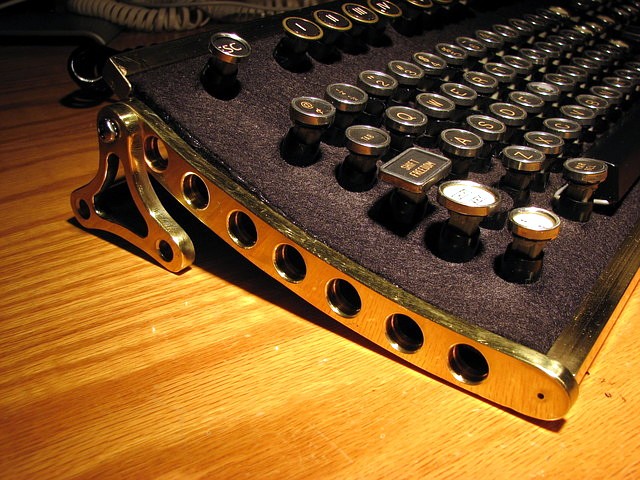
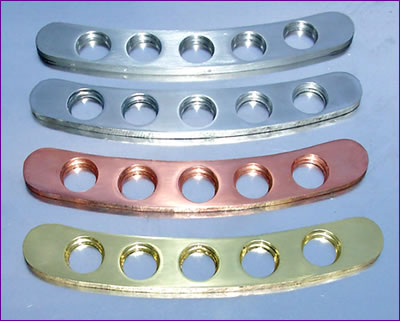
Then Jake cleared the remains of the plastic keys and put them in place. Jack began to develop the framework of the new keyboard. He was going to use thick brass plates.

Jake wanted to achieve a simple design that would take up less space on the table than the original Model M.
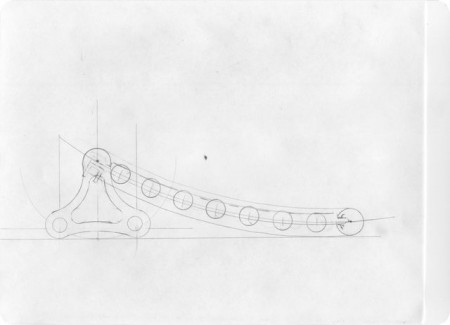
Then it was necessary to shape the brass part .
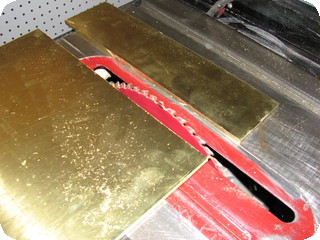
Parts and holes were made with a jigsaw and a drill . Brass is easy to process and all the work could be done with a jigsaw . Jake files the file , smoothing out the contours.

3/16 "diameter holes (3/16 inch ≈ 0.5 si) were drilled in the details.
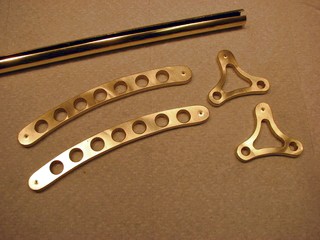
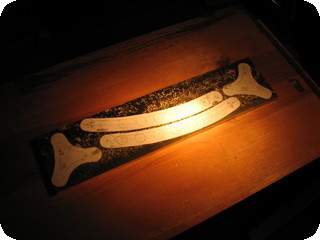
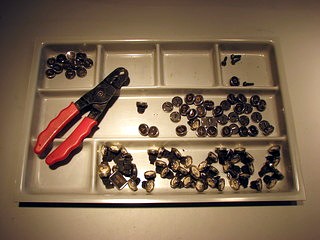
The parts were then machined with grinding tools and bolted together .
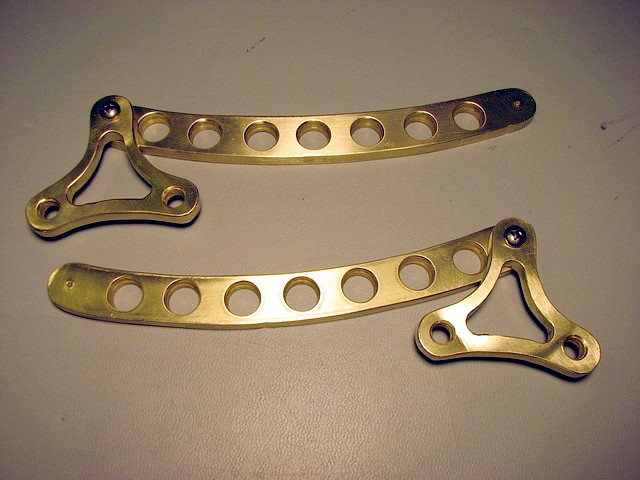
Jake fastened the construction with copper rods
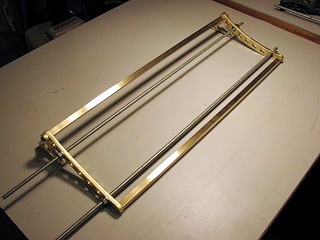

At this stage, the development of the framework has been completed.
Now Jake had to make stylized keys.
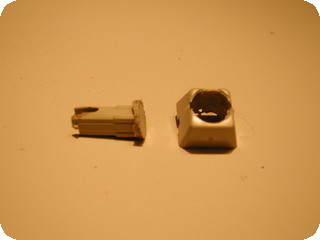
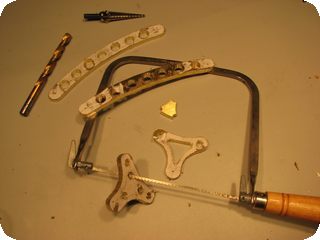
Jake bought a vintage typewriter on eBay auction , the keys from which he was going to use in his product.
Using the machine, Jake separated the typewriter keys from their bases.
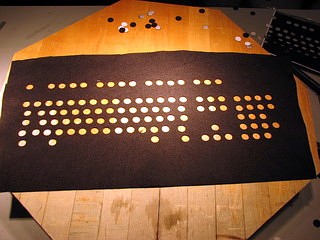
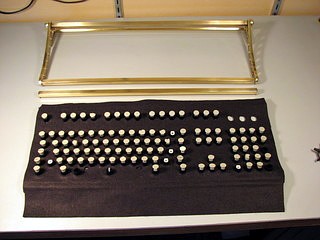
After all the keys were at the same level, Jake began to make a covering for the keyboard from felt . He used carbon paper as a pattern to make suitable holes for the keyboard.

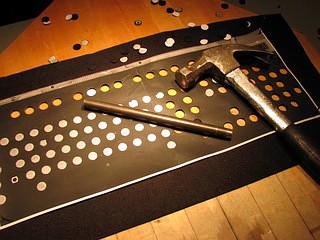
Now Jake cut round holes in the material, which will also come in handy later.
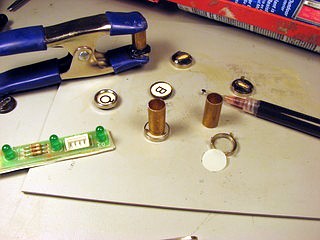
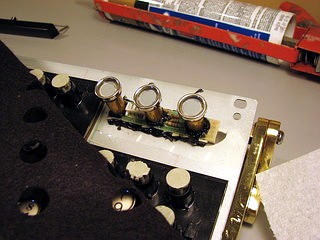
For indicator keys, Jake cut out the cardboard key labels, replacing them with translucent acetate. The keys were planted on copper tubes with LEDs inside.
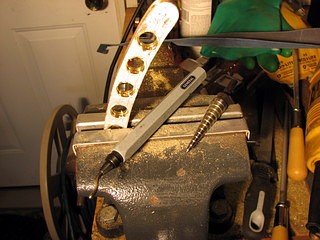
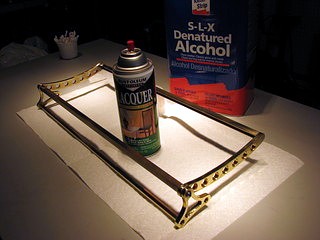
The frame for the key was varnished and treated with alcohol .
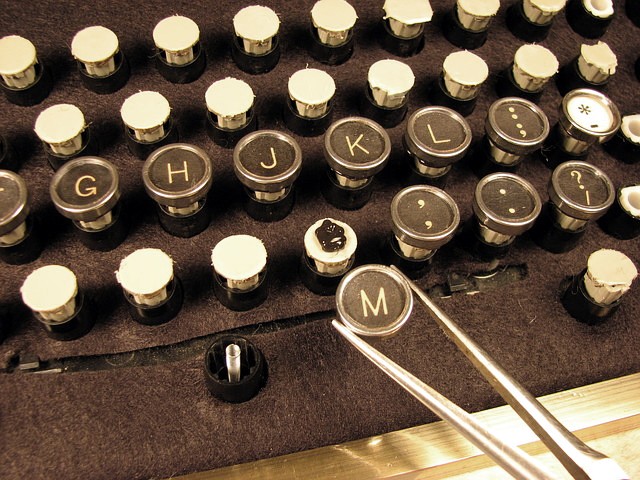
Now it's time to put the new keys in place.
Jake cleaned the keys with alcohol and set them on the bases with silicone glue. Each key was neatly placed in place. It takes ten minutes for the silicone glue to dry.
Jake also put the indicator keys in place.
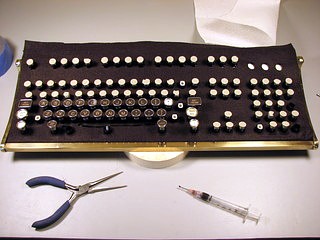
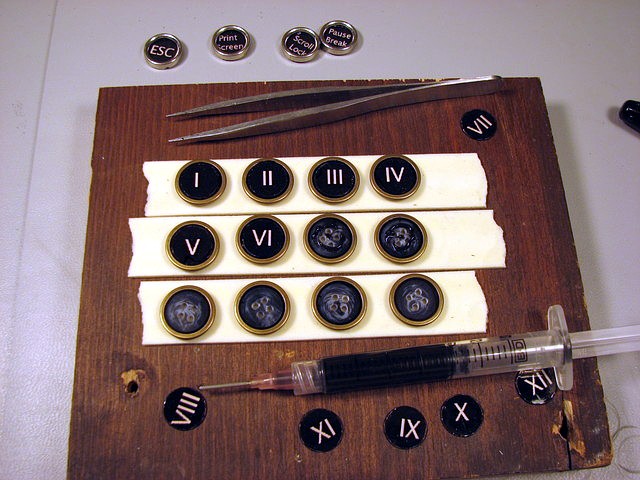
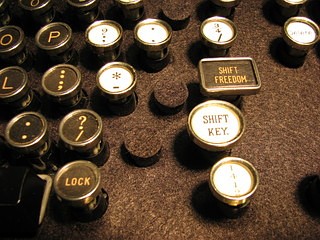
Jake sorted out the keys by inserting labels stamped out of glossy paper.


The typewriter does not have enough keys for the keyboard, so Jake installed the brass buttons purchased at Joanne Fabrics .

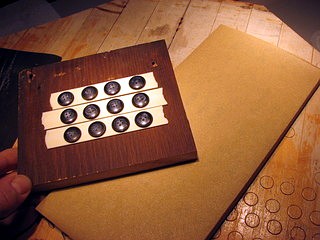
The flip sides of the buttons were rounded, so Jake polished them to give a plane.

He squeezed the labels with glossy paper printed on them in Roman numerals with the Sharpie anti-aliasing mode. After varnishing , he glued them to the buttons, using silicone glue.
Jake varnished the keyboard, giving it a metallic sheen.


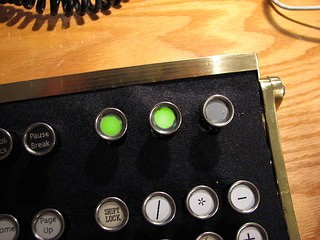
Indicators work:
Remember I said that we still need the remnants of felt ? They can be used to close openings formed by wider keys.
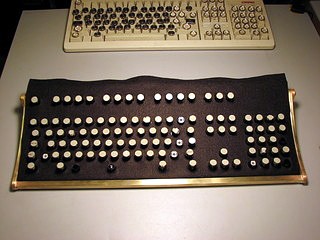
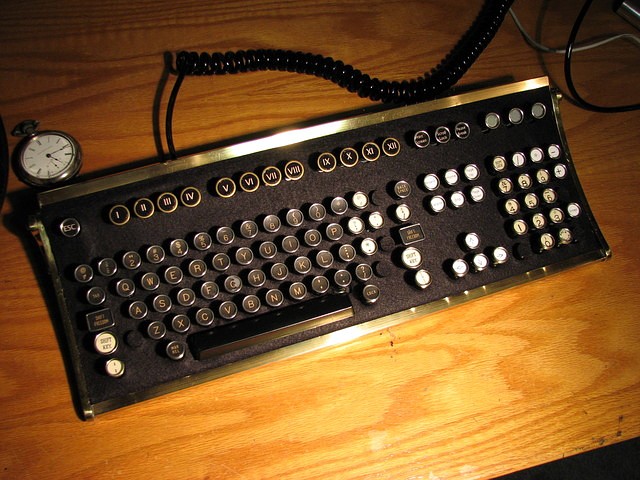
At this work with the keyboard is finished. It is convenient to work on it, as you can see by watching the video on the author's page .
Here are some more pictures of this wonderful keyboard:

Note:
Here is a copy of his work, which was sold to a man who was eager to buy a keyboard made by Jake. However, Jake himself refused him, saying that such projects for him - is a rest from work. Thus, he sent the client to the druse handyman. He repeated His work in the aluminum version, while using a modern USB keyboard. The keys were the same as when Jake worked. The space (which confused me in the original) was made using a frame with an old picture.

The author promises that he can make such a keyboard to anyone (not for free, of course). To do this, simply contact him by E-Mail. Different colors are available:
I am a big fan of Steampunk (Eng. Steam + punk, steam + punk), starting with my acquaintance with the game Arcanum . There are many books, movies, works of art dedicated to the era of steam engines .
Today I will introduce you to a person who creates wonderful things and, moreover, leads a website that tells about products made in the spirit of the 19th century.
His name is Jake von Slatt, and here is his blog .
')
Jake wanted to make a stylish retro keyboard, convenient for everyday work. For his project, he chose a robust IBM Model M Clickly keyboard . This keyboard, manufactured in 1989, was included with the IBM PowerStation 530.
First, it was necessary to separate the base of the key from the "cap". At first, Jake tried to cut the warp out of the key, thereby spoiling one of them. After several attempts, Jack decided to extrude the base with a red-hot rod and he received the intact bases needed for further work.
Then Jake cleared the remains of the plastic keys and put them in place. Jack began to develop the framework of the new keyboard. He was going to use thick brass plates.
Jake wanted to achieve a simple design that would take up less space on the table than the original Model M.
Then it was necessary to shape the brass part .
Parts and holes were made with a jigsaw and a drill . Brass is easy to process and all the work could be done with a jigsaw . Jake files the file , smoothing out the contours.
3/16 "diameter holes (3/16 inch ≈ 0.5 si) were drilled in the details.
The parts were then machined with grinding tools and bolted together .
Jake fastened the construction with copper rods
At this stage, the development of the framework has been completed.
Now Jake had to make stylized keys.
Jake bought a vintage typewriter on eBay auction , the keys from which he was going to use in his product.
Using the machine, Jake separated the typewriter keys from their bases.
After all the keys were at the same level, Jake began to make a covering for the keyboard from felt . He used carbon paper as a pattern to make suitable holes for the keyboard.
Now Jake cut round holes in the material, which will also come in handy later.
For indicator keys, Jake cut out the cardboard key labels, replacing them with translucent acetate. The keys were planted on copper tubes with LEDs inside.
The frame for the key was varnished and treated with alcohol .
Now it's time to put the new keys in place.
Jake cleaned the keys with alcohol and set them on the bases with silicone glue. Each key was neatly placed in place. It takes ten minutes for the silicone glue to dry.
Jake also put the indicator keys in place.
Jake sorted out the keys by inserting labels stamped out of glossy paper.
The typewriter does not have enough keys for the keyboard, so Jake installed the brass buttons purchased at Joanne Fabrics .
The flip sides of the buttons were rounded, so Jake polished them to give a plane.
He squeezed the labels with glossy paper printed on them in Roman numerals with the Sharpie anti-aliasing mode. After varnishing , he glued them to the buttons, using silicone glue.
Jake varnished the keyboard, giving it a metallic sheen.
Indicators work:
Remember I said that we still need the remnants of felt ? They can be used to close openings formed by wider keys.
At this work with the keyboard is finished. It is convenient to work on it, as you can see by watching the video on the author's page .
Here are some more pictures of this wonderful keyboard:
Note:
Here is a copy of his work, which was sold to a man who was eager to buy a keyboard made by Jake. However, Jake himself refused him, saying that such projects for him - is a rest from work. Thus, he sent the client to the druse handyman. He repeated His work in the aluminum version, while using a modern USB keyboard. The keys were the same as when Jake worked. The space (which confused me in the original) was made using a frame with an old picture.
The author promises that he can make such a keyboard to anyone (not for free, of course). To do this, simply contact him by E-Mail. Different colors are available:
Source: https://habr.com/ru/post/31164/
All Articles