As I read the sensor readings via SNMP (Python + AgentX + systemd + Raspberry Pi) and built another monitor.
Hello.
A lot of time has passed since the publication of the article about “Moderately Universal Control Device” (and to be exact, more than a year). Not a lot, but not enough for me to write a normal software stuffing for this device. It’s not for beauty, it’s there - it should collect data from the sensors and make it so that this data will be in the monitoring system (in my case Zabbix)
Since that time, the following has been implemented from the program filling:
')
There were attempts to write separate monitoring tools for ntpd and for gpsd. A lot of time was spent on super-monitoring, which should have been able to read the config, start the data collection processes from various sources according to the configuration, collect data from these processes and display readings on the screen, at the same time enabling the zabbix to read this data. In fact, it turned out to implement the process manager, who read the config and spawned the necessary processes, and the drawing on the screen, which turned out to be very cool - even knows how to read the layout from the config and change the screen contents by timer, while collecting data from the processes at the moment they are needed. There is only one thing in this super monitoring - the actual processes that would collect data. Well, plus there were ideas to make a system of signals, to assign functions to buttons, to take into account the priorities of different data sources, and so on, but everything came up in free time and the fact that this super monitoring was very bloated and monstrous.
For some time I scored on the development of a full-fledged software filling. Nenuacho, the script works, but the rule “works — don't touch it,” as they say, the holy rule of the administrator. But that's bad luck - the more you want to monitor, the more scripts you need to write and the more you need to add exceptions to SELinux for zabbiks (I’m not only a raspi monitor) - in the default policy zabbiksu (like rsyslog, for example) is forbidden to call arbitrary programs, and this is understandable. I didn’t want to disable SELinux for Zabbiks at all or to write my own policy for each binary that will be twitching. So I had to think.
And let's understand how to collect data in the monitoring system:
I use pull monitoring, not for religious reasons, but it just happened. In fact, there is little difference between push and pull, especially at low loads (I did Nagios + NSCA in one of the previous works, I didn’t notice much difference, I still need to create elements with my hands). It would be possible to use zabbix_sender, if I already had push-monitoring, but it doesn’t, and there’s no court, and it’s somehow wrong to interfere with one another. But in the question of which protocol to monitor, the choice seems to be large, but not very much - discovery is supported only through an agent or via SNMP, which leaves us with only two options. The agent disappears because of the described problem with SELinux. Voila, we still have pull-monitoring via SNMP.
Hurray! Why cheers then? Linux seems to have snmpd, but how to make it give what we need, but what does snmpd have no clue about? It turns out that snmpd has as many as 3 (fundamentally different) ways to give arbitrary data on arbitrary OIDs:
I am writing on python, so I went to look for, and if anyone had already implemented the agentx protocol. And after all there were such good people - https://github.com/rayed/pyagentx and https://github.com/pief/python-netsnmpagent . The second project seems to be more lively, but the first one seemed simpler. I started with the first one (pyagentx), it works and does everything it needs. But when I began to think, and how to transfer data to this library, I wanted to deal with the second package (python-netsnmpagent). The problem with pyagentx is that, as it is written, it cannot receive data from calling functions, and therefore, the request for fresh data must occur directly in a function that sends updates to snmpd, which is not always convenient and not always possible. It was possible, of course, to bud off something of my own and redefine the functions, but in fact I would have to rewrite the class almost as a whole, which I also didn’t want to do - we’re working out on the knee, everything should be simple and fast. However, the reluctance to deal with python-netsnmpagent did win and I found a way to transfer data to the updater from pyagentx, but more on that below.
The next question was this: what should the architerature look like? An attempt to write a dispatcher, forking data sources and reading data from them, was already and did not end very well (see above), so it was decided to abandon the dispatcher implementation. And so successfully it happened that either I saw an article about systemd somewhere, or just once again, the old desire to deal with it tickled closer, and I decided that systemd would be my dispatcher in my case. Haters gonna hate, and we will understand, if it is already even on the raspi out of the box.
What useful systemd features I found for myself:
With these findings in mind, architecture was drawn:
One very bad place is a shared internal state between the flow-collector and the flow-agentx. But I have forgiven myself, because in the python there is a magic GIL, which solves the issue of synchronization between the two threads. Although it is, of course, very bad and not on the book. There was a thought to put the shared state into a separate process and force the process-agentx and the process-collector to work with the state-process through the socket, but it broke me to make another socket, write another unit and so on.
Why I did not like IPC in python in relation to this task :
dbus looked like a solution to all troubles, and there it is everywhere where systemd is, but the trouble is that pydbus requires GLib> = 2.46 to publish the API, and only 2.42 in raspbian. dbus-python is deprecated and unsupported. In short, until the rooster roast in the ass bite, I will share the state in an insecure manner.
When using SNMP for your owndirty purposes, there is another catch - how to choose OIDs for your data sets? For this there is a special branch in private, which is called enterprises - .1.3.6.1.4.1. <Enterprise_id>. You can get a unique enterprise ID from IANA . When the OID scheme is defined, it would be nice to write a MIB, so as not to forget where everything is, and also to make monitoring systems easier. An introduction to writing MIBs is here .
At some point, I discovered ntpsnmpd with the corresponding MIB and was glad to be a bald, but when I compiled this miracle, I found that the author bothered only to implement a few top-level constants and at that exhausted. I did a little poking around in the code and did not fully understand how the author interacted with ntpd (or ntpq) in a clever way to get those constants out, without parrying the output. One thing I understood for sure - there is no ready-made python API, which means there is nothing to catch, I have to implement this MIB myself.
In general, the whole structure works and is very tenacious. Discovery works in zabbiks, items are created, graphics are drawn, triggers send alerts - what else do you need to be happy? The code is not finalized yet, so I do not publish it.
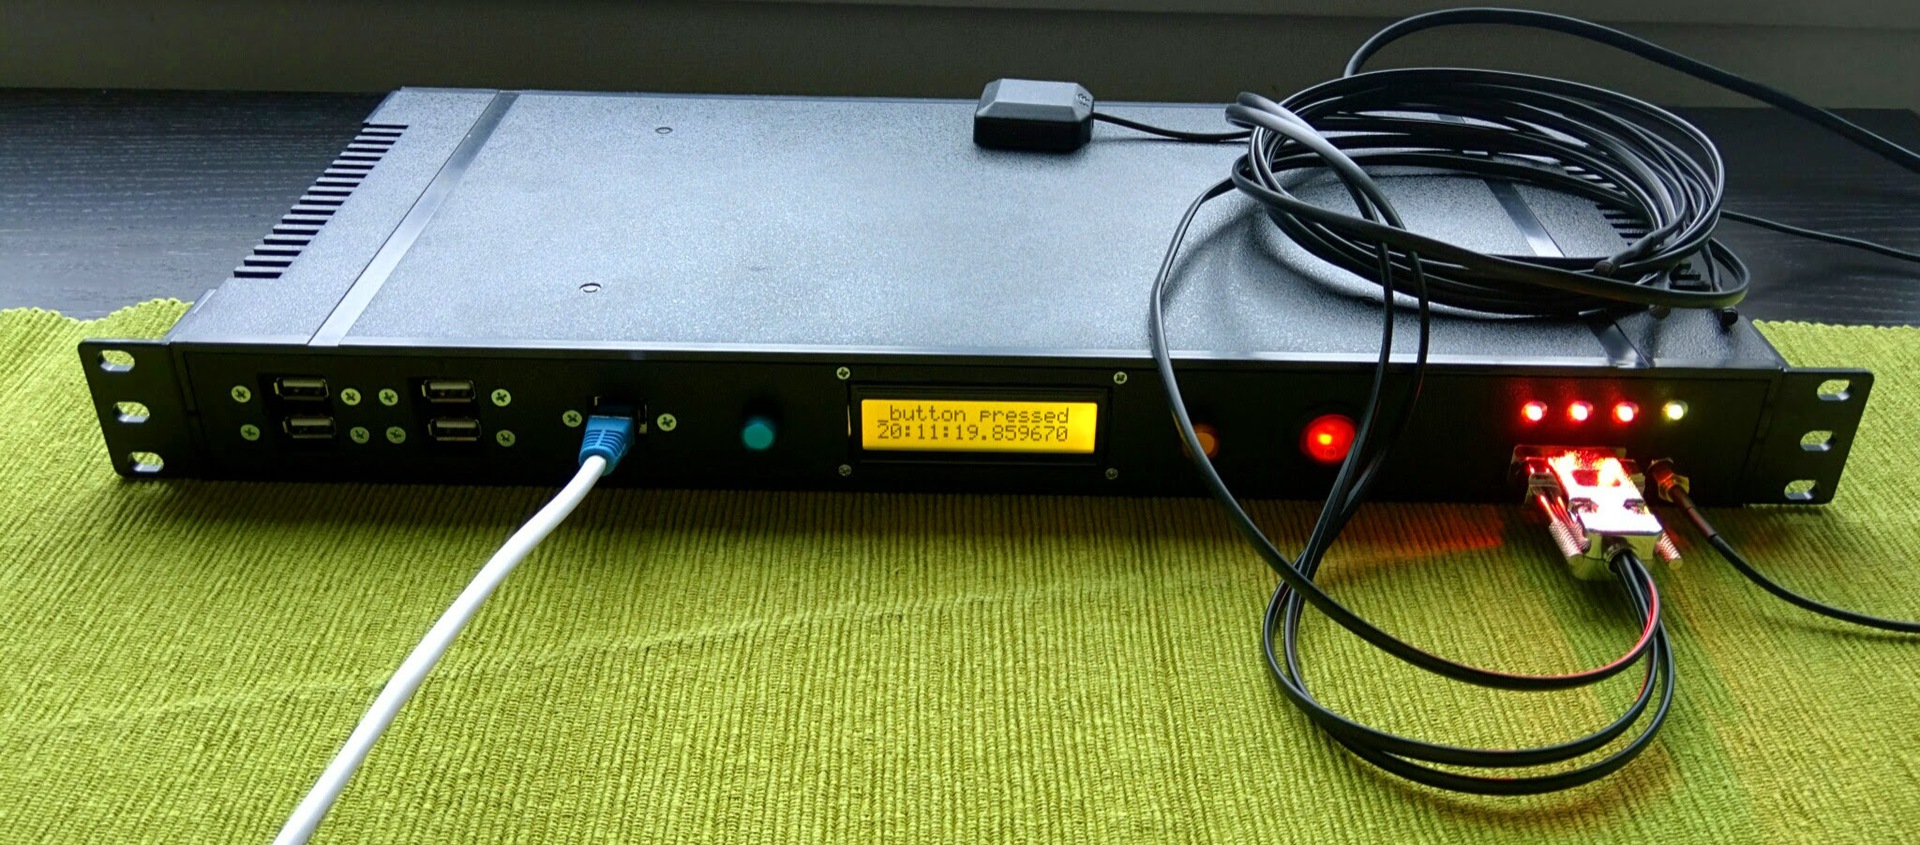
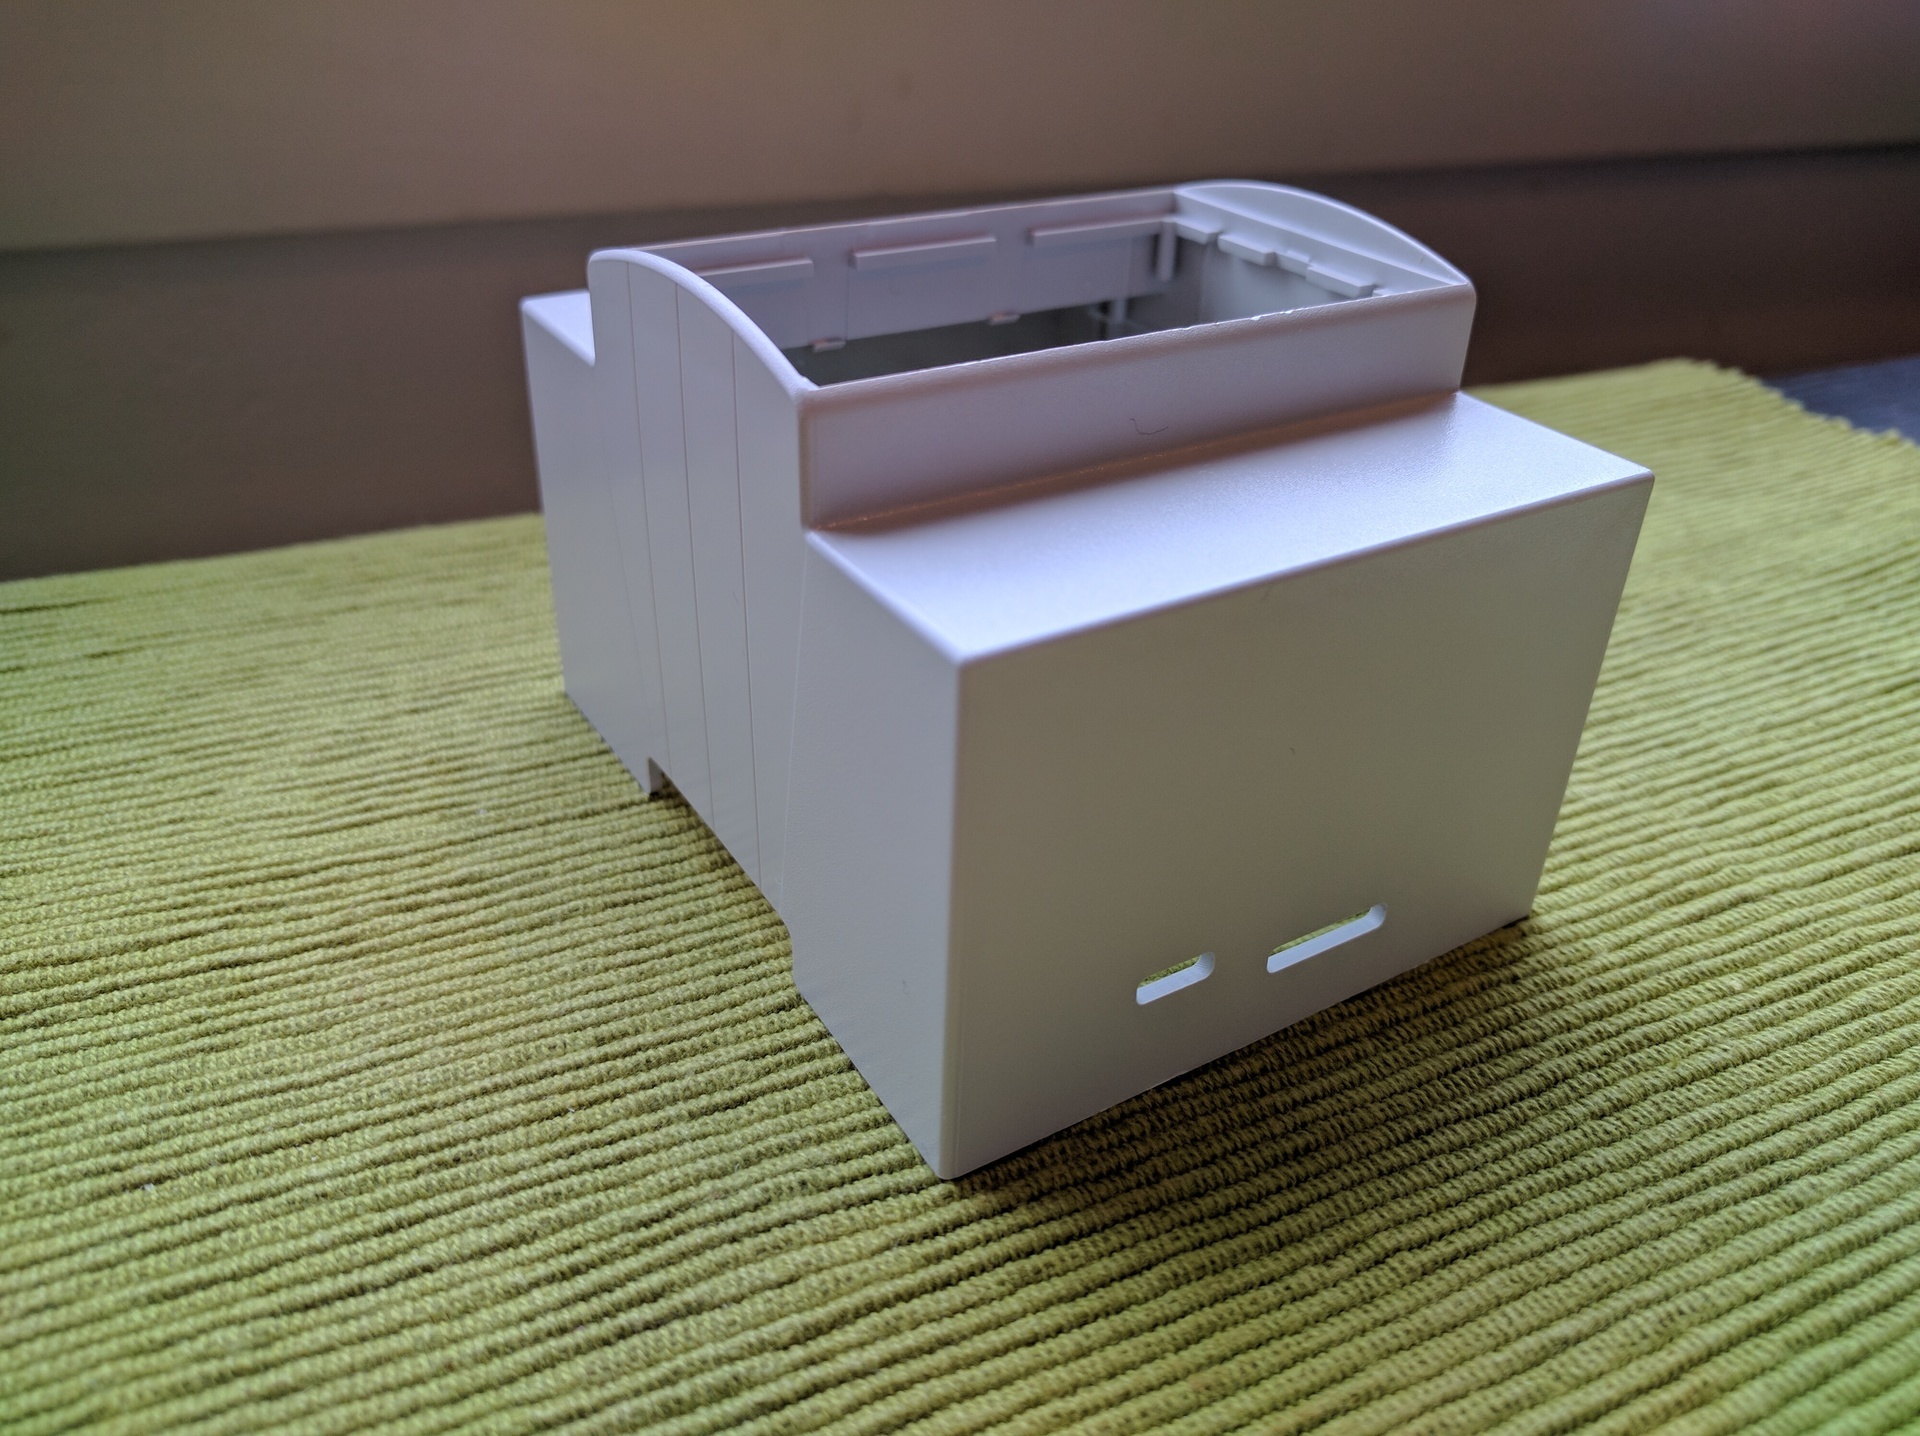
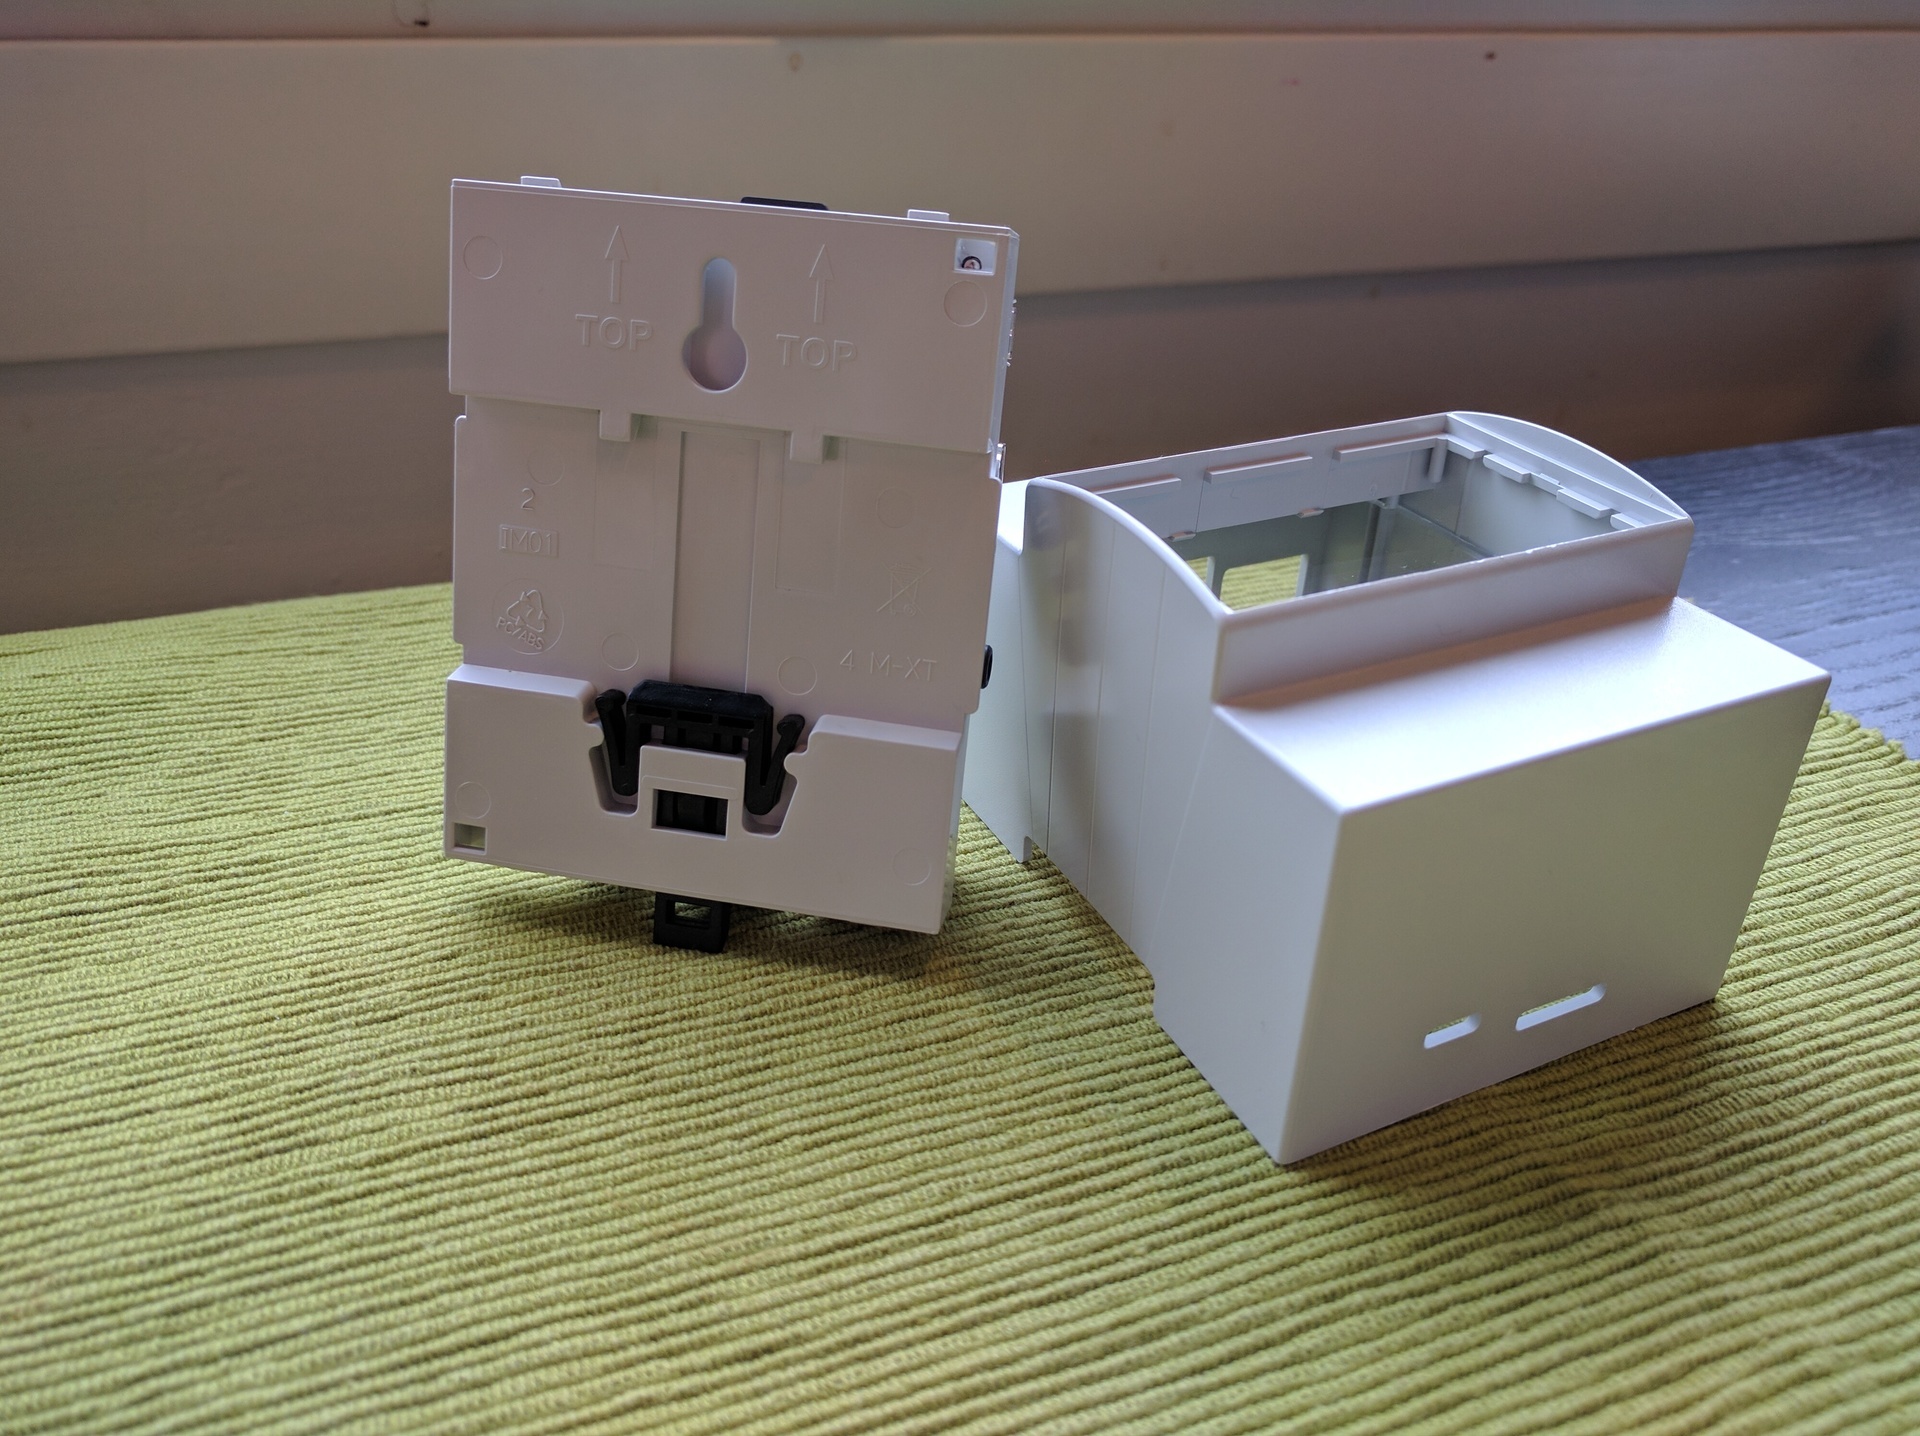
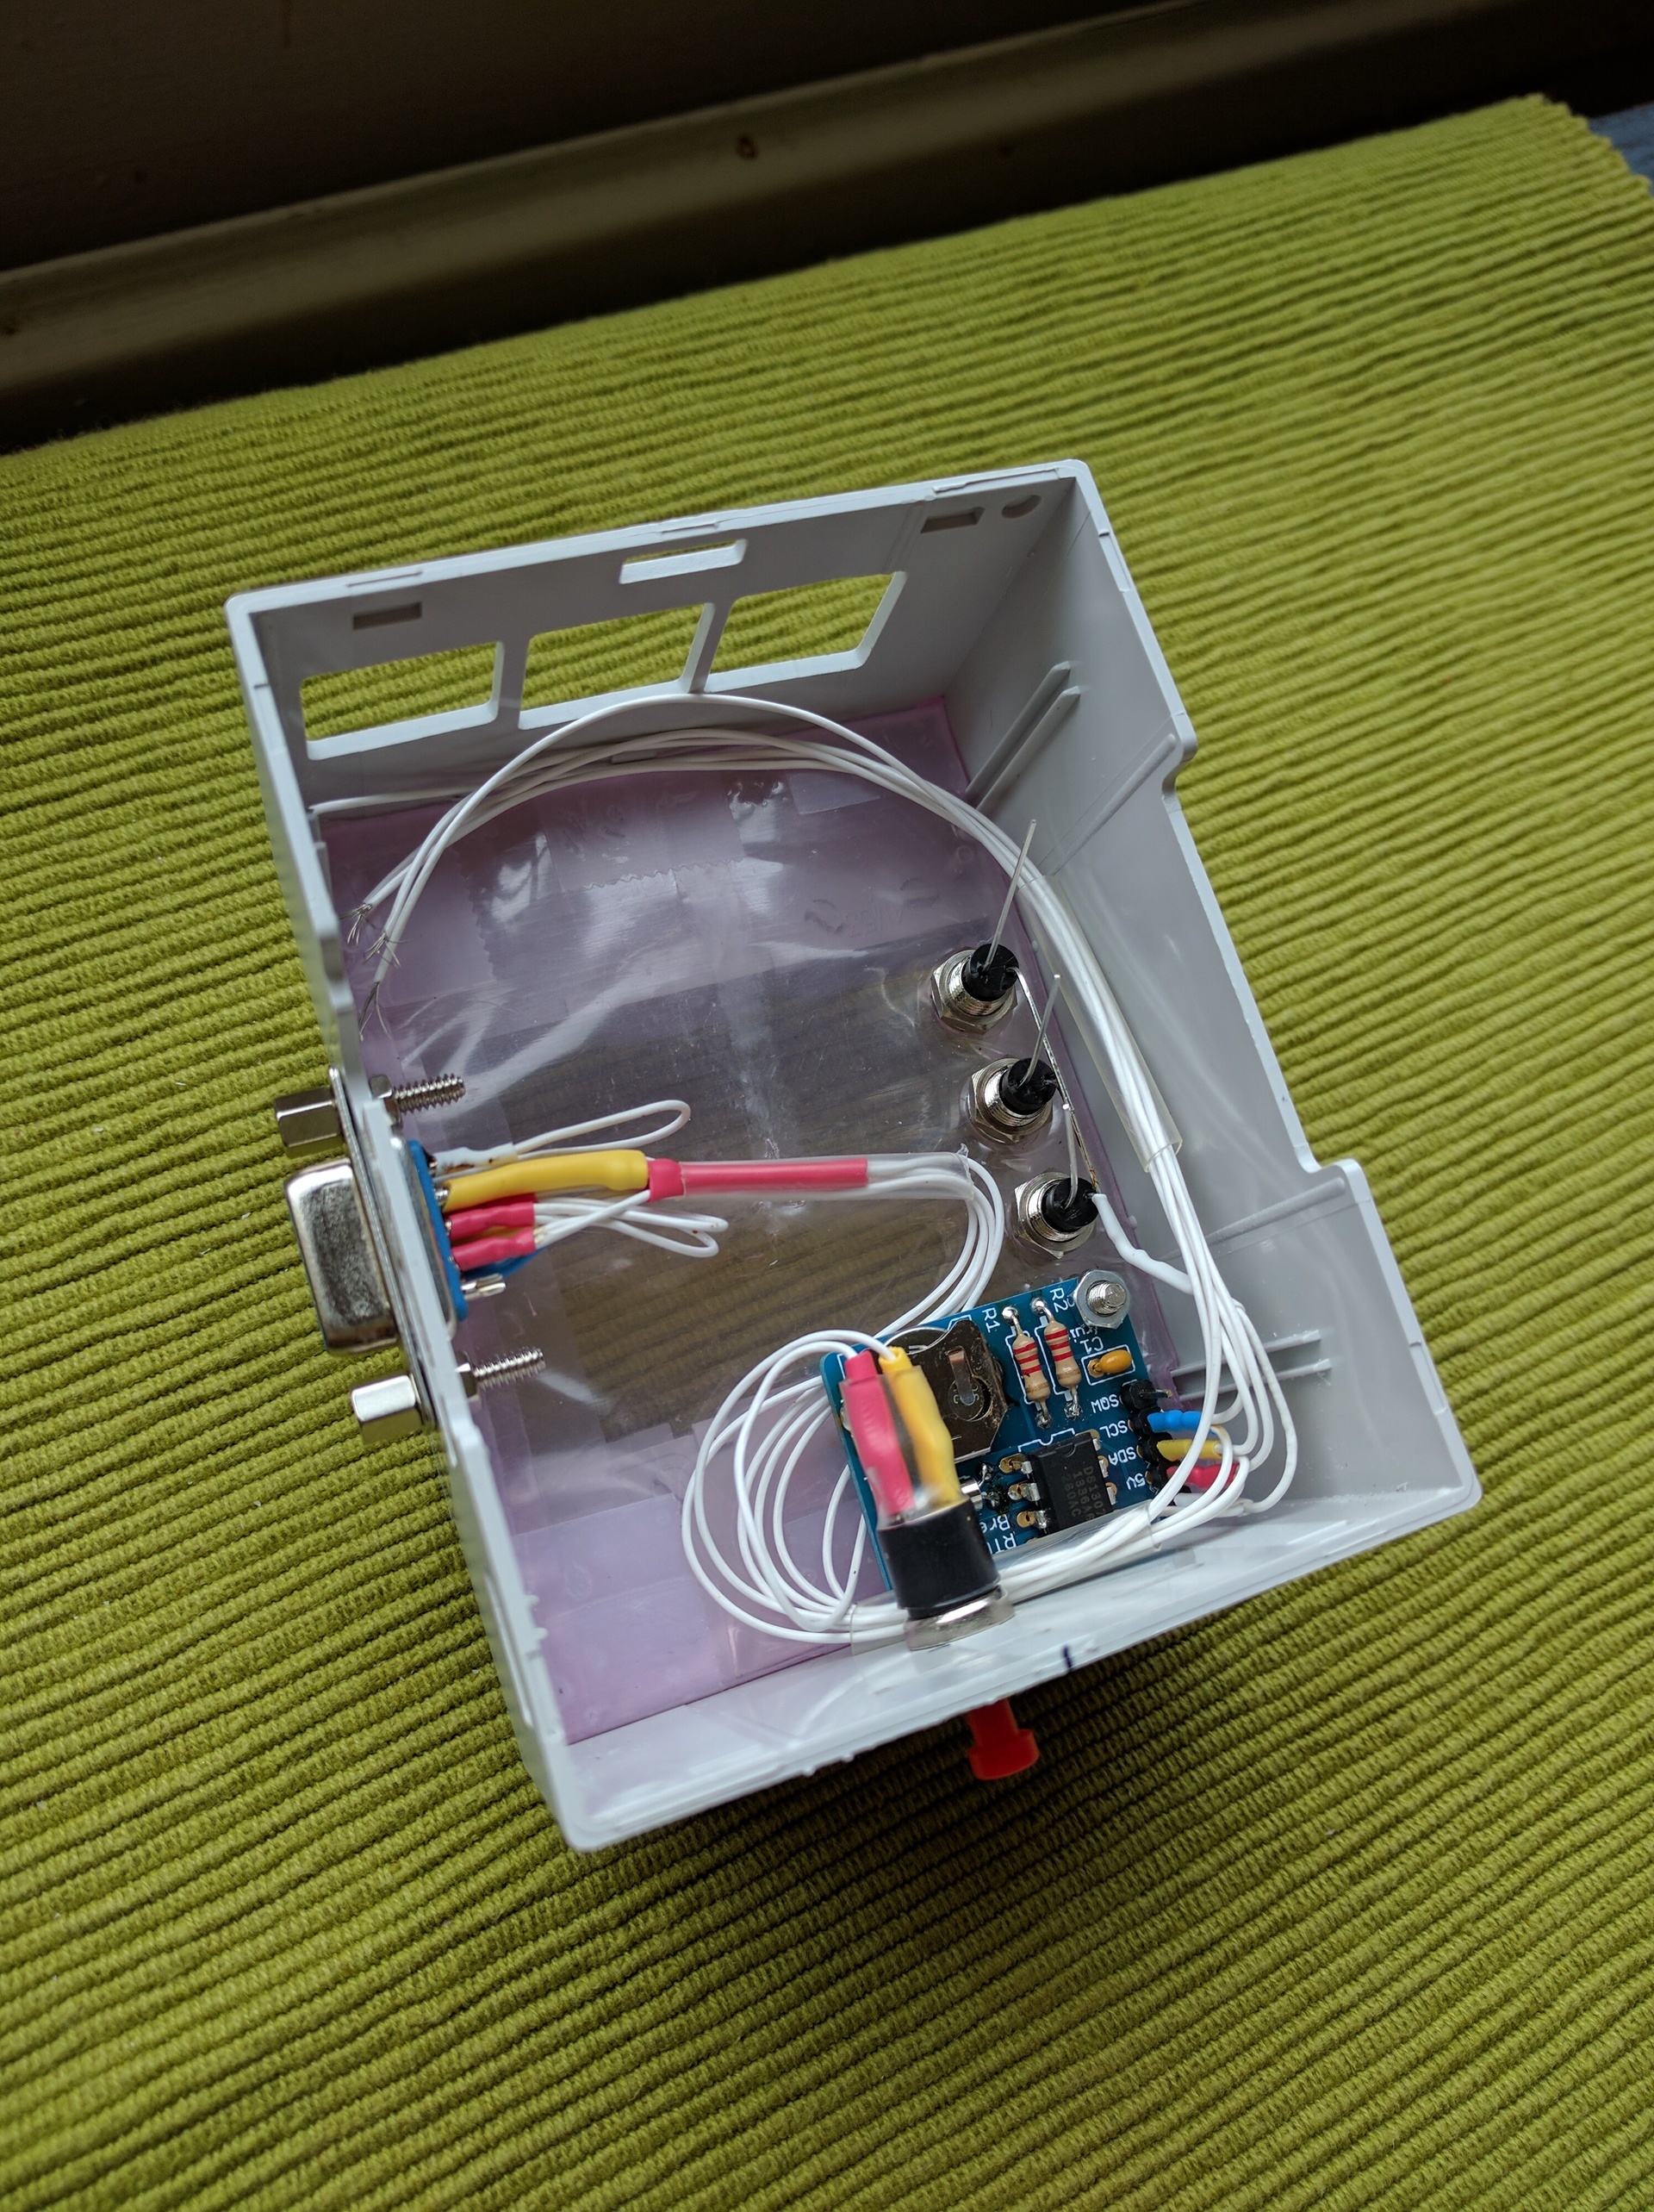
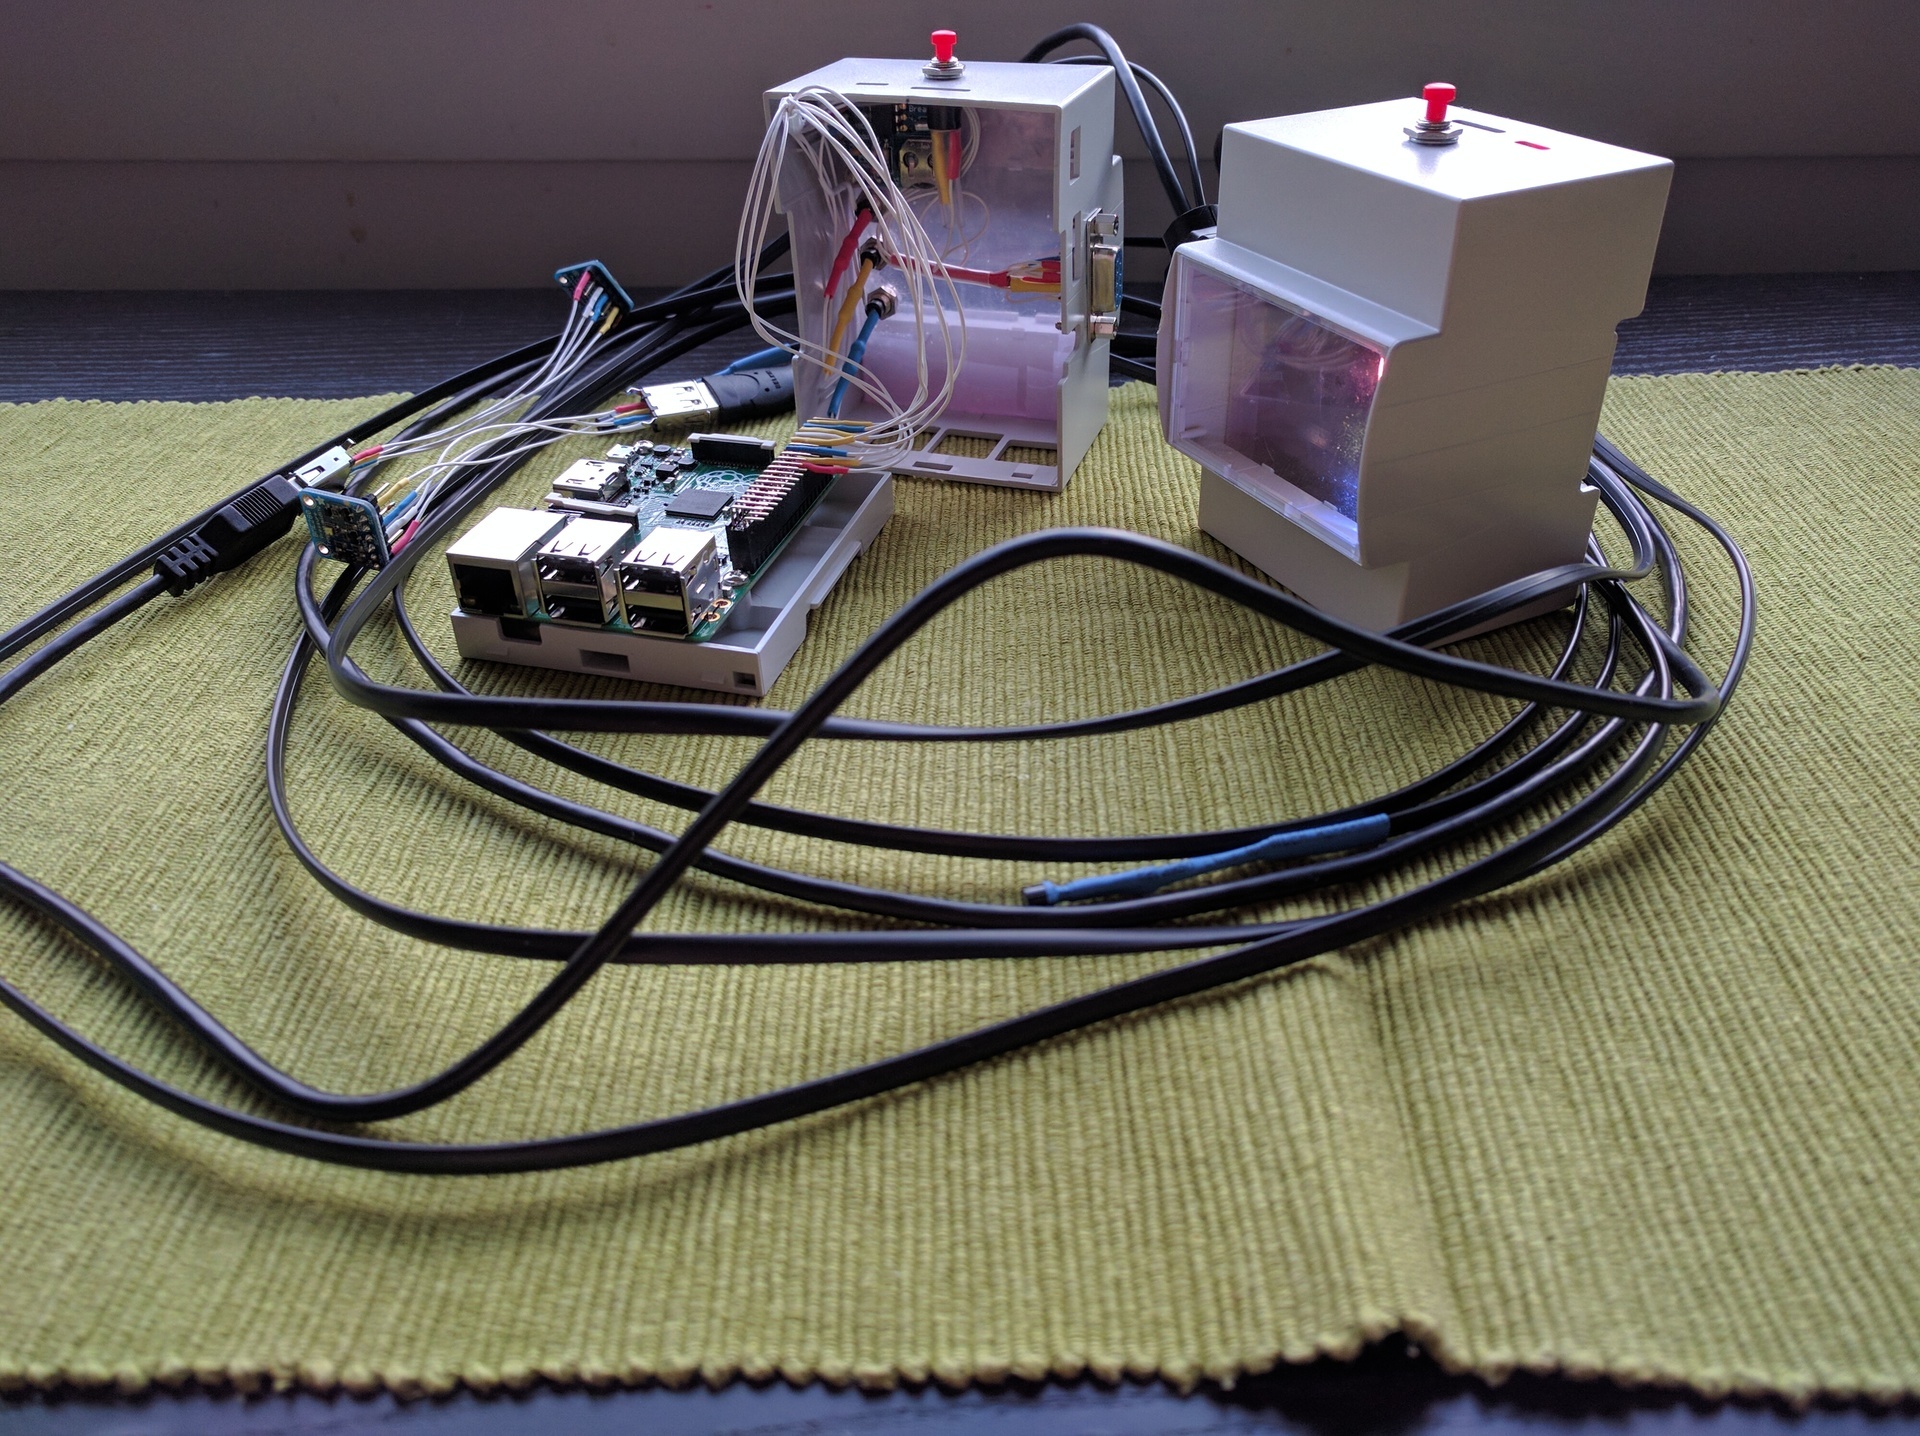
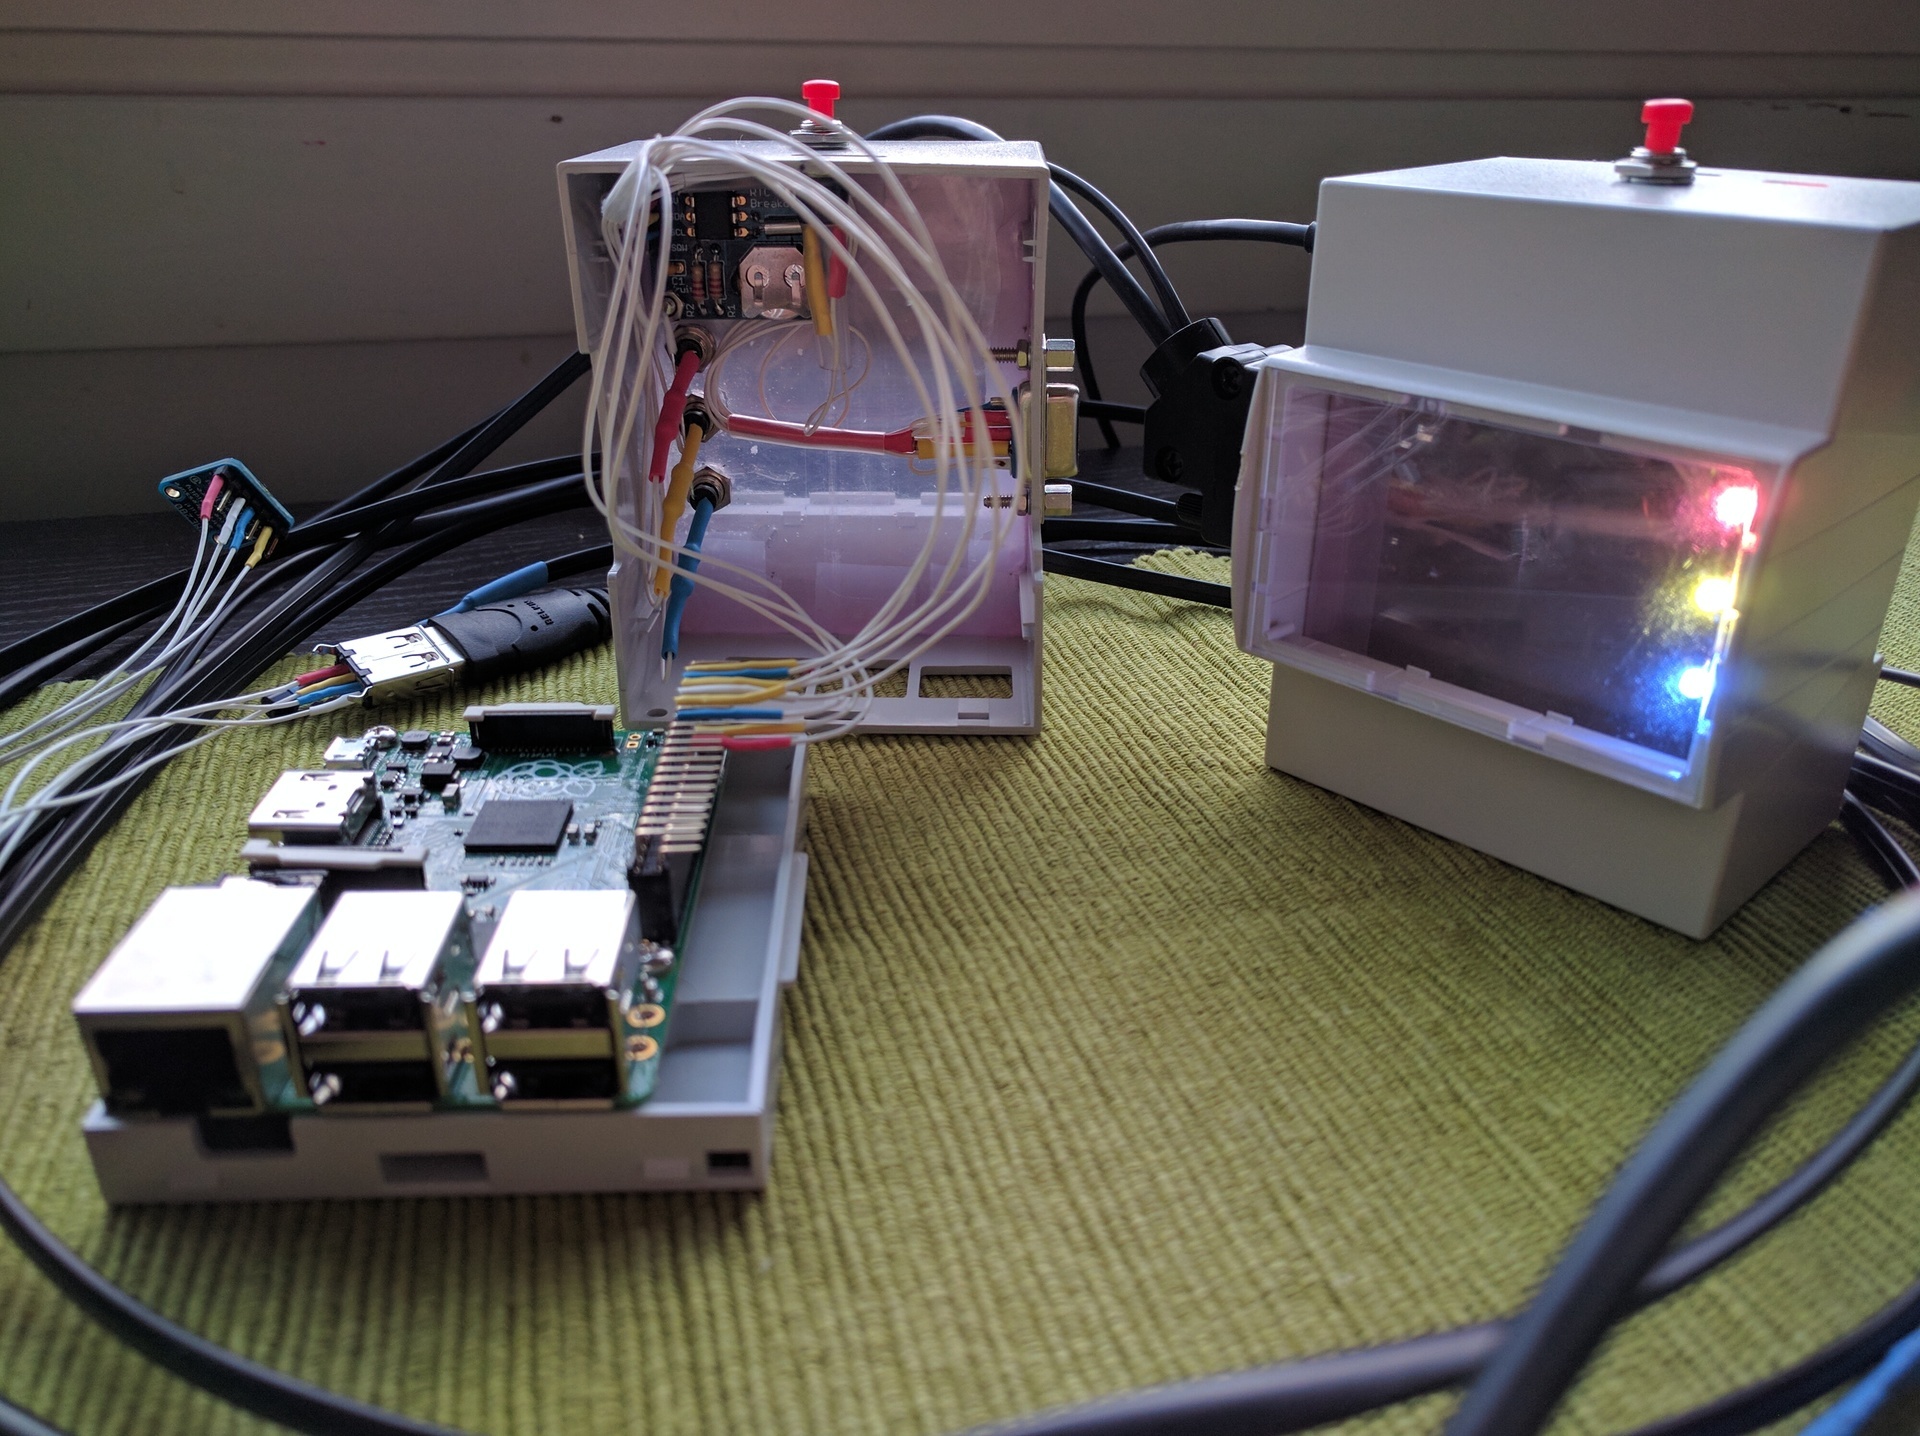
Not everywhere you can stick a unit case, but you don't want to hang snot on the walls either. There is a very elegant solution - DIN-rail. Heaps of constructions with a rail are sold on the market, in which it is possible to put the rack and power supply unit (I use the MeanWell DR-15-5), and all sorts of automata-uso-what-is-necessary. Accordingly, I wanted a DIN rail enclosure for raspi. These two comrades were considered as candidates - the model from Italtronic and RasPiBox . The advantage of RasPiBox is that there is already a board for prototyping and power is supplied via screw contacts (via a stabilizer on the GPIO), which is convenient, but it can be unsafe. But it costs more than 3 times more expensive, takes up more space on the rail and does not have a transparent window. The model from Italtronic is also not perfect - its width is such that all ready-made 16x2 LCD screens do not fit in width, that is, the value of a transparent window drops sharply, but for a low price I was ready to forgive this shortcoming.
The case turned out to be quite convenient, it has space for fastenings (or rather, for installation) of two printed circuit boards or a sheet of anything. I make the substrate from acrylic wrapped in a non-conductive ESD-protective film, I saw with a Dremel:

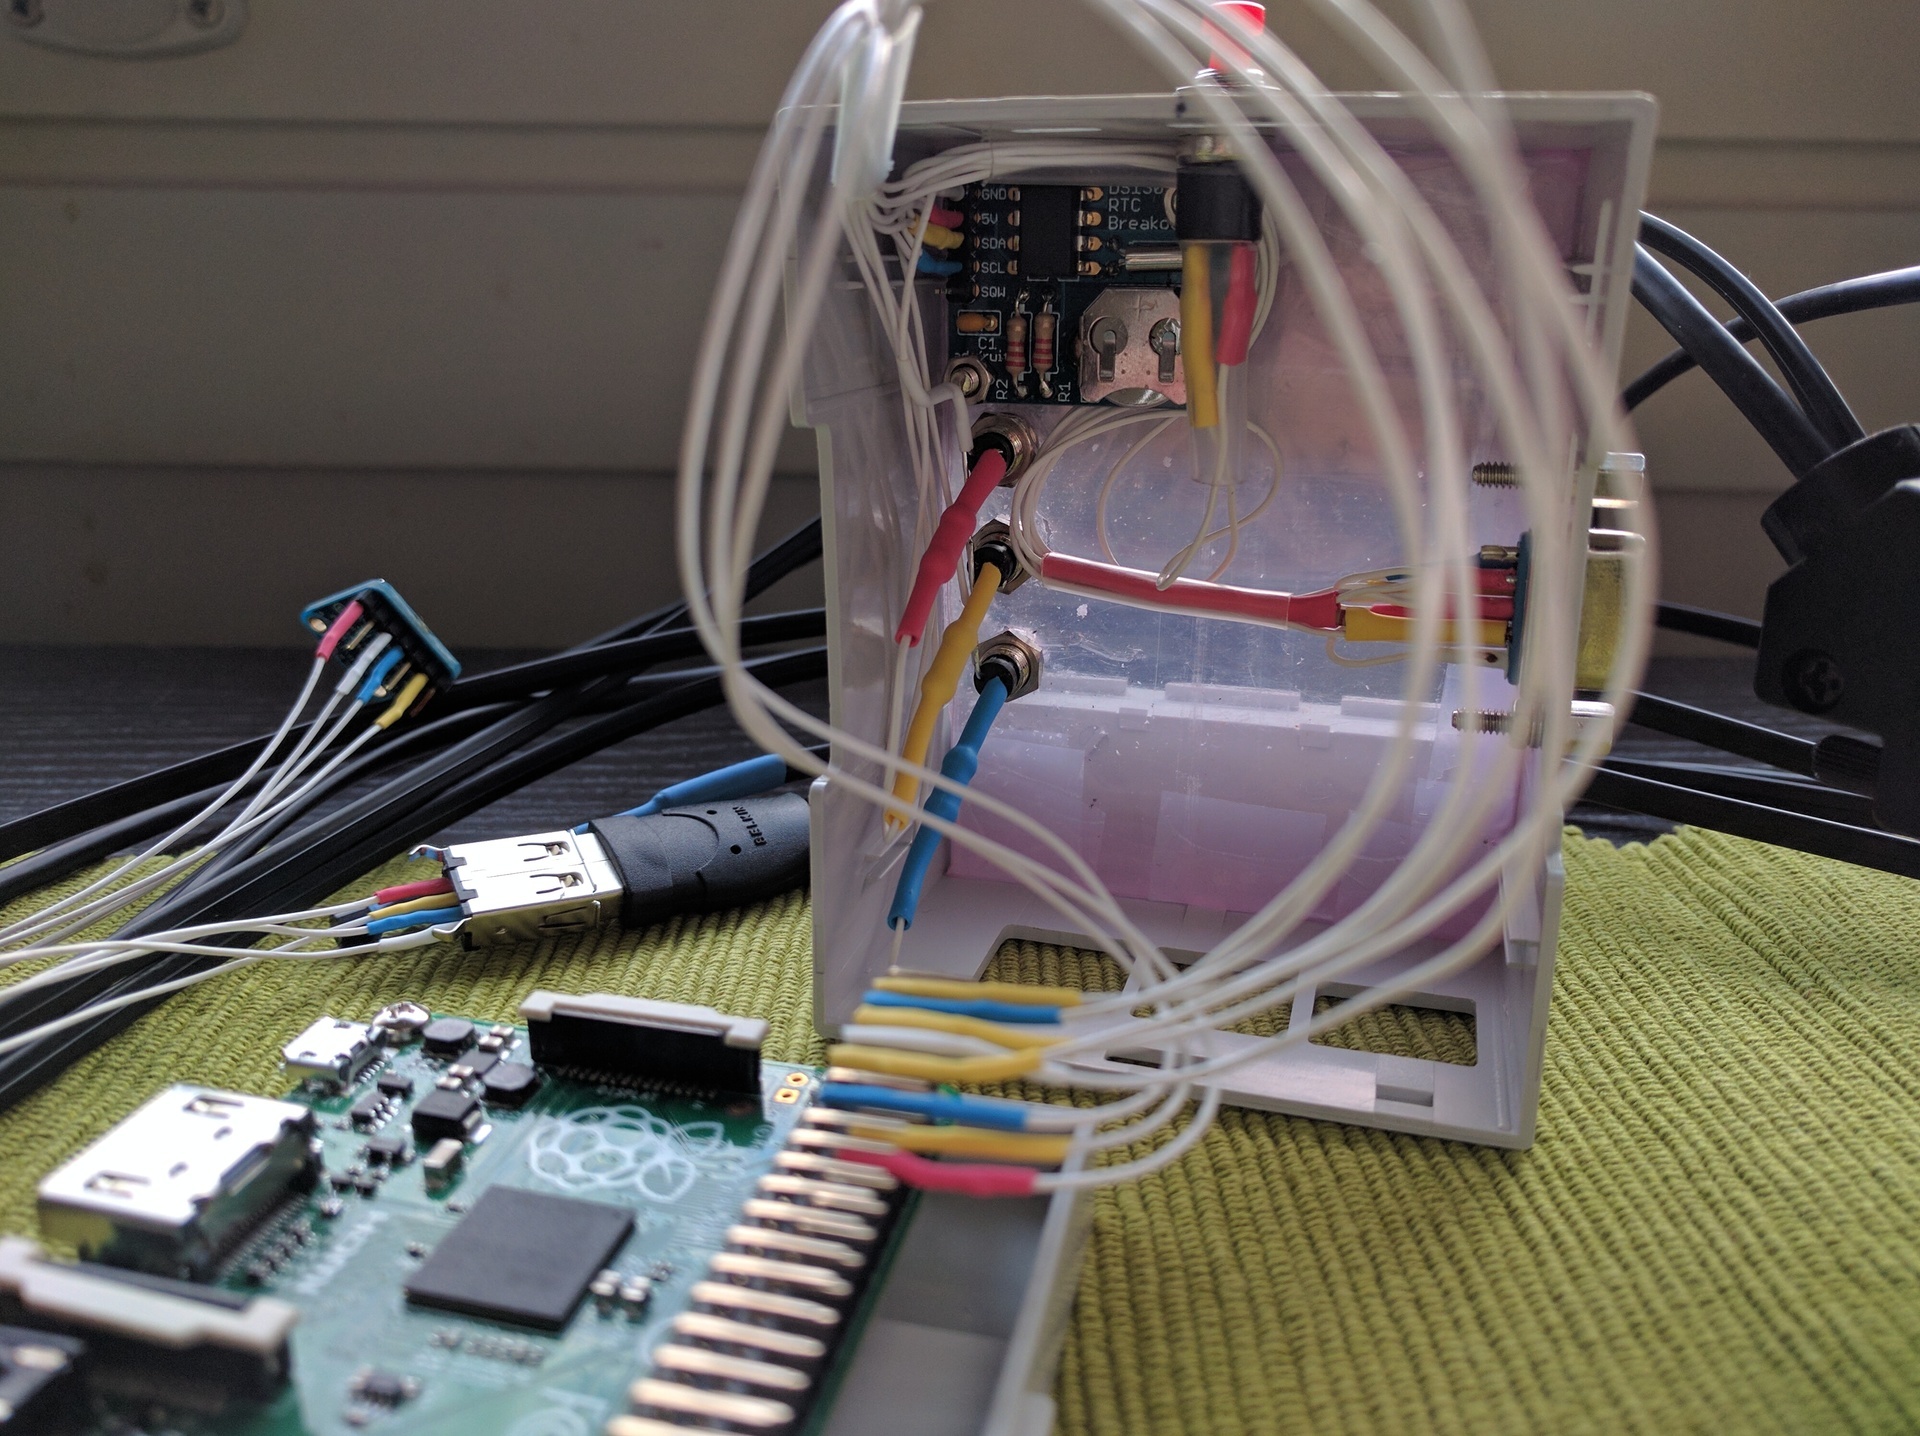
The boards inside are kept only on the force of friction and on small ledges on both sides, that is, there is no rigid mounting inside. Despite the apparent magnitude, the case is small and there is not so much space above the raspi itself, especially if you insert the board on the lower level. And I need a board, because I need to place several LEDs and a board with RTC.
I want to connect temperature and humidity sensors to a new monitor. For temperature, our choice is ds18b20, it works, but it is worth comparing readings with a calibrated thermometer, a sensor can lie half a degree according to the specification. To compensate, he added a primitive correction of the readings to a constant in the config, checked it with such a thermometer

It turned out that my ds18b20 copies do not completely lie to themselves. But the next sensor is just lying, and as much as 0.6 degrees. However, again, it depends on the instance - one lied, the other almost did not lie.
The humidity was not so simple. Cheap either does not work with raspi at all (because it is analog), or there are no libraries (I want to immediately and well), or more expensive like aviation cables. A compromise between convenience and toad was found in the Adafruit BME280 sensor, which also shows the temperature with pressure as a bonus (but it can lie, as I noted above).
If ds18b20 can simply be shrink and rejoice, with VME280 this trick will not work. There were a lot of ideas about the case - and left as they were, by soldering the wires and filling them with glue snot (the attachment ears are already there, it turns out), and make a mini-case of the same acrylic as the substrate for the components, and fiction something with 3D printer, the benefit is there is one within reach ... But then I remembered about the eggs:
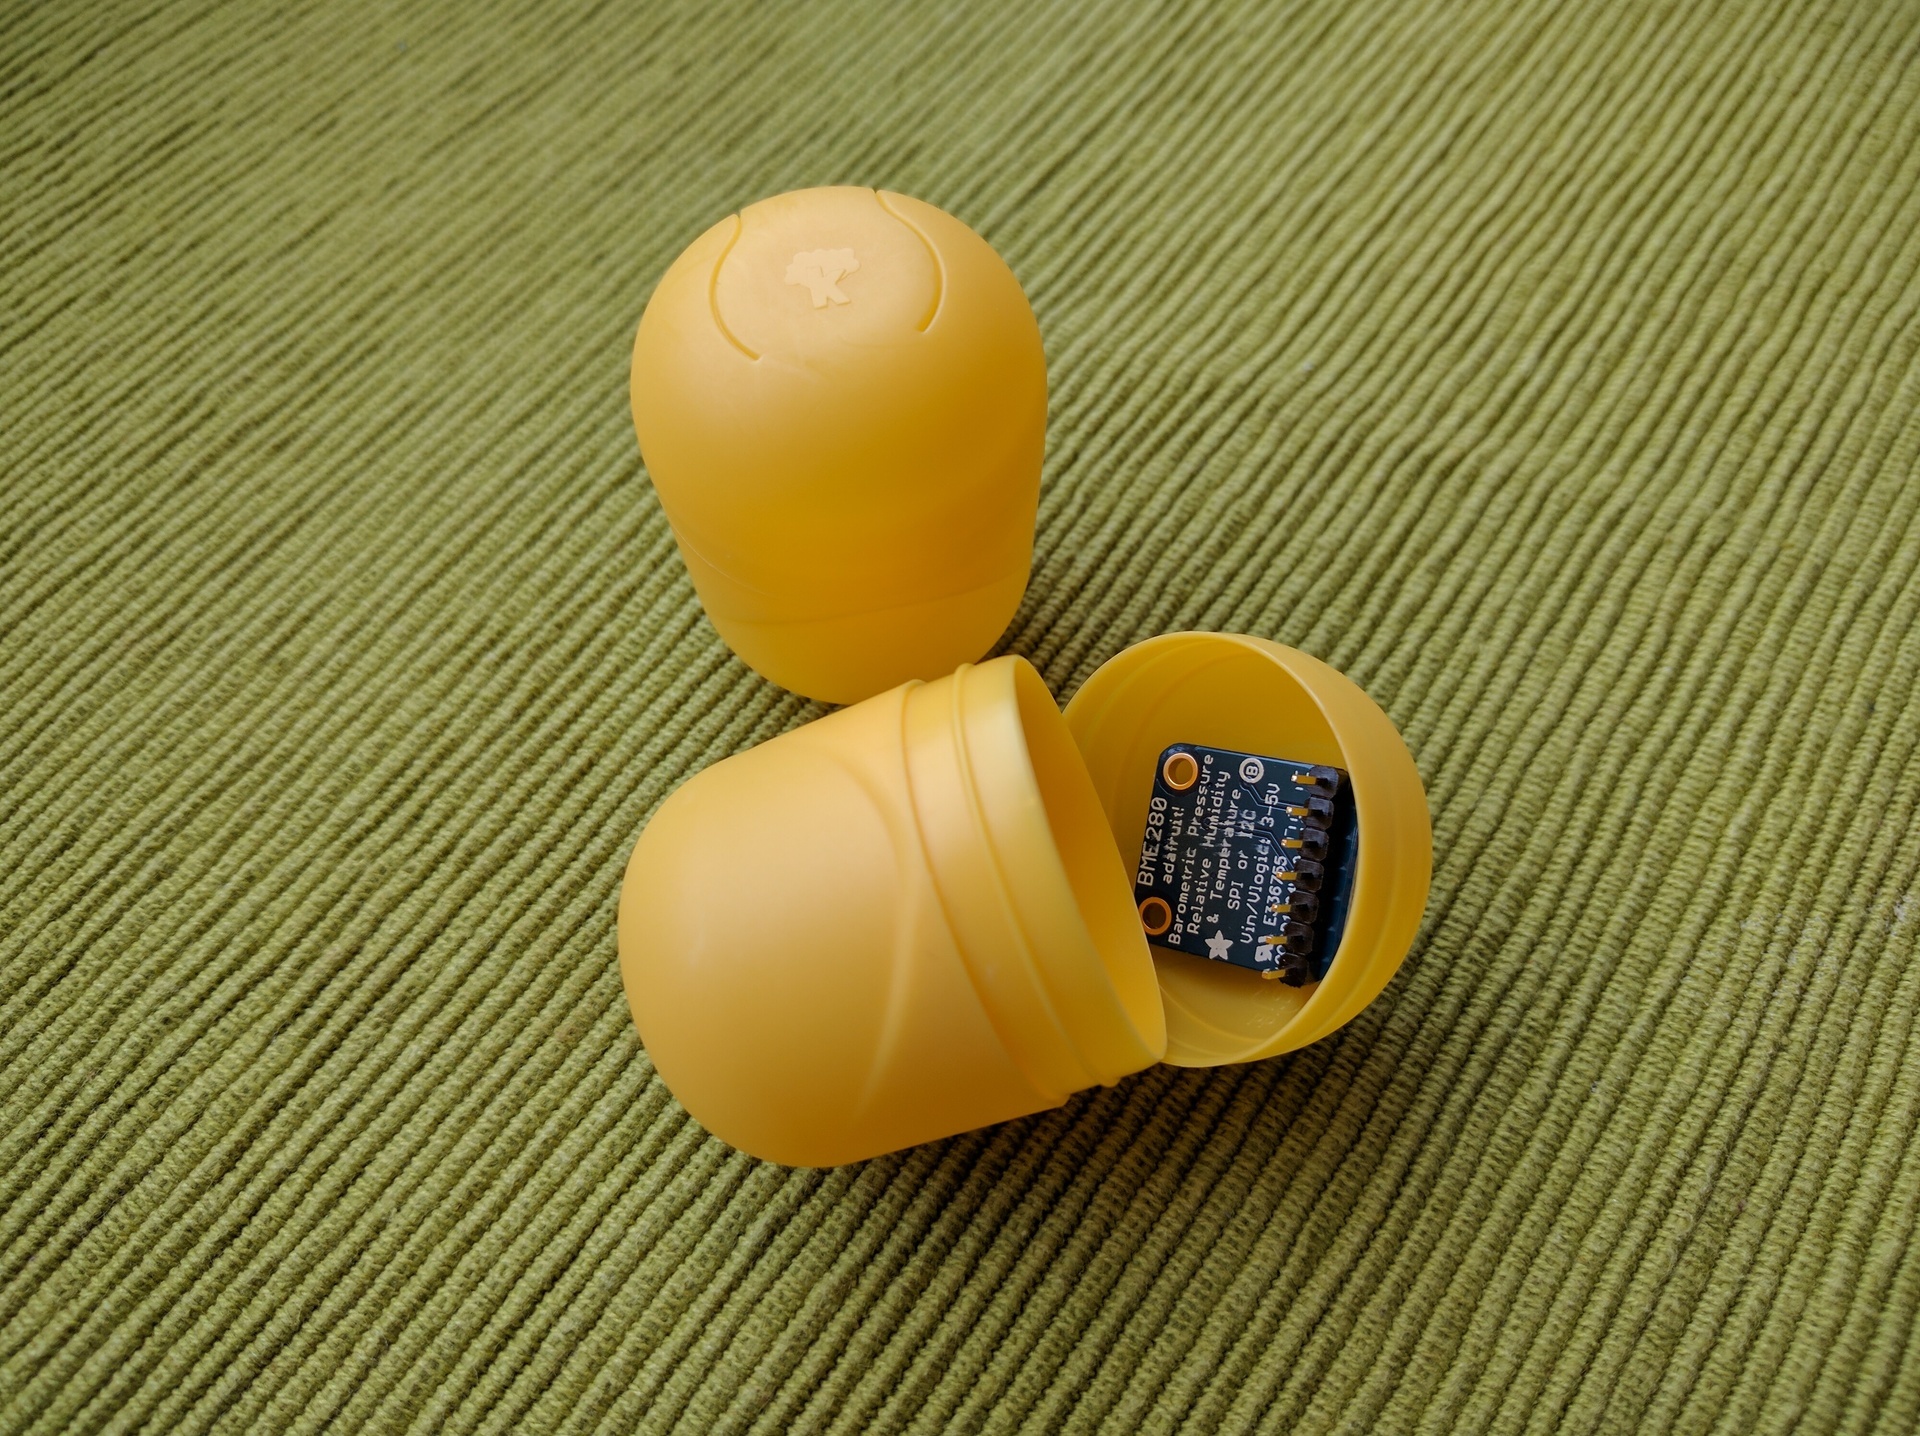
This is the perfect body. There is enough space for a sensor, you can put a connector, convenient access for maintenance, you can hang it everywhere or just throw it somewhere.
Connect the sensors to raspi decided through DB9. In the USB lines a little, the RJ45 socket did not fit in size. The egg sensor decided to connect via USB, because in the cabinet there were found remains of cut USB cables - the good should not be lost:

To protect the GPIO-comb on the raspi and for the convenience of disassembling the case, I took another comb and soldered to it. The comb is angular, which gave a little more space vertically, but I didn’t read it a little and this comb bumped into the resistors for the LEDs. All, of course, tightly wrapped in heat shrink, but the point that in the future is worth remembering. As a result, the halves of the case can still be separated, for example, to change the battery in rtc or the raspi itself. Everything else (more precisely, a flash drive) is available for replacement without opening the case.
One recommendation - do not save on the buttons. I've saved, so the button not only jingles (this can be fought with, the RPI.GPIO library has anti-bounce protection), but it also works only in a very specific position. I provided a button for software shutdown of the device in case you need to turn off the power (I already killed the FS on the flash drive several times by inaccurately shutting it down), but it turned out that there was not enough to foresee something - you also need to read the documentation. If you, like me, do not read the documentation, then you should know - overlay gpio_shutdown does not at all what you would assume, but only exposes a high / low level on a pin when disconnecting, so that, for example, an external power supply can go out . In order to disable raspi by the button, there is a vigorous rpi_power_switch module (but you need to compile it, and for this, kernel-headers are needed) or the user demon Adafruit-GPIO-Halt . I will have my hostd, which will flash LEDs, and at the same time it will respond to the button.
The result was a software and hardware monitoring system that is extensible using up-to-date technologies and is resistant to failures. Parts of the software can be updated and restarted independently of other parts (thanks to systemd, this did not require any efforts from me as a developer). And most importantly - it turned out to get a lot of pleasure from the process and from the result. Well, a small truck of new knowledge was added.
Thank you for reading!
Lyrical digression
The article is in the drafts for a couple of weeks, because there was no time to finish the described object. But under the onslaught of comrades who already covered half of what I wanted to say with my articles, decided to follow the principle of “release fast, release early , release crap ” and publish what we have. Moreover, the development is 80% complete.
A lot of time has passed since the publication of the article about “Moderately Universal Control Device” (and to be exact, more than a year). Not a lot, but not enough for me to write a normal software stuffing for this device. It’s not for beauty, it’s there - it should collect data from the sensors and make it so that this data will be in the monitoring system (in my case Zabbix)
Part One - software
Since that time, the following has been implemented from the program filling:
')
- Test script to demonstrate that everything connected works
- Script for zabbiks to collect readings from thermal sensors
There were attempts to write separate monitoring tools for ntpd and for gpsd. A lot of time was spent on super-monitoring, which should have been able to read the config, start the data collection processes from various sources according to the configuration, collect data from these processes and display readings on the screen, at the same time enabling the zabbix to read this data. In fact, it turned out to implement the process manager, who read the config and spawned the necessary processes, and the drawing on the screen, which turned out to be very cool - even knows how to read the layout from the config and change the screen contents by timer, while collecting data from the processes at the moment they are needed. There is only one thing in this super monitoring - the actual processes that would collect data. Well, plus there were ideas to make a system of signals, to assign functions to buttons, to take into account the priorities of different data sources, and so on, but everything came up in free time and the fact that this super monitoring was very bloated and monstrous.
For some time I scored on the development of a full-fledged software filling. Nenuacho, the script works, but the rule “works — don't touch it,” as they say, the holy rule of the administrator. But that's bad luck - the more you want to monitor, the more scripts you need to write and the more you need to add exceptions to SELinux for zabbiks (I’m not only a raspi monitor) - in the default policy zabbiksu (like rsyslog, for example) is forbidden to call arbitrary programs, and this is understandable. I didn’t want to disable SELinux for Zabbiks at all or to write my own policy for each binary that will be twitching. So I had to think.
And let's understand how to collect data in the monitoring system:
- According to the initiator:
- Active monitoring - monitored node initiates data transfer (push)
- Passive monitoring - the monitoring node initiates data transfer (pull)
- By the method of data collection:
- Through the agent on the monitored node, using only metrics supported by the agent
- Through the agent on the monitored node, expanding the agent with scripts
- By SNMP
- Primitive ping
- By telnet
- … and so on
I use pull monitoring, not for religious reasons, but it just happened. In fact, there is little difference between push and pull, especially at low loads (I did Nagios + NSCA in one of the previous works, I didn’t notice much difference, I still need to create elements with my hands). It would be possible to use zabbix_sender, if I already had push-monitoring, but it doesn’t, and there’s no court, and it’s somehow wrong to interfere with one another. But in the question of which protocol to monitor, the choice seems to be large, but not very much - discovery is supported only through an agent or via SNMP, which leaves us with only two options. The agent disappears because of the described problem with SELinux. Voila, we still have pull-monitoring via SNMP.
Hurray! Why cheers then? Linux seems to have snmpd, but how to make it give what we need, but what does snmpd have no clue about? It turns out that snmpd has as many as 3 (fundamentally different) ways to give arbitrary data on arbitrary OIDs:
- Running an external script (exec / sh / execfix / extend / extendfix / pass / pass_persist directives) is bad because of potential problems with SELinux and because an uncontrollable bunch of scripts will eventually turn into a dump. Yes, and they say, pass_persist is all bad with the transfer of binary data. I don’t know, maybe I’m lying shamelessly, but in any case I didn’t like the idea of producing a million scripts;
- Write something on the built-in perl or download .so — I don’t know and don’t want to know the pearl, I don’t want to write so-shki, I’m not a programmer to write in C;
- Get data from an external agent (proxy, SMUX, AgentX) - and that sounds good, but loose coupling does not depend on the language. Let's understand:
- proxy - request an OID from an SNMP agent on the specified host. It is necessary to implement the entire SNMP protocol, which is absolutely useless to me, and why should I request something from another node, use the network when I want to receive data locally. I know about the existence of 127.0.0.1, but in any case, implementing SNMP does not smile at all;
- SMUX - we need support for the smux protocol in the calling agent, including, and man says that by default net-snmp is going without smux support (and so ntpd will reassemble to support pps, also re-compile net-snmp on raspi). Yes, and this smux is just a wrapper for SNMP packets, just added the ability for the subagent to register with the agent;
- AgentX is essentially the same as SMUX, only the protocol is simpler, and the package is easier. Well compiled by default in net-snmp, which is also nice. Sounds like our pick.
- proxy - request an OID from an SNMP agent on the specified host. It is necessary to implement the entire SNMP protocol, which is absolutely useless to me, and why should I request something from another node, use the network when I want to receive data locally. I know about the existence of 127.0.0.1, but in any case, implementing SNMP does not smile at all;
I am writing on python, so I went to look for, and if anyone had already implemented the agentx protocol. And after all there were such good people - https://github.com/rayed/pyagentx and https://github.com/pief/python-netsnmpagent . The second project seems to be more lively, but the first one seemed simpler. I started with the first one (pyagentx), it works and does everything it needs. But when I began to think, and how to transfer data to this library, I wanted to deal with the second package (python-netsnmpagent). The problem with pyagentx is that, as it is written, it cannot receive data from calling functions, and therefore, the request for fresh data must occur directly in a function that sends updates to snmpd, which is not always convenient and not always possible. It was possible, of course, to bud off something of my own and redefine the functions, but in fact I would have to rewrite the class almost as a whole, which I also didn’t want to do - we’re working out on the knee, everything should be simple and fast. However, the reluctance to deal with python-netsnmpagent did win and I found a way to transfer data to the updater from pyagentx, but more on that below.
The next question was this: what should the architerature look like? An attempt to write a dispatcher, forking data sources and reading data from them, was already and did not end very well (see above), so it was decided to abandon the dispatcher implementation. And so successfully it happened that either I saw an article about systemd somewhere, or just once again, the old desire to deal with it tickled closer, and I decided that systemd would be my dispatcher in my case. Haters gonna hate, and we will understand, if it is already even on the raspi out of the box.
What useful systemd features I found for myself:
- Free demonization - we write a service unit with the type simple (or notify) and we get the daemon without writing a single line of code for this. Goodbye python-daemon and / or daemonize
- Automatic restart of fallen units - well, there are no comments, saves from intermittent errors
- Socket-activation and socket management in general is very nice when someone who wants to write to the socket can do it, even if the one who will read from the socket is not yet ready to do it. Moreover, the reader can be activated by writing to the socket, which can save some RAM (however, it’s not that it was missing ...)
- Template units - if I have a lot of identical sensors, you can spawn a lot of processes from one unit, transfer different parameters to everyone and rejoice
- (discovered too late, until implemented) units-timers - allow you to periodically start a certain unit. Why not cron - because cron has a minimum period of 1 minute, and I want to interrogate sensors more often. Why not sleep () - because active waiting and because the period starts to drift - yes, we pull the sensor every N seconds, but taking into account reading and processing data, the data update period will not be N seconds, but N + x, that is, at each reading the data update period will move down by x
With these findings in mind, architecture was drawn:
- systemd opens a socket for communication between sensor processes and a collector process, all sensor processes write to the same socket
- systemd launches units for sensor processes
- the sensor process reads data from the sensor, writes it to the socket and goes to sleep (I haven’t yet found the systemd timer unit)
- As soon as data from a sensor is written to the socket, systemd starts a collector process, which receives the update from the sensor, magically processes it and stores it in the internal state. The collector process does not die
- the collector process generates a separate flow (just a flow, not a process, to avoid IPC between processes, which is somewhat sad in python for this task , I will write below why I think so), in which the internal state is transferred to snmpd using agentx protocol
One very bad place is a shared internal state between the flow-collector and the flow-agentx. But I have forgiven myself, because in the python there is a magic GIL, which solves the issue of synchronization between the two threads. Although it is, of course, very bad and not on the book. There was a thought to put the shared state into a separate process and force the process-agentx and the process-collector to work with the state-process through the socket, but it broke me to make another socket, write another unit and so on.
Why I did not like IPC in python in relation to this task :
- Queue works fine, but these queues are unnamed, the Queue instance must be passed to the forked process. In my case this means completely rewriting pyagentx
- The manager might have solved my problem, but again, this means rewriting pyagentx completely
- posix / sysv ipc is great, there are named queues, but these queues are limited in size, on some systems they are quite poorly limited (they write [scroll to “Usage tips”] , for example, macos have no more than 2KB per queue and even configure not allowed). Not that I had to run on a bunch of different systems with varying degrees of wretchedness with the implementation of sysv ipc, but I also didn’t want to do tuning. I want to immediately and well
- again posix / sysv ipc - blocking queues, that is, some minimum timeout must be before reading from the queue returns “empty”. In the case of pyagentx, locking on reading from the queue in update () is very undesirable, and indeed it is poorly
- and again posix / sysv ipc is a problem with queue naming. Despite the fact that message queues are named, they are named not by name, but by key. Since the key is not hierarchical or semantically obvious, it is easy to choose a non-unique key. In the posix / sysv ipc implementation for python, it is possible to generate the queue key automatically, but bad luck - if I could transfer something to pyagentx, I would transfer the Queue there and not suffer. You can generate a key using ftok, but they write [scroll to “Usage tips”] that ftok gives no more certainty that the key is unique than
int random() {return 4;} - (nothing else came to mind, which would not involve an external queue broker, and the task is not such as to keep the queue broker — extra service, an extra headache)
dbus looked like a solution to all troubles, and there it is everywhere where systemd is, but the trouble is that pydbus requires GLib> = 2.46 to publish the API, and only 2.42 in raspbian. dbus-python is deprecated and unsupported. In short, until the rooster roast in the ass bite, I will share the state in an insecure manner.
When using SNMP for your own
At some point, I discovered ntpsnmpd with the corresponding MIB and was glad to be a bald, but when I compiled this miracle, I found that the author bothered only to implement a few top-level constants and at that exhausted. I did a little poking around in the code and did not fully understand how the author interacted with ntpd (or ntpq) in a clever way to get those constants out, without parrying the output. One thing I understood for sure - there is no ready-made python API, which means there is nothing to catch, I have to implement this MIB myself.
Five minutes of hate
No, well, that's true, really, for all these years, no one has written analogs of ntpd, smartctl, lm_sensors and other utilities without an API? Nobody screwed snmp-agents to them? Such analogs that it was not necessary to parse the text output? No, I understand, unixway and all that, but this is not the case. Well, it would be possible to display the data in a machine-readable format, but no, everything is only for people. And judging by the crying on the Internet (Russian and foreign), I'm not the only one so unhappy. Well, let's say lm_sensors can be forgiven, because the same data can be subtracted from sysfs in machine-readable format, but the rest?
In general, the whole structure works and is very tenacious. Discovery works in zabbiks, items are created, graphics are drawn, triggers send alerts - what else do you need to be happy? The code is not finalized yet, so I do not publish it.
Part two - hardware
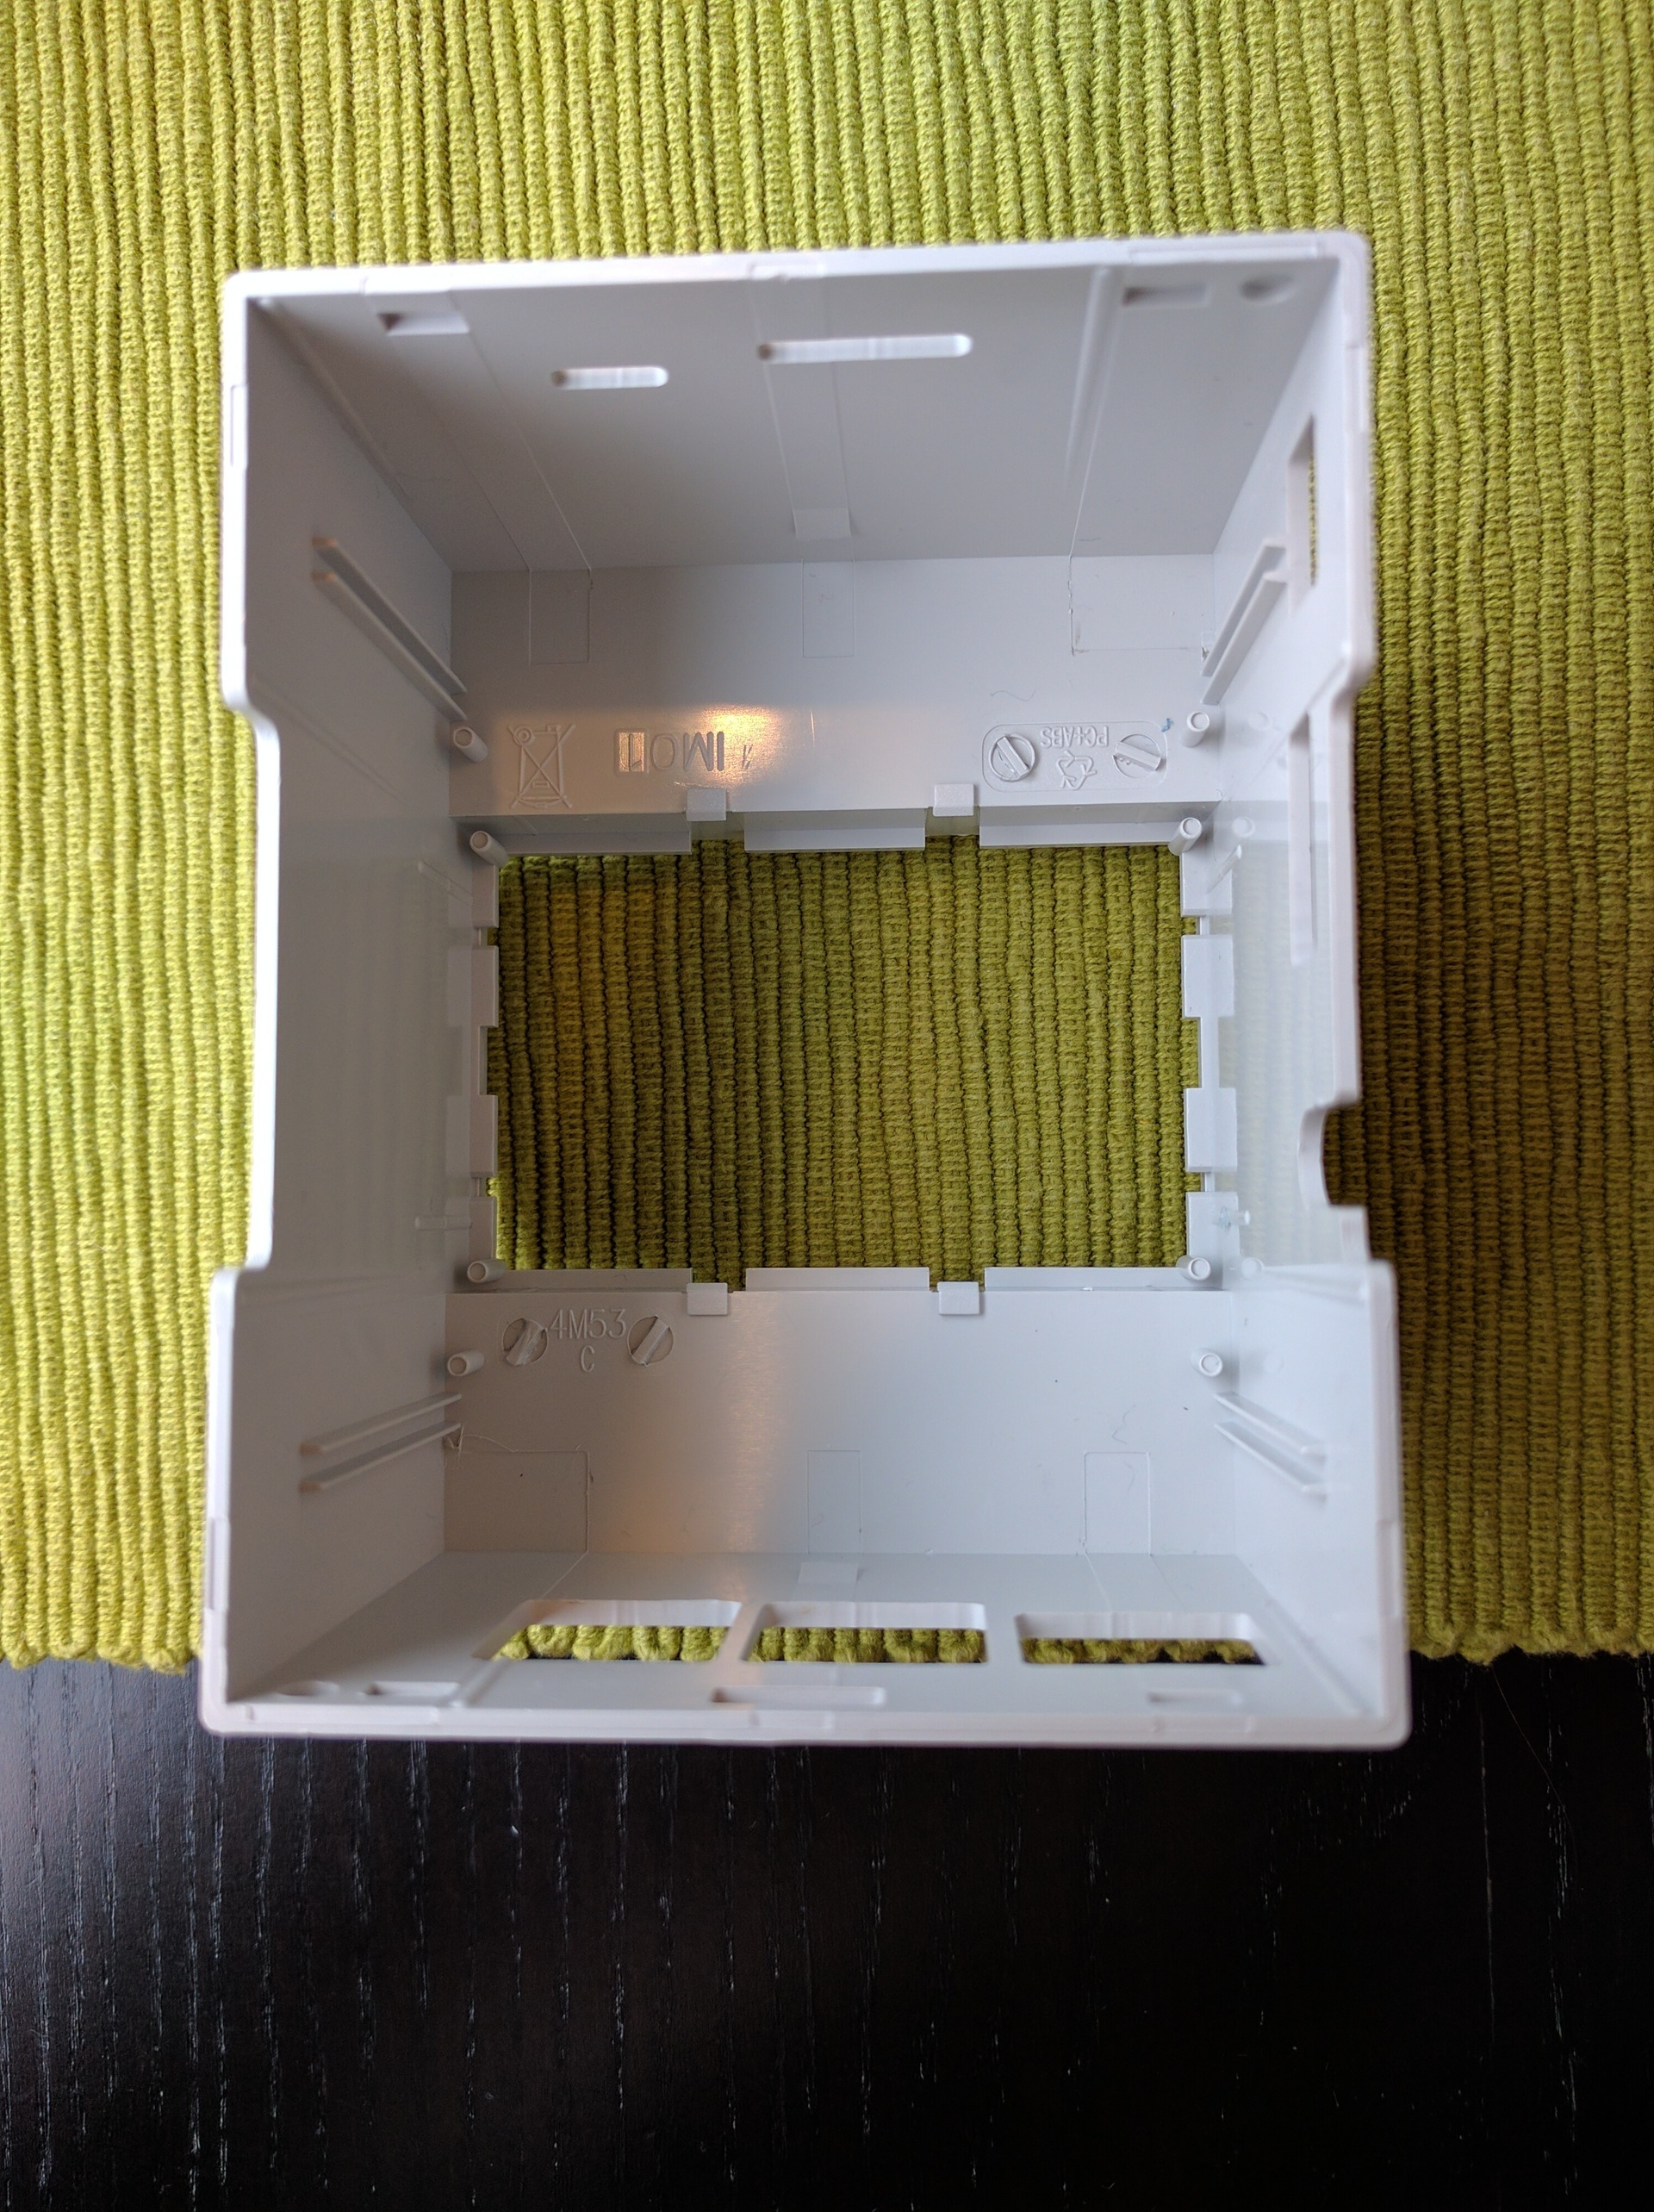
Not everywhere you can stick a unit case, but you don't want to hang snot on the walls either. There is a very elegant solution - DIN-rail. Heaps of constructions with a rail are sold on the market, in which it is possible to put the rack and power supply unit (I use the MeanWell DR-15-5), and all sorts of automata-uso-what-is-necessary. Accordingly, I wanted a DIN rail enclosure for raspi. These two comrades were considered as candidates - the model from Italtronic and RasPiBox . The advantage of RasPiBox is that there is already a board for prototyping and power is supplied via screw contacts (via a stabilizer on the GPIO), which is convenient, but it can be unsafe. But it costs more than 3 times more expensive, takes up more space on the rail and does not have a transparent window. The model from Italtronic is also not perfect - its width is such that all ready-made 16x2 LCD screens do not fit in width, that is, the value of a transparent window drops sharply, but for a low price I was ready to forgive this shortcoming.
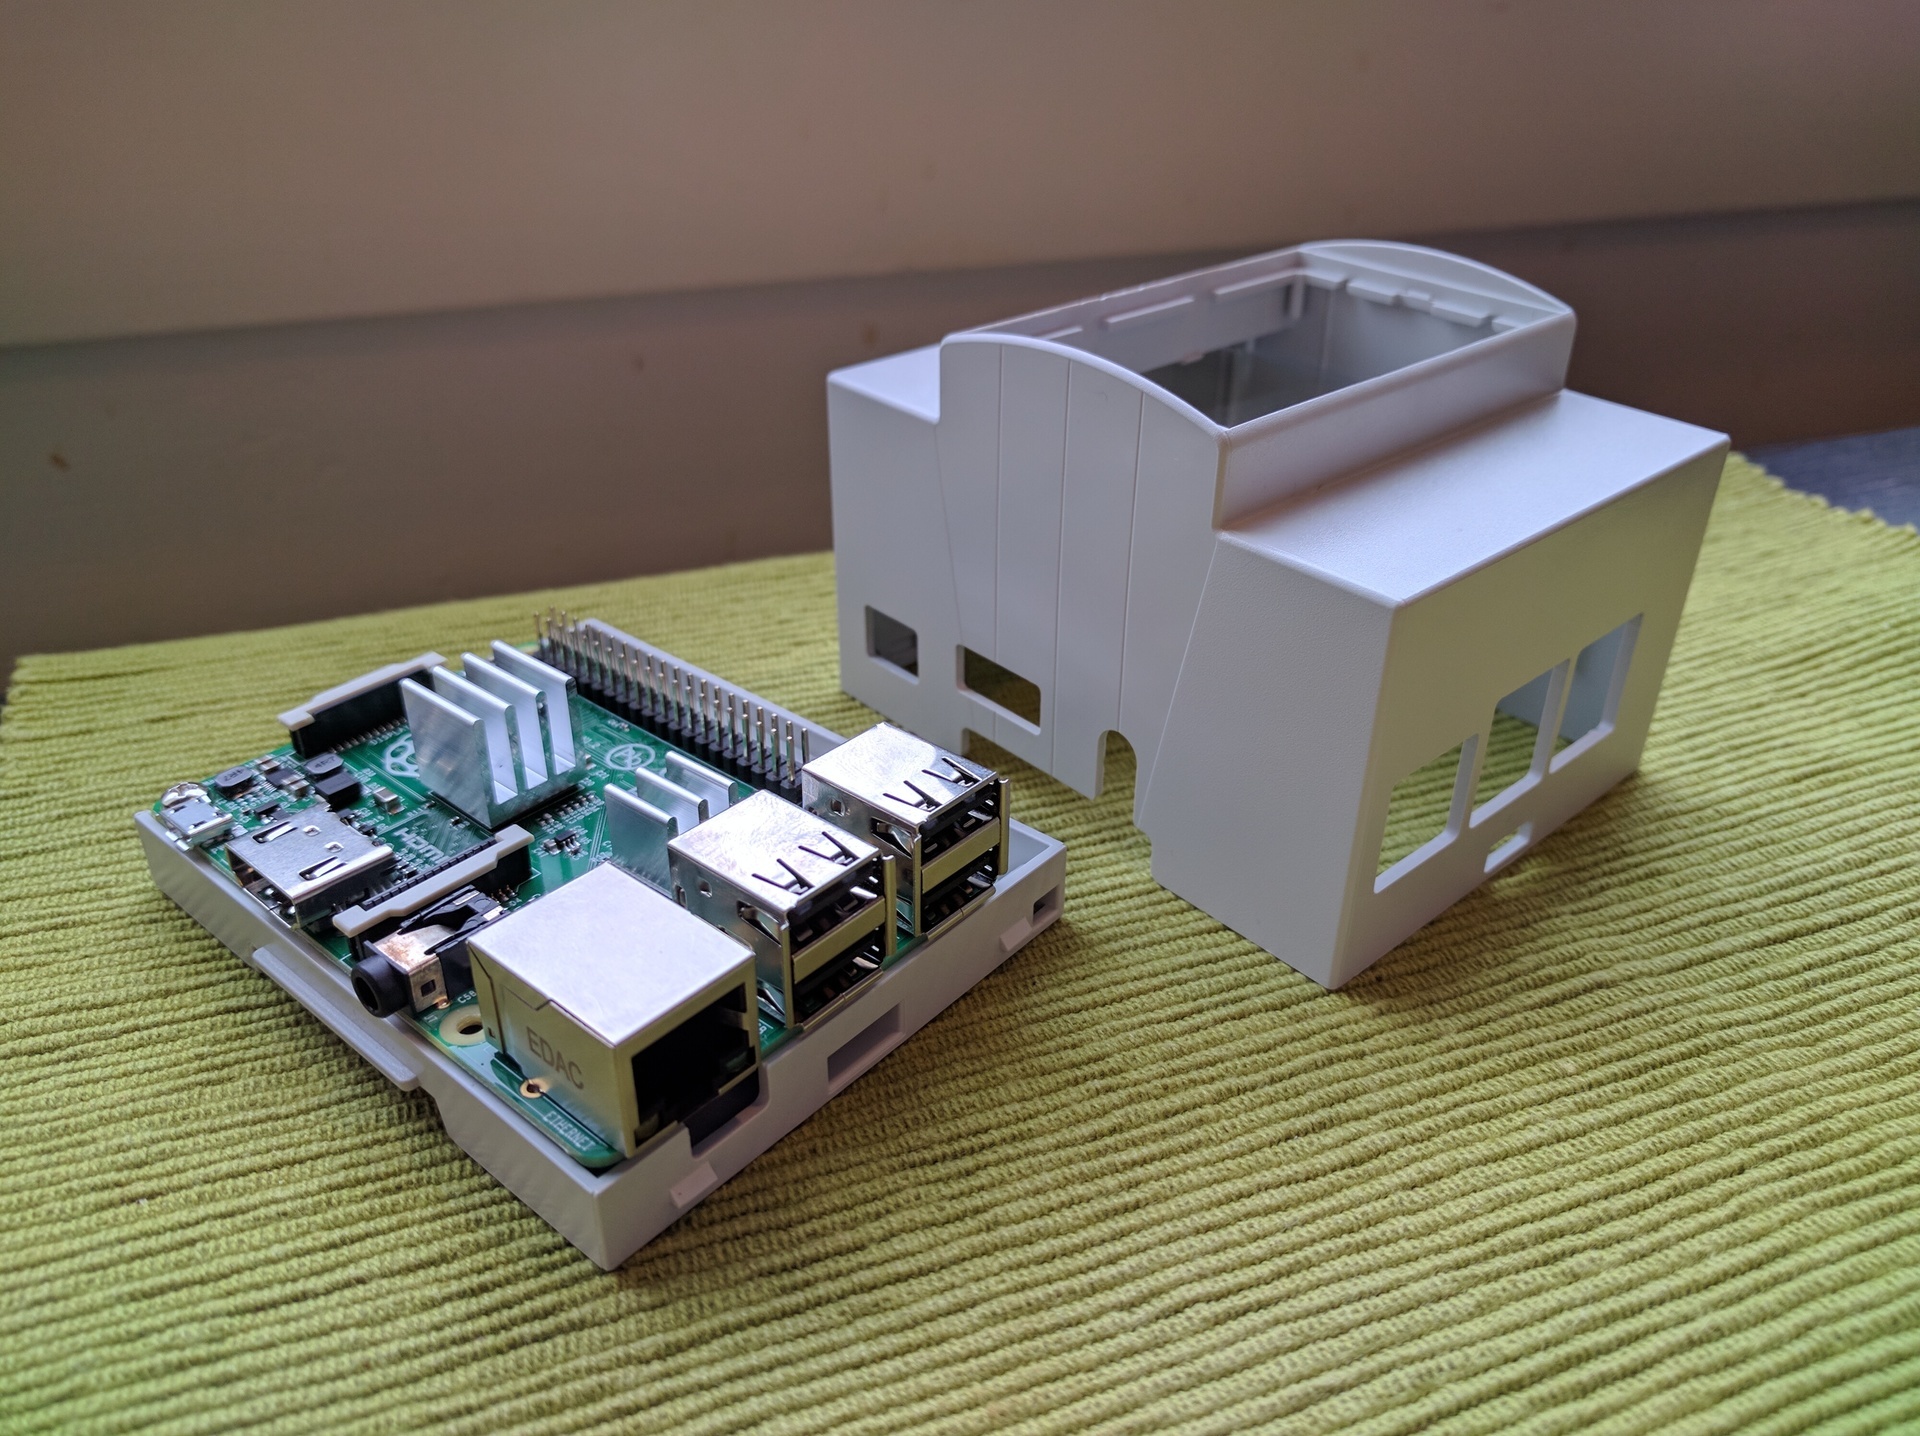
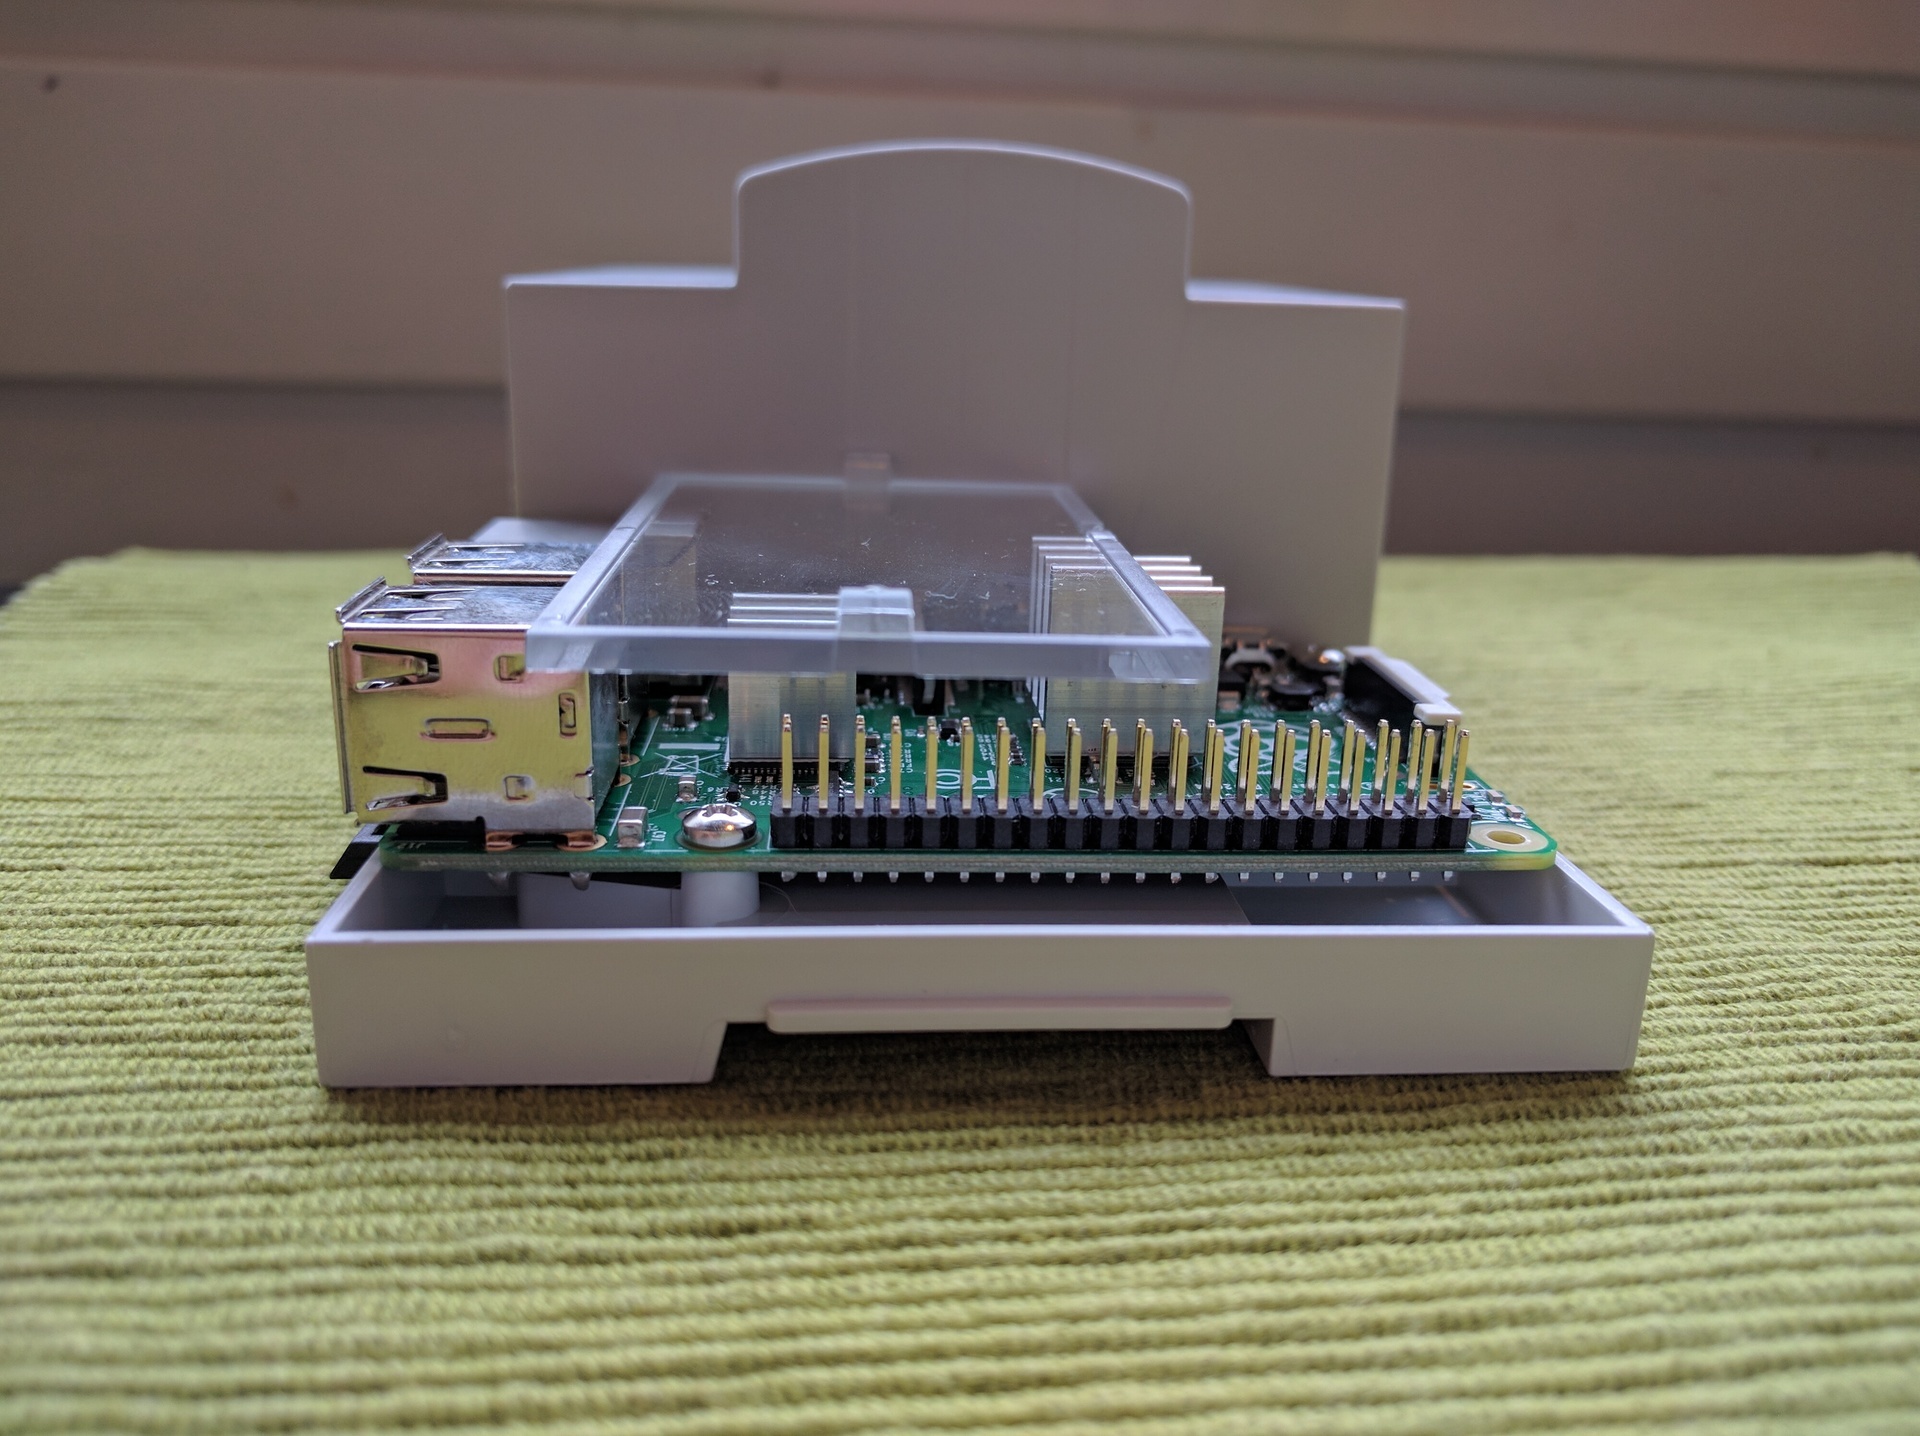
The case turned out to be quite convenient, it has space for fastenings (or rather, for installation) of two printed circuit boards or a sheet of anything. I make the substrate from acrylic wrapped in a non-conductive ESD-protective film, I saw with a Dremel:
The boards inside are kept only on the force of friction and on small ledges on both sides, that is, there is no rigid mounting inside. Despite the apparent magnitude, the case is small and there is not so much space above the raspi itself, especially if you insert the board on the lower level. And I need a board, because I need to place several LEDs and a board with RTC.
Body photos
I want to connect temperature and humidity sensors to a new monitor. For temperature, our choice is ds18b20, it works, but it is worth comparing readings with a calibrated thermometer, a sensor can lie half a degree according to the specification. To compensate, he added a primitive correction of the readings to a constant in the config, checked it with such a thermometer
It turned out that my ds18b20 copies do not completely lie to themselves. But the next sensor is just lying, and as much as 0.6 degrees. However, again, it depends on the instance - one lied, the other almost did not lie.
The humidity was not so simple. Cheap either does not work with raspi at all (because it is analog), or there are no libraries (I want to immediately and well), or more expensive like aviation cables. A compromise between convenience and toad was found in the Adafruit BME280 sensor, which also shows the temperature with pressure as a bonus (but it can lie, as I noted above).
If ds18b20 can simply be shrink and rejoice, with VME280 this trick will not work. There were a lot of ideas about the case - and left as they were, by soldering the wires and filling them with glue snot (the attachment ears are already there, it turns out), and make a mini-case of the same acrylic as the substrate for the components, and fiction something with 3D printer, the benefit is there is one within reach ... But then I remembered about the eggs:
This is the perfect body. There is enough space for a sensor, you can put a connector, convenient access for maintenance, you can hang it everywhere or just throw it somewhere.
Connect the sensors to raspi decided through DB9. In the USB lines a little, the RJ45 socket did not fit in size. The egg sensor decided to connect via USB, because in the cabinet there were found remains of cut USB cables - the good should not be lost:
To protect the GPIO-comb on the raspi and for the convenience of disassembling the case, I took another comb and soldered to it. The comb is angular, which gave a little more space vertically, but I didn’t read it a little and this comb bumped into the resistors for the LEDs. All, of course, tightly wrapped in heat shrink, but the point that in the future is worth remembering. As a result, the halves of the case can still be separated, for example, to change the battery in rtc or the raspi itself. Everything else (more precisely, a flash drive) is available for replacement without opening the case.
Photos of semi-ready and ready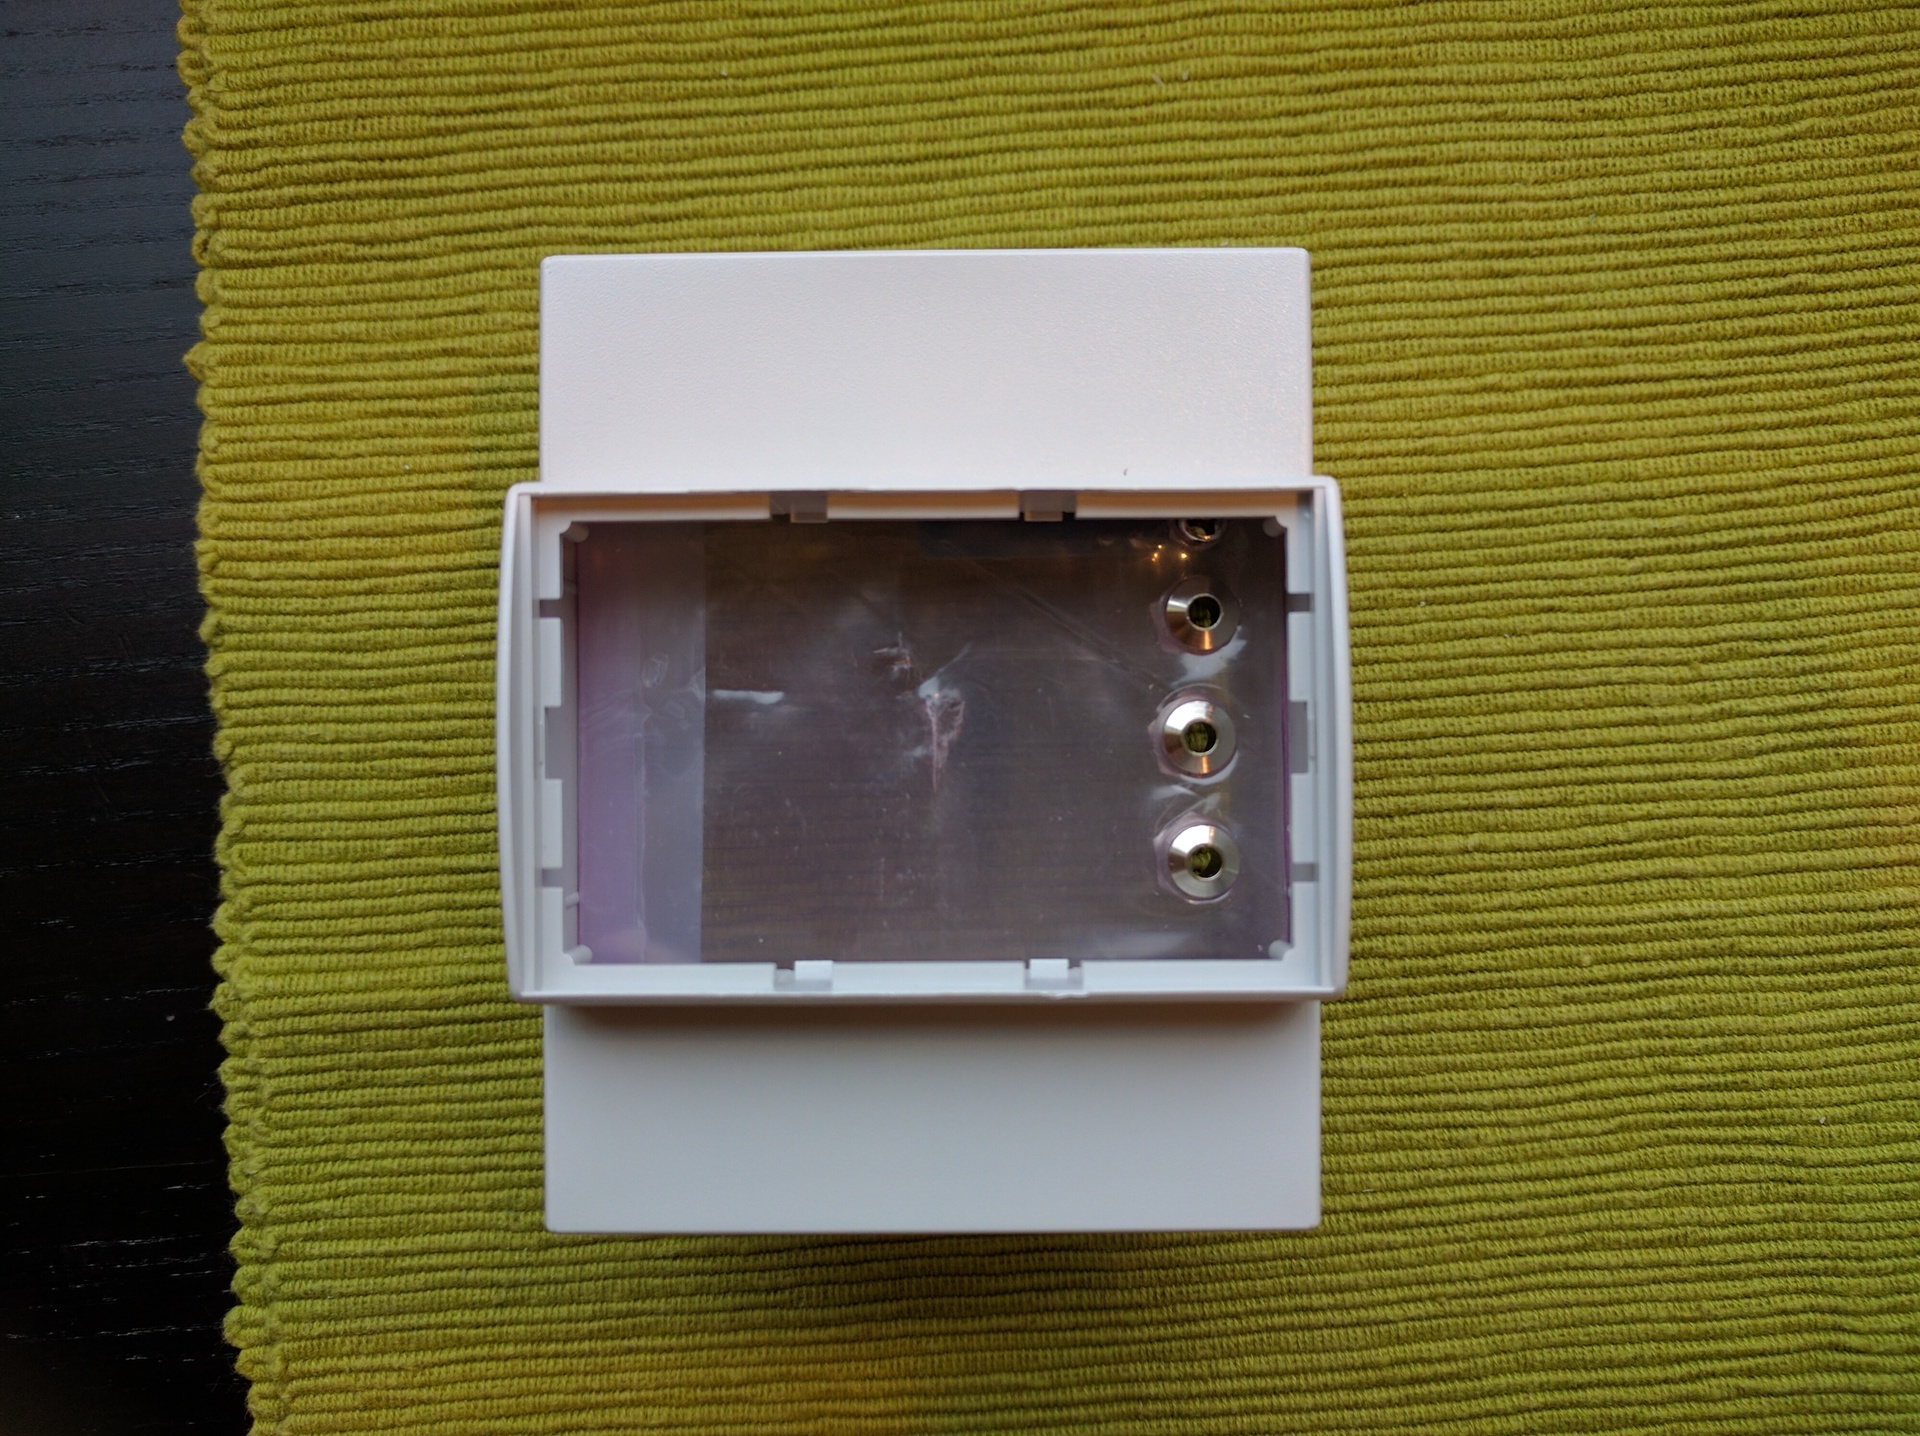
One recommendation - do not save on the buttons. I've saved, so the button not only jingles (this can be fought with, the RPI.GPIO library has anti-bounce protection), but it also works only in a very specific position. I provided a button for software shutdown of the device in case you need to turn off the power (I already killed the FS on the flash drive several times by inaccurately shutting it down), but it turned out that there was not enough to foresee something - you also need to read the documentation. If you, like me, do not read the documentation, then you should know - overlay gpio_shutdown does not at all what you would assume, but only exposes a high / low level on a pin when disconnecting, so that, for example, an external power supply can go out . In order to disable raspi by the button, there is a vigorous rpi_power_switch module (but you need to compile it, and for this, kernel-headers are needed) or the user demon Adafruit-GPIO-Halt . I will have my hostd, which will flash LEDs, and at the same time it will respond to the button.
Conclusion
The result was a software and hardware monitoring system that is extensible using up-to-date technologies and is resistant to failures. Parts of the software can be updated and restarted independently of other parts (thanks to systemd, this did not require any efforts from me as a developer). And most importantly - it turned out to get a lot of pleasure from the process and from the result. Well, a small truck of new knowledge was added.
Thank you for reading!
Source: https://habr.com/ru/post/311502/
All Articles