Flutter I - Introduction and Installation
Flutter is a new tool from Google that allows developers to write cross-platform applications that can be run on various systems (for example, Android or iOS) with a common code base.
The tool itself is written in C and C ++. It provides a 2D rendering engine, a React-like FRP framework and a set of widgets in the Material Design style. At the moment, the alpha: 0.0.20 version is distributed, but despite the rather “raw” version, you can already create an advanced interface, work with the network and even with the file system.
The approach of Flutter differs from tools that work through WebView and execute HTML, CSS, and Javascript (for example, Cordova) —it is to use Dart as the only programming language. Dart is quite simple to learn, and if you also know Java, then consider that 75% of the work is done, and you can go to Dart in just a couple of days.
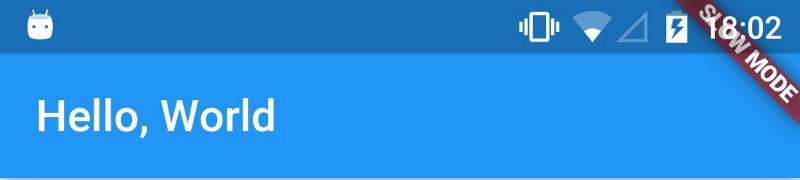
Applications are compiled into native code when building for release. This increases performance and reduces latency when working with the interface. When building in debug mode (and identifying possible bugs), Flutter also performs some tasks that may slow down the application. In such cases, Flutter will display “Slow Mode” in the upper right corner of the screen.
Why choose Flutter?
In addition to the fact that you are doing the application immediately under several systems (Android and iOS), the Flutter code is very expressive. That is, you will need to write less code than if you would write a native application under one platform.
Performance and user interface response.

Another plus Flutter - it is focused on Material Design and provides many opportunities to work with it.
Google also uses Flutter to develop the user interface of its new Fuchsia system.
Installation
Since Flutter is still in development and is constantly being updated, the installation process may change over time. Current installation instructions can be found on the Flutter website.
We will use version 0.0.20 + .alpha. (Note: at the moment, installation is possible only under Mac and Linux (64-bit))
Step 1. Cloning
Clone the alpha branch from the Flutter repository with Git (SourceTree, Github Desktop ...) and add the bin directory to the PATH.
$ git clone https://github.com/flutter/flutter.git -b alpha $ export PATH=`pwd`/flutter/bin:$PATH Step 2. Dependency check
Run Flutter doctor to install all necessary dependencies.
$ flutter doctor Step 3. Installing the platforms
Next we will establish a platform for development. We can install both or limit to the one for which we want to write an application.
In the case of Android, you must install the Android SDK. You can simply install Android Studio, the SDK will be included. In case Android Studio is not installed in the default directory, you need to add the ANDROID_HOME variable to PATH, specifying the new location where the SDK was installed.
In the case of iOS, xCode version 7.2 or higher is required. An additional tool is needed to run applications on a physical device. It can be installed using Homebrew .
$ brew tap flutter/flutter $ brew install ideviceinstaller ios-deploy Step 4. Atom configuration
It is recommended to use Atom text editor with installed Flutter and Dart plugins.
Installing the Flutter plugin for Atom:
- Launch Atom.
- Packages> Settings View> Install Packages / Themes.
- Write the word 'flutter' in the Install Packages field, then click the Packages button.
- Select Flutter and install.
Open Packages> Flutter> Package Settings and set to FLUTTER_ROOT the path where the Flutter SDK has been tilted.
Then Packages> Dart> Package Settings and set the variable to the location of the dart sdk, usually bin / cache / dart-sdk in the Flutter directory.
If you have a Mac, run Atom> Install Shell Commands to install shell commands.
And finally, run Flutter doctor again to make sure everything is in order.
The output from the console below shows that the installation process is successful, but the iOS environment still does not meet all the necessary requirements.
[✓] Flutter (on Mac OS, channel alpha) • Flutter at /Users/XensS/dev-dart/flutter-sdk • Framework revision 9a0a0d9903 (5 days ago), engine revision f8d80c4617 [✓] Android toolchain — develop for Android devices (Android SDK 24.0.1) • Android SDK at /Users/XensS/Library/Android/sdk • Platform android-N, build-tools 24.0.1 • Java(TM) SE Runtime Environment (build 1.8.0_25-b17) [✓] iOS toolchain — develop for iOS devices (Xcode 6.4) • XCode at /Applications/Xcode.app/Contents/Developer • Xcode 6.4, Build version 6E35b x Flutter requires a minimum XCode version of 7.0.0. Download the latest version or update via the Mac App Store. x ideviceinstaller not available; this is used to discover connected iOS devices. Install via 'brew install ideviceinstaller'. x ios-deploy not available; this is used to deploy to connected iOS devices. Install via 'brew install ios-deploy'. [✓] Atom — a lightweight development environment for Flutter • flutter plugin version 0.2.4 • dartlang plugin version 0.6.37 First steps (Writing Hello World!)
Let's create a simple application and see Flutter in action. In subsequent articles, the examples will be much more complicated and exciting.
Run Packages → Flutter → create new Flutter Project. In the lib directory there is a file main.dart, open it and erase all the code.
Dart code execution begins with the main function, which must be included in the main.dart file.
void main() { } Now we import the material library, it provides us with a function for launching applications.
import 'package:flutter/material.dart'; This function is called runApp and takes a widget (Widget) as a parameter. The widget can be compared with the view (View) in Android or iOS to have a general idea, but, of course, there are differences between them. That is, in Flutter, the entire interface is based on the use of widgets and all code is written in Dart. For example, in Android, you would need to use XML to describe the views.
To begin with, we will display arbitrary text using the Text widget.
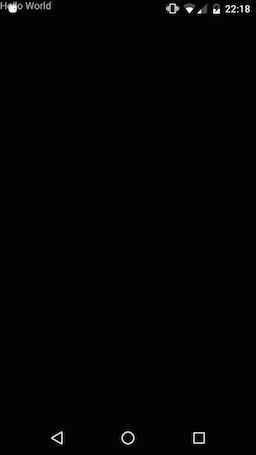
import 'package:flutter/material.dart'; void main() { runApp( new Text("Hello World") ); } Now we start application through Atom.

As you can see, the text appeared behind the status bar. This happened because the Flutter (0,0) coordinates are set there.
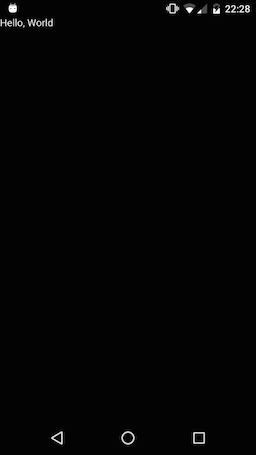
Let's add indents to fix this. Since the Flutter user interface is built on widgets, the padding will also be a widget. Perhaps for people with experience on Android and iOS (where indents are just presentation properties) this sounds crazy. We now need to add the Padding widget and specify the Text widget as a child element.
import 'package:flutter/material.dart'; void main() { runApp( new Padding( padding: const EdgeInsets.only(top: 24.0), child: new Text("Hello, World") ) ); } In the example above, the Padding widget is created, in which the padding is set to 24 using the EdgeInsets object, and the Text widget is specified as a child element. Run the application and see that the text is now below.
Note: If you are familiar with Java, keep in mind that const EdgeInsets.only (top: 24.0) is just a call to the EdgeInsets constructor. It returns an instance of the object that will be the compile time constant. This is the difference between Java and Dart, more information about the constructors in Dart can be found here .
Use the Center widget to place text in the center of the screen.
import 'package:flutter/material.dart'; void main() { runApp( new Center( child: new Text("Hello, World") ) ); } 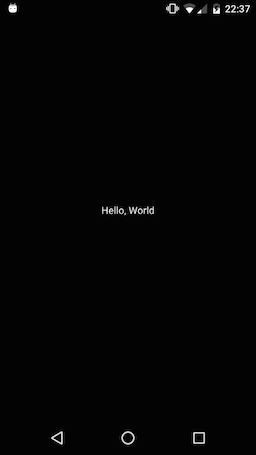
Both widgets, Padding and Center, provide an attribute called child, used to specify the child element. In fact, this is one of the features that make Flutter such a powerful tool. Each widget can have children, so that some widgets can be nested in other widgets. So, for example, Text can be nested in Padding, which will be nested in Center.
import 'package:flutter/material.dart'; void main() { runApp( new Center( child: new Padding( padding: const EdgeInsets.only(left: 128.0), child: new Text("Hello, World") ) ) ); } 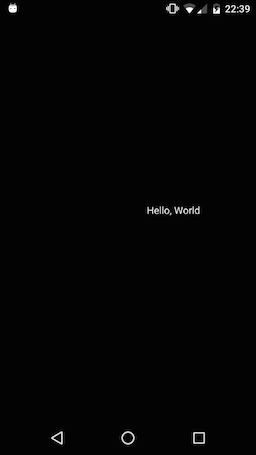
Conclusion
In the first article in the series of articles about Flutter, we looked at how you can display text in an application with just a few lines of code. In subsequent articles, we will focus on more complex interfaces in order to show how easy they are to implement (compared to the native method).
Original: @develodroid
')
Source: https://habr.com/ru/post/311412/
All Articles