We measure battery consumption on mobile devices. Experiment in Yandex
Nowadays, it can be argued that the phone has ceased to be a device only for calls. He allows us to pay for purchases, find the right way, call a taxi. The situation in which you sit down the battery becomes one of the most stressful. Staying at night in an unfamiliar street without a phone is rather unpleasant. In this case, the battery consumption is growing largely as a result of the expansion of opportunities.
Manufacturers of both hardware and software are trying to solve this problem. For Yandex, it is also relevant, because our services are what should be at hand with a person at any time. We are working on this in different ways and as part of the experiment we created a device for measuring the current that the phone consumes from the battery. Now we can measure the instantaneous values of the current from the phone's battery (Nexus, iPhone, etc.) in milliamperes 500 times per second, save this metric to disk and read the average consumption on it.
Under the cut, I'll tell you how we did it. There will be a lot of photos of the glands, but I apologize in advance for the quality - the pictures were taken in combat conditions.
From the very beginning we had some kind of tactic.
A few months ago, when we started to tie up load testing of phones to Yandex. Tanku (this is our opensource tool for performance testing), we were faced with the fact that one of the most important metrics - current consumption from a battery - we cannot reliably measure, and Some phones can not measure at all. For example, this is how the current consumption graph on the iPhone, obtained by standard Apple tools, looks like:
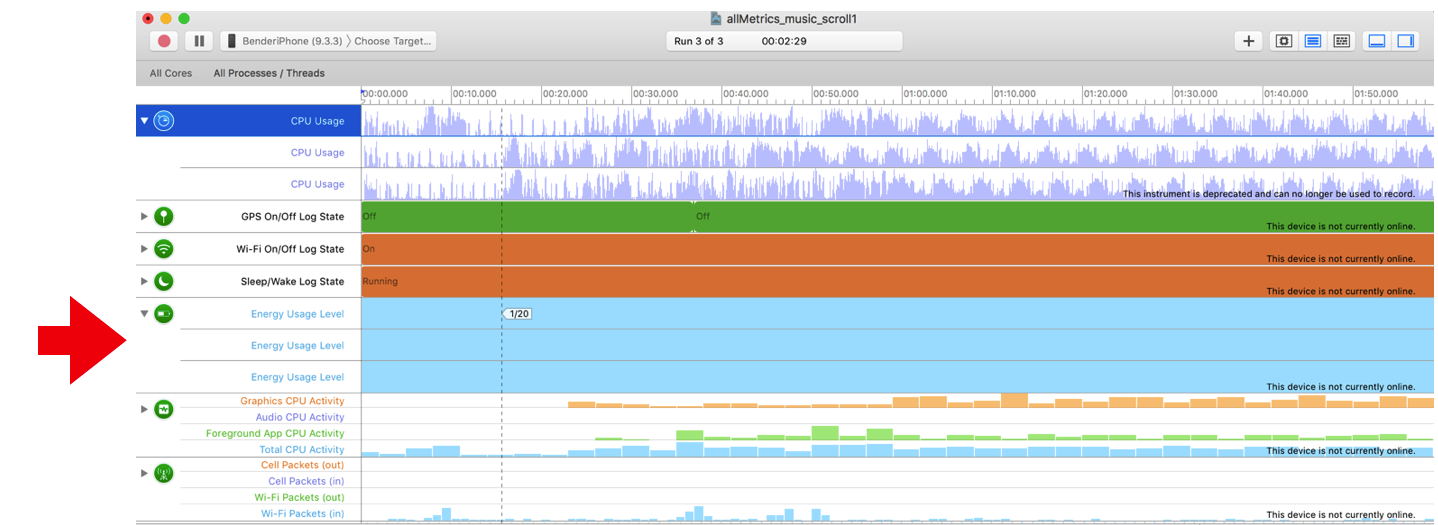
All three test launches did not change the consumption value at all and were equal to 1/20. The unit used is surprising - 1/20 means that if the phone continues to work with the same power consumption, it will sit down in 20 hours. That is, the metric is very inaccurate and not very interpretable. In addition, raw figures cannot be obtained, only a screenshot can be made and attached to the ticket.
With Android devices, the situation looks better, but still far from ideal. The current can be measured by reading from /proc/… dial, but it is better not to do it too often - by polling the values, you can squander the phone's performance and spoil the tests. On different devices tsiferka is in different places of the file system. On the part of the Android phones there is no piece of hardware that measures current, so they cannot be consumed by software using software. On Nexus, which we took as reference, the value in /proc changes every 20 seconds.
In general, we decided to try to measure the consumption of hardware and thus kill all the hares at once: this way you can measure on all devices in general, including laptops and refrigerators. We knew about the existence of the Power Monitor , but the price of the device (about $ 800 apiece, and each device will need its own device), and its incompatibility with Linux (and, therefore, difficulties with automation), made us think about our bike. A similar situation is observed with oscilloscopes and other general-purpose measuring devices on the market - it is expensive to buy and difficult to automate.
There is also a BattOr project, according to the description, this is about what we want. I did not try to contact the authors myself, but my colleagues say that the team was bought by Google and since then they have not heard anything from them and they don’t respond to the mail. Coincidence? =)
To begin with, as a proof-of-concept, we have assembled a circuit with a shunt, similar to that presented in this article. We measured the current in the break of the USB wire. Since the current value was expected to be small, up to 500 mA, we had to increase the voltage with the help of an instrumental amplifier, and not remove it directly from the arduink shunt.
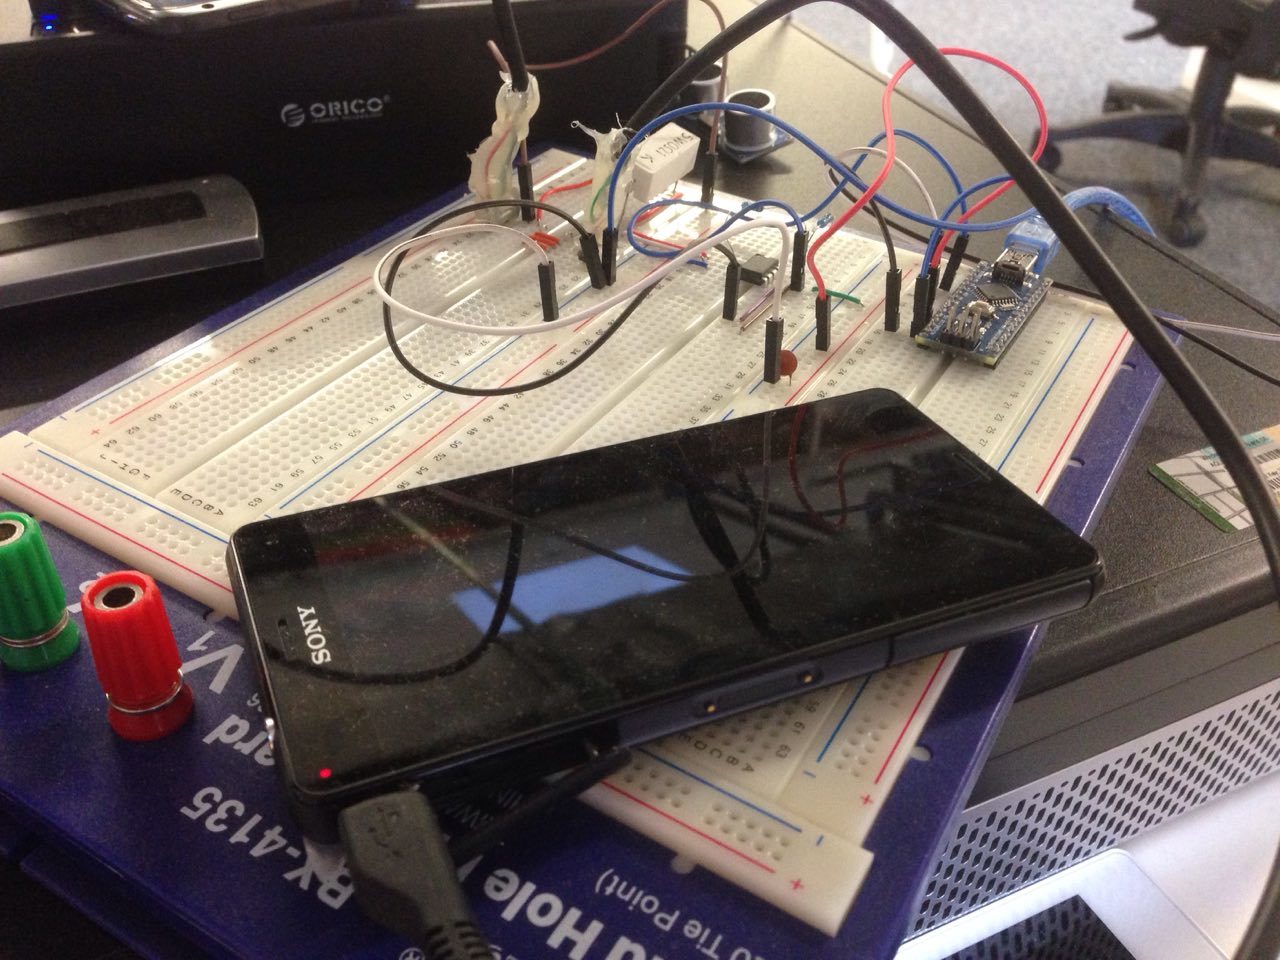
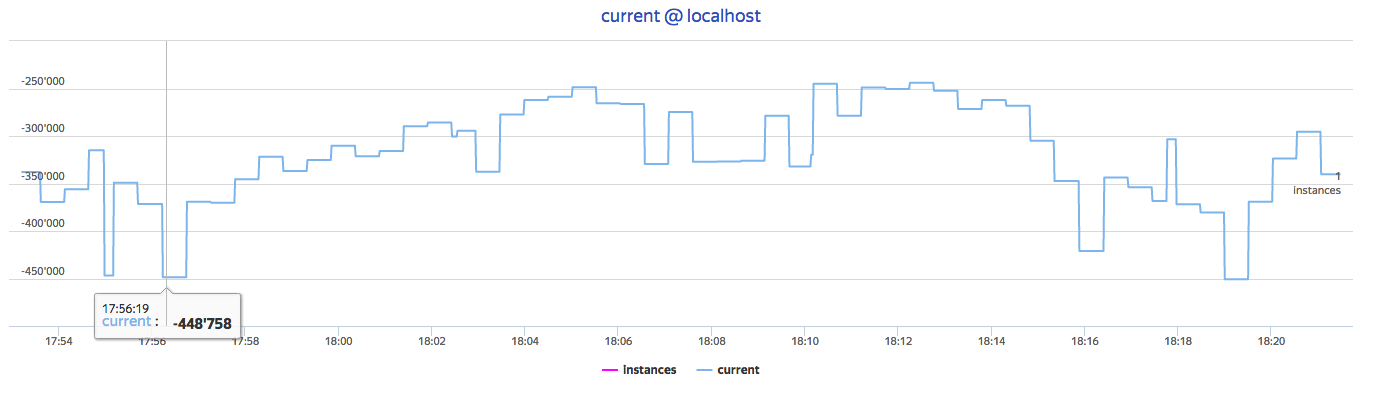
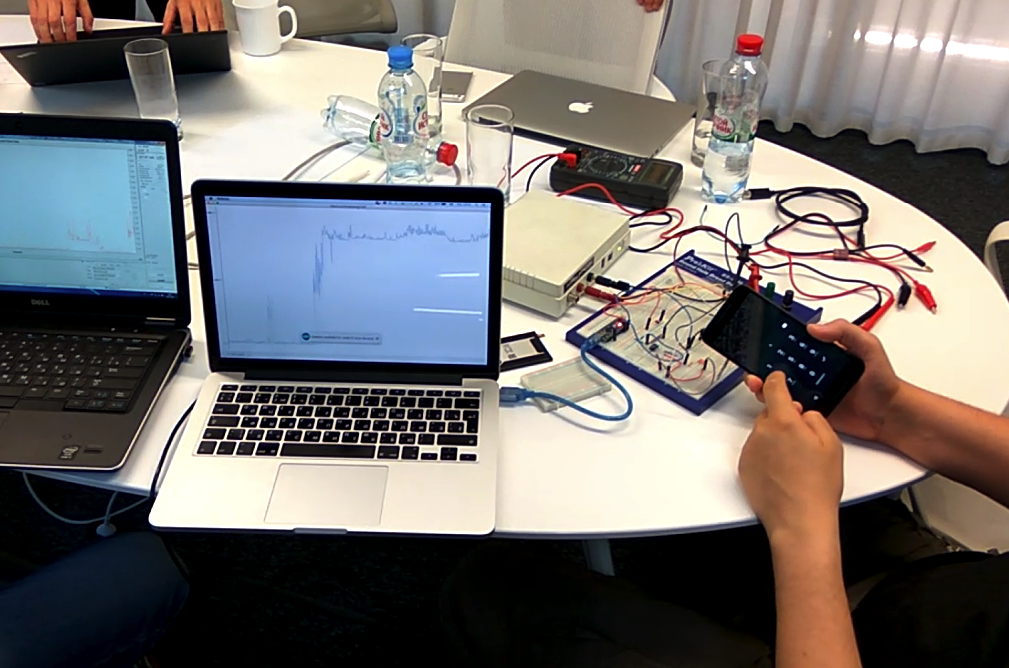
After some more dances with a tambourine, we managed to get on the laptop screen a graph of the current consumption of the phone from USB. Then we realized that we lack such measurements - we measure not the current from the battery, but the current from USB, the phone stores energy in the battery, and we cannot compare the graph of current consumption with what is happening on the phone. We decided that we need to pull the battery out of the phone and use external power instead, and we don’t stick USB at all during the tests.
Electronics works on white smoke
As you know, everything that we were taught in the lessons of physics and electrical engineering is a lie, there are no electrons, and the devices work on white smoke. And if this white smoke comes out, the device stops working. In the next experiment, white smoke came out of the Arduino and we lost it. It turned out that between the “0” at the input of our power supply and the “-“ at its output is 88 volts of alternating voltage. After a few more experiments with different BPs, we realized that not all of them are equally good, but there are those that are suitable for us. And we began to use these suitable. We also decided not to use the circuit with a shunt and a tool amplifier and instead take the ready-made current measurement module for the Arduino based on the MAX471, which is essentially the same, only in the form of a chip. We also considered a variant based on a Hall sensor (ACS712), but, having studied the documentation for this chip, we saw that it made a lot of noise and decided not to even try.
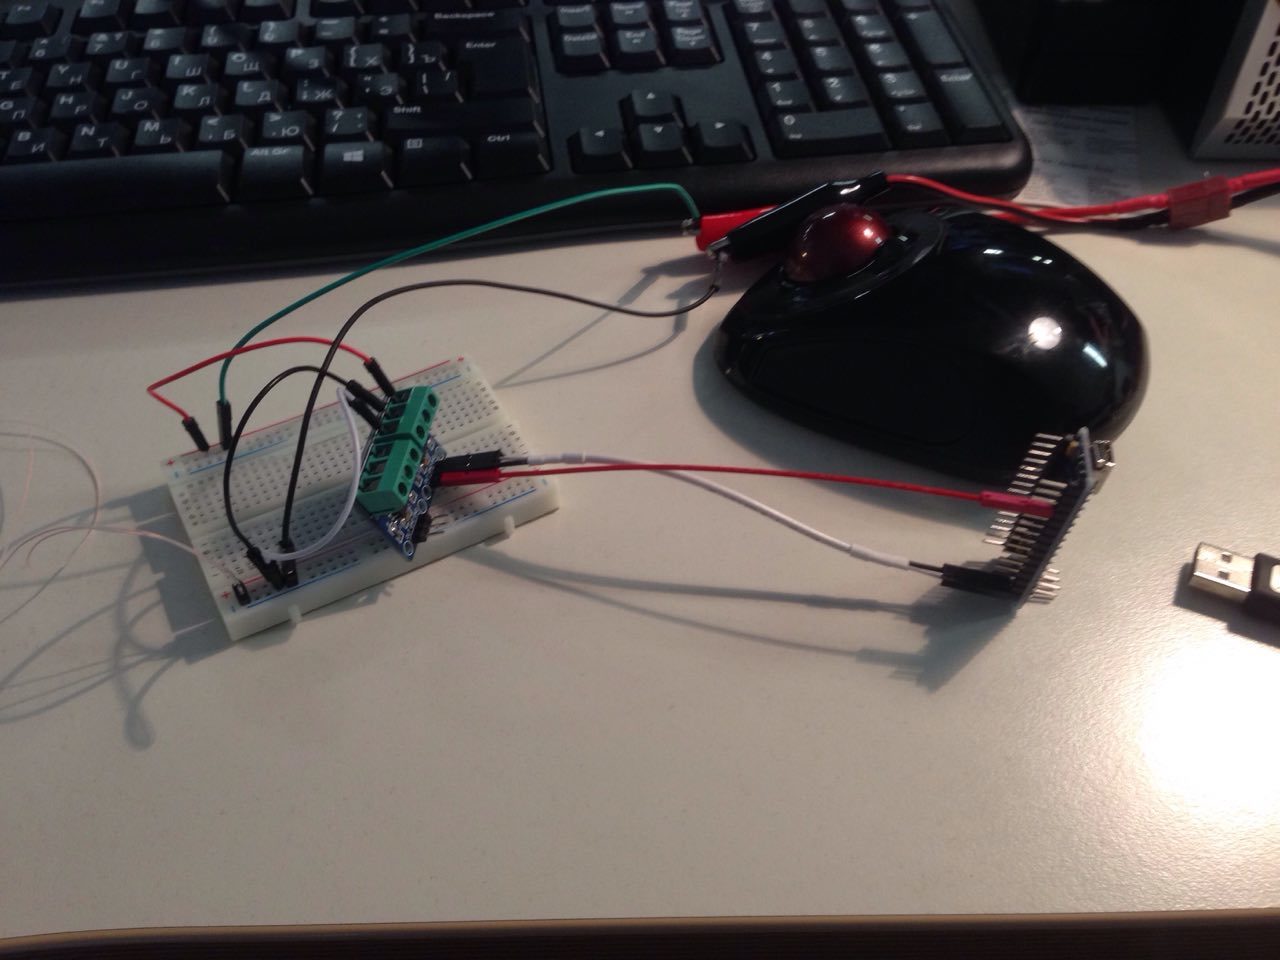
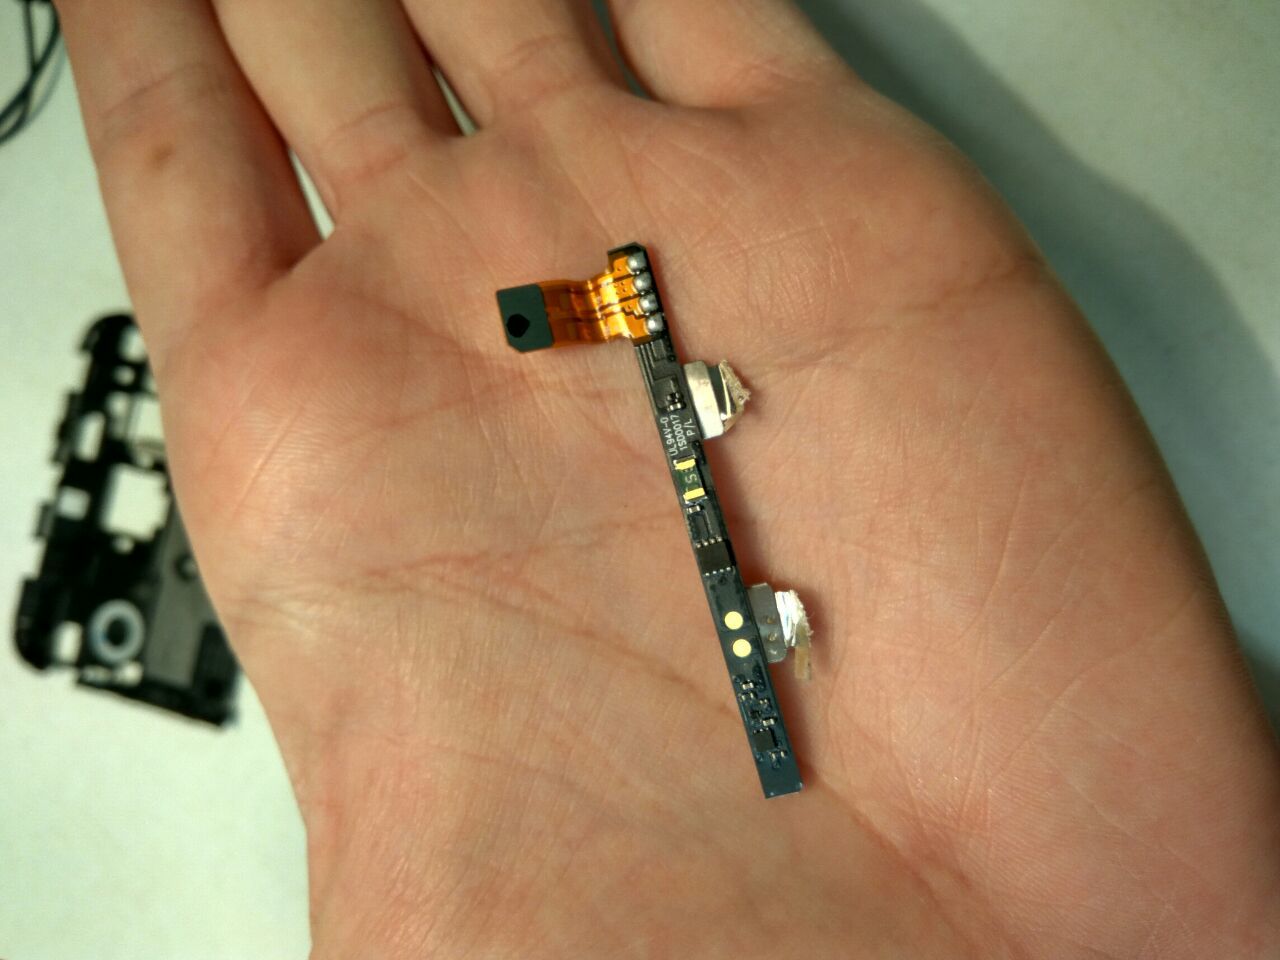
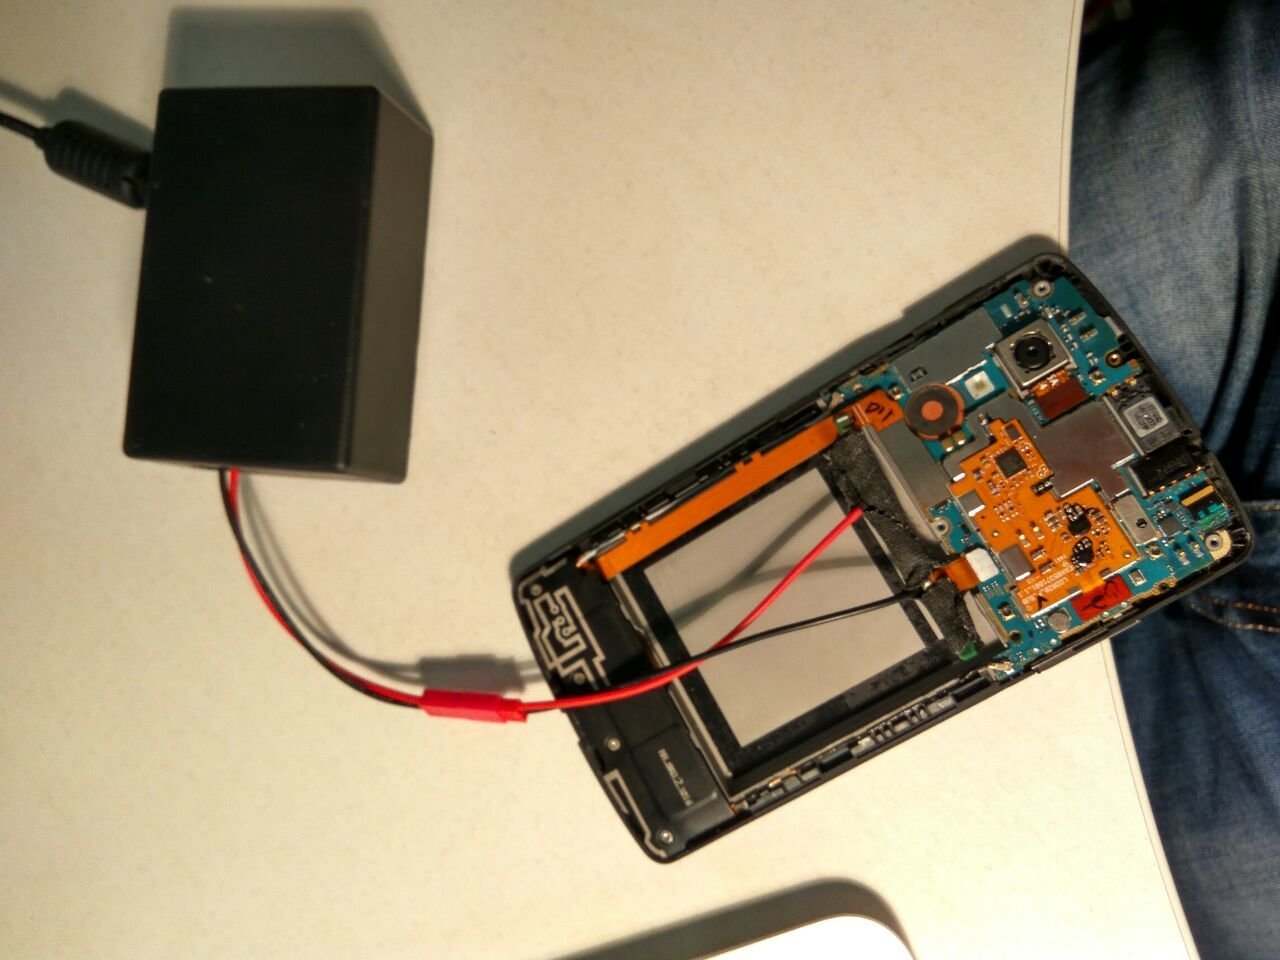
In order to power a modern phone not from a built-in battery, but from an external source, it is not enough to disassemble it and pull out the battery - modern batteries are too smart . Therefore, we pull the controller out of the battery and connect to it already.
To return the modified iPhone (or other device) to the assembled state, we drill the case and draw two wiring.
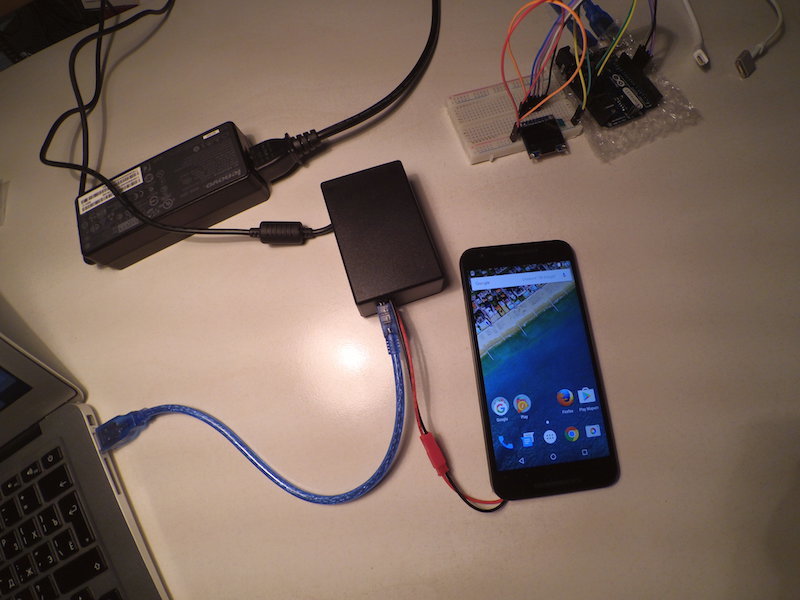
This is the box we got as a result. True, in the subway it is better not to carry it, telephone, wires, that's all ... they can not understand =)
What does it give us
We have already begun to introduce testing of our applications for power consumption, so expect improvements in this area. I will quote colleagues who use our box.
For obtaining a relevant test result with direct battery measurements with this device, five minutes is enough. If you measure “as before,” that is, look at the rate of decrease in% battery charge — it takes 6-8 hours, plus don't forget about the human factor. That is, the test time was reduced from 8 hours to 5 minutes: almost 100 times.
The current scatter of the measurement results is ± 15%. This is not ideal and it is necessary to reduce the error. However, now the credibility of the result has increased due to the exclusion of the human factor and significantly less time by 1 measurement. It’s enough to do a lot of measurements in half a day and cut off the results that have suffered from sudden bursts of incomprehensible activity on the phone.
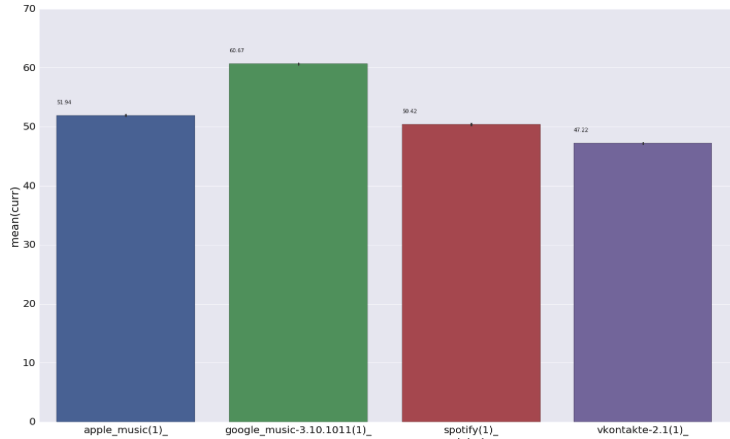
Cross-platform, and cross-device comparison of values has become possible. The unit of measurement is mA, not the “rate of charge percent reduction”, which depends on the platform, battery volume, battery “freshness”, not to mention running processes ... Compare only mA with the same launched Ya.Service on Andoird and on iOS is not. It is necessary to add a correction factor - how much each platform is eating, without Ya.Servis. But, this is again a question for half a day of measurements (and this is a coffee-chat).
A couple of words about software
To collect data from Arduino (and she just sends it over USB 500 times per second), we wrote a simple reader. On Python, there were problems with re-opening the device for reading - the second time the data was no longer read. We did not understand and just rewrote the same thing on Golang - after that everything worked.
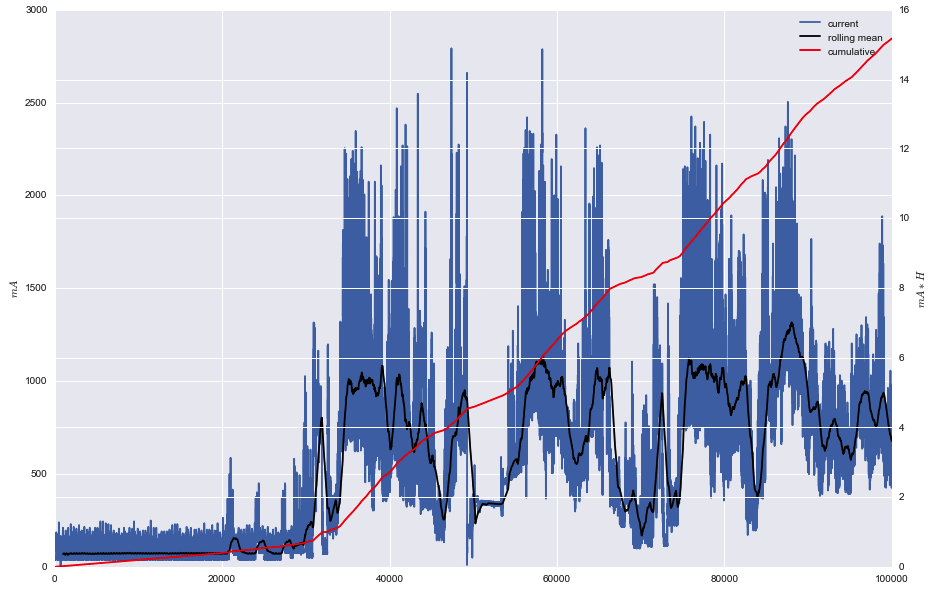
There was still a small rake waiting for us: the old data remains in the device buffer from the previous run. Therefore, now we simply discard the first 500 measurements (1 second). Then we process the data collected in .csv with a Python script (which uses Pandas and Seaborn) and get the graphics that you saw at the beginning of the article.
If you are interested in the source code of the reader, firmware and code for data processing - I can share, write in a personal.
')
Source: https://habr.com/ru/post/311046/
All Articles