We make a startup simply and technologically. Eddystone Beacon
Have you ever been to the Louvre? Got to Mona Lisa? If yes, then surely you saw only a big line in front of her, and the picture itself only from afar and not in full size. People want to learn more about the canvas, to memorize every detail of it, to find out all the details about it, so they stay close to it for a long time. But what if all this information is transferred directly to the smartphone? To make the picture itself tell the device about itself, and it conveyed the information to you?
Article author Alexei Naberezhny, in the framework of the project " Devces Lab from Google . "
In this article we describe the technology iBeacon and Eddystone, which may well solve our problem. These technologies use small Bluetooth Low Energy devices - so-called beacons. We will tell you what beacons are, how they are arranged and how to work with them.
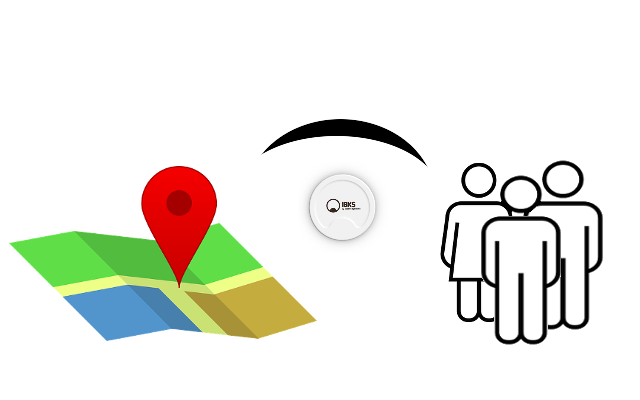
Let's see what a beacon is. For review habrahabr.ru provided a model iBKS105 , produced by Accent Systems. The beacon is a small round box with glued double-sided tape on one side for convenient fastening on any surfaces, for example, on the glass of the store.
')

This is how it looks like:

The beacon can operate on a single CR2477 battery for a full 40 months thanks to the BLE module NRF51822, produced by Nordic Semiconductors. At the same time, iBKS105 supports iBeacon and Eddystone protocols, sending a maximum of 5 Advertisment packets (1 for iBeacon and 4 for Eddystone).
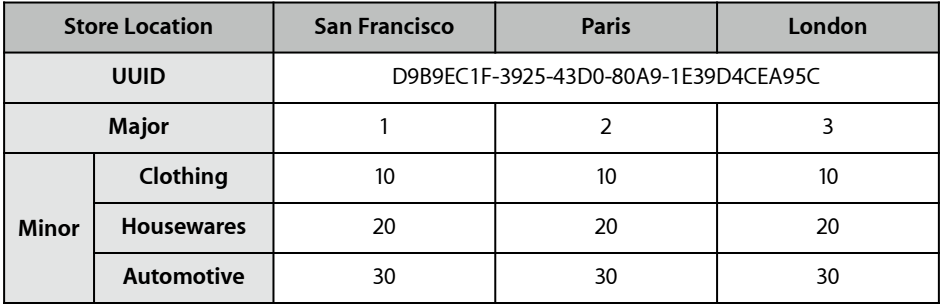
iBeacon , a closed technology introduced by Apple in 2013, provides for broadcasting one packet containing UUID (16 bytes), Major and Minor (another 2 bytes), as well as TX Power (1 byte): a total of 21 bytes. The UUID is usually used to determine the application working with the beacon, Major to determine the group of beacons, and Minor to determine the number of the beacon in a group. Apple suggests using the UUIDGEN utility to generate this information and gives the following example of determining the beacon in the store.
Apple offers a closed standard beacon setting. However, to obtain information about it, you must obtain a license iBeakon License.
Eddystone technology came up with Google in July 2015. Unlike iBeacon, the Eddystone standard is open and therefore supported by devices based on any operating system. Eddystone can do much more than its competitor: it translates up to 4 data packets - Eddystone-UID (20 bytes), Eddystone-URL (up to 20 bytes), Eddystone-TLM (14 or 18 bytes) and, from March 14, 2016 , Eddystone-EID (10 bytes). The Eddysone-UID is the equivalent of the package used in iBeacon, while the Eddystone URL passes any URL address that can be opened on the device receiving the package. Eddystone-TLM packet contains telemetry information, such as transmitter battery voltage, ambient temperature, time since switching on, etc. Eddystone-EID (Ephemeral IDs) is an encrypted identifier that allows you to register a beacon in WEB services. It supports AES encryption, as well as the latest version of Eddystone-TLM. For security purposes, when establishing a connection, the devices exchange public keys, and the beacon changes the identifier pseudo-randomly (from 1 second to 9 hours). To set up Eddystone beacons, Google invented the open standard GATT Configuration Service . You can learn more about the Eddystone protocol at the link on Github .
As already mentioned, our beacon can work with both iBeacon and Eddystone. Accent Systems has released iBKS Config Tool applications for iOS and Android, allowing you to customize their beacons. By default, the beacon can enter the setup mode only in the first 30 seconds after it is turned on, so that when acquiring a beacon, do not rush to pull out the protective tongue! Otherwise, the beacon will have to open and remove the battery, and then insert it back.
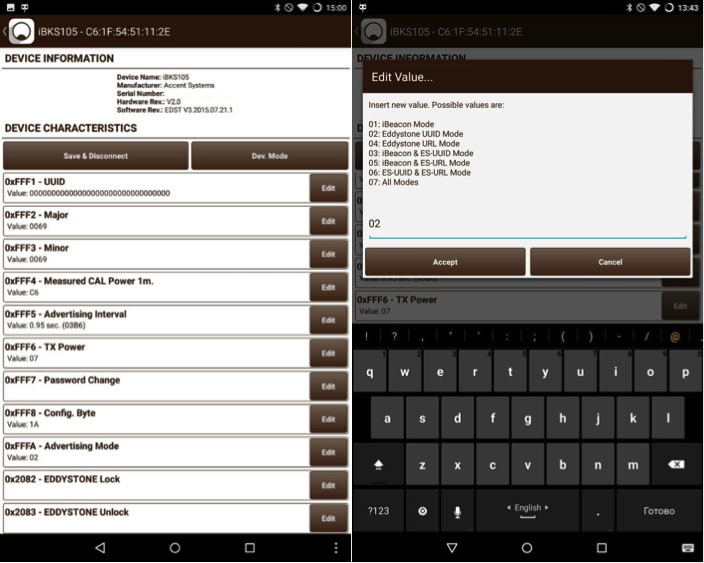
The Android application has more advantages as it allows you to see telemetry information. When you try to connect to the beacon, you will be asked for the password that was written into the non-volatile memory, if it was installed.

Then you can select the mode in which the beacon works - iBeacon, Eddystone UID, Eddystone URL or a mixture of these modes. Eddystone-EID packets are sent if one of the Eddystone modes is enabled.
Then you can try other types of settings:
Please note that if the device does not have any applications that work with beacons, iOS will not react to their appearance, while Android must show a notification (using Google Play Services). We checked the beacons using the iPhone. As it turned out, the easiest way to do this is by using Google Chrome.
Let's try to look at what the beacon sends us.
Create a test project BeaconNotifier and add permissions BLUETOOTH and BLUETOOTH_ADMIN. Also mark up our future Reciever and Service: Reciever will catch the change in Bluetooth status, and Service - look for our beacons.
Reciever catches two Action - turn on, turn off Bluetooth, as well as the intent, which we ourselves will send when opening the application, in order to revive our service for the first time.
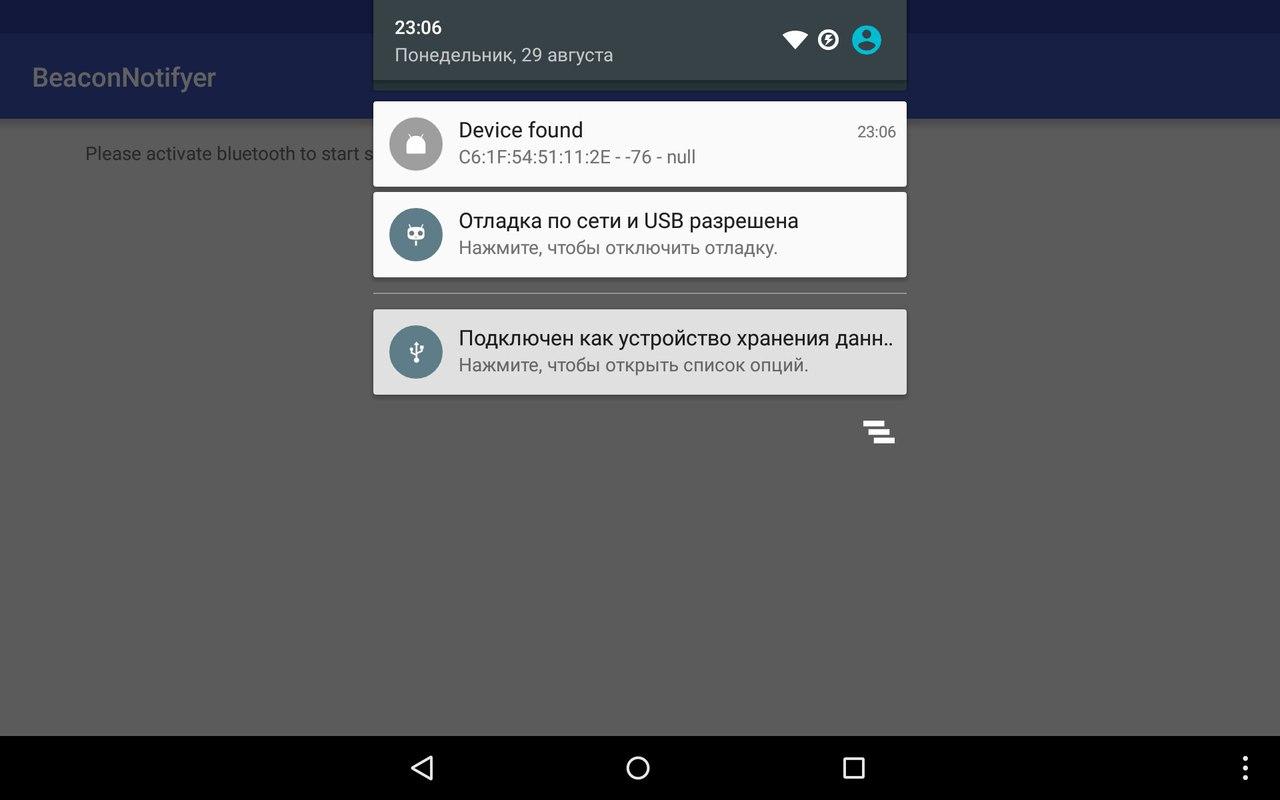
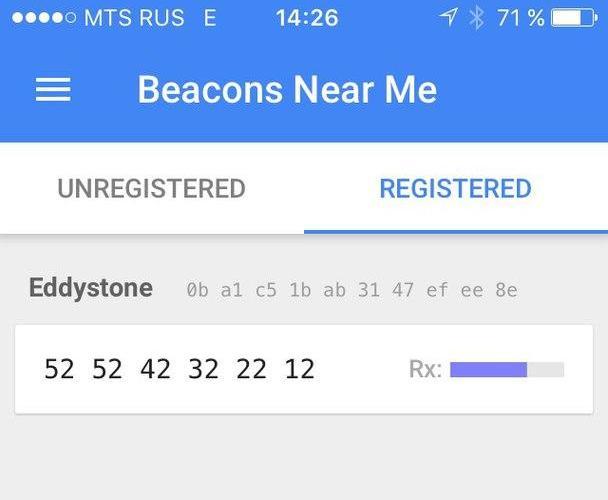
The service will contain the stream that searches for Bluetooth Low Energy devices. When we find the device, issue a notification and continue the search.
This is all you need to do to get data from the beacon. Here's what we got:
The source code of the application is available on Github .
Unfortunately, we will have to install a special application to receive information from the beacons. But not all users have it installed. It is much easier to turn on Bluetooth on your phone and immediately receive the necessary information without installing the application. This will help us Google.
Google
Admittedly, Google has invaded our world. Android OS, which occupies 82.8% of the smartphone market , has long been pushing iOS. Many iOS users prefer to install the Google Chrome browser on their smartphone. Not surprisingly, Google has become a company whose name is closely related to such a promising development as beacons. There are several online services that help complement the small amount of information that these BLE devices are capable of transmitting, for example, pubnub, but Google introduced support for its cloud service directly to Google Play Services, which can be found on almost any Android device. Therefore, we can say that Google is a monopolist in this area. Therefore, in our article we will look at Google services.
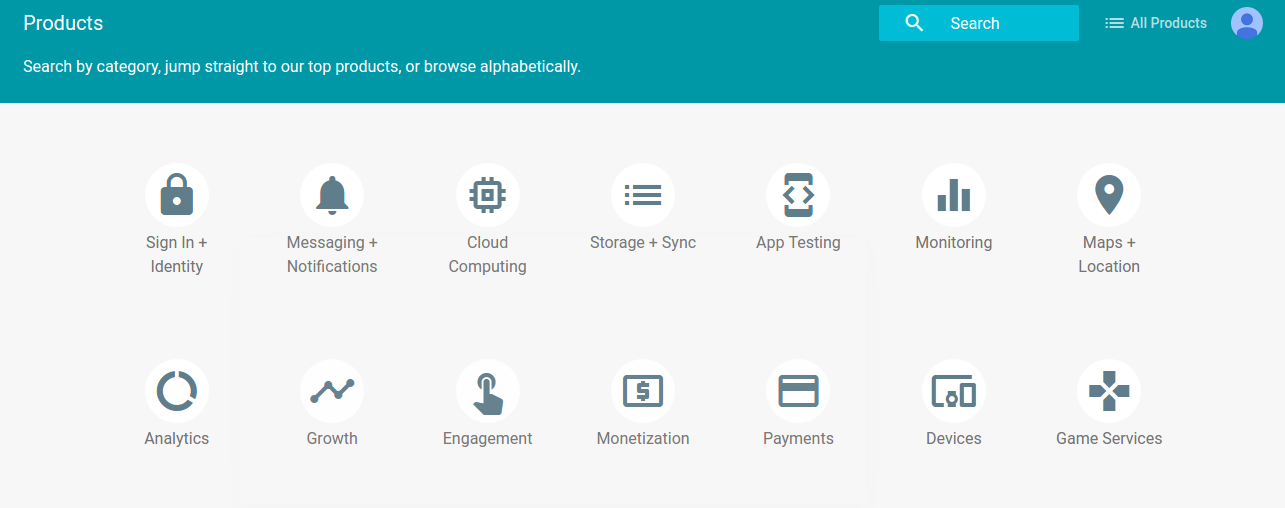
As you know, Google in its arsenal has a huge number of services for developers.
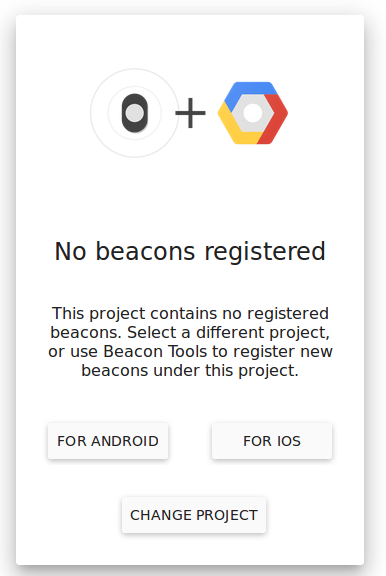
Google’s service for beacons is available at the following link: https://developers.google.com/beacons/dashboard . Google warmly welcomes us with this notification:
To use the service, you need to transfer the beacon to Eddystone transfer mode - UID or URL. For this action, we had to update the iBKS105 using the nRF Connect application.
Download the Beacon Tools app (it is available for iOS and for Android). We go there under your Google account and select our project. The beacon will appear in the “Unregistered” tab. Select it and click on “Register Beacon”. Done, the beacon is added to our project.
Now we saw a beacon on the site. This is a good sign.
Choose it to configure.
We can set the beacon description, location, floor, stability parameter, as well as other properties that are needed for specific applications.

The stability parameter determines whether the beacon is stationary or moving. If the beacon is in the store, it is logical to determine the place on the map and the floor, and also indicate that it is stationary. And if you stick a beacon on the windshield of a bus, then you should indicate that it is portable, and also not to indicate the place and floor (only if we are not in London).
Now we need to force the beacon to transmit the information we really need. Open the drop-down list “View beacon details” and select “Nearby Notifications”.
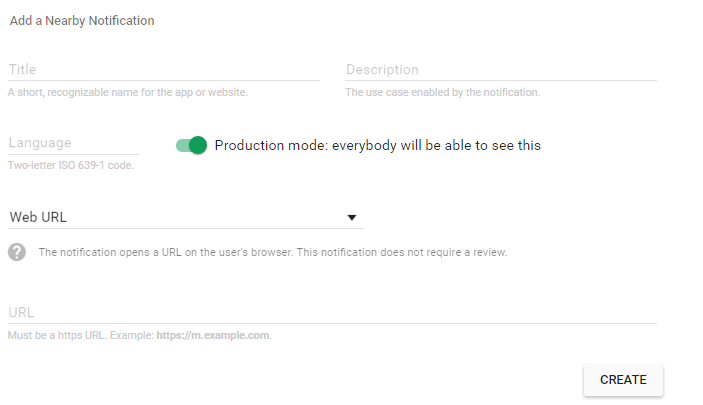
At first we see only 4 text fields, but do not underestimate the possibility of beacons! So, what can the beacon connected to Google Cloud tell us? He can:
Set the name of the notification in the Title field, and its description in the Description field. The language field is used to define the notification language so that users can see the content in their native language. The language sets the ISO 639-1 code (most often 2 lower case letters, for example, ru).
Next we see a drop-down list.
When we are done with these settings, we must click on the Create button. This will save our labors.
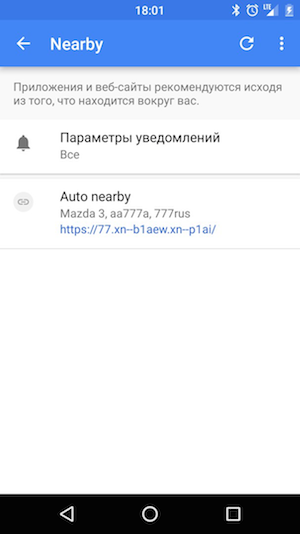
Now we can check the result. To do this, on the Android device, select in Google Settings -> Nearby Notifications -> Scan. We should see the data that we set up in the configurator on the site.
Immediately it becomes obvious that beacons - technology for programmers. We had to sit at the table for 4 hours and try to optimize everything. We asked for Beacon, dealt with localization, selected various Property. This is on condition that we are strong in understanding Package, Exported, Action, Intent, Binder and many other Android terms.
I want everything to work for the user, there was no need to install anything so that the steps for setting up the smartphone were very simple.
There is an idea about the creation of the Market Place - a service that connects people who want to organize IT-events (customers), and people who are ready to set up beacons (performers). This will be the most common bulletin board on proposals for organizing IT-events with beacons.
For example, one day the artist will receive a notification:
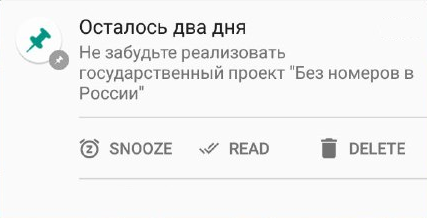
The contractor will remember that in our service he took an order to replace the license plates of Eddystone beacons. This will help road services to identify cars and reduce the number of stolen cars. Having executed it, being guided by our article, he will receive compensation, and the world - technology.
We already registered the car, only 7 million remained.
We hope that after reading this article, you will be interested in new technologies. We are sure that in a few years the beacons will become part of everyday life on a par with smartphones.
Article author Alexei Naberezhny, in the framework of the project " Devces Lab from Google . "
In this article we describe the technology iBeacon and Eddystone, which may well solve our problem. These technologies use small Bluetooth Low Energy devices - so-called beacons. We will tell you what beacons are, how they are arranged and how to work with them.
Beacon for a software engineer
Let's see what a beacon is. For review habrahabr.ru provided a model iBKS105 , produced by Accent Systems. The beacon is a small round box with glued double-sided tape on one side for convenient fastening on any surfaces, for example, on the glass of the store.
')
This is how it looks like:
The beacon can operate on a single CR2477 battery for a full 40 months thanks to the BLE module NRF51822, produced by Nordic Semiconductors. At the same time, iBKS105 supports iBeacon and Eddystone protocols, sending a maximum of 5 Advertisment packets (1 for iBeacon and 4 for Eddystone).
iBeacon , a closed technology introduced by Apple in 2013, provides for broadcasting one packet containing UUID (16 bytes), Major and Minor (another 2 bytes), as well as TX Power (1 byte): a total of 21 bytes. The UUID is usually used to determine the application working with the beacon, Major to determine the group of beacons, and Minor to determine the number of the beacon in a group. Apple suggests using the UUIDGEN utility to generate this information and gives the following example of determining the beacon in the store.
Apple offers a closed standard beacon setting. However, to obtain information about it, you must obtain a license iBeakon License.
Eddystone technology came up with Google in July 2015. Unlike iBeacon, the Eddystone standard is open and therefore supported by devices based on any operating system. Eddystone can do much more than its competitor: it translates up to 4 data packets - Eddystone-UID (20 bytes), Eddystone-URL (up to 20 bytes), Eddystone-TLM (14 or 18 bytes) and, from March 14, 2016 , Eddystone-EID (10 bytes). The Eddysone-UID is the equivalent of the package used in iBeacon, while the Eddystone URL passes any URL address that can be opened on the device receiving the package. Eddystone-TLM packet contains telemetry information, such as transmitter battery voltage, ambient temperature, time since switching on, etc. Eddystone-EID (Ephemeral IDs) is an encrypted identifier that allows you to register a beacon in WEB services. It supports AES encryption, as well as the latest version of Eddystone-TLM. For security purposes, when establishing a connection, the devices exchange public keys, and the beacon changes the identifier pseudo-randomly (from 1 second to 9 hours). To set up Eddystone beacons, Google invented the open standard GATT Configuration Service . You can learn more about the Eddystone protocol at the link on Github .
Setting the beacon
As already mentioned, our beacon can work with both iBeacon and Eddystone. Accent Systems has released iBKS Config Tool applications for iOS and Android, allowing you to customize their beacons. By default, the beacon can enter the setup mode only in the first 30 seconds after it is turned on, so that when acquiring a beacon, do not rush to pull out the protective tongue! Otherwise, the beacon will have to open and remove the battery, and then insert it back.
The Android application has more advantages as it allows you to see telemetry information. When you try to connect to the beacon, you will be asked for the password that was written into the non-volatile memory, if it was installed.
Then you can select the mode in which the beacon works - iBeacon, Eddystone UID, Eddystone URL or a mixture of these modes. Eddystone-EID packets are sent if one of the Eddystone modes is enabled.
Then you can try other types of settings:
- choose the signal strength, the frequency of sending packets (0.1 - 10 seconds);
- set a password, select the URL and UID;
- activate the developer mode, allowing you to connect to the beacon at any time and transmit telemetry packets in iBeacon mode;
- Calibrate to transmit the signal strength parameter. Such a setting is desirable for new beacons. To perform it, you need to measure the force at a certain distance from the beacon and enter it in the desired field of the configurator.
Please note that if the device does not have any applications that work with beacons, iOS will not react to their appearance, while Android must show a notification (using Google Play Services). We checked the beacons using the iPhone. As it turned out, the easiest way to do this is by using Google Chrome.
Inside Android SDK
Let's try to look at what the beacon sends us.
Create a test project BeaconNotifier and add permissions BLUETOOTH and BLUETOOTH_ADMIN. Also mark up our future Reciever and Service: Reciever will catch the change in Bluetooth status, and Service - look for our beacons.
<<b>uses-permission android:name="android.permission.BLUETOOTH"</b> /> <<b>uses-permission android:name="android.permission.BLUETOOTH_ADMIN"</b> /> <<b>uses-feature android:name="android.hardware.bluetooth_le" android:required="true"</b> /> <<b>application …</b>> <<b>activity android:name=".MainActivity"</b>> <<b>intent-filter</b>> <<b>action android:name="android.intent.action.MAIN"</b> /> <<b>category android:name="android.intent.category.LAUNCHER"</b> /> </<b>intent-filter</b>> </<b>activity</b>> <<b>receiver android:name=".BTReceiver"</b>> <<b>intent-filter</b>> <<b>action android:name="android.bluetooth.adapter.action.STATE_CHANGED"</b> /> <<b>action android:name="ru.racoondeveloper.beaconnotifyer.WAKE_RECEIVER"</b>/> </<b>intent-filter</b>> </<b>receiver</b>> <<b>service android:name=".BService"</b> /> </<b>application</b>> Reciever catches two Action - turn on, turn off Bluetooth, as well as the intent, which we ourselves will send when opening the application, in order to revive our service for the first time.
<b>public class</b> BTReceiver <b>extends</b> BroadcastReceiver { <b>private</b> Intent <b>BServiceIntent</b>; @Override <b>public void</b> onReceive(Context context, Intent intent) { <b>final</b> String action = intent.getAction(); <b>if</b> (action.equals(BluetoothAdapter.<i><b>ACTION_STATE_CHANGED</i></b>)) { <b>final int</b> state = intent.getIntExtra(BluetoothAdapter.<i><b>EXTRA_STATE</i></b>, BluetoothAdapter.<i><b>ERROR</i></b>); <b>if</b> (state == BluetoothAdapter.<i><b>STATE_TURNING_OFF</i></b>) { <i>// Bluetooth — </i> <b>if</b> (<b>BServiceIntent</b> != <b>null</b>) { context.stopService(<b>BServiceIntent</b>); <b>BServiceIntent</b> = <b>null</b>; } } <b>if</b> (state == BluetoothAdapter.<i><b>STATE_ON</i></b>) { <i>// Bluetooth — </i> <b>if</b> (<b>BServiceIntent</b> == <b>null</b>) { <b>BServiceIntent</b> = <b>new</b> Intent(context, BService.<b>class</b>); context.startService(<b>BServiceIntent</b>); } } } <b>if</b> (action.equals(<b>"ru.racoondeveloper.beaconnotifyer.WAKE_RECEIVER"</b>)) { <i>// — </i> <b>if</b> (<b>BServiceIntent</b> == <b>null</b>) { <b>BServiceIntent</b> = <b>new</b> Intent(context, BService.<b>class</b>); context.startService(<b>BServiceIntent</b>); } } } } The service will contain the stream that searches for Bluetooth Low Energy devices. When we find the device, issue a notification and continue the search.
<b>public class</b> BService <b>extends</b> Service { BeaconFinderThread <b>thread</b>; <b>boolean live </b>= <b>true</b>; @Override <b>public</b> IBinder onBind(Intent arg0) { <b>return null</b>; } @Override <b>public int</b> onStartCommand(Intent intent, <b>int</b> flags, <b>int</b> startId) { <i>// </i> <b>thread </b>= <b>new</b> BeaconFinderThread(); <b>thread</b>.start(); <b>return <i>START_STICKY</i></b>; } @Override <b>public void</b> onDestroy() { <i>// </i> <b>live </b>= <b>false</b>; <b>thread </b>= <b>null</b>; <b>super</b>.onDestroy(); } <b>private class</b> BeaconFinderThread <b>extends</b> Thread{ @Override <b>public void</b> run() { <i>// BluetoothAdapter BluetoothLeScanner</i> <b>final</b> BluetoothAdapter mBluetoothAdapter = BluetoothAdapter.<i>getDefaultAdapter</i>(); <b>final</b> BluetoothLeScanner mBluetoothLeScanner = mBluetoothAdapter.getBluetoothLeScanner(); <i>// , </i> ScanCallback mScanCallback = <b>new</b> ScanCallback() { @Override <b>public void</b> onScanResult(<b>int</b> callbackType, ScanResult result) { <i>// </i> ScanRecord mScanRecord = result.getScanRecord(); mScanRecord. String resulty = result.getDevice().getAddress() + <b>" — "</b> + result.getRssi() + <b>" — "</b> + mScanRecord.getDeviceName(); <i>// !</i> showNotification(resulty); <i>// , , </i> <b>if</b> (mBluetoothAdapter.getState() == BluetoothAdapter.<i><b>STATE_ON </i></b>&& <b>live</b>) mBluetoothLeScanner.startScan(<b>this</b>); } }; <b>if</b> (mBluetoothAdapter.getState() == BluetoothAdapter.<i><b>STATE_ON </i></b>&& <b>live</b>) mBluetoothLeScanner.startScan(mScanCallback); <b>super</b>.run(); } } <b>private void</b> showNotification(String name) { <i>// </i> Context context = getApplicationContext(); Intent notificationIntent = <b>new</b> Intent(context, MainActivity.<b>class</b>); PendingIntent contentIntent = PendingIntent.<i>getActivity</i>(context, 0, notificationIntent, PendingIntent.<i><b>FLAG_CANCEL_CURRENT</i></b>); Notification.Builder builder = <b>new</b> Notification.Builder(context); builder.setContentIntent(contentIntent) .setSmallIcon(R.mipmap.<i><b>ic_launcher</i></b>) .setContentTitle(<b>"Device found"</b>) .setContentText(name); Notification notification = builder.build(); NotificationManager notificationManager = (NotificationManager) context .getSystemService(Context.<i><b>NOTIFICATION_SERVICE</i></b>); notificationManager.notify(0, notification); } } This is all you need to do to get data from the beacon. Here's what we got:
The source code of the application is available on Github .
Unfortunately, we will have to install a special application to receive information from the beacons. But not all users have it installed. It is much easier to turn on Bluetooth on your phone and immediately receive the necessary information without installing the application. This will help us Google.
Admittedly, Google has invaded our world. Android OS, which occupies 82.8% of the smartphone market , has long been pushing iOS. Many iOS users prefer to install the Google Chrome browser on their smartphone. Not surprisingly, Google has become a company whose name is closely related to such a promising development as beacons. There are several online services that help complement the small amount of information that these BLE devices are capable of transmitting, for example, pubnub, but Google introduced support for its cloud service directly to Google Play Services, which can be found on almost any Android device. Therefore, we can say that Google is a monopolist in this area. Therefore, in our article we will look at Google services.
Setting the beacon
As you know, Google in its arsenal has a huge number of services for developers.
Google’s service for beacons is available at the following link: https://developers.google.com/beacons/dashboard . Google warmly welcomes us with this notification:
To use the service, you need to transfer the beacon to Eddystone transfer mode - UID or URL. For this action, we had to update the iBKS105 using the nRF Connect application.
We connect the beacon to the Google Beacons service
Download the Beacon Tools app (it is available for iOS and for Android). We go there under your Google account and select our project. The beacon will appear in the “Unregistered” tab. Select it and click on “Register Beacon”. Done, the beacon is added to our project.
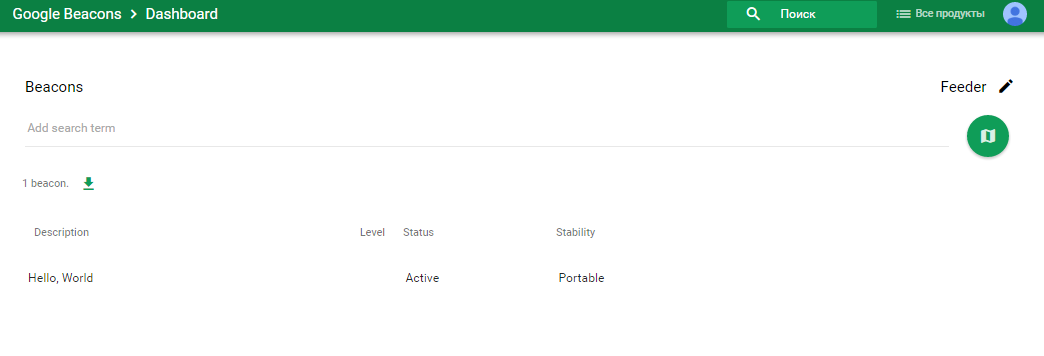
Now we saw a beacon on the site. This is a good sign.
Choose it to configure.
We can set the beacon description, location, floor, stability parameter, as well as other properties that are needed for specific applications.
The stability parameter determines whether the beacon is stationary or moving. If the beacon is in the store, it is logical to determine the place on the map and the floor, and also indicate that it is stationary. And if you stick a beacon on the windshield of a bus, then you should indicate that it is portable, and also not to indicate the place and floor (only if we are not in London).
Now we need to force the beacon to transmit the information we really need. Open the drop-down list “View beacon details” and select “Nearby Notifications”.
At first we see only 4 text fields, but do not underestimate the possibility of beacons! So, what can the beacon connected to Google Cloud tell us? He can:
- submit URL;
- suggest installing an application on the device;
- send an intent to the system, opening the application, if installed.
Set the name of the notification in the Title field, and its description in the Description field. The language field is used to define the notification language so that users can see the content in their native language. The language sets the ISO 639-1 code (most often 2 lower case letters, for example, ru).
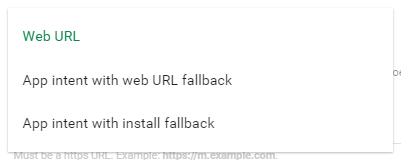
Next we see a drop-down list.
- We select the Web URL if we want the beacon to transmit any network address. Only one field is offered for setting - the address itself. Unlike the usual Eddystone URL, a beacon, a beacon using the Google service will also provide its description. Another advantage is the transmission of links of any length, in contrast to the 16 characters of the Eddystone-URL protocol.
- If you want the beacon to advertise any application to users, select App intent with install fallback. There are 3 fields - 2 we use to select the intent, and in one we write the name of the package of the desired application. If the application is not installed, we will transfer to Google Play. Otherwise, the application will be sent an intent.
- Another option - App intent with web URL fallback. It is similar to the previous one, but if the application is not installed on the user's device, we will be sent to the specified URL address.
When we are done with these settings, we must click on the Create button. This will save our labors.
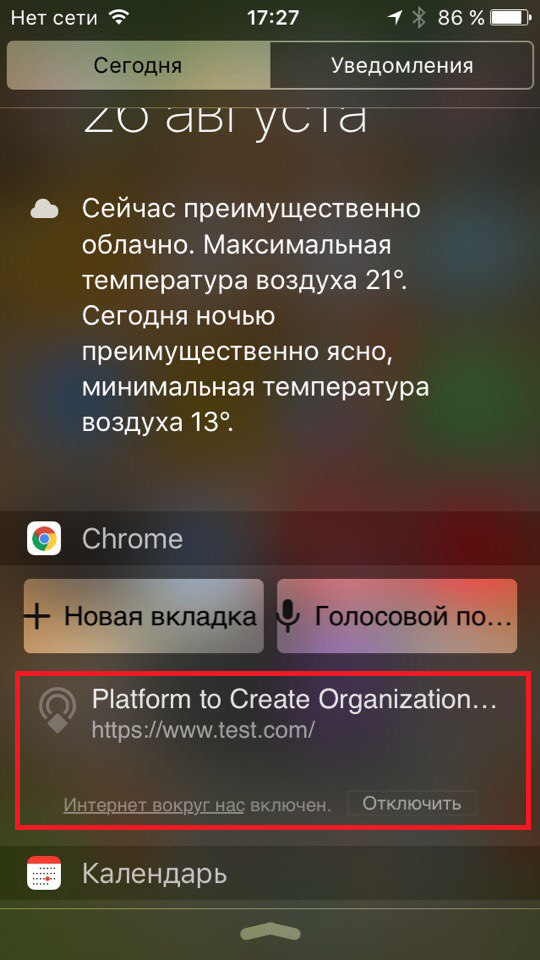
Now we can check the result. To do this, on the Android device, select in Google Settings -> Nearby Notifications -> Scan. We should see the data that we set up in the configurator on the site.
Is Eddystone Difficult To Set Up?
Immediately it becomes obvious that beacons - technology for programmers. We had to sit at the table for 4 hours and try to optimize everything. We asked for Beacon, dealt with localization, selected various Property. This is on condition that we are strong in understanding Package, Exported, Action, Intent, Binder and many other Android terms.
I want everything to work for the user, there was no need to install anything so that the steps for setting up the smartphone were very simple.
There is an idea about the creation of the Market Place - a service that connects people who want to organize IT-events (customers), and people who are ready to set up beacons (performers). This will be the most common bulletin board on proposals for organizing IT-events with beacons.
For example, one day the artist will receive a notification:
The contractor will remember that in our service he took an order to replace the license plates of Eddystone beacons. This will help road services to identify cars and reduce the number of stolen cars. Having executed it, being guided by our article, he will receive compensation, and the world - technology.
We already registered the car, only 7 million remained.
Conclusion
We hope that after reading this article, you will be interested in new technologies. We are sure that in a few years the beacons will become part of everyday life on a par with smartphones.
Source: https://habr.com/ru/post/310486/
All Articles