The Complete Docker Practical Guide: From Scratch to AWS Cluster

Content
- Questions and answers
- Introduction
- 1.0 Playing with Busybox
- 2.0 Web Applications and Docker
- 3.0 Multiple Container Environments
- 4.0 Conclusion
Questions and answers
What is a docker?
The definition of Docker on Wikipedia is:
software to automate the deployment and management of applications in a virtualization environment at the operating system level; allows you to "pack" the application with all its environments and dependencies into a container, and also provides a container management environment.
Wow! How much information. In simple words, Docker is a tool that allows developers, system administrators, and other professionals to deploy their sandbox applications (called containers ) to run on a target operating system, such as Linux. The key advantage of Docker is that it allows users to package the application with all its dependencies in a standardized module for development. Unlike virtual machines, containers do not create such an extra load, so you can use the system and resources more efficiently with them.
What is a container?
The standard in the industry today is to use virtual machines to run applications. Virtual machines run applications inside the guest operating system that runs on the virtual hardware of the main server operating system.
Virtual machines are great for completely isolating the process for an application: almost no problems with the underlying operating system can affect the software of the guest OS, and vice versa. But for this isolation you have to pay. There is a significant computational load required for guest OS virtualization.
Containers use a different approach: they provide isolation levels similar to virtual machines, but due to the proper use of the low-level mechanisms of the main operating system, they do so with a much smaller load.
Why should I use them?
Docker's takeoff was truly epic. Despite the fact that the containers themselves are not a new technology, until Docker they were not so common and popular. Docker changed the situation by providing a standard API, which greatly simplified the creation and use of containers, and allowed the community to work together on container libraries. An article published in The Register in mid-2014 states that Google supports more than two billion containers per week .
Google Trends for 'Docker'
In addition to Docker's continued growth, the company-developer Docker Inc. was valued at more than two billion dollars! With its advantages in efficiency and portability, Docker began to receive more and more support, and now he is at the head of the containerization movement. As modern developers, we need to understand this trend and find out how we can benefit from it.
What will this manual teach me?
This is a single and complete manual on all aspects of working with Docker. In addition to explaining the myths about Docker and his ecosystem, it will allow you to get a little experience in building and deploying your own web applications in the cloud. We will use Amazon Web Services for deploying static sites, and two dynamic web applications will be secured on EC2 using Elastic Beanstalk and Elastic Container Service . Even if you never deploili, this manual will give you everything you need.
How to use this document
This document contains several sections, each of which is devoted to a particular aspect of Docker. In each section, we will enter commands or write code. All code is available in the Github repository .
Introduction
Note: This manual uses Docker version 1.12.0-rc2 . If you encounter an incompatibility, please send an issue . Thank!
Pre-requisites
All you need to complete this tutorial is basic command line skills and a text editor. Experience in developing web applications will be useful, but not required. During the work we will encounter several cloud services. You will need to create an account on these sites:
Computer settings
Installing and configuring all the necessary tools can be a difficult task, but, fortunately, Docker has become quite stable, and installing and running it on any OS has become a very simple task. So, install Docker.
Docker
A few more releases ago, the launch of Docker on OS X and Windows was problematic. But the development team has done a tremendous job, and today the whole process has nowhere else. This tutorial getting started includes detailed installation instructions for Mac , Linux and Windows .
Check if everything is installed correctly:
$ docker run hello-world Hello from Docker. This message shows that your installation appears to be working correctly. ... Python
Python is usually pre-installed on OS X and on most Linux distributions. If you need to install Python, then download the installer here .
Check version:
$ python --version Python 2.7.11 We will use pip to install packages for our application. If pip is not installed, then download the version for your system.
To check, run the following command:
$ pip --version pip 7.1.2 from /Library/Python/2.7/site-packages/pip-7.1.2-py2.7.egg (python 2.7) Java (optional)
The application we are developing will use Elasticsearch for storage and retrieval. To run Elasticsearch locally, you'll need Java. In this tutorial, everything will run inside the container, so you don’t need to have Java locally. If Java is installed, the java -version should generate a similar output:
$ java -version java version "1.8.0_60" Java(TM) SE Runtime Environment (build 1.8.0_60-b27) Java HotSpot(TM) 64-Bit Server VM (build 25.60-b23, mixed mode) 1.0 Playing with Busybox
Now that everything you need is set, it's time to get to work. In this section, we will launch the Busybox container on our system and try to run the docker run .
To get started, run the following command:
$ docker pull busybox Attention: depending on how you installed Docker on your system, you may
permission deniedmessages. If you are on a Mac, then make sure that the Docker engine is running. If you're on Linux, then run this command withsudo. Or you can create a docker group to get rid of this problem.
The pull command downloads the busybox image from Docker's register and saves it locally. You can use the docker images to view a list of images in the system.
$ docker images REPOSITORY TAG IMAGE ID CREATED VIRTUAL SIZE busybox latest c51f86c28340 4 weeks ago 1.109 MB 1.1 Docker Run
Fine! Now let's run the Docker container with this image. For this we use the docker run magic command:
$ docker run busybox $ Wait, nothing happened! Is this a bug? Well no. Under the hood, a lot of things happened. The docker client found an image (in our case, busybox), loaded the container and ran the command inside this container. We did the docker run busybox , but did not specify any commands, so the container was loaded, an empty command was launched and the program was terminated. Well, yes, somehow offensive, so let's do something more interesting.
$ docker run busybox echo "hello from busybox" hello from busybox Hurray, finally some kind of conclusion. In our case, the Docker client obediently launched the echo command inside the container, and then left it. You probably noticed that everything happened very quickly. Now imagine how you need to boot a virtual machine, run a command in it and turn it off. Now it’s clear why the containers are said to be fast!
Now let's take a look at the docker ps . It displays a list of all running containers.
$ docker ps CONTAINER ID IMAGE COMMAND CREATED STATUS PORTS NAMES There are no containers now, so an empty line is displayed. Not very useful, so let's run a more useful option: docker ps -a
$ docker ps -a CONTAINER ID IMAGE COMMAND CREATED STATUS PORTS NAMES 305297d7a235 busybox "uptime" 11 minutes ago Exited (0) 11 minutes ago distracted_goldstine ff0a5c3750b9 busybox "sh" 12 minutes ago Exited (0) 12 minutes ago elated_ramanujan Now we see a list of all the containers that we launched. In the STATUS column, you can see that the containers completed their work a few minutes ago.
You are probably wondering how to run more than one command in a container. Let's try:
$ docker run -it busybox sh / # ls bin dev etc home proc root sys tmp usr var / # uptime 05:45:21 up 5:58, 0 users, load average: 0.00, 0.01, 0.04 The run command with the -it flag connects the interactive tty to the container. Now you can run as many commands as you like inside. Try it.
Dangerously! : If you want a thrill, you can try the
rm -rf binin a container. But make sure you run it inside the container, not outside . If you do it outside on your computer, it will be very bad, and commands likels,echowill stop working. When everything inside the container stops working, just exit and restart it with thedocker run -it busybox sh. The docker creates a new container at launch, so everything will work again.
On this exciting tour of the capabilities of the docker run team is over. Most likely, you will use this command quite often. So it is important that we understand how to handle it. To learn more about run , use docker run --help , and see a full list of supported flags. Soon we will see some more ways to use the docker run .
Before continuing, let's take a quick look at the removal of containers. We saw above that with the help of the docker ps -a you can still see the remnants of the completed containers. Throughout this tutorial, you will run the docker run several times, and the remaining, homeless containers will eat up disk space. So I made it a rule to remove containers after completing work with them. To do this, use the docker rm . Just copy the ID (several) from the output above and pass the parameters to the command.
$ docker rm 305297d7a235 ff0a5c3750b9 305297d7a235 ff0a5c3750b9 When deleted, identifiers will be displayed again. If you need to remove a lot of containers, instead of manually copying and pasting, you can do this:
$ docker rm $(docker ps -a -q -f status=exited) This command removes all containers that have exited status. The -q flag returns only numeric IDs, and the -f flag filters output based on the provided conditions. The last useful detail is that the --rm flag can be passed to the docker run --rm , then the container will be automatically deleted upon completion. This is very useful for one-time launches and experiments with Docker.
You can also delete unnecessary images with the docker rmi .
1.2 Terminology
In the previous section, we used a lot of Docker-specific jargon, and this can be confusing to many. Before continuing, let's examine some terms that are often used in the Docker ecosystem.
- Images (images) - Schemes of our application, which are the basis of containers. In the example above, we used the
docker pullto download the busybox image. - Containers (containers) - Created on the basis of the image and run the application itself. We created the container with the
docker run, and used the busybox image that we downloaded earlier. The list of running containers can be viewed using thedocker ps. - Docker Daemon — A background service running on a host machine that is responsible for creating, launching, and destroying Docker containers. A daemon is a process that runs on the operating system with which the client interacts.
- Docker Client ( Docker client) - A command line utility that allows the user to interact with the daemon. There are other forms of client, for example, Kitematic , with a graphical interface.
- Docker Hub - Register Docker-images. Roughly speaking, the archive of all available images. If necessary, you can keep your own register and use it to get images.
2.0 Web Applications and Docker
Super! Now we have learned how to work with the docker run , played with several containers and understood the terminology. Armed with this knowledge, we are ready to move on to real things: deploying web applications with Docker!
2.1 Static sites
Let's start small. First, consider the simplest static website. Download the image from the Docker Hub, run the container and see how easy it will be to start the web server.
Go. For a one-page site, we need an image that I created in advance for this tutorial and placed in the register - prakhar1989/static-site . You can download the image directly with the docker run .
$ docker run prakhar1989/static-site Since the image does not exist locally, the client first downloads the image from the register, and then starts it. If everything is okay, then you will see the message Nginx is running... in the terminal. Now the server is running. How to see the site in action? What port is the server running on? And, most importantly, how to directly reach the container from the host container?
In our case, the client does not open any ports, so you will need to restart the docker run to make the ports public. At the same time, let's make sure that the terminal is not attached to the running container. In this case, you can safely close the terminal, and the container will continue to work. This is called detached mode.
$ docker run -d -P --name static-site prakhar1989/static-site e61d12292d69556eabe2a44c16cbd54486b2527e2ce4f95438e504afb7b02810 The -d flag will detach the terminal, the -P flag will make all open ports public and random, and finally the --name flag is the name we want to give to the container. Now you can see the ports with the docker port [CONTAINER] .
$ docker port static-site 80/tcp -> 0.0.0.0:32769 443/tcp -> 0.0.0.0:32768 Open http: // localhost: 32769 in your browser.
Note: If you are using the docker-toolbox, you may need to use
docker-machine ip defaultto get the IP address.
You can also mark your port. The client will redirect connections to it.
$ docker run -p 8888:80 prakhar1989/static-site Nginx is running... 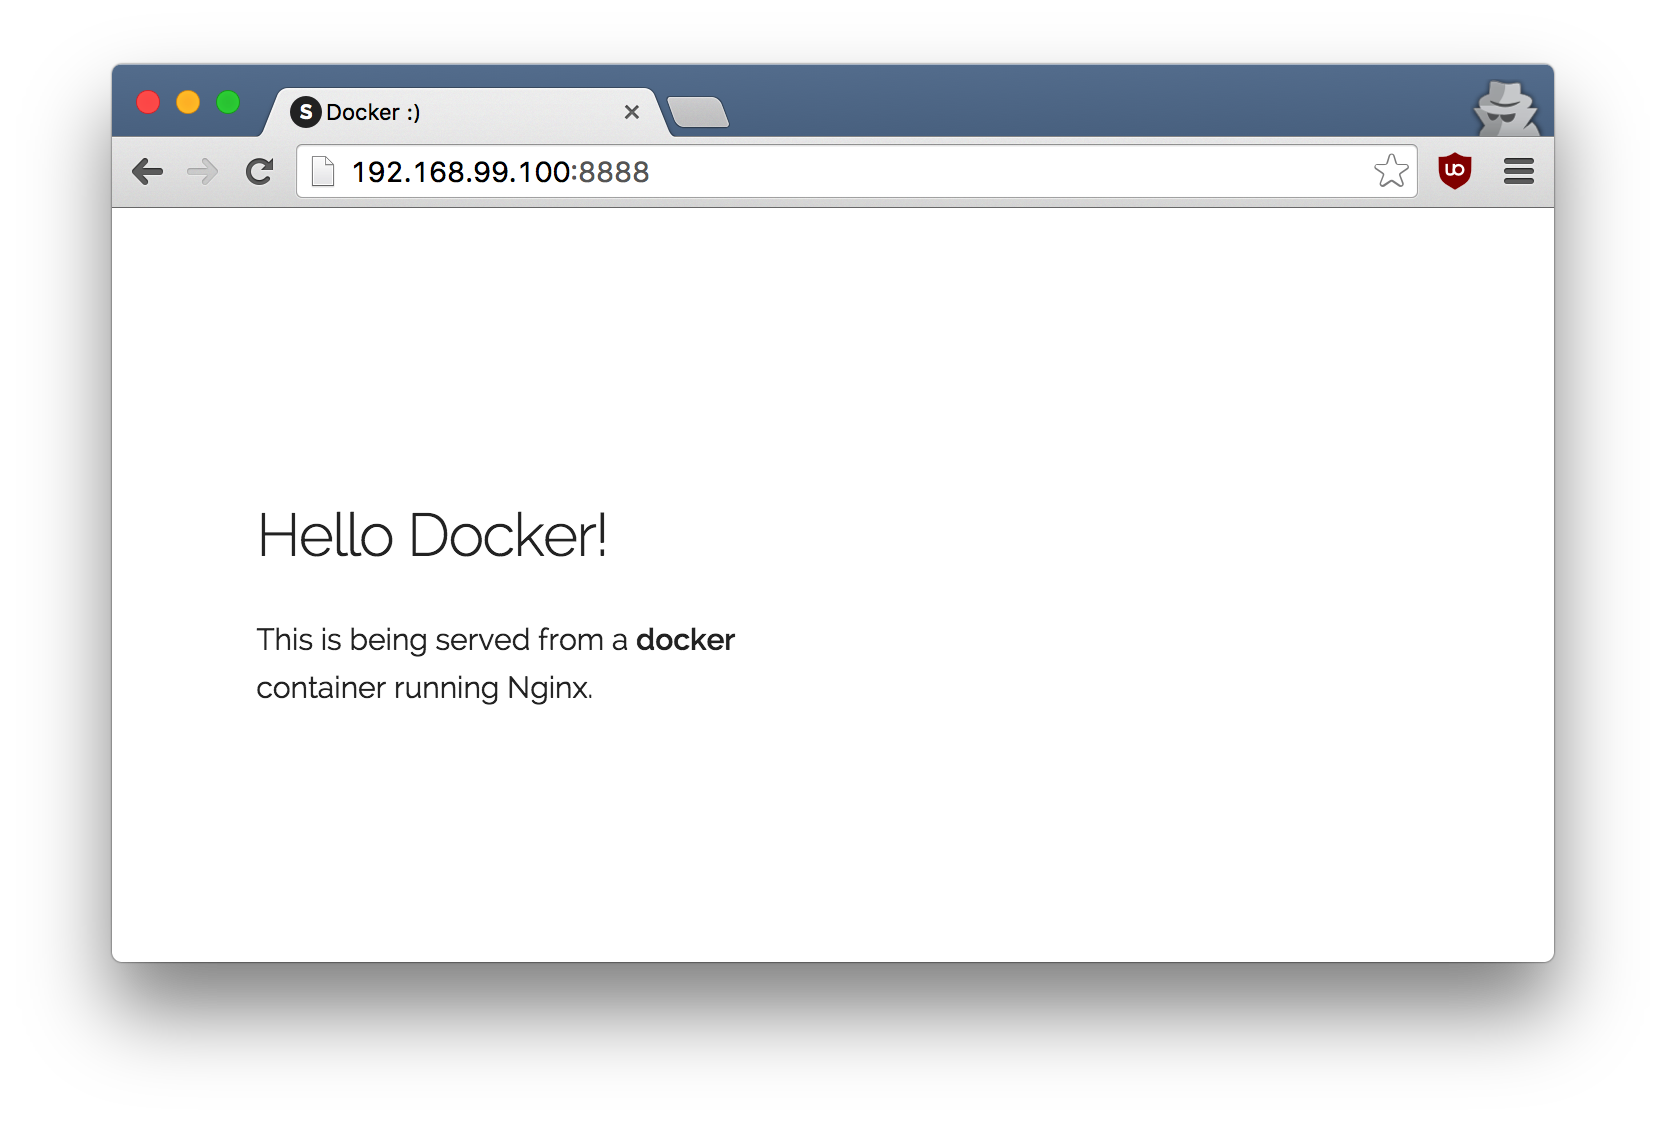
To stop a container, launch docker stop and specify the identifier (ID) of the container.
Agree, everything was very simple. To set this up on a real server, you just need to install Docker and run the command above. Now that you have seen how to run a web server inside an image, you are probably wondering - how to create your own Docker image? We will explore this topic in the next section.
2.2 Images
We have dealt with images earlier, but in this section we take a deeper look: what are Docker images and how to create our own images. Finally, we use our own image to run the application locally, and then upload it to AWS to show friends. Cool? Cool! Let's start.
Images are the basis for containers. In the last example, we downloaded ( pull ) an image called Busybox from the register, and asked the Docker client to launch a container based on that image. To see a list of images available locally, use the docker images .
$ docker images REPOSITORY TAG IMAGE ID CREATED VIRTUAL SIZE prakhar1989/catnip latest c7ffb5626a50 2 hours ago 697.9 MB prakhar1989/static-site latest b270625a1631 21 hours ago 133.9 MB python 3-onbuild cf4002b2c383 5 days ago 688.8 MB martin/docker-cleanup-volumes latest b42990daaca2 7 weeks ago 22.14 MB ubuntu latest e9ae3c220b23 7 weeks ago 187.9 MB busybox latest c51f86c28340 9 weeks ago 1.109 MB hello-world latest 0a6ba66e537a 11 weeks ago 960 B This is a list of images that I downloaded from the register, as well as those that I did myself (see soon how to do it). TAG is a specific snapshot or snapshot of an image, and IMAGE ID is the corresponding unique image identifier.
For simplicity, you can treat the image as a git repository. You can commit images with changes, and you can have several versions. If you do not specify a specific version, the client defaults to the latest . For example, you can download a specific version of the ubuntu image:
$ docker pull ubuntu:12.04 To get a new Docker image, you can download it from the registry (such as Docker Hub) or create your own. There are tens of thousands of images on the Docker Hub . You can search directly from the command line using docker search .
It is important to understand the difference between basic and child images:
- Base images (base images) are images that do not have a parent image. These are usually operating system images such as ubuntu, busybox or debian.
- Child images (child images) are images that are built on basic images and have additional functionality.
There are official and custom images, and any of them can be basic and child.
- Official images are images that are officially supported by the Docker team. Usually in their name one word. In the list above,
python,ubuntu,busyboxandhello-worldare basic images. - Custom images are images created by ordinary users like you and me. They are built on basic images. Usually, they are named after the
user/image-nameformat.
2.3 Our first image
Now that we understand better what images are and what they are, it's time to create our own image. The goal of this section is to create an image with a simple application on Flask . For this tutorial, I made a small application that displays a random gif with a cat. Well, because who doesn't love cats? Clone this repository to your local machine.
First, let's verify that the application is running locally. Enter the flask-app directory with the cd and install the dependencies.
$ cd flask-app $ pip install -r requirements.txt $ python app.py * Running on http://0.0.0.0:5000/ (Press CTRL+C to quit) If all is well, then you will see the output as in the example above. Go to http: // localhost: 5000 to see the application in action.
Note: If the
pip installcommand crashes with "permission denied" errors, then try running it withsudo. If you do not want to install custom packages at the system level, use the commandpip install --user -r requirements.txt.
Looks great, right? Now you need to create an image with the application. As mentioned above, all custom images are based on the base image. Since our application is written in Python, we need a basic Python 3 image. In particular, we need a version of python:3-onbuild base image with Python.
What is the version of onbuild , you ask?
These images include several ONBUILD triggers, which are usually enough to quickly deploy an application. When building, the
requirements.txtfile will be copied,pip installwill be launched with this file, and then the current directory will be copied to/usr/src/app.
In other words, the onbuild version includes helpers that automate the boring application launch processes. Instead of manually performing these tasks (or writing scripts), the images do everything for you. Now we have all the ingredients for creating our own image: a working web application and a basic image. How to do it? Answer: use Dockerfile .
2.4 Dockerfile
Dockerfile is a simple text file that contains a list of Docker client commands. This is an easy way to automate the image creation process. The great thing is that the commands in Dockerfile are almost identical to their Linux counterparts. This means that, in principle, no new syntax needs to be learned in order to start working with dockerfiles.
In the application directory there is a Dockerfile, but since we are doing everything for the first time, we need to create it from scratch. Create a new empty file in your favorite text editor, and save it in the same directory as the flask application. Name the file Dockerfile .
To begin, let us indicate the base image. To do this, use the keyword FROM .
FROM python:3-onbuild Then usually indicate the commands for copying files and installing dependencies. But fortunately, the onbuild version of the base image takes over these tasks. Next we need to specify the port that should be opened. Our application runs on port 5000, so we specify it:
EXPOSE 5000 The last step is to specify the command to start the application. This is just python ./app.py . To do this, use the cmd command:
CMD ["python", "./app.py"] The main purpose of a CMD is to tell the container which commands to execute at startup. Now our Dockerfile ready. Here is what it looks like:
# our base image FROM python:3-onbuild # specify the port number the container should expose EXPOSE 5000 # run the application CMD ["python", "./app.py"] Now you can create an image. The docker build deals with the complex task of creating an image based on Dockerfile .
The listing below shows the process. Before you run the command yourself (do not forget the dot at the end), check that there is your username instead of mine. Username must match what was used when registering on the Docker hub . If you have not registered yet, do it before executing the command. The docker build pretty simple: it takes an optional tag with the -t flag and the path to the directory where the Dockerfile .
$ docker build -t prakhar1989/catnip . Sending build context to Docker daemon 8.704 kB Step 1 : FROM python:3-onbuild # Executing 3 build triggers... Step 1 : COPY requirements.txt /usr/src/app/ ---> Using cache Step 1 : RUN pip install --no-cache-dir -r requirements.txt ---> Using cache Step 1 : COPY . /usr/src/app ---> 1d61f639ef9e Removing intermediate container 4de6ddf5528c Step 2 : EXPOSE 5000 ---> Running in 12cfcf6d67ee ---> f423c2f179d1 Removing intermediate container 12cfcf6d67ee Step 3 : CMD python ./app.py ---> Running in f01401a5ace9 ---> 13e87ed1fbc2 Removing intermediate container f01401a5ace9 Successfully built 13e87ed1fbc2 If you do not have a python:3-onbuild image python:3-onbuild , then the client will download it first, and then take up the creation of your image. So, the output on the screen may differ from mine. Take a good look at the onbuild triggers. If everything went well, the image is ready! Run docker images and see your image in the list.
The last step is to run the image and test its performance (replace username with your own):
$ docker run -p 8888:5000 prakhar1989/catnip * Running on http://0.0.0.0:5000/ (Press CTRL+C to quit) Go to the URL and see the application in work.
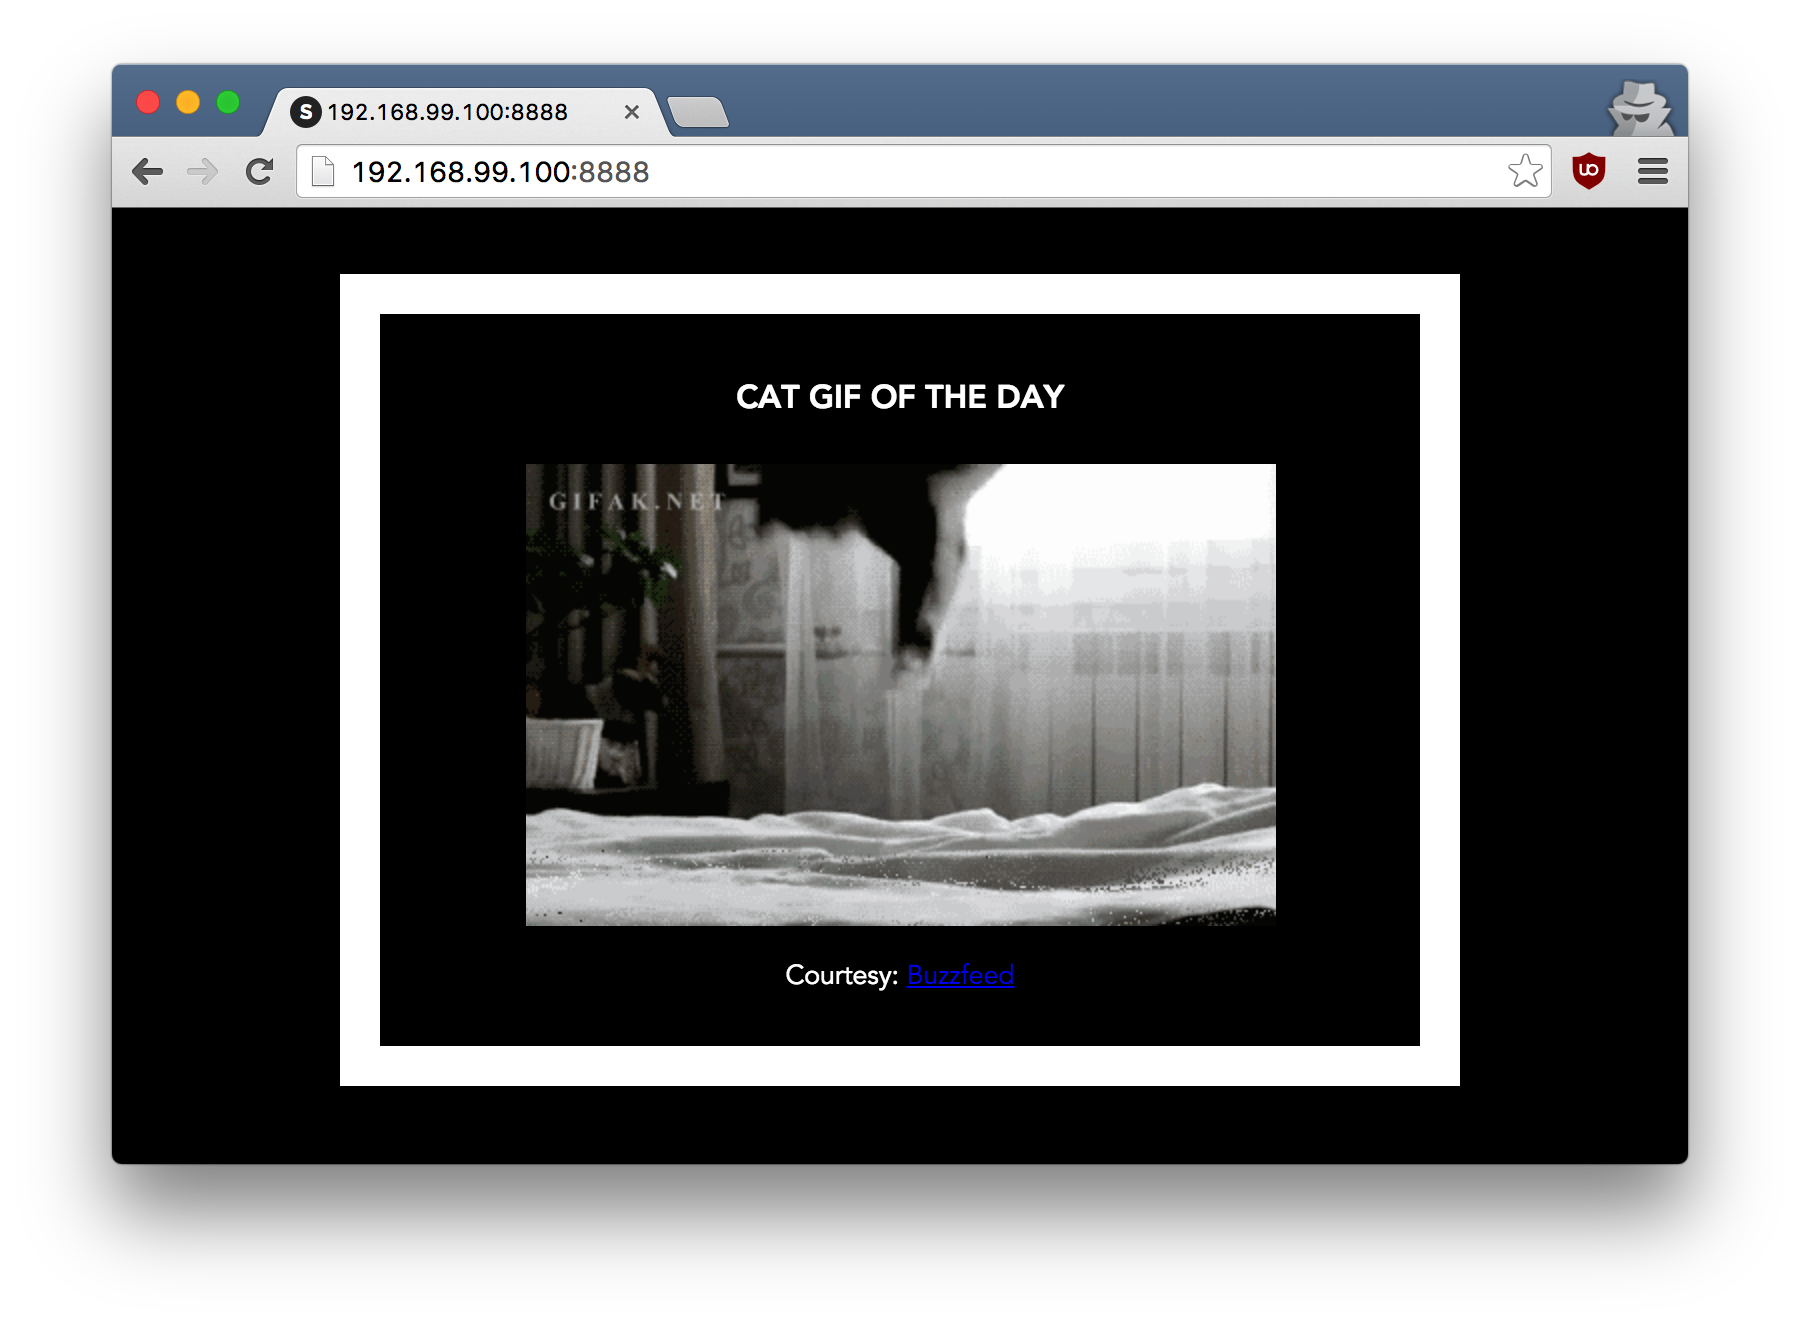
Congratulations! You have successfully created your first image of Docker!
2.5 Docker on AWS
What good is an app that cannot be shown to friends, right? So in this section we will learn how to deploy our awesome application to the cloud. We will use AWS Elastic Beanstalk to solve this problem in a couple of clicks. We will see how using Beanstalk to easily manage and scale our application.
Docker push
The first thing to do before deploying to AWS is to publish our image in the register so that you can download it from AWS. There are several Docker registers (or you can create your own ). For starters, let's use the Docker Hub . Just follow:
$ docker push prakhar1989/catnip If this is your first publication, the client will ask you to log in. Enter the same information that you use to access Docker Hub.
$ docker login Username: prakhar1989 WARNING: login credentials saved in /Users/prakhar/.docker/config.json Login Succeeded Do not forget to replace the image name with your own. It is very important to save the username/image_name format so that the client understands where to publish the image.
After that you can look at your image on the Docker Hub. For example, here is the page of my image.
Note: one important point that should be clarified before continuing is that it is not necessary to store the image in a public register (or in any other register at all) in order to deploy it on AWS. If you are writing code for the next multi-million dollar startup unicorn, you can skip this step. We publish our image to simplify deploy, skipping a few configuration steps.
Now our image is online, and any docker client can play around with it using a simple command:
$ docker run -p 8888:5000 prakhar1989/catnip If in the past you suffered with the installation of a local work environment and attempts to share your configuration with colleagues, then you understand how cool it sounds. That's why Docker is power!
Beanstalk
AWS Elastic Beanstalk (EB) is PaaS (Platform as a Service - platform as a service) from Amazon Web Services. If you used Heroku, Google App Engine, etc., then everything will be familiar. As a developer, you tell EB how to run your application, and EB does everything else, including scaling, monitoring, and even updates. In April 2014, EB added the ability to run Docker containers, and we will use this opportunity for deployment. EB , , - .
, AWS . , . . , , , .
:
- AWS .
- Elastic Beanstalk. compute, . .
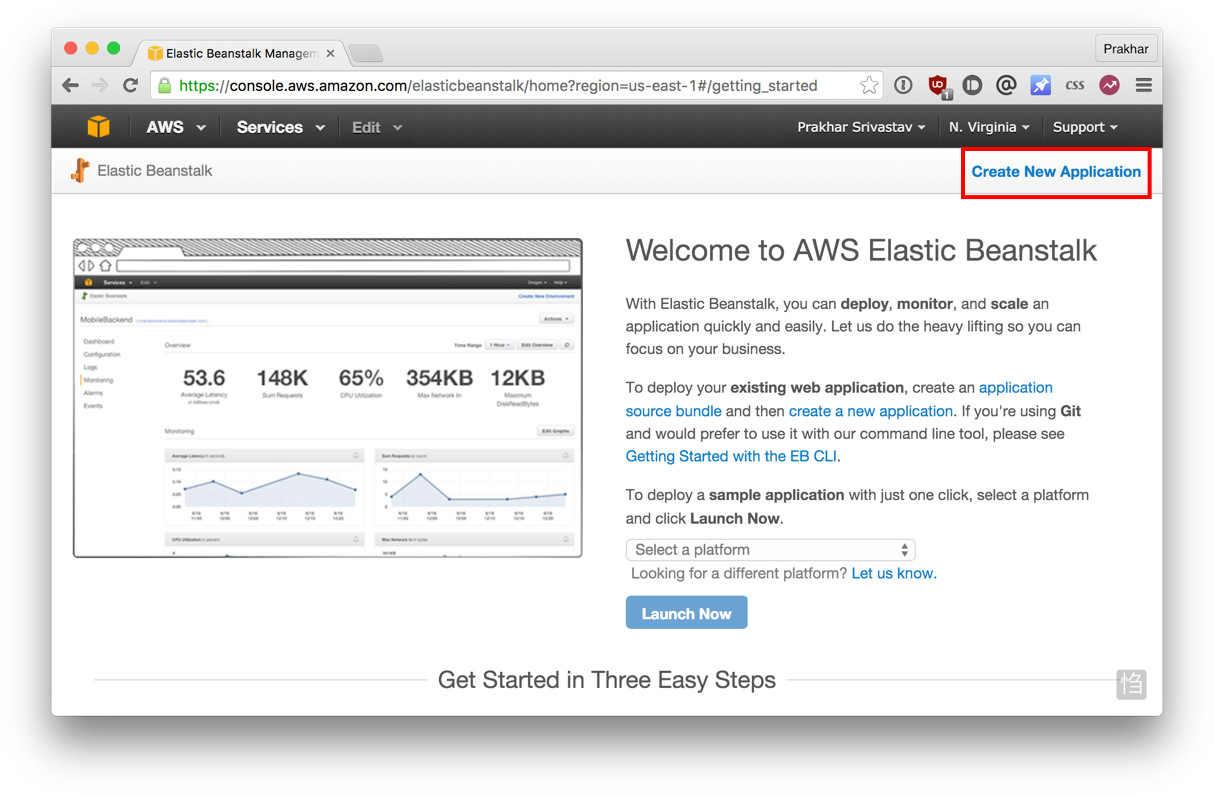
- "Create New Application" .
- ( ) , , .
- New Environment Web Server Environment .
- . Docker . Environment type . Click Next.
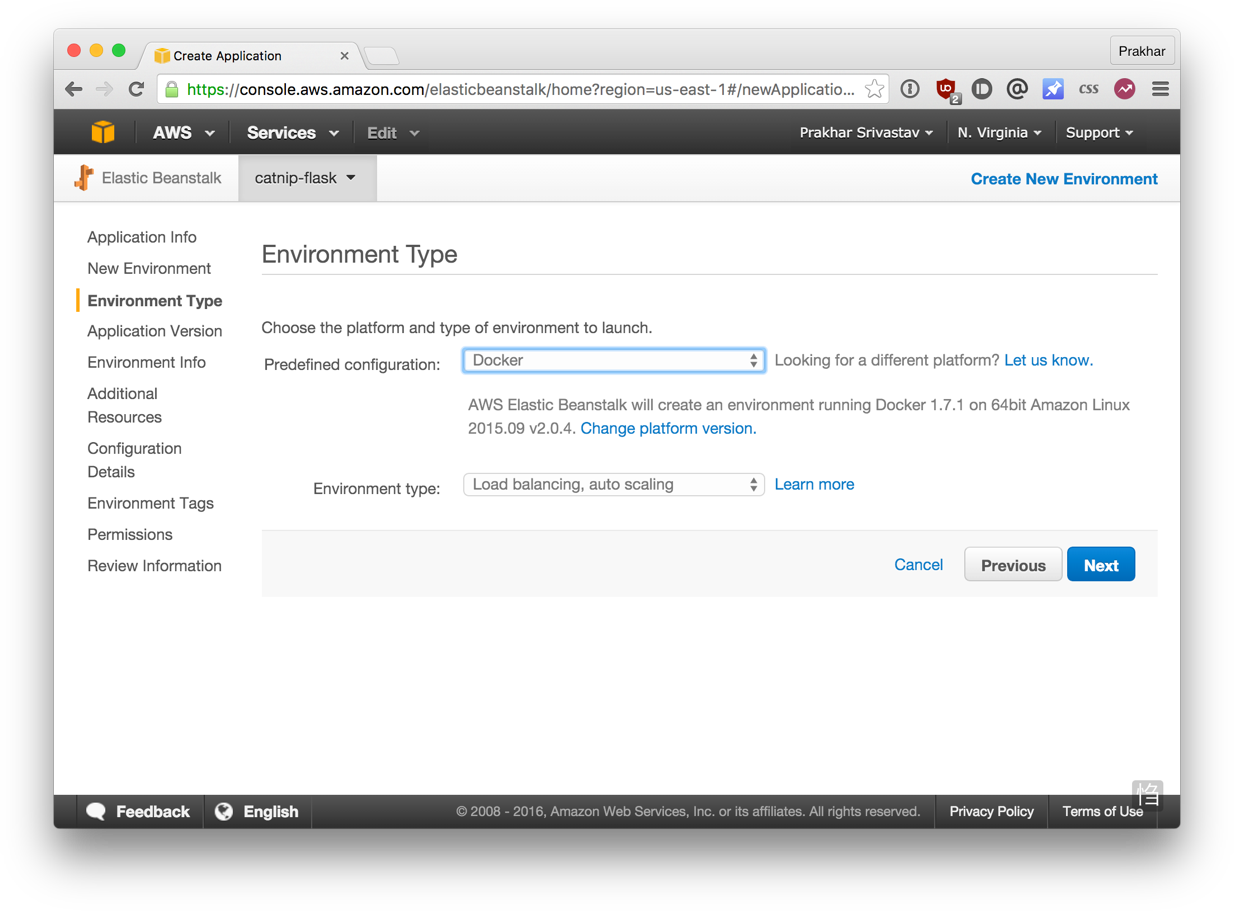
- EB . Dockerrun.aws.json
flask-appName, . , . "upload your own" . - , URL. URL , - .
- Additional Resources . Next Configuration Details .
t1.micro. , AWS. , . , , . .- Environment Tags and Permissions , Next . Review . , Launch .
- . . , .
, Dockerrun.aws.json . AWS, . EB .
{ "AWSEBDockerrunVersion": "1", "Image": { "Name": "prakhar1989/catnip", "Update": "true" }, "Ports": [ { "ContainerPort": "5000" } ], "Logging": "/var/log/nginx" } . EB .
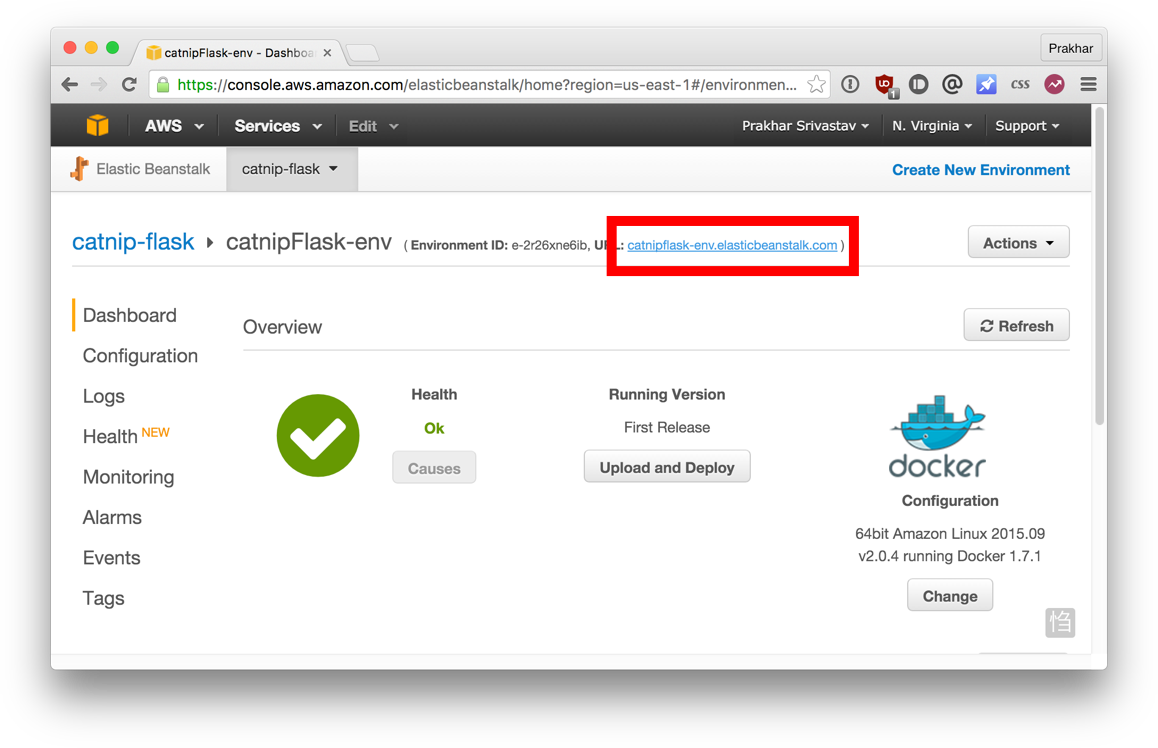
URL . , .
Congratulations! -! , , EB . , , . AWS single-container Docker environment , EB.
, , , . -. Go!
3.0
, . , Flask-. , . : .
, , . ( ). Redis Memcached -. , "" , .
, , -. , ? , , . ( ) .
3.1 SF Food Trucks
, , SF Food Trucks ( , — . . ). - ( ), -, , . .
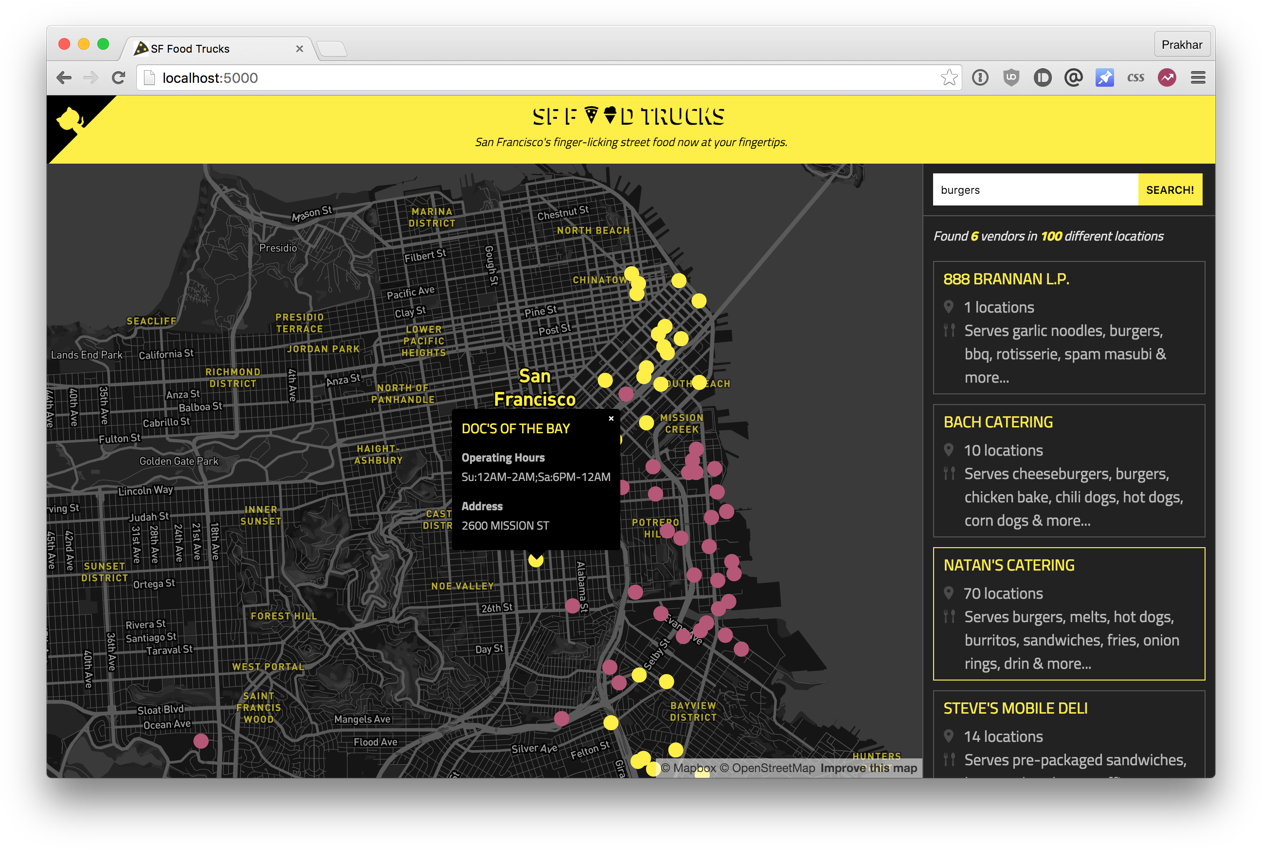
(Flask), Elasticsearch . , Github . , - .
, (), , . Flask Elasticsearch. , : Flask, Elasticsearch (ES). , , .
, . , ? Flask- . Elasticsearch… , - :
$ docker search elasticsearch NAME DESCRIPTION STARS OFFICIAL AUTOMATED elasticsearch Elasticsearch is a powerful open source se... 697 [OK] itzg/elasticsearch Provides an easily configurable Elasticsea... 17 [OK] tutum/elasticsearch Elasticsearch image - listens in port 9200. 15 [OK] barnybug/elasticsearch Latest Elasticsearch 1.7.2 and previous re... 15 [OK] digitalwonderland/elasticsearch Latest Elasticsearch with Marvel & Kibana 12 [OK] monsantoco/elasticsearch ElasticSearch Docker image 9 [OK] , Elasticsearch. ES, docker run , , ES.
$ docker run -dp 9200:9200 elasticsearch d582e031a005f41eea704cdc6b21e62e7a8a42021297ce7ce123b945ae3d3763 $ curl 0.0.0.0:9200 { "name" : "Ultra-Marine", "cluster_name" : "elasticsearch", "version" : { "number" : "2.1.1", "build_hash" : "40e2c53a6b6c2972b3d13846e450e66f4375bd71", "build_timestamp" : "2015-12-15T13:05:55Z", "build_snapshot" : false, "lucene_version" : "5.3.1" }, "tagline" : "You Know, for Search" } Flask. Dockerfile . python:3-onbuild . , , pip , , Javascript- . Nodejs. , ubuntu .
: , , . , Docker Hub
DockerfileGithub. — .
Dockerfile Flask- :
# start from base FROM ubuntu:14.04 MAINTAINER Prakhar Srivastav <prakhar@prakhar.me> # install system-wide deps for python and node RUN apt-get -yqq update RUN apt-get -yqq install python-pip python-dev RUN apt-get -yqq install nodejs npm RUN ln -s /usr/bin/nodejs /usr/bin/node # copy our application code ADD flask-app /opt/flask-app WORKDIR /opt/flask-app # fetch app specific deps RUN npm install RUN npm run build RUN pip install -r requirements.txt # expose port EXPOSE 5000 # start app CMD [ "python", "./app.py" ] . Ubuntu LTS , apt-get , — Python Node. yqq "Yes" . node. .
ADD — /opt/flask-app . . , . , , . Node, npm , package.json . Python, CMD , .
, ( prakhar1989 username ).
$ docker build -t prakhar1989/foodtrucks-web . , ubuntu, . docker build .
$ docker run -P prakhar1989/foodtrucks-web Unable to connect to ES. Retying in 5 secs... Unable to connect to ES. Retying in 5 secs... Unable to connect to ES. Retying in 5 secs... Out of retries. Bailing out... Oops! , Elasticsearch. ? — .
3.2 Docker
, , . , , .
, docker ps , :
$ docker ps CONTAINER ID IMAGE COMMAND CREATED STATUS PORTS NAMES e931ab24dedc elasticsearch "/docker-entrypoint.s" 2 seconds ago Up 2 seconds 0.0.0.0:9200->9200/tcp, 9300/tcp cocky_spence , ES 0.0.0.0:9200 , . , ES, ? , , .
es = Elasticsearch(host='es') Flask-, ES 0.0.0.0 ( 9200 ), , ? , , IP 0.0.0.0 - , . . , , ES? , .
, . , :
$ docker network ls NETWORK ID NAME DRIVER 075b9f628ccc none null be0f7178486c host host 8022115322ec bridge bridge bridge — , . , ES, bridge. , :
$ docker network inspect bridge [ { "Name": "bridge", "Id": "8022115322ec80613421b0282e7ee158ec41e16f565a3e86fa53496105deb2d7", "Scope": "local", "Driver": "bridge", "IPAM": { "Driver": "default", "Config": [ { "Subnet": "172.17.0.0/16" } ] }, "Containers": { "e931ab24dedc1640cddf6286d08f115a83897c88223058305460d7bd793c1947": { "EndpointID": "66965e83bf7171daeb8652b39590b1f8c23d066ded16522daeb0128c9c25c189", "MacAddress": "02:42:ac:11:00:02", "IPv4Address": "172.17.0.2/16", "IPv6Address": "" } }, "Options": { "com.docker.network.bridge.default_bridge": "true", "com.docker.network.bridge.enable_icc": "true", "com.docker.network.bridge.enable_ip_masquerade": "true", "com.docker.network.bridge.host_binding_ipv4": "0.0.0.0", "com.docker.network.bridge.name": "docker0", "com.docker.network.driver.mtu": "1500" } } ] , e931ab24dedc Containers . IP-, — 172.17.0.2 . ? : Flask- IP:
$ docker run -it --rm prakhar1989/foodtrucks-web bash root@35180ccc206a:/opt/flask-app# curl 172.17.0.2:9200 bash: curl: command not found root@35180ccc206a:/opt/flask-app# apt-get -yqq install curl root@35180ccc206a:/opt/flask-app# curl 172.17.0.2:9200 { "name" : "Jane Foster", "cluster_name" : "elasticsearch", "version" : { "number" : "2.1.1", "build_hash" : "40e2c53a6b6c2972b3d13846e450e66f4375bd71", "build_timestamp" : "2015-12-15T13:05:55Z", "build_snapshot" : false, "lucene_version" : "5.3.1" }, "tagline" : "You Know, for Search" } root@35180ccc206a:/opt/flask-app# exit . bash . --rm , . curl , . , 172.17.0.2:9200 ES! Super!
, , :
/etc/hostsFlask-, ,es172.17.0.2. IP- , .- bridge , .
: . . /etc/hosts , .
-, :
$ docker network create foodtrucks 1a3386375797001999732cb4c4e97b88172d983b08cd0addfcb161eed0c18d89 $ docker network ls NETWORK ID NAME DRIVER 1a3386375797 foodtrucks bridge 8022115322ec bridge bridge 075b9f628ccc none null be0f7178486c host host . --net . , ElasticSearch, bridge .
$ docker ps CONTAINER ID IMAGE COMMAND CREATED STATUS PORTS NAMES e931ab24dedc elasticsearch "/docker-entrypoint.s" 4 hours ago Up 4 hours 0.0.0.0:9200->9200/tcp, 9300/tcp cocky_spence $ docker stop e931ab24dedc e931ab24dedc $ docker run -dp 9200:9200 --net foodtrucks --name es elasticsearch 2c0b96f9b8030f038e40abea44c2d17b0a8edda1354a08166c33e6d351d0c651 $ docker network inspect foodtrucks [ { "Name": "foodtrucks", "Id": "1a3386375797001999732cb4c4e97b88172d983b08cd0addfcb161eed0c18d89", "Scope": "local", "Driver": "bridge", "IPAM": { "Driver": "default", "Config": [ {} ] }, "Containers": { "2c0b96f9b8030f038e40abea44c2d17b0a8edda1354a08166c33e6d351d0c651": { "EndpointID": "15eabc7989ef78952fb577d0013243dae5199e8f5c55f1661606077d5b78e72a", "MacAddress": "02:42:ac:12:00:02", "IPv4Address": "172.18.0.2/16", "IPv6Address": "" } }, "Options": {} } ] , , es . , , , .
$ docker run -it --rm --net foodtrucks prakhar1989/foodtrucks-web bash root@53af252b771a:/opt/flask-app# cat /etc/hosts 172.18.0.3 53af252b771a 127.0.0.1 localhost ::1 localhost ip6-localhost ip6-loopback fe00::0 ip6-localnet ff00::0 ip6-mcastprefix ff02::1 ip6-allnodes ff02::2 ip6-allrouters 172.18.0.2 es 172.18.0.2 es.foodtrucks root@53af252b771a:/opt/flask-app# curl es:9200 bash: curl: command not found root@53af252b771a:/opt/flask-app# apt-get -yqq install curl root@53af252b771a:/opt/flask-app# curl es:9200 { "name" : "Doctor Leery", "cluster_name" : "elasticsearch", "version" : { "number" : "2.1.1", "build_hash" : "40e2c53a6b6c2972b3d13846e450e66f4375bd71", "build_timestamp" : "2015-12-15T13:05:55Z", "build_snapshot" : false, "lucene_version" : "5.3.1" }, "tagline" : "You Know, for Search" } root@53af252b771a:/opt/flask-app# ls app.py node_modules package.json requirements.txt static templates webpack.config.js root@53af252b771a:/opt/flask-app# python app.py Index not found... Loading data in elasticsearch ... Total trucks loaded: 733 * Running on http://0.0.0.0:5000/ (Press CTRL+C to quit) root@53af252b771a:/opt/flask-app# exit Hooray! Works! /etc/hosts , es:9200 — ES. Fine! Flask- -:
$ docker run -d --net foodtrucks -p 5000:5000 --name foodtrucks-web prakhar1989/foodtrucks-web 2a1b77e066e646686f669bab4759ec1611db359362a031667cacbe45c3ddb413 $ docker ps CONTAINER ID IMAGE COMMAND CREATED STATUS PORTS NAMES 2a1b77e066e6 prakhar1989/foodtrucks-web "python ./app.py" 2 seconds ago Up 1 seconds 0.0.0.0:5000->5000/tcp foodtrucks-web 2c0b96f9b803 elasticsearch "/docker-entrypoint.s" 21 minutes ago Up 21 minutes 0.0.0.0:9200->9200/tcp, 9300/tcp es $ curl -I 0.0.0.0:5000 HTTP/1.0 200 OK Content-Type: text/html; charset=utf-8 Content-Length: 3697 Server: Werkzeug/0.11.2 Python/2.7.6 Date: Sun, 10 Jan 2016 23:58:53 GMT http://0.0.0.0:5000 , . , , , 4 . bash- .
#!/bin/bash # build the flask container docker build -t prakhar1989/foodtrucks-web . # create the network docker network create foodtrucks # start the ES container docker run -d --net foodtrucks -p 9200:9200 -p 9300:9300 --name es elasticsearch # start the flask app container docker run -d --net foodtrucks -p 5000:5000 --name foodtrucks-web prakhar1989/foodtrucks-web , . , . !
$ git clone https://github.com/prakhar1989/FoodTrucks $ cd FoodTrucks $ ./setup-docker.sh That's all! -, !
Docker Links
, , , docker network , Docker 1.9 .
, network , . , linking deprecated. , link , network ( links legacy, — . .)
3.3 Docker Compose
. , . Some of these are:
- Docker Machine - , -.
- Docker Compose — - .
- Docker Swarm — .
— Docker Compose, , .
Docker Compose . OrchardUp Fig. , . Hacker News - , , .
, : . API : ( , ) (shared volumes), - , , . : .
, "", , . Fig: . " " ( , " ") " ".
, . , Fig , Docker Inc. , Docker Compose.
, Compose ? -. docker-compose.yml , .
, docker-compose.yml SF-Foodtrucks , , .
Docker Compose. Windows Mac, Docker Compose — Docker Toolbox. Linux Docker Compose . Compose Python, pip install docker-compose . :
$ docker-compose version docker-compose version 1.7.1, build 0a9ab35 docker-py version: 1.8.1 CPython version: 2.7.9 OpenSSL version: OpenSSL 1.0.1j 15 Oct 2014 , docker-compose.yml . yml - , ,
version: "2" services: es: image: elasticsearch web: image: prakhar1989/foodtrucks-web command: python app.py ports: - "5000:5000" volumes: - .:/code . : es web . , image — . es Docker Hub elasticsearch . Flask- — , .
command ports . volumes , web . , , . .
:
docker-compose.ymlCompose.
Fine! , docker-compose . , . Flask ES, :
$ docker stop $(docker ps -q) 39a2f5df14ef 2a1b77e066e6 docker-compose . Foodtrucks docker-compose up .
$ docker-compose up Creating network "foodtrucks_default" with the default driver Creating foodtrucks_es_1 Creating foodtrucks_web_1 Attaching to foodtrucks_es_1, foodtrucks_web_1 es_1 | [2016-01-11 03:43:50,300][INFO ][node ] [Comet] version[2.1.1], pid[1], build[40e2c53/2015-12-15T13:05:55Z] es_1 | [2016-01-11 03:43:50,307][INFO ][node ] [Comet] initializing ... es_1 | [2016-01-11 03:43:50,366][INFO ][plugins ] [Comet] loaded [], sites [] es_1 | [2016-01-11 03:43:50,421][INFO ][env ] [Comet] using [1] data paths, mounts [[/usr/share/elasticsearch/data (/dev/sda1)]], net usable_space [16gb], net total_space [18.1gb], spins? [possibly], types [ext4] es_1 | [2016-01-11 03:43:52,626][INFO ][node ] [Comet] initialized es_1 | [2016-01-11 03:43:52,632][INFO ][node ] [Comet] starting ... es_1 | [2016-01-11 03:43:52,703][WARN ][common.network ] [Comet] publish address: {0.0.0.0} is a wildcard address, falling back to first non-loopback: {172.17.0.2} es_1 | [2016-01-11 03:43:52,704][INFO ][transport ] [Comet] publish_address {172.17.0.2:9300}, bound_addresses {[::]:9300} es_1 | [2016-01-11 03:43:52,721][INFO ][discovery ] [Comet] elasticsearch/cEk4s7pdQ-evRc9MqS2wqw es_1 | [2016-01-11 03:43:55,785][INFO ][cluster.service ] [Comet] new_master {Comet}{cEk4s7pdQ-evRc9MqS2wqw}{172.17.0.2}{172.17.0.2:9300}, reason: zen-disco-join(elected_as_master, [0] joins received) es_1 | [2016-01-11 03:43:55,818][WARN ][common.network ] [Comet] publish address: {0.0.0.0} is a wildcard address, falling back to first non-loopback: {172.17.0.2} es_1 | [2016-01-11 03:43:55,819][INFO ][http ] [Comet] publish_address {172.17.0.2:9200}, bound_addresses {[::]:9200} es_1 | [2016-01-11 03:43:55,819][INFO ][node ] [Comet] started es_1 | [2016-01-11 03:43:55,826][INFO ][gateway ] [Comet] recovered [0] indices into cluster_state es_1 | [2016-01-11 03:44:01,825][INFO ][cluster.metadata ] [Comet] [sfdata] creating index, cause [auto(index api)], templates [], shards [5]/[1], mappings [truck] es_1 | [2016-01-11 03:44:02,373][INFO ][cluster.metadata ] [Comet] [sfdata] update_mapping [truck] es_1 | [2016-01-11 03:44:02,510][INFO ][cluster.metadata ] [Comet] [sfdata] update_mapping [truck] es_1 | [2016-01-11 03:44:02,593][INFO ][cluster.metadata ] [Comet] [sfdata] update_mapping [truck] es_1 | [2016-01-11 03:44:02,708][INFO ][cluster.metadata ] [Comet] [sfdata] update_mapping [truck] es_1 | [2016-01-11 03:44:03,047][INFO ][cluster.metadata ] [Comet] [sfdata] update_mapping [truck] web_1 | * Running on http://0.0.0.0:5000/ (Press CTRL+C to quit) IP . Cool, yeah? - . detached mode:
web_1 | * Running on http://0.0.0.0:5000/ (Press CTRL+C to quit) Killing foodtrucks_web_1 ... done Killing foodtrucks_es_1 ... done $ docker-compose up -d Starting foodtrucks_es_1 Starting foodtrucks_web_1 $ docker-compose ps Name Command State Ports ---------------------------------------------------------------------------------- foodtrucks_es_1 /docker-entrypoint.sh elas ... Up 9200/tcp, 9300/tcp foodtrucks_web_1 python app.py Up 0.0.0.0:5000->5000/tcp , . ? Compose . ? Compose ? , .
, . :
$ docker-compose stop Stopping foodtrucks_web_1 ... done Stopping foodtrucks_es_1 ... done , foodtrucks , . , Compose .
$ docker network rm foodtrucks $ docker network ls NETWORK ID NAME DRIVER 4eec273c054e bridge bridge 9347ae8783bd none null 54df57d7f493 host host Great! , Compose .
$ docker-compose up -d Recreating foodtrucks_es_1 Recreating foodtrucks_web_1 $ docker ps CONTAINER ID IMAGE COMMAND CREATED STATUS PORTS NAMES f50bb33a3242 prakhar1989/foodtrucks-web "python app.py" 14 seconds ago Up 13 seconds 0.0.0.0:5000->5000/tcp foodtrucks_web_1 e299ceeb4caa elasticsearch "/docker-entrypoint.s" 14 seconds ago Up 14 seconds 9200/tcp, 9300/tcp foodtrucks_es_1 . , - :
$ docker network ls NETWORK ID NAME DRIVER 0c8b474a9241 bridge bridge 293a141faac3 foodtrucks_default bridge b44db703cd69 host host 0474c9517805 none null , Compose foodtrucks_default , , . , . hostname, . , /etc/hosts .
$ docker ps CONTAINER ID IMAGE COMMAND CREATED STATUS PORTS NAMES bb72dcebd379 prakhar1989/foodtrucks-web "python app.py" 20 hours ago Up 19 hours 0.0.0.0:5000->5000/tcp foodtrucks_web_1 3338fc79be4b elasticsearch "/docker-entrypoint.s" 20 hours ago Up 19 hours 9200/tcp, 9300/tcp foodtrucks_es_1 $ docker exec -it bb72dcebd379 bash root@bb72dcebd379:/opt/flask-app# cat /etc/hosts 127.0.0.1 localhost ::1 localhost ip6-localhost ip6-loopback fe00::0 ip6-localnet ff00::0 ip6-mcastprefix ff02::1 ip6-allnodes ff02::2 ip6-allrouters 172.18.0.2 bb72dcebd379 Oops! , es . ? :
root@bb72dcebd379:/opt/flask-app# ping es PING es (172.18.0.3) 56(84) bytes of data. 64 bytes from foodtrucks_es_1.foodtrucks_default (172.18.0.3): icmp_seq=1 ttl=64 time=0.049 ms 64 bytes from foodtrucks_es_1.foodtrucks_default (172.18.0.3): icmp_seq=2 ttl=64 time=0.064 ms ^C --- es ping statistics --- 2 packets transmitted, 2 received, 0% packet loss, time 999ms rtt min/avg/max/mdev = 0.049/0.056/0.064/0.010 ms Voila! Works! - es . , Docker 1.10 , DNS-. , release notes .
Docker Compose . , , . Docker Compose.
, Compose. AWS!
3.4 AWS Elastic Container Service
docker-compose : docker-compose up . , , , , . , AWS.
, , Docker — . . . , - AWS, Azure , Rackspace , DigitalOcean . Elastic Beanstalk, AWS Elastic Container Service ( ECS) .
AWS ECS — , . EC2 API. Beanstalk , ECS . ECS — .
, ECS (CLI) Docker Compose ECS! docker-compose.yml , AWS . Let's start!
CLI. CLI- Windows. CLI Mac Linux . , :
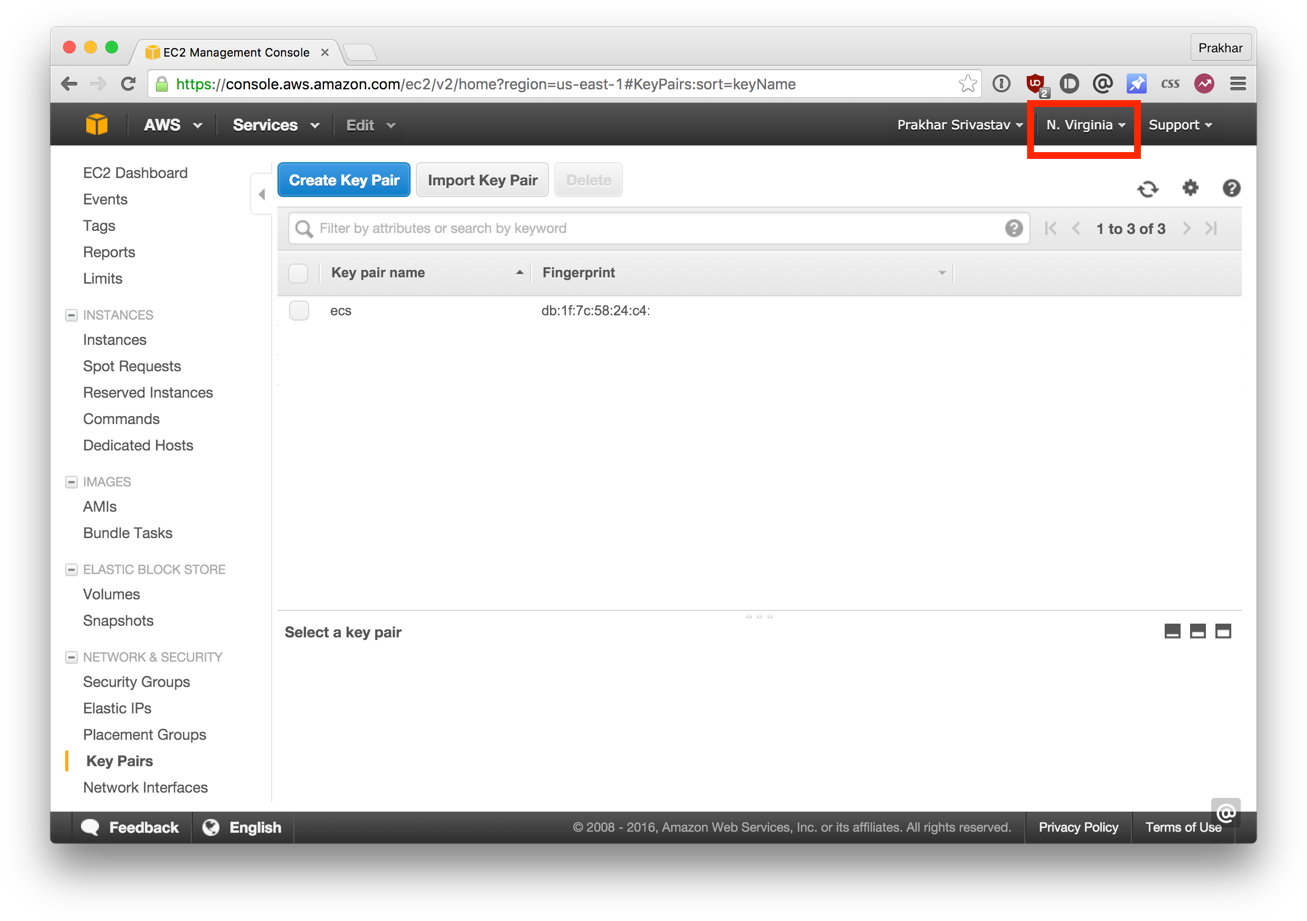
$ ecs-cli --version ecs-cli version 0.1.0 (*cbdc2d5) — . EC2 Console keypair. . — . ecs us-east-1 . .
CLI:
$ ecs-cli configure --region us-east-1 --cluster foodtrucks INFO[0000] Saved ECS CLI configuration for cluster (foodtrucks) configure , , . , . AWS CLI , , .
$ ecs-cli up --keypair ecs --capability-iam --size 2 --instance-type t2.micro INFO[0000] Created cluster cluster=foodtrucks INFO[0001] Waiting for your cluster resources to be created INFO[0001] Cloudformation stack status stackStatus=CREATE_IN_PROGRESS INFO[0061] Cloudformation stack status stackStatus=CREATE_IN_PROGRESS INFO[0122] Cloudformation stack status stackStatus=CREATE_IN_PROGRESS INFO[0182] Cloudformation stack status stackStatus=CREATE_IN_PROGRESS INFO[0242] Cloudformation stack status stackStatus=CREATE_IN_PROGRESS , ( ecs ), ( --size ) , . --capability-iam , , IAM.
docker-compose.yml . , , aws-compose.yml . ( ):
es: image: elasticsearch cpu_shares: 100 mem_limit: 262144000 web: image: prakhar1989/foodtrucks-web cpu_shares: 100 mem_limit: 262144000 ports: - "80:5000" links: - es docker-compose.yml mem_limit cpu_shares .
, version services , AWS 2 Compose. t2.micro , 250 . Docker Hub. , ecs-cli build . Docker Compose .
$ docker push prakhar1989/foodtrucks-web Beauty! , ECS!
$ ecs-cli compose --file aws-compose.yml up INFO[0000] Using ECS task definition TaskDefinition=ecscompose-foodtrucks:2 INFO[0000] Starting container... container=845e2368-170d-44a7-bf9f-84c7fcd9ae29/es INFO[0000] Starting container... container=845e2368-170d-44a7-bf9f-84c7fcd9ae29/web INFO[0000] Describe ECS container status container=845e2368-170d-44a7-bf9f-84c7fcd9ae29/web desiredStatus=RUNNING lastStatus=PENDING taskDefinition=ecscompose-foodtrucks:2 INFO[0000] Describe ECS container status container=845e2368-170d-44a7-bf9f-84c7fcd9ae29/es desiredStatus=RUNNING lastStatus=PENDING taskDefinition=ecscompose-foodtrucks:2 INFO[0036] Describe ECS container status container=845e2368-170d-44a7-bf9f-84c7fcd9ae29/es desiredStatus=RUNNING lastStatus=PENDING taskDefinition=ecscompose-foodtrucks:2 INFO[0048] Describe ECS container status container=845e2368-170d-44a7-bf9f-84c7fcd9ae29/web desiredStatus=RUNNING lastStatus=PENDING taskDefinition=ecscompose-foodtrucks:2 INFO[0048] Describe ECS container status container=845e2368-170d-44a7-bf9f-84c7fcd9ae29/es desiredStatus=RUNNING lastStatus=PENDING taskDefinition=ecscompose-foodtrucks:2 INFO[0060] Started container... container=845e2368-170d-44a7-bf9f-84c7fcd9ae29/web desiredStatus=RUNNING lastStatus=RUNNING taskDefinition=ecscompose-foodtrucks:2 INFO[0060] Started container... container=845e2368-170d-44a7-bf9f-84c7fcd9ae29/es desiredStatus=RUNNING lastStatus=RUNNING taskDefinition=ecscompose-foodtrucks:2 , Docker Compose — . --file ( docker-compose.yml ). , desiredStatus=RUNNING lastStatus=RUNNING .
Cool! . ?
ecs-cli ps Name State Ports TaskDefinition 845e2368-170d-44a7-bf9f-84c7fcd9ae29/web RUNNING 54.86.14.14:80->5000/tcp ecscompose-foodtrucks:2 845e2368-170d-44a7-bf9f-84c7fcd9ae29/es RUNNING ecscompose-foodtrucks:2 http://54.86.14.14 , Food Trucks - ! , AWS ECS .
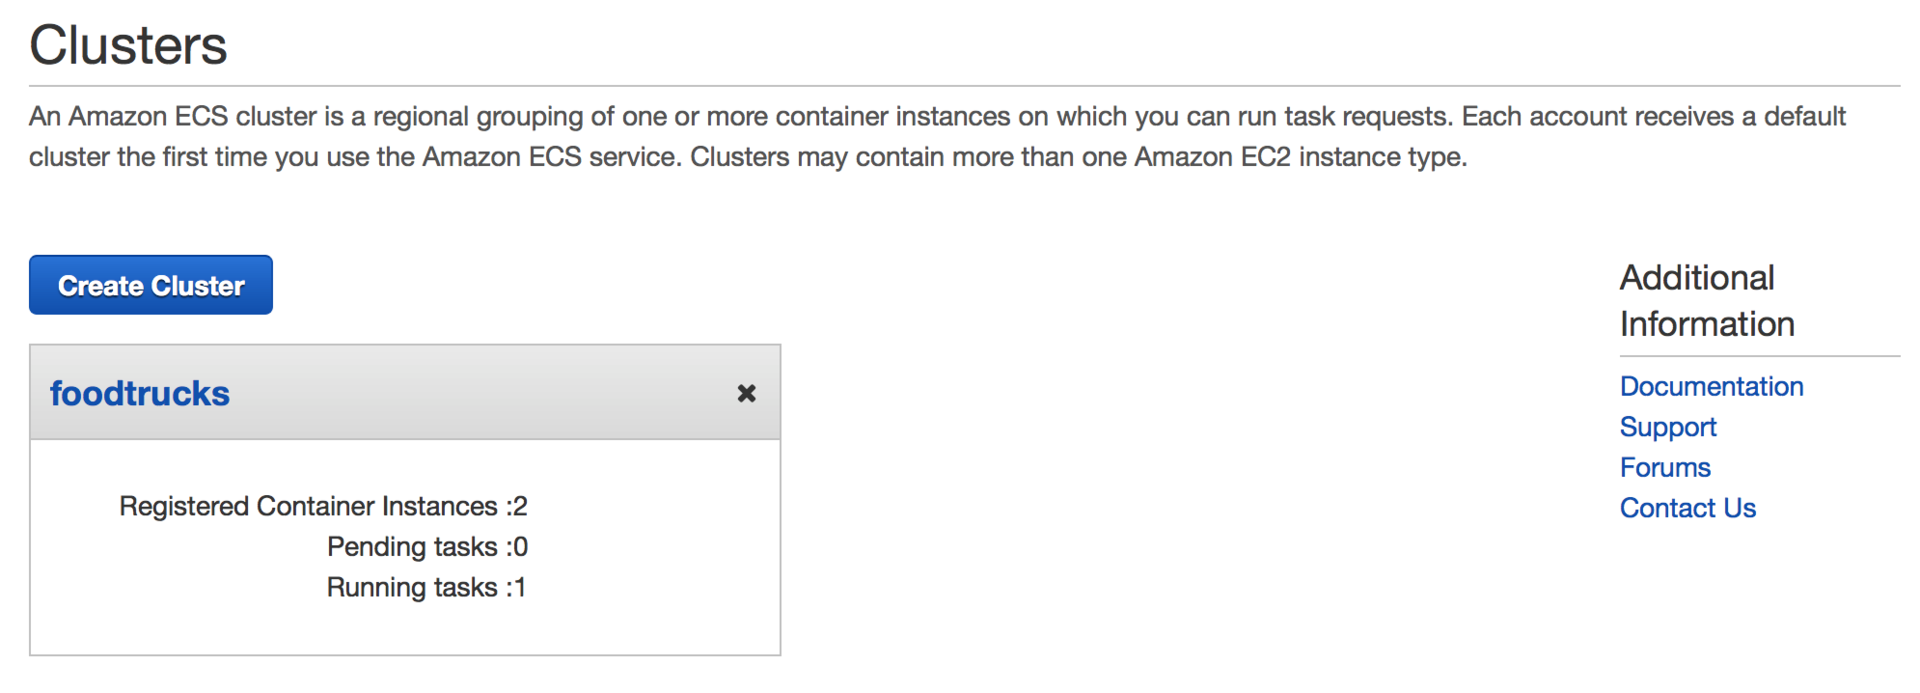
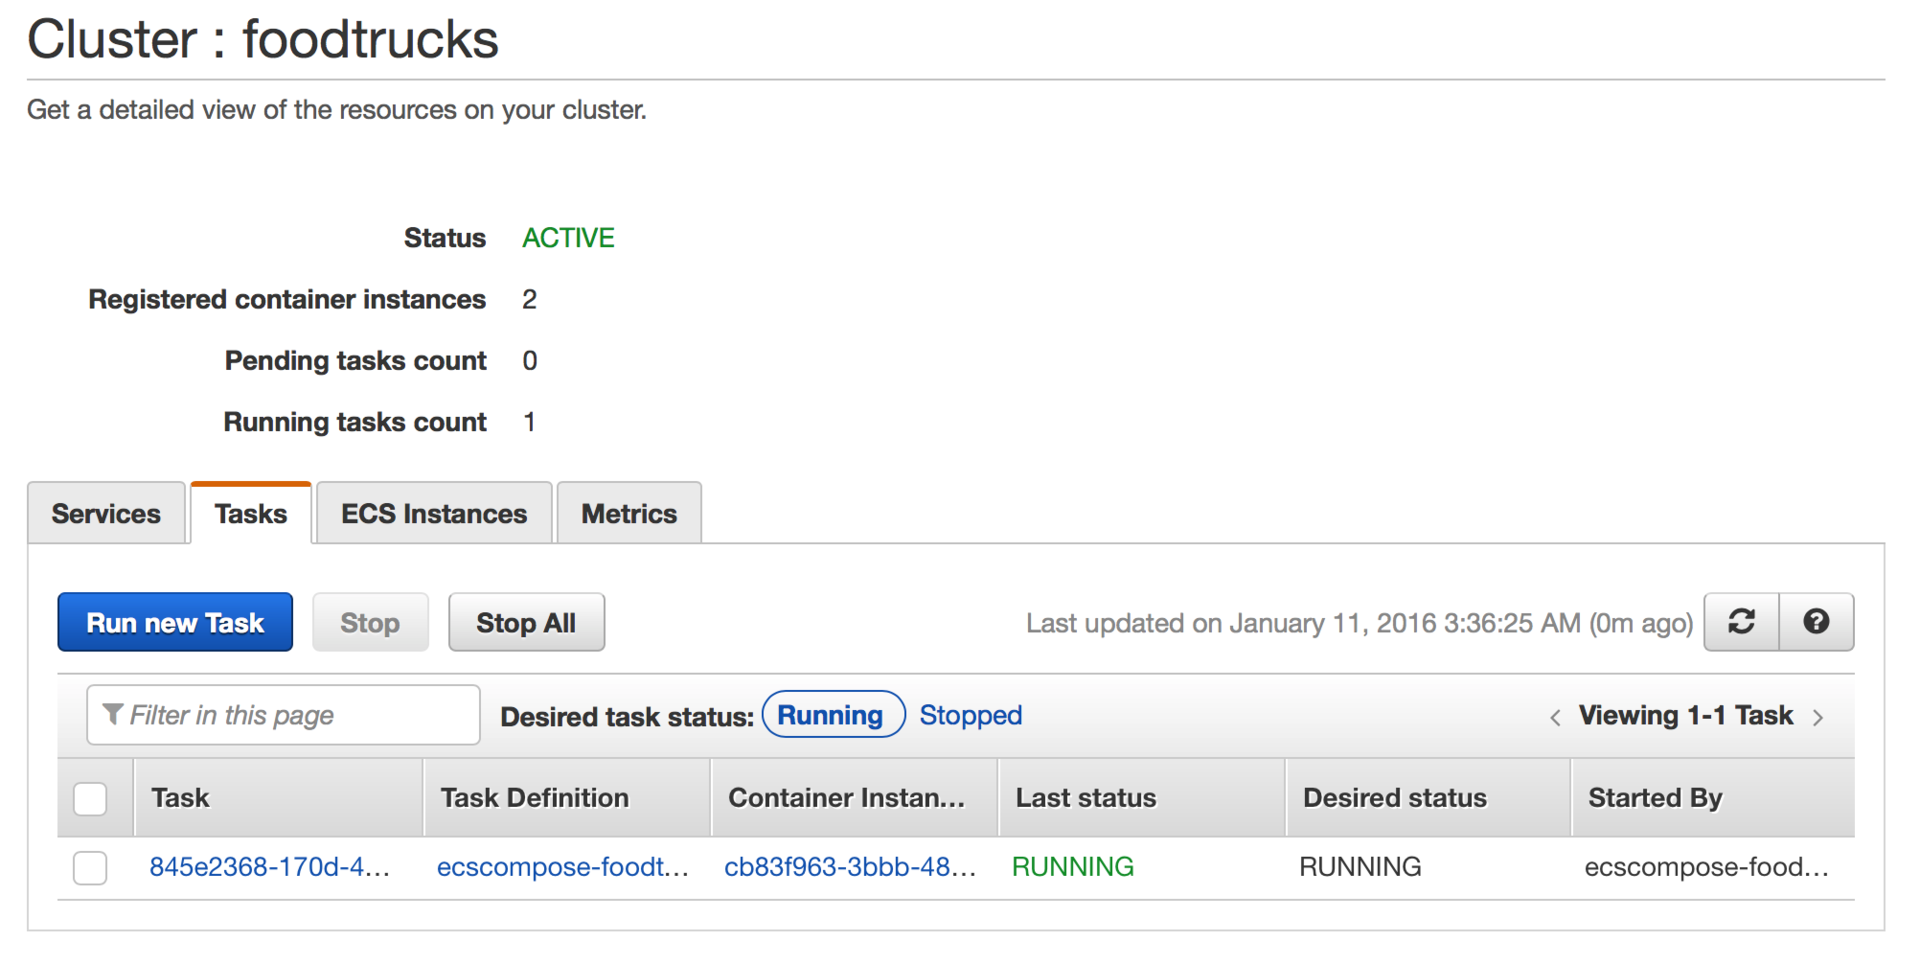
, ECS- 'foodtrucks', . .
That's all. — AWS!
4.0
. , , ! , . , , - , , .
, . , , .
4.1
. . , . , , . , , , .
— . . — .
- Awesome Docker
- Hello Docker Workshop
- Building a microservice with Node.js and Docker
- Why Docker
- Docker Weekly and archives
- Codeship Blog
, !
4.2
. ? , -?
( , — . .) prakhar@prakhar.me issue . , , .
( -, — . .).
. . , . .
')
Source: https://habr.com/ru/post/310460/
All Articles