Writing Hello World for HoloLens
We are glad to share unique material prepared specifically for our blog by Gleb Zakharov , Zengalt's HoloLens Lead - step-by-step instructions for developing an application for Microsoft HoloLens and launching it in an emulator. In the article you will also find an overview of the device itself and learn about the types of applications.
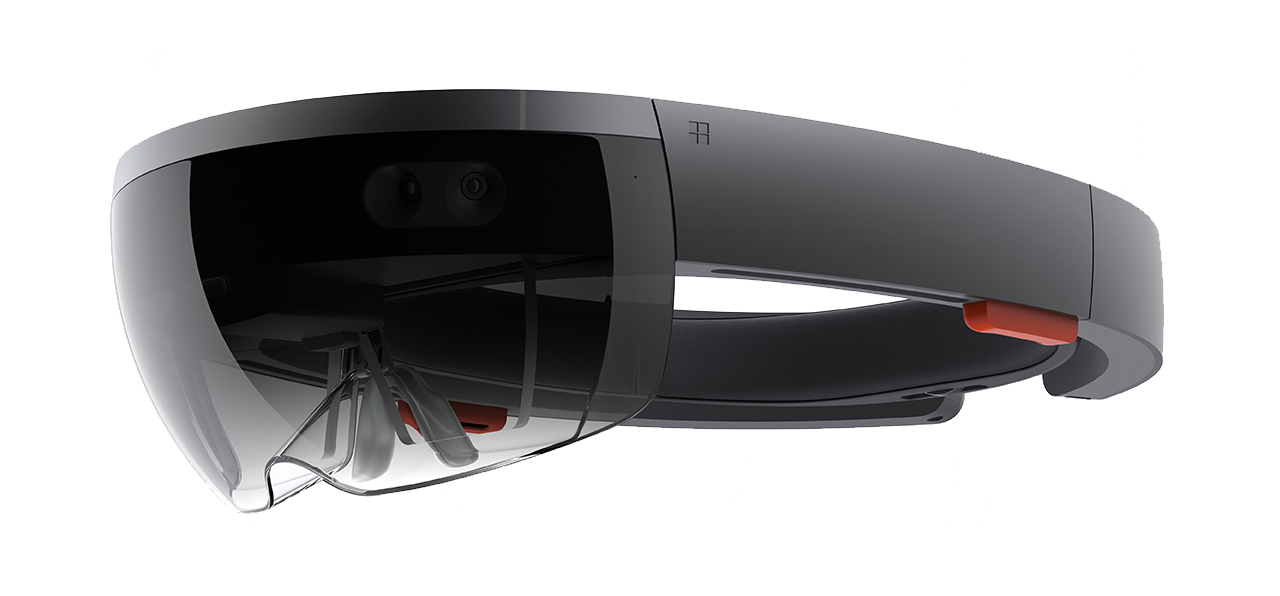
HoloLens is a Windows 10 PC (2GB RAM, 64GB SSD, x86 CPU, GPU, HPU, BT, WiFi, detailed specifications can be viewed here ) in the form of a device similar to glasses for skiing. Through the glasses you can see everything around, although they darken the picture a little.
On Habré already had a review of this device from the conference // Build . In this article, I suggest you write an application for HoloLens and run it in the emulator.
Device overview
Two transparent screens are built into the visor - one before each eye. Several cameras look ahead and to the sides, and above the ears there are two small speakers, the sound of which is superimposed on the sound of the environment.
Stereoscopic image. Therefore, you need to think about the focal length. For example, we at the very beginning deduced the debug text using the focal length of 30 centimeters. My eyes hurt. There are no keyboards and mice, although they can be connected via Bluetooth. The main way to control the device is the cursor, which moves along with turning the head (“gaze”), and a pinch-like gesture that replaces the usual tap (“air tap”). Voice control works well. Although, while only English is available.
')
With the help of cameras, the device scans the surrounding space and turns it into a 3D model, access to which can be obtained directly in Unity (a special version is used for device development) or through the Windows API. One of the most frequent applications of this feature is searching for the floor and installing holograms on it.

In the future, such devices will replace everything that has screens and sound. Imagine that you can edit in real time how you see and hear the real world. For example, the neighbors play music that you do not like. You can get rid of it or replace it with the one you like. Without the help of a drill, you can hang any number of posters or marker boards anywhere. One gesture to rearrange (virtual) TV. Smartphones, televisions, signs, road signs, light bulbs and displays on household appliances - all this will be a thing of the past, as soon as devices like HoloLens start to cost as much as a smartphone costs now, they will look like ordinary glasses. These are only the most obvious examples, we are sure that the changes will be more global. For example, the future might look like this (we hope not):
That is, this technology, unlike pure VR, is the next platform for everything.
It makes sense to start developing under HoloLens right now because there is already effective demand from banks, the oil industry, education, engineering, architects. And you have a chance to be the first. Devices are becoming available much faster than we expected. A couple of months ago, they were a rarity, but now everyone can order five pieces in the American Microsoft Store.

Since HoloLens runs on Windows 10, applications for it are developed on the Universal Windows Platform (UWP). This means that applications developed previously for mobile devices, desktop and Xbox based on UWP can be run on HoloLens.

Types of HoloLens Applications
A set of developer tools depends heavily on the type of application you want to make. Currently HoloLens applications support 2 types of views (views): 2D views and Holographic views.
The 2D view is a display of the 2D content we are used to as a plate inside the shell HoloLens. (see screenshot above) At the same time, many applications can be rendered in a 2D view, so organizing the workspace around you with simultaneously running mail, a browser and skype will be easy.
Holographic View - in this mode, the application can create holograms around you. At the same time, holograms of other applications and the shell OS are not visible, and any system notifications will be pronounced in a voice using Cortana.

Land of Dinosaurs is our first app in the HoloLens Store.
You can switch between these two types. One of the frequent scenarios for combining several views in one application is the transition from Holographic View to 2D view to enter text into the input field using the on-screen keyboard.
For the development of 2D views, the main tool will be Visual Studio and UWP API with XAML and / or DirectX. To develop Holographic Views, it is proposed to use 2 approaches - development using Visual Studio and DirectX or Unity3D.
In this article we will look at creating an application with one Holographic View in Unity3D.
Step 0: Install Tools
System requirements
- If you do not have a device, then to run the emulator you will need Windows 10 64-bit with Hyper-V support: Windows 10 Pro, Enterprise or Education. Win 10 Home will be enough otherwise
- 64-bit CPU with 4 or more cores and virtualization support
- 8 Gb of RAM or more (If you plan to develop network applications, then 12Gb or more, because to run several HoloLens emulators you will need about 10-11Gb RAM
- BIOS support for the following functions:
- Hardware-assisted virtualization
- Second Level Address Translation (SLAT)
- Hardware-based Data Execution Prevention (DEP)
- GPU (The emulator may work with an unsupported GPU, but it will work much slower)
 If your PC meets these requirements and you plan to use HoloLens Emulator for testing, you will need to activate the above settings in the BIOS.
After that, you need to enable Hyper-V support in the Windows Control Panel. To do this, go to Control Panel -> Programs -> Programs and Features -> Turn Windows Features on or off. Find and select the Hyper-V section. After installation is complete, reboot.
Instruments
- Windows 10
- Visual Studio 2015 Update 3 (Community Edition)
- Windows 10 SDK v. 1511 or higher (If you did not install it with Visual Studio 2015)
- HoloLens Emulator or HoloLens Development Edition
- Unity 3D HoloLens Technical Preview
To avoid errors during the assembly of the application, it is recommended to install the tools sequentially, in the specified order.
Step 1: Create a project
Now we have everything we need for work, let's start to make our hello world application. Run Unity Hololens Technical Preview (HTP) and create an empty project. Select a name and location on the disk. For a project type, select 3D and click Create project .

Main Camera Setup
After creating the project, Unity will automatically create and open an empty scene with a camera and a light source. Pay attention to the following panels:
- Scene - the elements that we put in the 3D world. Now it is only a light source and a camera.
- Game viewing application in game mode
- The Hierarchy contains all the elements of your scene.
- Inspector shows the properties of the selected item.
- Project all rerurs files added for the current project.
Let's start with the camera setup. In Holographic View mode, the main camera is the position between human eyes. Therefore, reset the default offset (0,0,0). The position and rotation of the camera while the application is running in the emulator or on the device will change with the position and tilt of the user's head.

You can customize the location of the tabs as you like.
HoloLens allows you to project 3D objects in the real world. To do this, the camera must have a transparent background. To set it, set the camera's Clear Flags value to Solid Color . After that, set the Background to [0,0,0,0] or # 00000000. For a more accurate simulation of the device in Unity, set the camera's Field of View to 16-20.
Step 2: Add a 3d object to the scene
We have prepared for the article a 3D model of Hello world. Download and add the .fbx model file to the Assets folder of the project. Or drag the file into the Assets area of the Project panel. After successfully importing the model, add it to the scene.
To do this, drag the HelloWorld model from the Project panel to the Hierarchy window. Set the position at Z = 3 and expand the inscription to 180 so that it looks at the camera by default. The original model is quite large, let's reduce it a bit by setting the Scale to 0.25 and save the scene with any name.

Meet HoloToolkit
Microsoft and the community have developed a set of components to accelerate the development of applications for HoloLens.
Currently the github repository contains components and examples of working with the API:
- Input with gestures, speech generation
- Shared experience - tools for implementing joint experience in the application
- Determination and processing of surfaces in space
- Spatial sound
- Accelerating the application build process
- Ready components and scripts for the cursor, camera control and others.
Let's import HoloToolkit into our project and look at some of the components. To do this, clone the HoloToolkit repository to your disk and open it in Unity. In the Project panel in the context menu of the Assets root folder, select Export Package . Wait for the download of the list of files to export, click Export and specify the path to save the package.

After the end of the export, import this package into your project by calling the context menu on the root folder Assets . Select Import Package -> Custom Package .
After the end, assets from HoloToolkit will be added to the project. A new menu group will appear in the Unity menu, allowing you to quickly apply general settings for the project and make a quick deployment. As part of this article, we will not use these options for the purpose of training.
Detailed settings for importing HoloToolkit into a project can be found on the project wiki on github: HoloToolkit Getting Started
We add components for debugging in Unity
To begin, let's add camera control in the Unity editor. Select the camera object in the Hierarchy panel. In the Inspector panel, click Add Component and in the window that opens, enter Manual . Select the Manual Camera Control component from the list. Now press Ctrl + P or Play button on the bar above. The application will start and you can navigate through it using WASD and look around using Shift.
In the settings of the Manual Camera Control script, you can adjust the control keys, the sensitivity of the mouse, the axis of movement, etc., to your taste.
Display room in Unity and emulator
If you are developing an application for HoloLens, you will definitely encounter the need to place your holograms with reference to the surrounding space.
Examples are easy:
- Virtually any application under HoloLens requires an understanding of the level of the floor in the room where it is launched in order to correctly place the holograms.
- Maybe you are writing an action / strategy game. Perhaps you want monsters / robots / ships to appear from the walls. You need to understand where the walls are.
For this, HoloLens has a special API for getting real-time surfaces. In Unity and HoloToolkit to work with him there are several ready-made components, which are sufficient for the implementation of most of these cases.
First, let's load the finished room model and display it in Unity. To do this, find in the project resources in the Project tab a ready-made component SpatialMapping and add it to the scene. This component consists of 3 parts:
- SpatialMappingObserver is a script that uses the Unity SurfaceObserver API to get surfaces from HoloLens. In it you can specify the volume you are interested in in the space in which you want to get the surface, the number of polygons per cubic meter of space and the frequency of updates. Surface analysis is a time consuming process, so fine tuning of parameters is extremely important for fast application operation.
- SpatialMappingManager - control of the source of surfaces, as a rule, this is the SpatialMappingObserver script in the emulator or ObjectSurfaceObserver in the Unity editor.
- ObjectSurfaceObserver - load the finished room model from the device or emulator.
The imported HoloToolkit package already has a finished room model. Let's load it into ObjectSurfaceObserver . Select the Room Model field in the Inspector panel, find the SRMesh object in the search and select it with a double click. Launch the application and you should have a room model drawn by a white grid. At the same time, surface objects will be dynamically added when launched into a SpatialMapping object.
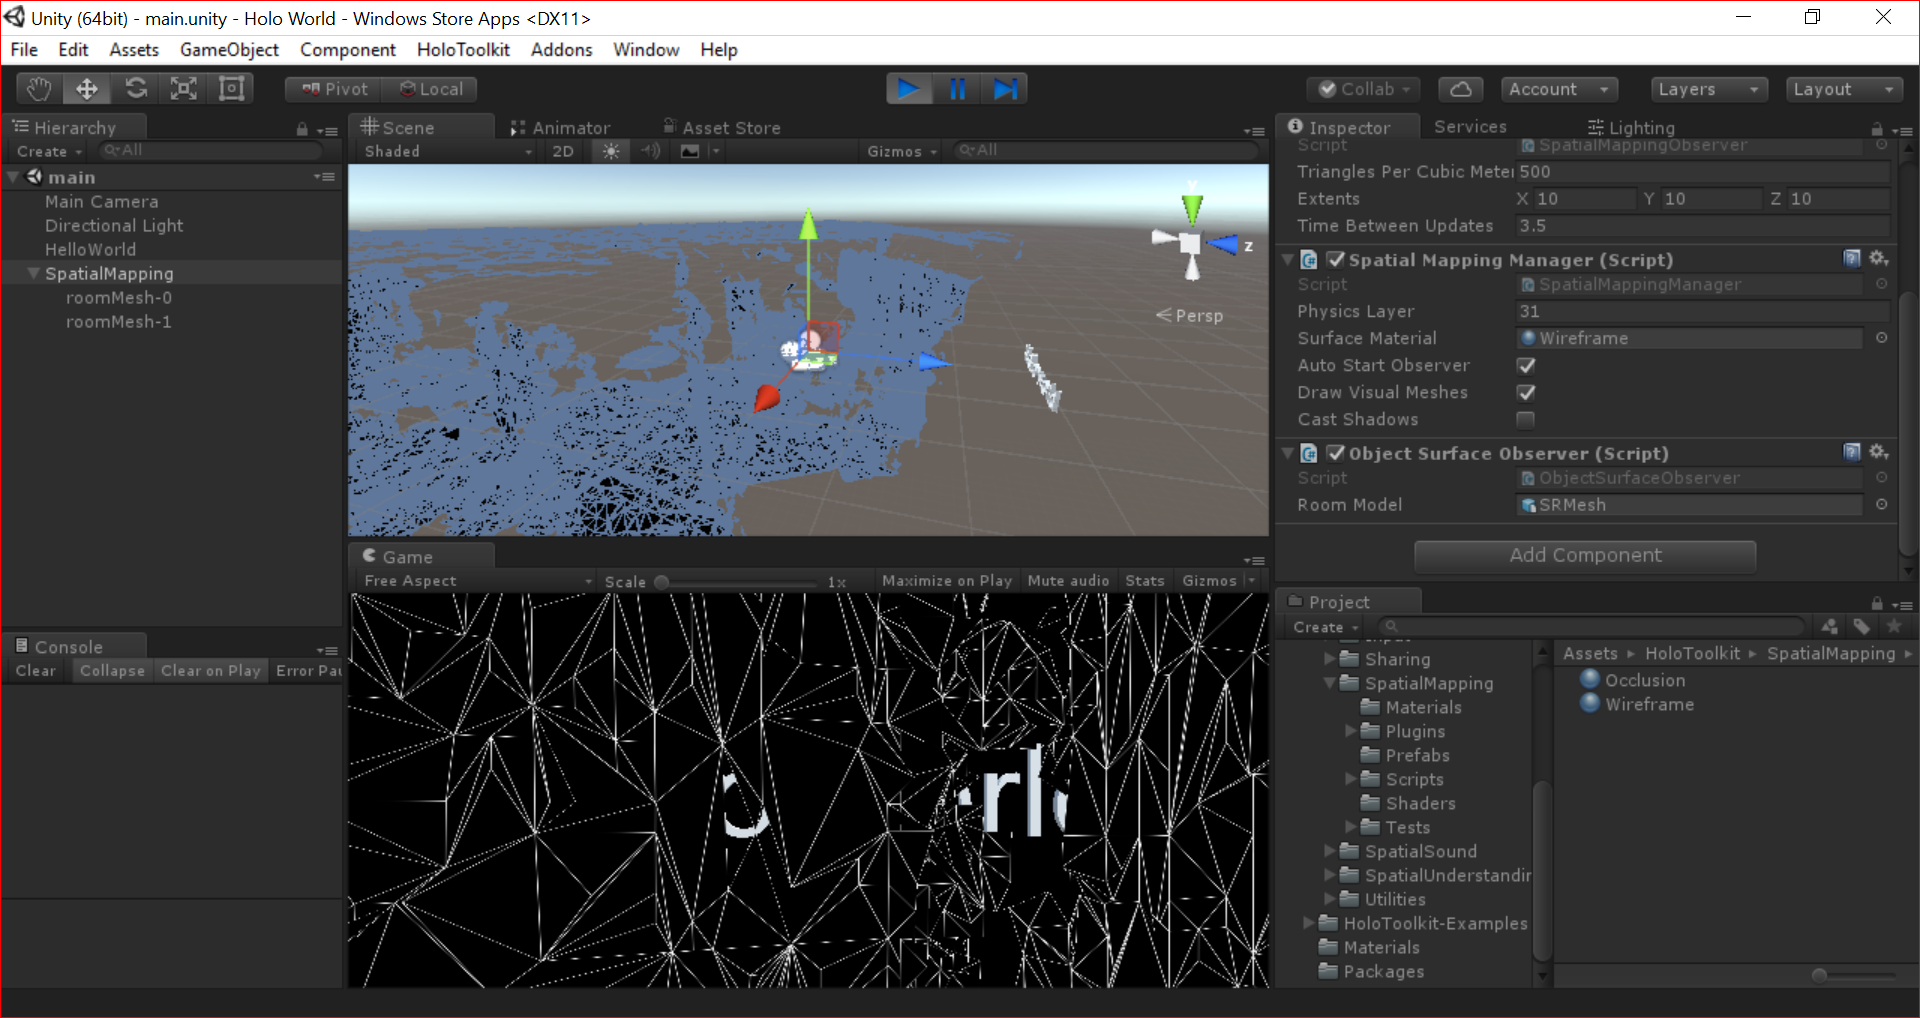
As can be seen in the screenshot, the inscription added earlier is almost completely hidden by the room model. This is also one of the nice possibilities of integrating with the space in HoloLens - you can add shadows from holograms or overlapping holograms with the surrounding world.
Look, gestures, and snapping to surfaces
This problem can be solved in different ways. In this article we will allow the user to install this inscription on the surrounding surfaces using glances and gestures.
To do this, add 2 scripts responsible for controlling the look and gestures to the main camera - GazeManager and GestureManager . Add a Tap To Place and Box Collider script to the label object. Disable the display of the default room through the Draw Visual Meshes property of the SpatialMappingManager component and launch the application.
In the game mode, look at the inscription and press the spacebar. Now the inscription will move with us and if you look at the surface - it will automatically “stick” to it.
Each frame of GazeManager checks which object the user is viewing and remembers it using the standard Unity Physics.Raycast API. Remember we added a box collider for our label? This object describes the shape of the object for the calculation of collisions by the physical engine, which allows us to easily check whether a person is looking at the object.
Next, tapu (the space key in Unity) checks if a person is looking at an object, and if so, the OnSelect message is sent to the object, which calls the same-name method for our text in TapToPlace , which starts or ends its movement.
At the same time, the TapToPlace script , at the end of the movement process, saves the position of the object in space, tying it to the so -called spatial anchor (World Anchor). At the same time, the anchor itself is saved in the device's memory and the next time the application is launched, the script will load it and the inscription appear in the same place where the user left it.
The standard implementation of the TapToPlace script has 2 problems that we need to solve:
- when installed on the floor, the inscription will be half immersed in the floor.
- the inscription will be rotated from the user, its forward vector will coincide with the camera forward. It would be nice to deploy it to the user.
Open the TapToPlace script in VisualStudio / MonoDevelop / Notepad / etc. and change the code responsible for setting the object on the surface.
Setting an object in TapToPlace
RaycastHit hitInfo; if (Physics.Raycast(headPosition, gazeDirection, out hitInfo, 30.0f, SpatialMappingManager.Instance.LayerMask)) { // Move this object to where the raycast // hit the Spatial Mapping mesh. // Here is where you might consider adding intelligence // to how the object is placed. For example, consider // placing based on the bottom of the object's // collider so it sits properly on surfaces. Vector3 surfacePoint = hitInfo.point; surfacePoint.y += GetComponent<Renderer>().bounds.extents.y/2; this.transform.position = surfacePoint; // Rotate this object to face the user. Quaternion toQuat = Camera.main.transform.localRotation; toQuat.x = 0; toQuat.z = 0; this.transform.rotation = toQuat * Quaternion.AngleAxis(180, Vector3.up); } In this piece, we take the position of the intersection of the user's ray of sight with the surrounding surface:
Vector3 surfacePoint and raise it along the vertical axis half the size of our inscription. So that she was above the level of the floor.
surfacePoint.y += GetComponent<Renderer>().bounds.extents.y/2; this.transform.position = surfacePoint; Next, we expand the inscription 180 degrees around the vertical axis, taking into account the rotation of the camera. It turns out when linking the inscription will always be turned on one axis to the user.
That's all, our tap to place logic is ready.
Voice commands
The Windows 10 API has an extremely powerful API for working with speech recognition and generation . HoloLens has 4 microphones on board and perfectly recognizes speech. Therefore, voice control in the application successfully complements the work with gestures.
As an example of the implementation of such logic, we will write with you a simple script that will respond to the phrase Change color and randomly change the color of the label. Note author: the script code is left as simple as possible and is given as an example.
To do this, add C # Script to the project and call it Change Color Command. To do this, in the Unity menu, select Assets-> Create -> C # Script . Double click on it in Unity to open the editor.
Script template
using UnityEngine; using System.Collections; public class ChangeColorCommand : MonoBehaviour { // Use this for initialization void Start () { } // Update is called once per frame void Update () { } } Add the following line to the using section:
using UnityEngine.Windows.Speech; This will allow us to use the built-in Unity wrapper to work with voice commands. Add a field-reference to an object of type KeywordRecognizer and a link to the Renderer component for which we will change color.
private KeywordRecognizer keywordRecognizer; public Renderer target; Perform the initial initialization of this component inside the Start method. The Start method will be called once after adding this script to the scene.
void Start() { var commands = new[] { "Change color" }; keywordRecognizer = new KeywordRecognizer(commands); } In the Start method, we specify an array of commands that the system will listen to. Upon successful recognition, an OnPhraseRecognized event will be triggered by keywordRecognizer, in which we will perform a color change. Add a subscription to the event and the start of voice recognition at the end of the method.
keywordRecognizer.OnPhraseRecognized += KeywordRecognizerOnOnPhraseRecognized; keywordRecognizer.Start(); and a simple handler function:
private void KeywordRecognizerOnOnPhraseRecognized(PhraseRecognizedEventArgs args) { if (args.text == "Change color") GetComponent<Renderer>().material.color = new Color(Random.value, Random.value, Random.value); } Inside the function, we check that the phrase “Change color” was recognized and change the color of the material of the object to which this script will be attached to a random one.
ChangeColorCommand.cs
using UnityEngine; using UnityEngine.Windows.Speech; public class ChangeColorCommand : MonoBehaviour { private KeywordRecognizer keywordRecognizer; // Use this for initialization void Start() { var commands = new[] { "Change color" }; keywordRecognizer = new KeywordRecognizer(commands); keywordRecognizer.OnPhraseRecognized += KeywordRecognizerOnOnPhraseRecognized; keywordRecognizer.Start(); } private void KeywordRecognizerOnOnPhraseRecognized(PhraseRecognizedEventArgs args) { if (args.text == "Change color") GetComponent<Renderer>().material.color = new Color(Random.value, Random.value, Random.value); } // Update is called once per frame void Update() { } } Add the ChangeColorCommand script to the label object and run the application in Unity to check the result. To test, say “Change color” and see how the color of the label changes.
Graphics optimization
At the moment, our label uses the slow standard Unity shader, which is more suitable for high-performance platforms than for wearable devices and HoloLens.
In addition, there are a number of specific optimizations for HoloLens from the point of view of graphics, for example, using min16float when implementing shaders.
As part of this article, we will not consider in detail the writing of shaders for HoloLens. And besides, HoloToolkit has a set of customizable optimized standard shaders that will cover most of the needs.
Let's replace our label shader with StandardFast. Select the inscription in the scene hierarchy, and find the section with Material in the Inspector panel. Inside the drop-down list, select HoloToolkit -> StandardFast.
Even with only one label, our application could work with FPS below 60, which adversely affects the stability of the holograms.
Step 3: Configure build options
To run our application on HoloLens, we need to configure the appropriate build parameters in Unity - the Windows type of the project, the name and Capabilites of the package with the application.

- Open the menu File -> Build Settings
- Select the Build Settings Windows Store window from the list and click the Switch Platform button
- In the Windows Store section , select the SDK - Universal 10, UWP Build Type - D3D and tick the Unity C # Projects checkbox for debugging
- Click the Players Settings ... button in the Build Settings window. In the Inspector panel, fill in the company name and application name. Immediately select the settings section for Windows Store (p.7 in the screenshot)
- Go to the Other Settings section in the inspector panel and tick the Virtual Reality Supported checkbox, you should appear in the SDK list below “Windows Holographic”.
- Next, scroll the inspector panel to the end and in the section Publishing Settings -> Capabilities check the following items
- Internet client
- Microphone
- SpatialPerception
The final step in the configuration process is optimization and quality of resources.
Open the menu Edit -> Quality . In the Inspector, click on the triangle in each column and select Fastest . It is important to select these settings for both Unity and HoloLens in order to see a more or less current image both there and there. This profile disables anti-aliasing, imported textures are compressed to half the resolution, shadows are disabled, etc. All these profiles can be customized to your needs, at this stage, the default settings for this performance profile are enough.

Step 4: Build the project in Visual Studio and run in HoloLens Emulator
So, we have our first finished project for HoloLens. To run it on a device or an emulator, we need to generate a project for Visual Studio, build and upload the assembly to an emulator or device.
Build the project
Everything is a little different from the standard Unity build process.
Open the Build Settings window, click Add Open Scenes and then Build . Unity prompts you to select a folder where to generate a solution for Visual Studio. We in our projects use for this build folder in the root of the project. After the build process is complete, open the generated solution in Visual Studio.
To run on the emulator, install the following parameters in the debug panel: Release, x86, HoloLens Emulator 10.0.14342.1018

Press Ctrl + F5 or in the menu Debug -> Start Without Debugging.
During this process, Visual Studio:
- will put together a project
- will start the emulator
- wait for the OS to load in the emulator
- shut down and launch our application
After downloading the application to the emulator, we will see something like the following:

To move in the emulator, you can use WASD, view control - LKM + Mouse, Tap - PCM, Bloom (exit to the shell) - Esc.
For all input management options, see the documentation for the emulator . There is a big bonus that this technology was released by Microsoft - the documentation for the device, its use and API is extremely rich and complete.
One of the key tools used with the emulator or HoloLens itself is the Device Portal. It is easy and convenient to see:
- Device Status: FPS, Power, CPU, GPU, I / O
- Current running and installed applications
- Make a video or screenshot
- View room surfaces defined by the device
- File system access
- Logging, network connection settings

My integrated GPU (Intel 5500) provides a rather modest framerate in the emulator
I made a video from the demo application on one of our devices:
In the video recording mode on the device, everything looks worse than it really is, because Video is written at 30 fps. You can see the smooth lines and there is a feeling of a small lag. With a normal start, this is not there, so it is important to finally see your application on a real device.
This is a basic article about developing for HoloLens, we will be happy to write something else. Write in the comments that you are interested. We also plan a mitap where you can watch the device and talk to us - sign up here .
Resources to learn
- Official documentation - guidelines and design specifications for DirectX and Unity
- Holographic Academy - Hololens tutorial development video series
- HoloToolkit - a set of components to accelerate the development of applications for HL
- GalaxyExplorer - opensource application for HoloLens, published in the Store for HoloLens
- HoloLens App Development Forum - official development forums
- The official HoloLens channel on Youtube
Source: https://habr.com/ru/post/310446/
All Articles