The art of design opponents in the game Zelda: A Link to the Past
Let me start this article, briefly indicating what it will not be about. This is not a tedious reference for each monster in Zelda: A Link to the Past and not a comprehensive overview of how to create each class of opponents. Rather, it’s an article about creating opponents using the example of Zelda: A Link to the Past based on their functions.

Most articles dealing with this issue often borrow examples from several games to give a comprehensive view of how the theory is applied to different environments. But such articles do not provide a holistic understanding of how the functions and mechanics of gameplay interact at the level of each individual game.
')
The purpose of this article is to analyze the opponents in Zelda: A Link to the Past in order to better understand how a particular gameplay can combine various obstacles in terms of mechanics and what their influence is on the course of the game, as well as on the player's decision-making process.
Please note that we will not consider bosses here, as they represent a completely different form of obstacles.
The first part of our analysis will be devoted to the internal structure of the game. This is necessary so that we can better understand the creation principle of each monster. We do not strive to make our arbitrary analysis comprehensive, but this should be enough to explain how to create opponents, based on their function.
Life
 Life is the main resource of the protagonist named Link. They are a kind of "measure of wear," indicating Link's ability to overcome tests. The main cause of death (the loss of all lives) is a serious waste of time. Even if the game progress has been saved, the player needs to start again from the remote location and repeat all the way to continue the game from the place where he died.
Death grieves the players very much, because they try to avoid it in all available ways: with the help of potions, magic fairies and, of course, simply dodging damage.
Reasons for taking damage or death:
Magic
 Magic gives Link the ability to use some of his most powerful items (including magical ones). The player must be careful when using them, as they require a lot of magic, and this is an extremely important resource for the game. Magic is much less common than life, so it would be unwise to fully expend it.
Bombs and arrows


Bombs are an exhaustible resource that can be carried in your inventory and used if you have at least one such unit (no auxiliary items are required). They are very effective for opening caches. The allowable number of bombs in the inventory is limited.
To use arrows, Link will need a bow (plain or silver).
Bombs, arrows (and bows) have much in common with magic, but they, of course, have their own specifics.
Rupees


Rupees are in-game currency, they exist in different colors, each of which corresponds to a certain value. Rupees are really necessary to purchase only two things:
All other acquisitions (for example, upgrades to increase the limit of portable bombs or arrows) are optional and remain at the discretion of the player.
Time
 Time is not a completely obvious resource, but this is the only thing that a player loses if he managed to save progress before dying. To some extent, the loss of time implies the need for the player to re-do all the way to the place where he died, while again avoiding all dangers along the way. Accordingly, death in the game is a waste of time.
Similarly, if a player needs to replenish stocks of rupees (perhaps to buy bombs, arrows, potions, etc.) or restore health, magic, etc., he can do all this by spending some time on safer locations of the game.
It can be said that most of the resources are acquired in exchange for the time spent in the game, and death is a loss of time that could be spent on the extraction of resources. Accordingly, the loss of resources is also a waste of time, but with a delayed effect. This loss is manifested only when you lack a certain resource for the passage of the dungeon and you are forced to return to make up for the shortage. However, in most cases, such a loss is barely perceptible, since the player will naturally find the necessary resources on his next journey on the map.
The role of opponents in this game is to make the game longer, forcing the player to spend time on them. This assumption is confirmed by the presence in the game of a large number of rooms where the player must kill all the monsters in order, for example, to get the key and get out. By and large, the obstacle should prompt the player to first analyze the situation and then work out a plan of action.
The role of each opponent is to provide the player with a loss of time in key locations.
The most obvious way to do this is to create such monsters that will greatly exceed the character in terms of their damage and their level of health. However, this is a serious test of the player's skills: he needs to learn to observe and correctly respond to circumstances, which requires more time than just refining reflexes on mediocre and same-type opponents.
If the game had only one type of opponents (for example, Swordsman), but of varying difficulty, she would not only get bored quickly, but would soon become very simple, because once she had learned to win such an opponent, the player would apply similar tactics to all the rest, regardless of their strength.
So how do you need to create monsters in order to improve the observation of the players and their ability to recognize in-game patterns?
Swordsman
 We begin our review with Swordsmen. It may seem to someone that the Swordsman is the most primitive type of opponents in the game, but it's not that simple. They have their own model of behavior, as well as one of the most interesting hidden features of the game. Call it inattention.
Until the player catches the eye of the Swordsman or attacks him, he will not actively pursue. The ability to outwit the Minnich makes interaction with him especially interesting. Many levels of the game contribute to maintaining this effect, but, in one way or another, very few people managed to complete the game without engaging with him at all (with the exception of the SpeedRunner community). There is simply no need for this except to save time (and most players have nothing to worry about about time).
In addition, Swordsmen can throw away lives or rupees, which, as we said, are also worth the time. By and large, joining the battle with the Swordsman and picking up what he throws out, you thereby repay yourself as much time as you would save by avoiding the duel.
The Mechnikov function is to introduce the player to the battle mechanics and hidden features of the opponents.
Archer
 As conceived, the Archer is a coward who avoids direct confrontation, preferring to attack the player precisely from the corner. His strength depends on other opponents in the location and on how difficult it is for the player to move. As a result, in order to successfully overcome the level with Archers the player is forced to improve the skills of movement and orientation. In the castle Agahnima there is one room, where according to the condition you need to push the block under the gun of several Archers. This example well demonstrates how strong the Archer can be with the assistance of surrounding circumstances.
With the first such experience, it often makes a strong impression on the players. They are forced either to choose a complex model of movement, dodging arrows at a distance of close combat, or, conversely, to take shots at close range. Players need time to master this model and calibrate their reflexes. But, most importantly, the difficulty of passing can vary greatly depending on the obstacles or enemies of the melee that separate the player directly from the Archer.
In extreme cases, the player can use his own resources against him (for example, arrows). But such costs are not worth it and in most cases will not pay for themselves. You need to be careful: the immoderate consumption of arrows will play a cruel joke with those who do not fully understand that resources are time, especially if these arrows are needed a little later while passing the same dungeon.
The function of Archers - to strengthen the skills of movement and orientation of the player; contribute to the waste of resources.
Control opponents
The game has a whole class of opponents who secretly perform a kind of checkpoint function. Most often, they are needed to make sure that you have the necessary item to pass. Control opponents can be divided into several subgroups (these are not canonical terms, I just use them for a visual explanation).
Opponents for moderate control


This includes opponents who can be killed in an ordinary way, but it is much easier to do this with the help of some special method. Take, for example, Green Igor. You can try to defeat this clumsy monster with your sword, but you risk losing a lot of lives. On the other hand, one single arrow in his eye will instantly solve the problem.
To fight with opponents from this subgroup, additional resources may be required, because players who are accustomed to irrational spending risk to be in difficulty. For example, mummies in the Forest of Skulls are easier to kill with the Fire Rod (obtained in the same place in the dungeon), but it will additionally require magic to activate it. At the beginning of the dungeon, the player will have to defeat the mummies with his sword, because he does not have a baton at that time. But there is a high probability that, even after his discovery, he will still continue to wield a sword, because he will not have enough magic to use the rod.
The function of the representatives of this subgroup is to reward the player for researching new combat mechanics with the use of additional funds and to encourage the rational allocation of resources.
Opponents for strict control


Such opponents cannot be killed by any other means besides the fact that it was specially created for this purpose. For example, you cannot kill Terrorpin until you have the Magic Hammer. In other words, the presence of your Hammer confirms the fact that you have found the Big Chest in each dungeon. This is in a sense, insurance in terms of level design.
The function of the representatives of this subgroup is to limit the player's access to certain locations without creating additional super-powerful items (such as Titan's Gauntlets); Confuse the player by encouraging him to experiment with available inventory to overcome some enemies.
Opponents for strict control (requiring resource)
 As in the previous case, the enemies of this subgroup can be killed only by a special item, which, moreover, is used in conjunction with any limited resource.
Red Igor is a great example of this type of opponent. It can only be killed by twice hitting an eye with an arrow. But if you run out of arrows, and you still need to kill the enemy (for example, to get the key), then things are bad. It is at this moment that you fully feel the loss of time as a result of the waste of resources. To replenish the stock of arrows, you will most likely have to leave the dungeon, which in terms of the amount of time spent is sometimes equivalent to death.
As another example, you can take Frizor, who can be killed only with the help of the Rod of Fire, and only if you have enough magic left. And since Frizor guards the entrance to the Palace of Ice, you can get there only after passing through the Forest of Skulls (where the Rod of Fire is hidden).
The function of the representatives of this subgroup is to force the player to expend resources.
Knight Stalfos
 Knight Stalfos is a very interesting opponent: he knows how to come to life. But he has one vulnerability, which until recently remains unknown to the player, although indirect hints of it are found at earlier stages before the immediate meeting. This is the type of enemy that keeps the player on their toes and forces them to explore new items.
In essence, Knight Stalfos belongs to the third subgroup of control opponents, because you need to use a special resource against him - a bomb. But it also represents a very interesting type of obstacle: you can kill it only in two stages, and this will require a deeper study of the game from the player.
The function of Stalfos is to violate the rules of the game, cause the player to be surprised by the need to conduct additional research and experiment with weapons; punish the player for over-spending bombs.
Shlemozavr and Kaskozhuk


These two opponents have a common feature - they violate the rules of combat and affect the positioning of the player.
Shlemozavr attacks the player directly and does not take damage during a frontal counterattack, in connection with which the player is forced to attack him from the side. This opponent does not do much damage, but is always looking for an opportunity to push a player into a trap or pit.
Kaskozhuk behaves similarly, but he takes a defensive position and punishes the player for trying to engage in close combat, pushing him back (sometimes into a hole or trap).
The function of Shlemozavr and Kaskozhuka is to test melee combat skills and demonstrate the interaction between enemies and the environment (obstacles and traps).
Grief and Mini-Moldorm


Grief is not a very interesting opponent. Rather, he is quite annoying. But his attack tactics are curious enough. Due to the fact that the Griffin is moving in a circle, it is very difficult for a player to determine which side he will strike.
Mini-Moldorm acts in a similar way: its random model of movement does not allow the player to predict exactly where he will be, once again pushing himself from the wall.
It is difficult to hit both ranged weapons in both opponents, therefore, to defeat them, you must either deftly conduct close combat or resort to a circular attack.
The function of the Vulture and Mini-Moldorm is to reward the player's good reflexes and / or allow him to practice in a circular attack.
Red Stalfos
 Red Stalfos is a very mediocre opponent, but he has one interesting feature. Unlike Blue Stalfos, who behaves almost like a Swordsman, but does not pursue a player, Red Stalfos punishes the player for inaccurate punches by throwing a bone at him.
Most opponents do not care if they fall on them during an attack or not. The task of Red Stalfos is to teach the player to use a sword and study the radius of his defeat.
In addition, Stalfos will force the player to use valuable resources against him, thereby increasing the losses incurred as a result of the battle.
The function of Red Stalfos is to punish the player for inaccurate attacks, to provoke him to waste resources.
Thesaver
 Thesaver is a small creature in the form of a bush, which in general can hardly be called an enemy. He, too, in a sense, violates the rules of the game, forcing the user to reconsider his understanding of all basic principles. Thesaver may knock off the original route, forcing the player to chase after himself.
Thesauror's function is to manipulate the player (he does not have a lot of rupees, frankly).
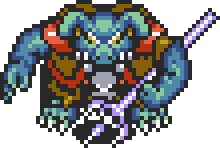
Monster Hand
 This is definitely one of the most annoying monsters in the game. This is a giant hand that appears on top and grabs Link, bringing him back to the top of the room or the maze. It’s not by chance that the Monster’s hand first appears in a dungeon at the level of the Forest of Skulls. In this dungeon, all the rooms are relatively small in size, and therefore being in the beginning is not so scary.
This enemy is killing you without killing.
While the majority of monsters have the task of driving the player out of the dungeon, resetting his life, the task of this monster is just to turn the player out of the dungeon. In many cases, this will be equivalent to death, although the player does not take direct damage, but only loses time.
The appearance of this monster is preceded by the sound of a fall and a growing shadow on the floor. In this regard, the Hand of the Monster has another purpose: to put in flight a player who has noticed these signs. And although in most cases it is very easy to evade Ruki, it limits the player’s ability to move, which, given the presence of other monsters in the room, makes it possible to create quite complex and interesting challenges.
Moreover, the Monster Hand does not leave the player much time to think. , , , , , .
– : , , , . , .
, , , . .
– .
, Zelda: A Link to the Past , .
1:
, , – . , , .
, . , , .
, , , , .
2:
, . , , :
, ( ; – );
, ( ; – ), , ( , ). , (). , .
3: ,
( ) , – , ( ). - , . , – . , , .
( , , ) . ( ) . , , , , .
, , , . - . , . , , , . : , , .
4: / /
2 3 , . , , , . , , , , : .
2 , . , , . , , . – , , , . , , , - .
– , . , , . – . , , .
, , – .
Most articles dealing with this issue often borrow examples from several games to give a comprehensive view of how the theory is applied to different environments. But such articles do not provide a holistic understanding of how the functions and mechanics of gameplay interact at the level of each individual game.
')
The purpose of this article is to analyze the opponents in Zelda: A Link to the Past in order to better understand how a particular gameplay can combine various obstacles in terms of mechanics and what their influence is on the course of the game, as well as on the player's decision-making process.
Please note that we will not consider bosses here, as they represent a completely different form of obstacles.
Mechanics and resources in the game A Link to the Past
The first part of our analysis will be devoted to the internal structure of the game. This is necessary so that we can better understand the creation principle of each monster. We do not strive to make our arbitrary analysis comprehensive, but this should be enough to explain how to create opponents, based on their function.
Life
Life is the main resource of the protagonist named Link. They are a kind of "measure of wear," indicating Link's ability to overcome tests. The main cause of death (the loss of all lives) is a serious waste of time. Even if the game progress has been saved, the player needs to start again from the remote location and repeat all the way to continue the game from the place where he died.Death grieves the players very much, because they try to avoid it in all available ways: with the help of potions, magic fairies and, of course, simply dodging damage.
Reasons for taking damage or death:
- clashing with enemies
- falling into the trap
- attacks by opponents with shells (and bombs),
- fall into the pit.
Magic
Magic gives Link the ability to use some of his most powerful items (including magical ones). The player must be careful when using them, as they require a lot of magic, and this is an extremely important resource for the game. Magic is much less common than life, so it would be unwise to fully expend it.Bombs and arrows
Bombs are an exhaustible resource that can be carried in your inventory and used if you have at least one such unit (no auxiliary items are required). They are very effective for opening caches. The allowable number of bombs in the inventory is limited.
To use arrows, Link will need a bow (plain or silver).
Bombs, arrows (and bows) have much in common with magic, but they, of course, have their own specifics.
Rupees
Rupees are in-game currency, they exist in different colors, each of which corresponds to a certain value. Rupees are really necessary to purchase only two things:
- Fins (allow Link to swim);
- Potions - (necessary to replenish lives and magic; usually are required to pass the level of "Turtle Rock").
All other acquisitions (for example, upgrades to increase the limit of portable bombs or arrows) are optional and remain at the discretion of the player.
Time
Time is not a completely obvious resource, but this is the only thing that a player loses if he managed to save progress before dying. To some extent, the loss of time implies the need for the player to re-do all the way to the place where he died, while again avoiding all dangers along the way. Accordingly, death in the game is a waste of time.Similarly, if a player needs to replenish stocks of rupees (perhaps to buy bombs, arrows, potions, etc.) or restore health, magic, etc., he can do all this by spending some time on safer locations of the game.
It can be said that most of the resources are acquired in exchange for the time spent in the game, and death is a loss of time that could be spent on the extraction of resources. Accordingly, the loss of resources is also a waste of time, but with a delayed effect. This loss is manifested only when you lack a certain resource for the passage of the dungeon and you are forced to return to make up for the shortage. However, in most cases, such a loss is barely perceptible, since the player will naturally find the necessary resources on his next journey on the map.
Opponents in the game Zelda: A Link to the Past
The role of opponents in this game is to make the game longer, forcing the player to spend time on them. This assumption is confirmed by the presence in the game of a large number of rooms where the player must kill all the monsters in order, for example, to get the key and get out. By and large, the obstacle should prompt the player to first analyze the situation and then work out a plan of action.
The role of each opponent is to provide the player with a loss of time in key locations.
The most obvious way to do this is to create such monsters that will greatly exceed the character in terms of their damage and their level of health. However, this is a serious test of the player's skills: he needs to learn to observe and correctly respond to circumstances, which requires more time than just refining reflexes on mediocre and same-type opponents.
If the game had only one type of opponents (for example, Swordsman), but of varying difficulty, she would not only get bored quickly, but would soon become very simple, because once she had learned to win such an opponent, the player would apply similar tactics to all the rest, regardless of their strength.
So how do you need to create monsters in order to improve the observation of the players and their ability to recognize in-game patterns?
Swordsman
We begin our review with Swordsmen. It may seem to someone that the Swordsman is the most primitive type of opponents in the game, but it's not that simple. They have their own model of behavior, as well as one of the most interesting hidden features of the game. Call it inattention.Until the player catches the eye of the Swordsman or attacks him, he will not actively pursue. The ability to outwit the Minnich makes interaction with him especially interesting. Many levels of the game contribute to maintaining this effect, but, in one way or another, very few people managed to complete the game without engaging with him at all (with the exception of the SpeedRunner community). There is simply no need for this except to save time (and most players have nothing to worry about about time).
In addition, Swordsmen can throw away lives or rupees, which, as we said, are also worth the time. By and large, joining the battle with the Swordsman and picking up what he throws out, you thereby repay yourself as much time as you would save by avoiding the duel.
The Mechnikov function is to introduce the player to the battle mechanics and hidden features of the opponents.
Archer
As conceived, the Archer is a coward who avoids direct confrontation, preferring to attack the player precisely from the corner. His strength depends on other opponents in the location and on how difficult it is for the player to move. As a result, in order to successfully overcome the level with Archers the player is forced to improve the skills of movement and orientation. In the castle Agahnima there is one room, where according to the condition you need to push the block under the gun of several Archers. This example well demonstrates how strong the Archer can be with the assistance of surrounding circumstances.With the first such experience, it often makes a strong impression on the players. They are forced either to choose a complex model of movement, dodging arrows at a distance of close combat, or, conversely, to take shots at close range. Players need time to master this model and calibrate their reflexes. But, most importantly, the difficulty of passing can vary greatly depending on the obstacles or enemies of the melee that separate the player directly from the Archer.
In extreme cases, the player can use his own resources against him (for example, arrows). But such costs are not worth it and in most cases will not pay for themselves. You need to be careful: the immoderate consumption of arrows will play a cruel joke with those who do not fully understand that resources are time, especially if these arrows are needed a little later while passing the same dungeon.
The function of Archers - to strengthen the skills of movement and orientation of the player; contribute to the waste of resources.
Control opponents
The game has a whole class of opponents who secretly perform a kind of checkpoint function. Most often, they are needed to make sure that you have the necessary item to pass. Control opponents can be divided into several subgroups (these are not canonical terms, I just use them for a visual explanation).
Opponents for moderate control
This includes opponents who can be killed in an ordinary way, but it is much easier to do this with the help of some special method. Take, for example, Green Igor. You can try to defeat this clumsy monster with your sword, but you risk losing a lot of lives. On the other hand, one single arrow in his eye will instantly solve the problem.
To fight with opponents from this subgroup, additional resources may be required, because players who are accustomed to irrational spending risk to be in difficulty. For example, mummies in the Forest of Skulls are easier to kill with the Fire Rod (obtained in the same place in the dungeon), but it will additionally require magic to activate it. At the beginning of the dungeon, the player will have to defeat the mummies with his sword, because he does not have a baton at that time. But there is a high probability that, even after his discovery, he will still continue to wield a sword, because he will not have enough magic to use the rod.
The function of the representatives of this subgroup is to reward the player for researching new combat mechanics with the use of additional funds and to encourage the rational allocation of resources.
Opponents for strict control
Such opponents cannot be killed by any other means besides the fact that it was specially created for this purpose. For example, you cannot kill Terrorpin until you have the Magic Hammer. In other words, the presence of your Hammer confirms the fact that you have found the Big Chest in each dungeon. This is in a sense, insurance in terms of level design.
The function of the representatives of this subgroup is to limit the player's access to certain locations without creating additional super-powerful items (such as Titan's Gauntlets); Confuse the player by encouraging him to experiment with available inventory to overcome some enemies.
Opponents for strict control (requiring resource)
As in the previous case, the enemies of this subgroup can be killed only by a special item, which, moreover, is used in conjunction with any limited resource.Red Igor is a great example of this type of opponent. It can only be killed by twice hitting an eye with an arrow. But if you run out of arrows, and you still need to kill the enemy (for example, to get the key), then things are bad. It is at this moment that you fully feel the loss of time as a result of the waste of resources. To replenish the stock of arrows, you will most likely have to leave the dungeon, which in terms of the amount of time spent is sometimes equivalent to death.
As another example, you can take Frizor, who can be killed only with the help of the Rod of Fire, and only if you have enough magic left. And since Frizor guards the entrance to the Palace of Ice, you can get there only after passing through the Forest of Skulls (where the Rod of Fire is hidden).
The function of the representatives of this subgroup is to force the player to expend resources.
Knight Stalfos
Knight Stalfos is a very interesting opponent: he knows how to come to life. But he has one vulnerability, which until recently remains unknown to the player, although indirect hints of it are found at earlier stages before the immediate meeting. This is the type of enemy that keeps the player on their toes and forces them to explore new items.In essence, Knight Stalfos belongs to the third subgroup of control opponents, because you need to use a special resource against him - a bomb. But it also represents a very interesting type of obstacle: you can kill it only in two stages, and this will require a deeper study of the game from the player.
The function of Stalfos is to violate the rules of the game, cause the player to be surprised by the need to conduct additional research and experiment with weapons; punish the player for over-spending bombs.
Shlemozavr and Kaskozhuk
These two opponents have a common feature - they violate the rules of combat and affect the positioning of the player.
Shlemozavr attacks the player directly and does not take damage during a frontal counterattack, in connection with which the player is forced to attack him from the side. This opponent does not do much damage, but is always looking for an opportunity to push a player into a trap or pit.
Kaskozhuk behaves similarly, but he takes a defensive position and punishes the player for trying to engage in close combat, pushing him back (sometimes into a hole or trap).
The function of Shlemozavr and Kaskozhuka is to test melee combat skills and demonstrate the interaction between enemies and the environment (obstacles and traps).
Grief and Mini-Moldorm
Grief is not a very interesting opponent. Rather, he is quite annoying. But his attack tactics are curious enough. Due to the fact that the Griffin is moving in a circle, it is very difficult for a player to determine which side he will strike.
Mini-Moldorm acts in a similar way: its random model of movement does not allow the player to predict exactly where he will be, once again pushing himself from the wall.
It is difficult to hit both ranged weapons in both opponents, therefore, to defeat them, you must either deftly conduct close combat or resort to a circular attack.
The function of the Vulture and Mini-Moldorm is to reward the player's good reflexes and / or allow him to practice in a circular attack.
Red Stalfos
Red Stalfos is a very mediocre opponent, but he has one interesting feature. Unlike Blue Stalfos, who behaves almost like a Swordsman, but does not pursue a player, Red Stalfos punishes the player for inaccurate punches by throwing a bone at him.Most opponents do not care if they fall on them during an attack or not. The task of Red Stalfos is to teach the player to use a sword and study the radius of his defeat.
In addition, Stalfos will force the player to use valuable resources against him, thereby increasing the losses incurred as a result of the battle.
The function of Red Stalfos is to punish the player for inaccurate attacks, to provoke him to waste resources.
Thesaver
Thesaver is a small creature in the form of a bush, which in general can hardly be called an enemy. He, too, in a sense, violates the rules of the game, forcing the user to reconsider his understanding of all basic principles. Thesaver may knock off the original route, forcing the player to chase after himself.Thesauror's function is to manipulate the player (he does not have a lot of rupees, frankly).
Monster Hand
This is definitely one of the most annoying monsters in the game. This is a giant hand that appears on top and grabs Link, bringing him back to the top of the room or the maze. It’s not by chance that the Monster’s hand first appears in a dungeon at the level of the Forest of Skulls. In this dungeon, all the rooms are relatively small in size, and therefore being in the beginning is not so scary.This enemy is killing you without killing.
While the majority of monsters have the task of driving the player out of the dungeon, resetting his life, the task of this monster is just to turn the player out of the dungeon. In many cases, this will be equivalent to death, although the player does not take direct damage, but only loses time.
The appearance of this monster is preceded by the sound of a fall and a growing shadow on the floor. In this regard, the Hand of the Monster has another purpose: to put in flight a player who has noticed these signs. And although in most cases it is very easy to evade Ruki, it limits the player’s ability to move, which, given the presence of other monsters in the room, makes it possible to create quite complex and interesting challenges.
Moreover, the Monster Hand does not leave the player much time to think. , , , , , .
– : , , , . , .
, , , . .
– .
Practical use
, Zelda: A Link to the Past , .
1:
, , – . , , .
, . , , .
, , , , .
2:
, . , , :
, ( ; – );
, ( ; – ), , ( , ). , (). , .
3: ,
( ) , – , ( ). - , . , – . , , .
( , , ) . ( ) . , , , , .
, , , . - . , . , , , . : , , .
4: / /
2 3 , . , , , . , , , , : .
2 , . , , . , , . – , , , . , , , - .
Conclusion
– , . , , . – . , , .
, , – .
Source: https://habr.com/ru/post/310354/
All Articles