ASP.NET MVC + VM: splitting complex views into simple ones using view models using the example of an event calendar
I decided to write on this topic, because I constantly use view models in ASP.NET MVC web applications, and often I have to explain the essence of this approach to my colleagues, and we’ve not found. This article focuses primarily on beginners.
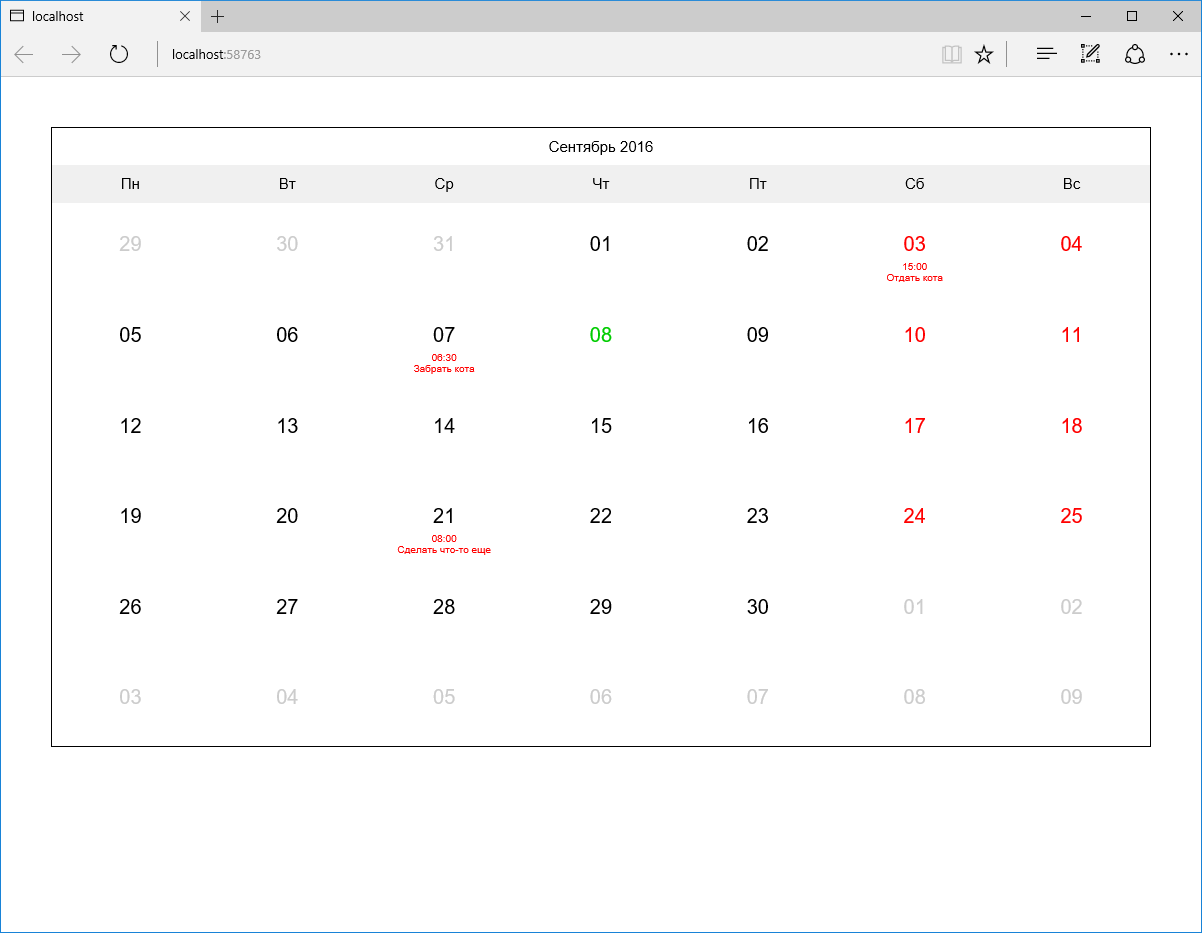
Imagine that we need to display a calendar of some events for the current month. This is a rather complicated construction. The calendar should contain a title with the name of the current month and year, a line with the names of the days and, in fact, the days themselves (6 rows of 7 days), each of which has a date and, optionally, a certain set of events, the names of which need to be displayed, having previously downloaded them from the database. Also suppose that weekends and holidays should be marked in a special way. That is, in the end, you should get something like this:
')
The MVC design pattern and its concept of dividing the application into 3 parts (model, presentation, and controller) are familiar to every developer.
Under the model, you can simply understand only the data (objects of the subject area, which are often called “models”), and the data combined with a certain logic of their processing. (The storage of data should be separated into a separate, independent layer.) That is, ideally we will have a model that exists and functions regardless of how its data is displayed and stored.
Consider, for example, online shopping. Often, in such projects, the frontend occupies only a small part of the entire functionality, most of which is concentrated in various administrative subsystems, such as order accounting and customer interaction, warehouse accounting, analytics, API and so on. It is obvious that the functioning of such subsystems (which, by the way, can easily be executed and in the form of individual applications) in the context of a single and common model is very important. The implementation of such functions as calculating the value of a specific position (including current promotions and discounts) or the total amount of the order should be the same for the entire project.
Let's imagine now the main page of a typical online store. It certainly has a place for a list of categories, several popular products, news and other things. That is, the transfer to the representation of any one object of the model is definitely not enough. But after all, to form a set of objects necessary to display such a representation, a certain logic is required. Yes, and these sets of objects may be similar for different representations, so it would be wrong to place such logic directly in the controller. (The two most common problems of bad code are duplication and long, illegible methods.) But this logic cannot be part of the model either, since it applies to a particular representation. That's where the species models come to the rescue.
In essence, a model of a view (it would be more correct to call it a view model) encapsulates a set of all the data necessary for a particular view (or even several views). As representations can consist of other representations, a species model can consist of other species models. In the case of the main page of the online store, we could define a model of the type of this page, which would include sets of models of types of categories, products and news. In turn, the model of the type of goods may consist of models of the types of photographs, comments, and so on. It is noteworthy that all these types of models (except, perhaps, models of the main page) can be reused. However, this does not solve the problem of the need to have the logic for the formation of the entire graph of these objects, which, as we have already discussed above, is directly a bad idea to put directly into the controller.
View model builders are ideal for isolating and reusing model view initialization code — a parallel hierarchy of classes that generate objects of view models of corresponding types. The builders of the parent view models can use the builders of the child view models to build the entire necessary hierarchy, calling each other in a chain, from top to bottom. Let's pay attention that for simple models of types where initialization is reduced only to installation of the values received from the controller, application of the builder is redundant and cumbersome - in this case, the usual constructor will suffice.
On this, I think, it's time to move on to practice.
We now return to our calendar of events as a simpler example. To begin with, we will prepare an empty ASP.NET MVC web application (I will use ASP.NET Core to demonstrate at the same time the capabilities of the new platform, but in the context of our example, this does not matter). Add in it the only controller DefaultController with a single action (action) Calendar in it - it will be responsible for displaying the calendar. We also add the corresponding view (for now, without any content). If we run our application now, we should get a blank page. (At the end of the article you will find a link to the finished test project posted on GitHub.)
As we have already seen above, in order to transfer all the necessary data to our view, we will need an appropriate view model. Let's call it CalendarViewModel. (It is very convenient to place the view models in the ViewModels folder of the project, following the structure of the Views folder; later I will provide the corresponding screenshot.) We will immediately add to it an obvious Date property of type DateTime. We need it to display the current month and year. It should be such a class:
Now let's add a builder for our view model (there is no special need for it now, but later it will appear - let's do it in advance):
As you can see, the Build builder method takes no parameters and returns a new object of the CalendarViewModel class - a ready-made view model.
Now we specify our CalendarViewModel class as a view model for the Calendar view and add the month and year display from this view model:
Next, use the CalendarViewModelBuilder builder to transfer the view model to the view. Our controller should take the following form:
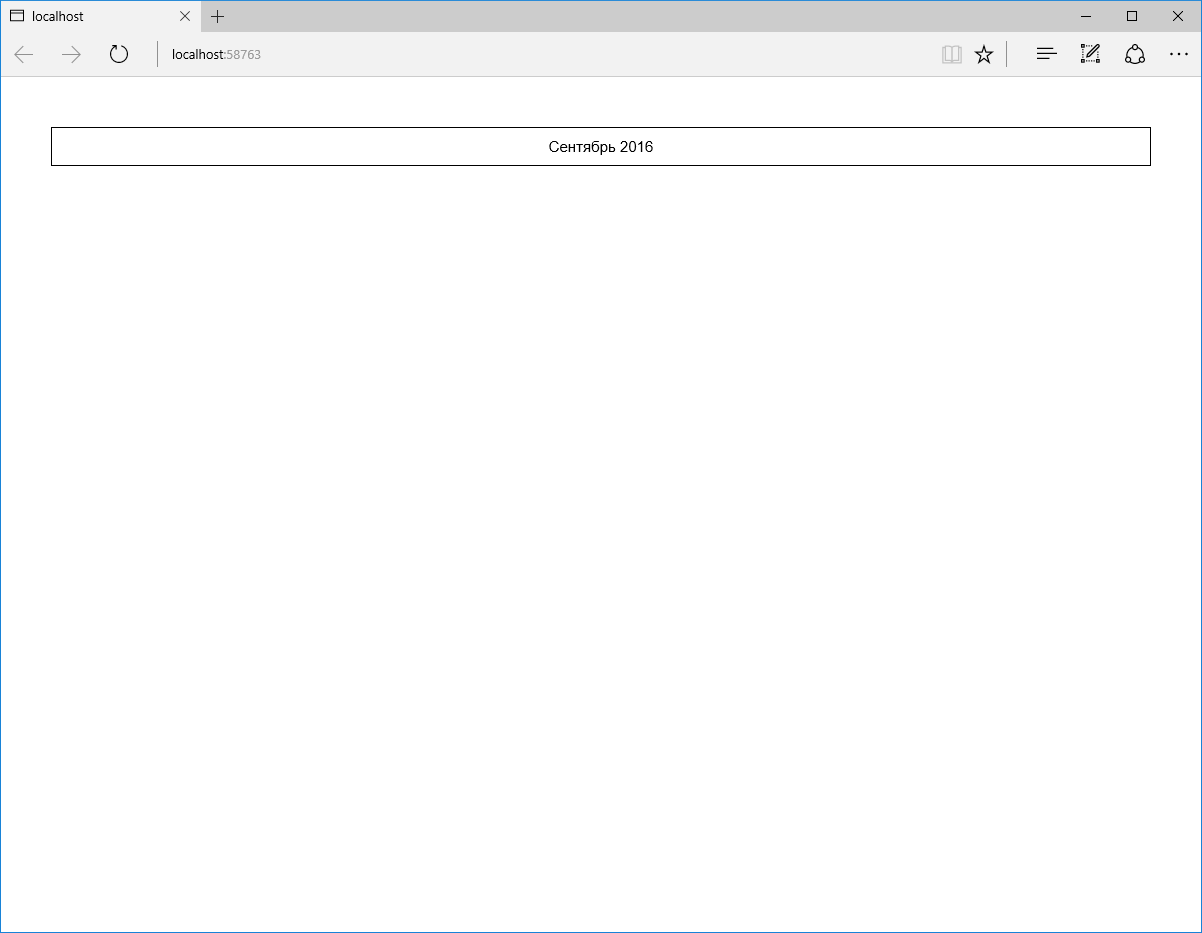
Now we can start the application again, and this time something will already be displayed (I did a bit of tinkering with styles, so the future calendar already has some decoration):
Let's now output a string with the names of the days. Since this is static information and it will not be used anywhere else, just add the appropriate markup directly to the view. It should turn out like this:
In a browser, it looks like this:

Now came the turn of the most interesting - the display of days. To do this, add a separate partial view _Day and a model of the form DayViewModel for it. (It is also quite possible that later in our project we might want to display days with planned events regardless of the calendar. For example, as a separate block of events for today. We will keep this in mind.)
For now, let's add a DateTime Date property to the DayViewModel class and 3 more bool properties — IsNotCurrentMonth, IsWeekendOrHoliday, and IsToday:
The build method of the builder this time takes one parameter - the date:
As you can see, the builder initializes all the properties of the view model. The IsNotCurrentMonth flag determines whether the day is outside the current month (in order to be able to highlight it in gray). The IsWeekendOrHoliday set means that the day is a weekend or holiday, and IsToday means today (accordingly, we will highlight such days in red or green).
The _Day partial view may look like this (note, we don’t specifically use the td tag here so that this partial view can be used separately from the calendar):
Depending on the values of the IsNotCurrentMonth, IsWeekendOrHoliday, and IsToday properties, the corresponding CSS classes are set.
It remains to add a set of day view models to the calendar view model and make the calendar view model builder initialize this set.
Reflecting on which logic is best implemented in the view model builder, and which one directly in the view, one should proceed from the results of a simple test: do you have to duplicate this logic again if you need to replace the view? If so, then the logic should be placed in the view model builder. If not, directly in the view (this means that the code is too specific and refers only to a specific display method). Although if logic means something truly voluminous, then perhaps the best solution would be to make an additional view model for a specific view and transfer this logic to the Build method of its builder. In our case, we could represent days as an array of 42 elements (6 rows of 7 days each), but in this case, in the Calendar view, we need logic to split this array into lines. Therefore, perhaps it would be more appropriate to immediately make the array two-dimensional (unless we assume that in the future we will need to output the days in some other way than with a table):
The Build method of the builder of this view model can now be supplemented with the following logic:
Run the application and see what happened:

Almost done. Now let's deal with events. First, we need to add the Event class to our model:
Secondly, we will add some kind of fake data access layer, which in fact will simply return predefined objects for given dates. I will not dwell on this in detail, its implementation (using the templates Unit of Work and Repository in its simplest form + using the built-in ASP.NET Core DI) can be viewed in a test project.
Immediately add the EventViewModel view model, the builder for it, and partly the _Event view.
EventViewModel class:
Build method of EventViewModelBuilder class:
As you can see, in this case, the set of model view properties is almost identical to the set of model properties, therefore, in order not to project each property of one class onto a property of another class, we should use something like AutoMapper .
Partial view of _Event:
Obviously, all this can be reused, regardless of days or calendar.
To finish our application, we need to add an IEnumerable type Events property to the DayViewModel class and initialize it in the day view model builder. To do this, we need the daytime model builder to access the data access layer, which we have presented by implementing the Unit of Work pattern. I would not like to touch on this now in detail so as not to enlarge an already large article. In short, all calls to the data access layer within a single request to the controller should occur in the context of a single instance of the class of our unit of work. That is, such an instance must be created when creating a controller object (for example, using DI) and transferred to all builders of view models along the chain. Therefore, I added another abstract class ViewModelBuilderBase, whose constructor takes one storage argument of type IStorage and stores it in a protected variable so that all heirs can access it. Now the Build method of the DayViewModelBuilder class can be extended by initializing the Events property:
As you can see, we access the EventRepository repository and use its FilteredByDate method to select all events for a given date, and then use the LINQ Select method and the EventViewModelBuilder builder to project each object of the Event model onto an object of the EventViewModel view model.
If we now add the output of the events to the _Day partial view, then our application will be ready and by running it we will get what was depicted in the first screenshot:
That's all. The final project structure:

I posted this project on GitHub so that you can see it live. Again, it is implemented on an ASP.NET Core. Here you can find everything you need to run it.
I hope I managed to explain the essence of this approach and demonstrate a simple way to implement it. I did not mention anything at all about using view models to display forms, although this is no less a common scenario for using them. If it is interesting, I can describe it in the next article. Perhaps due to the use of the “database” the example seemed too confusing, but I would certainly like to touch on this aspect. In general, thank you for your attention and I will be glad to hear criticism!
Imagine that we need to display a calendar of some events for the current month. This is a rather complicated construction. The calendar should contain a title with the name of the current month and year, a line with the names of the days and, in fact, the days themselves (6 rows of 7 days), each of which has a date and, optionally, a certain set of events, the names of which need to be displayed, having previously downloaded them from the database. Also suppose that weekends and holidays should be marked in a special way. That is, in the end, you should get something like this:
')
Some theory
The MVC design pattern and its concept of dividing the application into 3 parts (model, presentation, and controller) are familiar to every developer.
Under the model, you can simply understand only the data (objects of the subject area, which are often called “models”), and the data combined with a certain logic of their processing. (The storage of data should be separated into a separate, independent layer.) That is, ideally we will have a model that exists and functions regardless of how its data is displayed and stored.
Consider, for example, online shopping. Often, in such projects, the frontend occupies only a small part of the entire functionality, most of which is concentrated in various administrative subsystems, such as order accounting and customer interaction, warehouse accounting, analytics, API and so on. It is obvious that the functioning of such subsystems (which, by the way, can easily be executed and in the form of individual applications) in the context of a single and common model is very important. The implementation of such functions as calculating the value of a specific position (including current promotions and discounts) or the total amount of the order should be the same for the entire project.
Let's imagine now the main page of a typical online store. It certainly has a place for a list of categories, several popular products, news and other things. That is, the transfer to the representation of any one object of the model is definitely not enough. But after all, to form a set of objects necessary to display such a representation, a certain logic is required. Yes, and these sets of objects may be similar for different representations, so it would be wrong to place such logic directly in the controller. (The two most common problems of bad code are duplication and long, illegible methods.) But this logic cannot be part of the model either, since it applies to a particular representation. That's where the species models come to the rescue.
In essence, a model of a view (it would be more correct to call it a view model) encapsulates a set of all the data necessary for a particular view (or even several views). As representations can consist of other representations, a species model can consist of other species models. In the case of the main page of the online store, we could define a model of the type of this page, which would include sets of models of types of categories, products and news. In turn, the model of the type of goods may consist of models of the types of photographs, comments, and so on. It is noteworthy that all these types of models (except, perhaps, models of the main page) can be reused. However, this does not solve the problem of the need to have the logic for the formation of the entire graph of these objects, which, as we have already discussed above, is directly a bad idea to put directly into the controller.
View model builders are ideal for isolating and reusing model view initialization code — a parallel hierarchy of classes that generate objects of view models of corresponding types. The builders of the parent view models can use the builders of the child view models to build the entire necessary hierarchy, calling each other in a chain, from top to bottom. Let's pay attention that for simple models of types where initialization is reduced only to installation of the values received from the controller, application of the builder is redundant and cumbersome - in this case, the usual constructor will suffice.
On this, I think, it's time to move on to practice.
Practice
We now return to our calendar of events as a simpler example. To begin with, we will prepare an empty ASP.NET MVC web application (I will use ASP.NET Core to demonstrate at the same time the capabilities of the new platform, but in the context of our example, this does not matter). Add in it the only controller DefaultController with a single action (action) Calendar in it - it will be responsible for displaying the calendar. We also add the corresponding view (for now, without any content). If we run our application now, we should get a blank page. (At the end of the article you will find a link to the finished test project posted on GitHub.)
As we have already seen above, in order to transfer all the necessary data to our view, we will need an appropriate view model. Let's call it CalendarViewModel. (It is very convenient to place the view models in the ViewModels folder of the project, following the structure of the Views folder; later I will provide the corresponding screenshot.) We will immediately add to it an obvious Date property of type DateTime. We need it to display the current month and year. It should be such a class:
public class CalendarViewModel { public DateTime Date { get; set; } } Now let's add a builder for our view model (there is no special need for it now, but later it will appear - let's do it in advance):
public class CalendarViewModelBuilder { public CalendarViewModel Build() { return new CalendarViewModel() { Date = DateTime.Now }; } } As you can see, the Build builder method takes no parameters and returns a new object of the CalendarViewModel class - a ready-made view model.
Now we specify our CalendarViewModel class as a view model for the Calendar view and add the month and year display from this view model:
@model AspNetCoreViewModels.ViewModels.Default.Calendar.CalendarViewModel <div class="calendar"> <div class="header"> @Model.Date.ToString("MMMM yyyy") </div> </div> Next, use the CalendarViewModelBuilder builder to transfer the view model to the view. Our controller should take the following form:
public class DefaultController : Controller { public ActionResult Calendar() { return this.View(new CalendarViewModelBuilder().Build()); } } Now we can start the application again, and this time something will already be displayed (I did a bit of tinkering with styles, so the future calendar already has some decoration):
Let's now output a string with the names of the days. Since this is static information and it will not be used anywhere else, just add the appropriate markup directly to the view. It should turn out like this:
@model AspNetCoreViewModels.ViewModels.Default.Calendar.CalendarViewModel <div class="calendar"> <div class="header"> @Model.Date.ToString("MMMM yyyy") </div> <table cellpadding="0" cellspacing="0"> <tr> <th></th> <th></th> <th></th> <th></th> <th></th> <th></th> <th></th> </tr> </table> </div> In a browser, it looks like this:
Now came the turn of the most interesting - the display of days. To do this, add a separate partial view _Day and a model of the form DayViewModel for it. (It is also quite possible that later in our project we might want to display days with planned events regardless of the calendar. For example, as a separate block of events for today. We will keep this in mind.)
For now, let's add a DateTime Date property to the DayViewModel class and 3 more bool properties — IsNotCurrentMonth, IsWeekendOrHoliday, and IsToday:
public class DayViewModel { public DateTime Date { get; set; } public bool IsNotCurrentMonth { get; set; } public bool IsWeekendOrHoliday { get; set; } public bool IsToday { get; set; } } The build method of the builder this time takes one parameter - the date:
public class DayViewModelBuilder { public DayViewModel Build(DateTime date) { return new DayViewModel() { Date = date, IsNotCurrentMonth = date.Month != DateTime.Now.Month, IsWeekendOrHoliday = date.DayOfWeek == DayOfWeek.Saturday || date.DayOfWeek == DayOfWeek.Sunday, IsToday = date.Date == DateTime.Now.Date }; } } As you can see, the builder initializes all the properties of the view model. The IsNotCurrentMonth flag determines whether the day is outside the current month (in order to be able to highlight it in gray). The IsWeekendOrHoliday set means that the day is a weekend or holiday, and IsToday means today (accordingly, we will highlight such days in red or green).
The _Day partial view may look like this (note, we don’t specifically use the td tag here so that this partial view can be used separately from the calendar):
<div class="day @(this.Model.IsNotCurrentMonth ? "not-current-month" : null) @(this.Model.IsWeekendOrHoliday ? "weekend-or-holiday" : null) @(this.Model.IsToday ? "today" : null)"> <div class="date"> @Model.Date.Day.ToString("00") </div> </div> Depending on the values of the IsNotCurrentMonth, IsWeekendOrHoliday, and IsToday properties, the corresponding CSS classes are set.
It remains to add a set of day view models to the calendar view model and make the calendar view model builder initialize this set.
Reflecting on which logic is best implemented in the view model builder, and which one directly in the view, one should proceed from the results of a simple test: do you have to duplicate this logic again if you need to replace the view? If so, then the logic should be placed in the view model builder. If not, directly in the view (this means that the code is too specific and refers only to a specific display method). Although if logic means something truly voluminous, then perhaps the best solution would be to make an additional view model for a specific view and transfer this logic to the Build method of its builder. In our case, we could represent days as an array of 42 elements (6 rows of 7 days each), but in this case, in the Calendar view, we need logic to split this array into lines. Therefore, perhaps it would be more appropriate to immediately make the array two-dimensional (unless we assume that in the future we will need to output the days in some other way than with a table):
public class CalendarViewModel { public DateTime Date { get; set; } public DayViewModel[,] Days { get; set; } } The Build method of the builder of this view model can now be supplemented with the following logic:
DayViewModel[,] days = new DayViewModel[6,7]; DateTime date = new DateTime(DateTime.Now.Year, DateTime.Now.Month, 1); int offset = (int)date.DayOfWeek; if (offset == 0) offset = 7; offset--; date = date.AddDays(offset * -1); for (int i = 0; i != 6; i++) { for (int j = 0; j != 7; j++) { days[i, j] = new DayViewModelBuilder().Build(date); date = date.AddDays(1); } } Run the application and see what happened:
Almost done. Now let's deal with events. First, we need to add the Event class to our model:
public class Event { public int Id { get; set; } public DateTime Date { get; set; } public string Name { get; set; } } Secondly, we will add some kind of fake data access layer, which in fact will simply return predefined objects for given dates. I will not dwell on this in detail, its implementation (using the templates Unit of Work and Repository in its simplest form + using the built-in ASP.NET Core DI) can be viewed in a test project.
Immediately add the EventViewModel view model, the builder for it, and partly the _Event view.
EventViewModel class:
public class EventViewModel { public DateTime Date { get; set; } public string Name { get; set; } } Build method of EventViewModelBuilder class:
public EventViewModel Build(Event @event) { return new EventViewModel() { Date = @event.Date, Name = @event.Name }; } As you can see, in this case, the set of model view properties is almost identical to the set of model properties, therefore, in order not to project each property of one class onto a property of another class, we should use something like AutoMapper .
Partial view of _Event:
@model AspNetCoreViewModels.ViewModels.Shared.EventViewModel <div class="event"> @Model.Date.ToString("HH:mm")<br /> @Model.Name </div> Obviously, all this can be reused, regardless of days or calendar.
To finish our application, we need to add an IEnumerable type Events property to the DayViewModel class and initialize it in the day view model builder. To do this, we need the daytime model builder to access the data access layer, which we have presented by implementing the Unit of Work pattern. I would not like to touch on this now in detail so as not to enlarge an already large article. In short, all calls to the data access layer within a single request to the controller should occur in the context of a single instance of the class of our unit of work. That is, such an instance must be created when creating a controller object (for example, using DI) and transferred to all builders of view models along the chain. Therefore, I added another abstract class ViewModelBuilderBase, whose constructor takes one storage argument of type IStorage and stores it in a protected variable so that all heirs can access it. Now the Build method of the DayViewModelBuilder class can be extended by initializing the Events property:
Events = this.Storage.EventRepository.FilteredByDate(date).Select( e => new EventViewModelBuilder(this.Storage).Build(e) ) As you can see, we access the EventRepository repository and use its FilteredByDate method to select all events for a given date, and then use the LINQ Select method and the EventViewModelBuilder builder to project each object of the Event model onto an object of the EventViewModel view model.
If we now add the output of the events to the _Day partial view, then our application will be ready and by running it we will get what was depicted in the first screenshot:
<div class="events"> @foreach (var @event in this.Model.Events) { @Html.Partial("_Event", @event) } </div> That's all. The final project structure:
Conclusion
I posted this project on GitHub so that you can see it live. Again, it is implemented on an ASP.NET Core. Here you can find everything you need to run it.
I hope I managed to explain the essence of this approach and demonstrate a simple way to implement it. I did not mention anything at all about using view models to display forms, although this is no less a common scenario for using them. If it is interesting, I can describe it in the next article. Perhaps due to the use of the “database” the example seemed too confusing, but I would certainly like to touch on this aspect. In general, thank you for your attention and I will be glad to hear criticism!
Source: https://habr.com/ru/post/309496/
All Articles