Introduction to GitLab CI
I publish a translation of my article from the GitLab blog about how to start using CI. The remaining translations of the Hitlab posts can be found on the Softmart company blog .
Imagine for a second that you do not know anything about the concept of continuous integration (Continuous Integration - CI) and why it is needed. Or you forgot all this. In any case, let's start with the basics.
Imagine that you are working on a project in which the entire code base consists of two text files. Moreover, it is very important that the concatenation of these files always results in the phrase "Hello world." If this condition is not met, the whole team loses a monthly salary. Yes, everything is so serious.

One responsible developer wrote a small script that needs to be run before each code is sent to customers. The script is non-trivial:
cat file1.txt file2.txt | grep -q "Hello world" The problem is that there are ten developers in the team, and no one has yet canceled the human factor.
A week ago, one newcomer forgot to run the script before sending the code, as a result of which three customers received broken assemblies. I would like to avoid this in the future, so you decide to put an end to this problem once and for all. Fortunately, your code is already on GitLab, and you remember the built-in CI system . In addition, at the conference you heard that CI is used for testing ...
Run the first test in CI
After a couple of minutes spent searching and reading the documentation, it turns out that all you need to do is add two lines of code to the .gitlab-ci.yml :
test: script: cat file1.txt file2.txt | grep -q 'Hello world' Add, commit - and cheers! Build successful!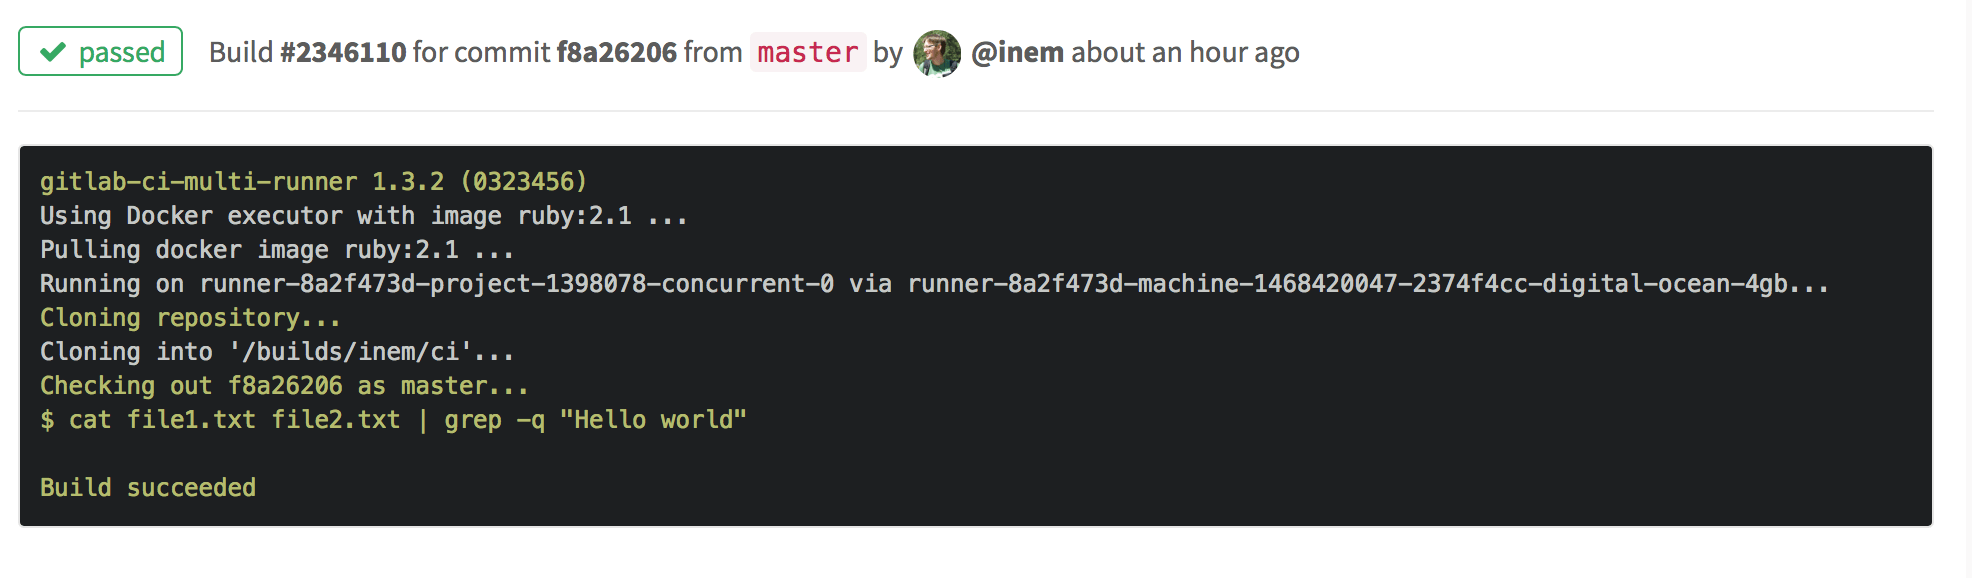
Change the second file "world" to "Africa" and see what happens: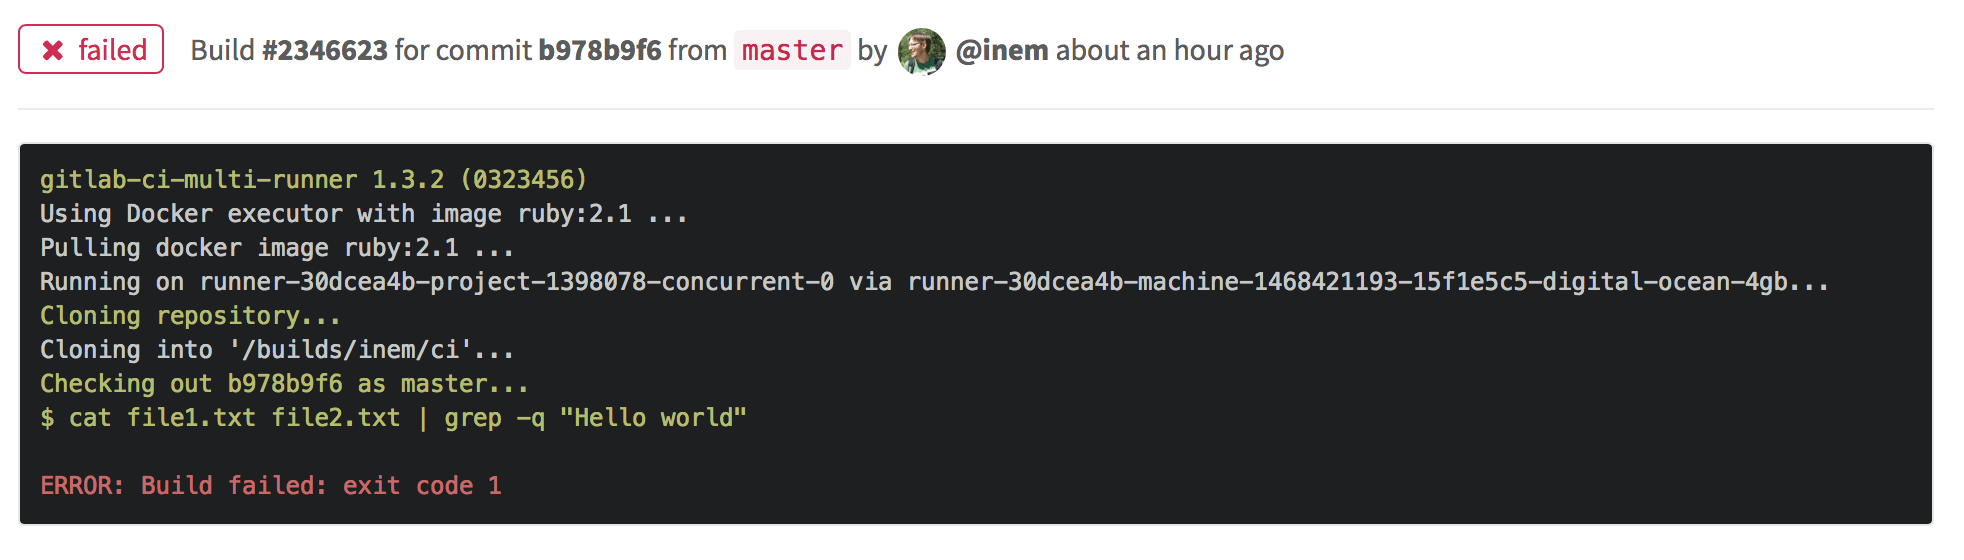
Build failed, as expected.
So, we now have automated tests. GitLab CI will run our test script every time new code is sent to the repository.
Ability to load build results
The next business requirement is to archive the code before sending it to customers. Why not automate it?
All you need to do is define another task for CI. Let's call it "package":
test: script: cat file1.txt file2.txt | grep -q 'Hello world' package: script: cat file1.txt file2.txt | gzip > package.gz As a result, the second tab appears.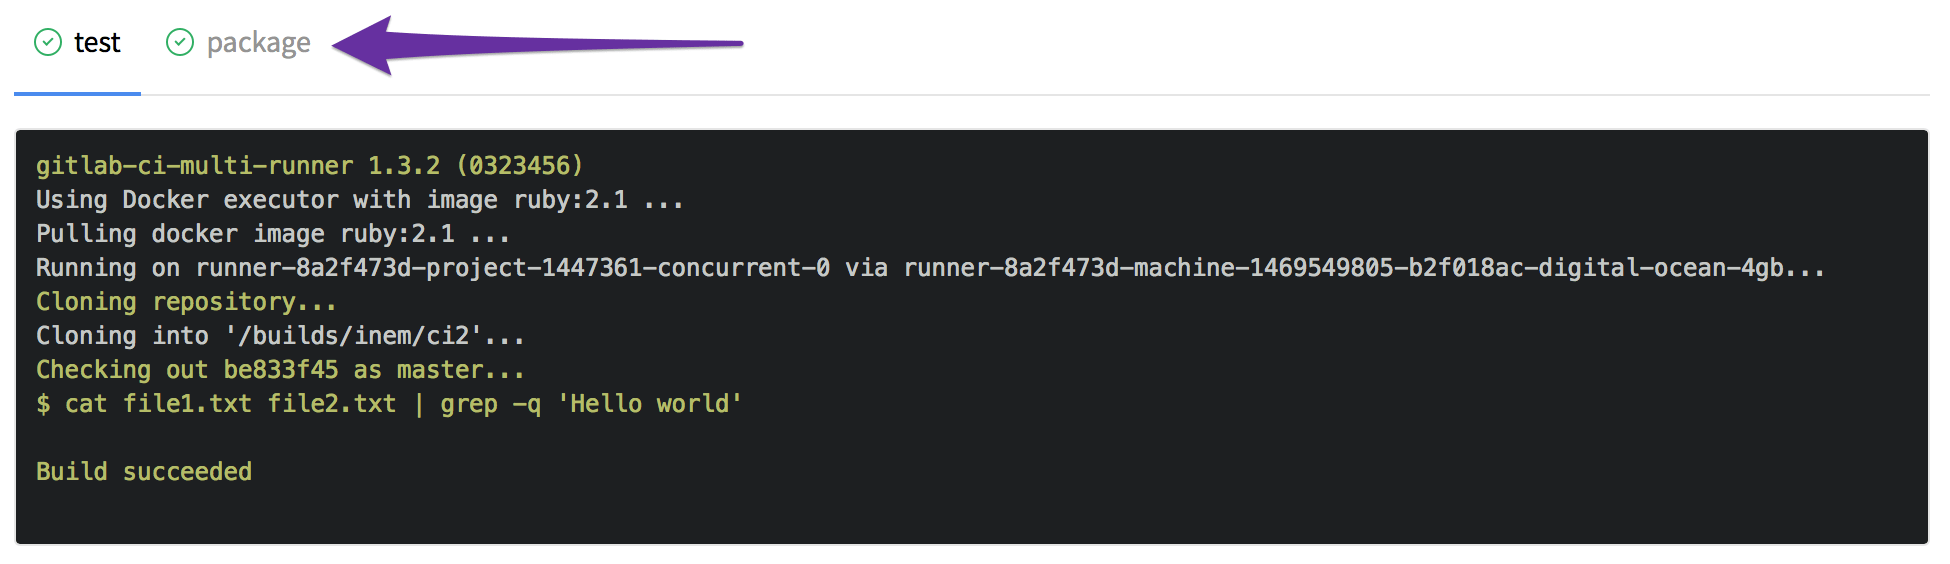
However, we forgot to clarify that the new file is an assembly artifact that will allow it to be downloaded. This is easy to fix by adding the artifacts section:
test: script: cat file1.txt file2.txt | grep -q 'Hello world' package: script: cat file1.txt file2.txt | gzip > packaged.gz artifacts: paths: - packaged.gz Checking ... Everything is in place: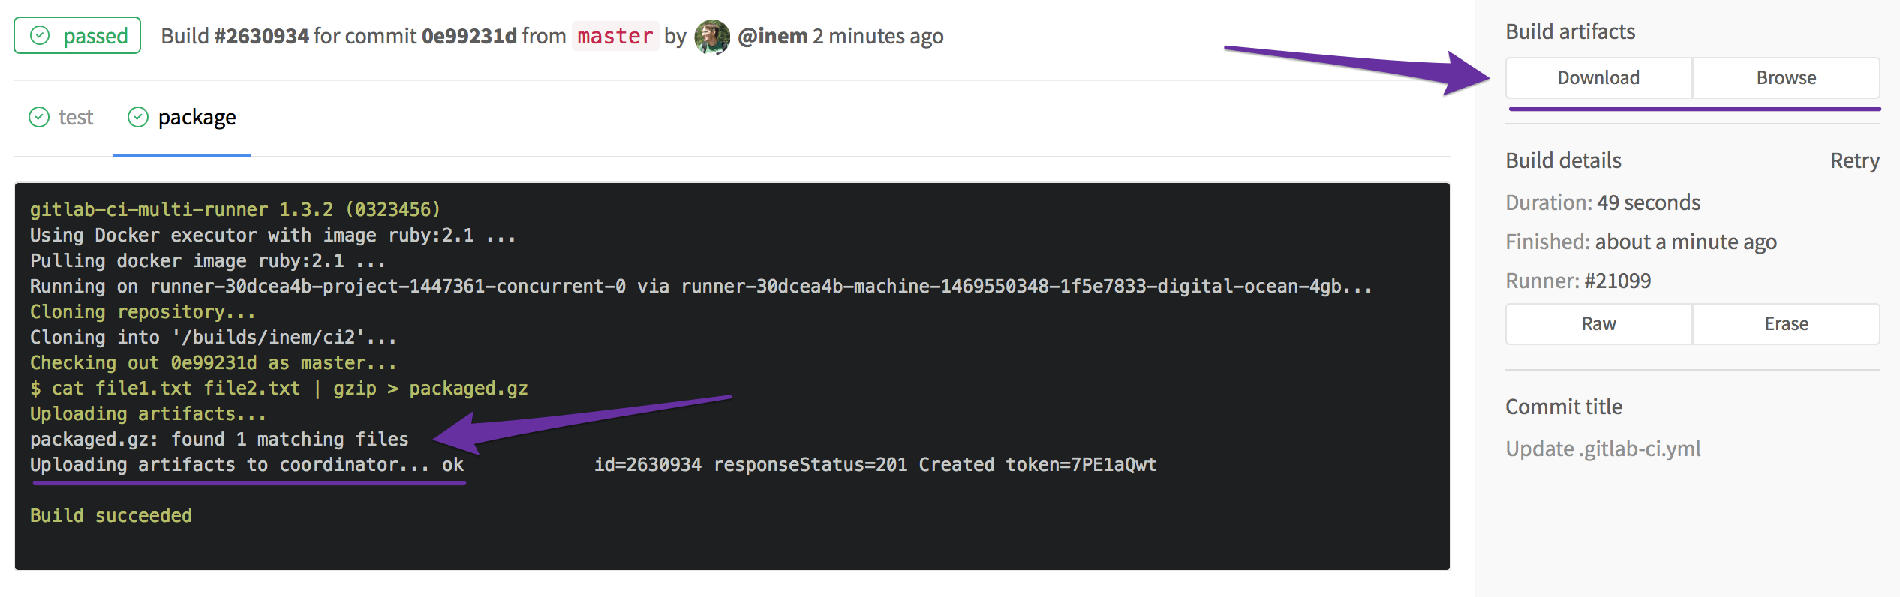
Fine! However, one problem remains: tasks are performed in parallel, and we do not need to archive our application in cases where the test fails.
Sequential execution of tasks
The 'package' task should only be performed if tests pass successfully. Define the order of the tasks by introducing stages:
stages: - test - package test: stage: test script: cat file1.txt file2.txt | grep -q 'Hello world' package: stage: package script: cat file1.txt file2.txt | gzip > packaged.gz artifacts: paths: - packaged.gz It should work.
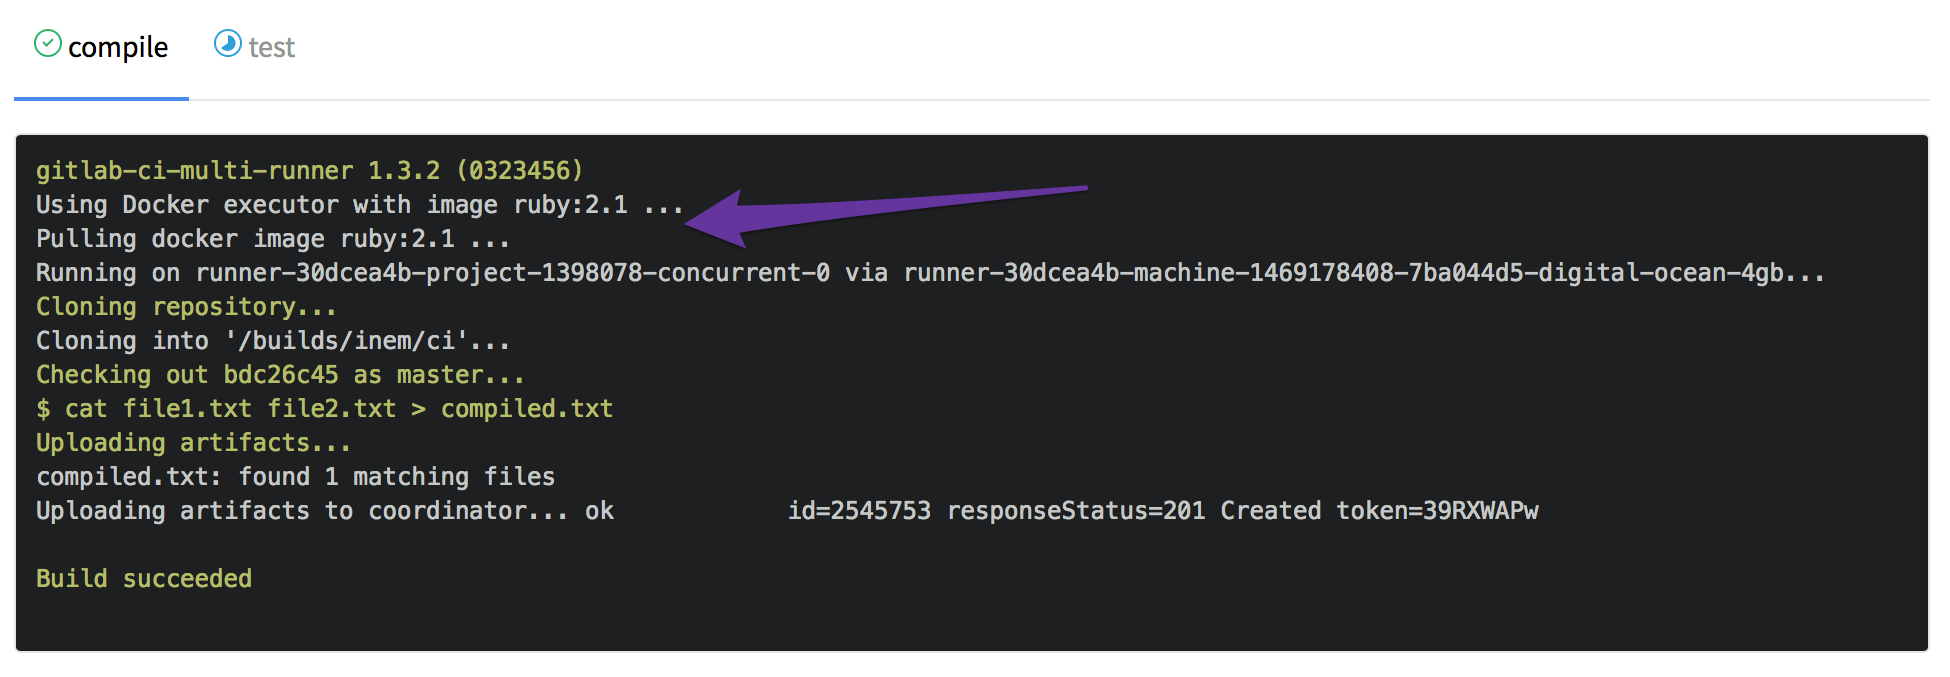
Also, do not forget that the compilation (which in our case is the concatenation of files) takes time, so you should not do it twice. We introduce a separate stage for compilation:
stages: - compile - test - package compile: stage: compile script: cat file1.txt file2.txt > compiled.txt artifacts: paths: - compiled.txt test: stage: test script: cat compiled.txt | grep -q 'Hello world' package: stage: package script: cat compiled.txt | gzip > packaged.gz artifacts: paths: - packaged.gz Let's look at the resulting artifacts:

We don’t need to download the compile file, so we’ll limit the lifetime of temporary artifacts to 20 minutes:
compile: stage: compile script: cat file1.txt file2.txt > compiled.txt artifacts: paths: - compiled.txt expire_in: 20 minutes The final functionality of the config is impressive:
- There are three consecutive stages: compiling, testing and archiving the application.
- The result of the compilation stage is transmitted to the subsequent stages, that is, the application is compiled only once (which speeds up the workflow).
- The archived version of the application is stored in build artifacts for future use.
What docker images are best to use
Progress is evident. However, despite our efforts, the assembly is still slow. Take a look at the logs:
I'm sorry, what? Ruby 2.1?
Why is there any Ruby here? And then, that GitLab.com uses Docker images to run assemblies , and by default this uses a ruby:2.1 image ruby:2.1 . Of course, this image contains many packages that we do not need. Having asked for help from Google, we find out that there is an alpine image, which is almost a “bare” image of Linux.
To use this image, add image: alpine to .gitlab-ci.yml .
Due to this, the assembly time is reduced by almost three minutes:

In general, there are quite a lot of different images in the public domain, so you can easily pick one for our stack. The main thing is to remember that images that do not contain additional functionality are better suited - this approach minimizes the download time.
Work with complex scenarios
Now imagine that we have a new customer who wants our application to be delivered as an .iso image instead of a .gz archive. Since the entire build process is implemented through CI, all we need to do is add another task. ISO images are created using the mkisofs command. As a result, the configuration file should look like this:
image: alpine stages: - compile - test - package # ... "compile" "test" pack-gz: stage: package script: cat compiled.txt | gzip > packaged.gz artifacts: paths: - packaged.gz pack-iso: stage: package script: - mkisofs -o ./packaged.iso ./compiled.txt artifacts: paths: - packaged.iso Please note that task titles do not have to be the same. Moreover, in this case, parallel execution of tasks at one stage would be impossible. So treat the same task and stage names as a coincidence.
In the meantime, the build failed:
The problem is that the mkisofs command is not included in the alpine image, so you need to install it separately.
Installing additional software
The Alpine Linux site states that mkisofs is included in the xorriso and cdrkit packages. To install the package, run the following commands:
echo "ipv6" >> /etc/modules # apk update # apk add xorriso # All this is also valid CI commands. The full list of commands in the script section should look like this:
script: - echo "ipv6" >> /etc/modules - apk update - apk add xorriso - mkisofs -o ./packaged.iso ./compiled.txt On the other hand, it is semantically more correct to execute commands responsible for installing packages up to the script section, namely, in the before_script section. When placing this section in the top level of the configuration file, its commands will be executed before all tasks. However, in our case it is enough to execute before_script before one specific task.
The final version of .gitlab-ci.yml :
image: alpine stages: - compile - test - package compile: stage: compile script: cat file1.txt file2.txt > compiled.txt artifacts: paths: - compiled.txt expire_in: 20 minutes test: stage: test script: cat compiled.txt | grep -q 'Hello world' pack-gz: stage: package script: cat compiled.txt | gzip > packaged.gz artifacts: paths: - packaged.gz pack-iso: stage: package before_script: - echo "ipv6" >> /etc/modules - apk update - apk add xorriso script: - mkisofs -o ./packaged.iso ./compiled.txt artifacts: paths: - packaged.iso But we just created a conveyor! We have three consecutive stages, while the pack-gz and pack-iso tasks of the package stage are performed in parallel:

Summing up
In this article, not all the features of GitLab CI are given, but for the time being we’ll dwell on this. We hope you enjoyed this short story. The examples cited in it were intentionally trivial - this was done in order to visually show the principles of CI work without being distracted by unfamiliar technologies. Let's summarize what we learned:
- In order to transfer the execution of a specific work in GitLab CI, you need to define one or more tasks in
.gitlab-ci.yml. - Tasks should be given names, we advise you to make them meaningful, so that you don’t get confused.
- Each task contains a set of rules and instructions for GitLab CI, defined by keywords .
- Tasks can be executed sequentially, in parallel, or you can define your own order of execution by creating a pipeline.
- It is possible to transfer files between tasks and save them as assembly artifacts for subsequent download via the interface.
The last section of this article provides a more formalized list of terms and keywords used in this example, as well as links to detailed descriptions of the GitLab CI functionality.
Keyword descriptions and documentation links
| Keyword / Term | Description |
|---|---|
| .gitlab-ci.yml | A configuration file that contains all the project build definitions |
| script | Defines an executable shell script. |
| before_script | Defines commands that are executed in front of all tasks. |
| image | Defines the used Docker image |
| stage | Defines the pipeline stage ( test by default) |
| artifacts | Defines a list of build artifacts |
| artifacts: expire_in | Used to remove downloaded artifacts after a certain period of time |
| pipeline | Conveyor - a set of assemblies that are performed in stages |
Also note other examples of working with GitLab CI:
- Migrating from Jenkins to GitLab CI
- Decreasing build time from 8 minutes 33 seconds to just 10 seconds
(The author of the translation is sgnl_05 )
')
Source: https://habr.com/ru/post/309380/
All Articles