Everyone will die, and I will stay: replication and disaster recovery to the cloud using Veeam Cloud Connect Replication
» We work with a hybrid cloud: VMware vCloud Connector, part 1
» We work with a hybrid cloud: VMware vCloud Connector, part 2
In the first two parts, we looked at how to build a hybrid cloud using VMware vCloud Connector. Today we will talk about accidents and how to restore the “fallen” internal infrastructure using the resources of the cloud provider. We will analyze the topic using the example of Veeam Cloud Connect Replication, a tool that helps to set up virtual machine replication and launch replicas in the service provider cloud.
For the experiences we need: our own virtual infrastructure and external cloud resources based on VMware, Veeam Backup and Replication is not lower than version 9.
')

Recovery to the cloud (cloud-based DRaaS) begins with the replication of virtual machines. In our scenario, replication is the synchronization of the contents of several virtual machines located in different virtual infrastructures. When you set up a virtual machine for replication, a replica of the desired virtual machine is created in the selected infrastructure. According to the specified schedule, all changes that occurred on the source VM since the creation of the replica, i.e. synchronization occurs.
If replication is configured correctly, then at certain points in time, two identical virtual machines will live in different infrastructures. As a result, we have a backup site with replicas (read, ready-to-run virtual machines), which we can use in the event of an accident at the main site.
Veeam Cloud Connect Replication helps you set up replication to the cloud service provider and switch to replicas in case of a disaster at the main site. All these operations are performed in the familiar interface Veeam Backup and Replication. The following switching scenarios for the backup site are possible:

Next, we’ll tell you how to get started with Veeam Cloud Connect Replication: connect to a cloud provider, set up replication and create a recovery plan.
Everything, we have connected to the cloud of the service provider. Now you can set up virtual machine replication and create recovery plans.
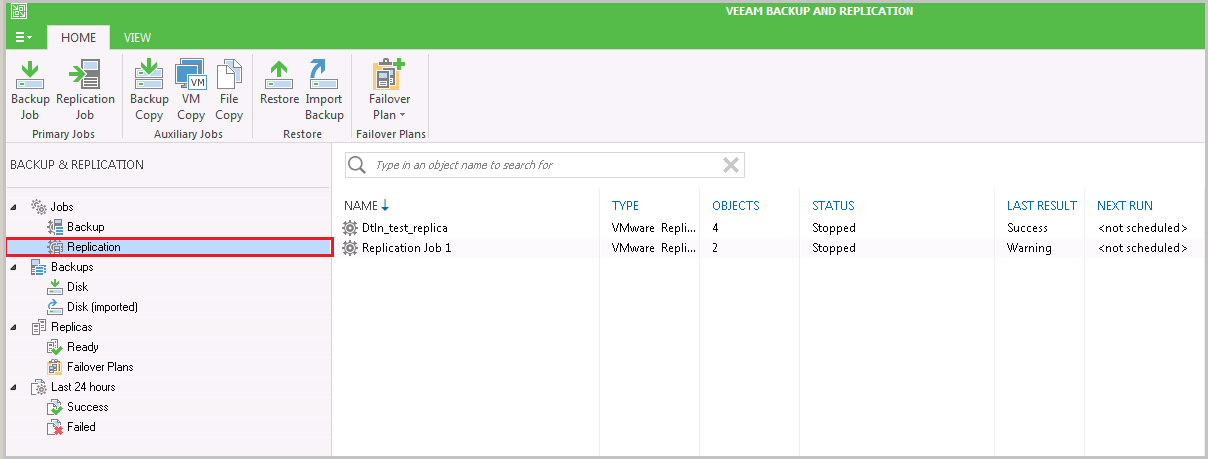
All created replication jobs will appear in the Replication tab.
All current replicas you will find in the Replicas clutch.

After replication is configured for machines, you can create a recovery plan. As part of these plans, we choose which replicas of virtual machines will run and in what order.
The created recovery plan can be tested. To do this, right-click the desired Failover Plan and click Test.

During the test, we check whether all the machines added to the Failover Plan run successfully in the provider cloud.

Although this test does not allow you to check the network connectivity and operability of applications deployed on the VM, it will show whether the VMs are running on the backup site. For a full check, you need to conduct a scheduled failover: turn off the combat virtual machines, i.e. simulate their failure, run the desired recovery plan. In this case, the virtual machines will start in the service provider cloud along with all the network settings.
Finally, a little bit about the worst-case scenario. If there was a real disaster, and Veeam Backup and Replication also became unavailable, then in this case there is a Cloud Connect Portal. This portal is deployed on the side of the service provider, and therefore he will not be afraid of Armageddon on your platform. Cloud Connect Portal is available through any browser.

Here you will find a list of all prepared recovery plans. Choose the one that corresponds to the case, click Start, and wait for the virtual machines to start in the cloud service provider.

In this post we make a small pause in our series about hybrid clouds. Write what you would like to know more on this topic, we will try to tell about it.
» We work with a hybrid cloud: VMware vCloud Connector, part 2
In the first two parts, we looked at how to build a hybrid cloud using VMware vCloud Connector. Today we will talk about accidents and how to restore the “fallen” internal infrastructure using the resources of the cloud provider. We will analyze the topic using the example of Veeam Cloud Connect Replication, a tool that helps to set up virtual machine replication and launch replicas in the service provider cloud.
For the experiences we need: our own virtual infrastructure and external cloud resources based on VMware, Veeam Backup and Replication is not lower than version 9.
')
In the beginning was replication
Recovery to the cloud (cloud-based DRaaS) begins with the replication of virtual machines. In our scenario, replication is the synchronization of the contents of several virtual machines located in different virtual infrastructures. When you set up a virtual machine for replication, a replica of the desired virtual machine is created in the selected infrastructure. According to the specified schedule, all changes that occurred on the source VM since the creation of the replica, i.e. synchronization occurs.
If replication is configured correctly, then at certain points in time, two identical virtual machines will live in different infrastructures. As a result, we have a backup site with replicas (read, ready-to-run virtual machines), which we can use in the event of an accident at the main site.
Veeam Cloud Connect Replication
Veeam Cloud Connect Replication helps you set up replication to the cloud service provider and switch to replicas in case of a disaster at the main site. All these operations are performed in the familiar interface Veeam Backup and Replication. The following switching scenarios for the backup site are possible:
- Run individual virtual machines (Failover Now). If single machines become unavailable, they can be started at the backup site from the created replica. At the same time, it is not necessary to configure the network connectivity between the main platform and the external cloud from scratch thanks to the pre-configured Network Appliance (we will tell about it in more detail below).
- Launch of the entire infrastructure according to the prepared plan (Failover Plan). You can use this script when the entire infrastructure becomes unavailable. Add all the virtual machines you need to run on the backup site to the Failover Plan, and activate the Failover Plan in case of a crash. You can divide virtual machines into groups according to their criticality and create several plans: some VM group will start first, others later.
If, as a result of the accident, the server on which Veeam Backup and Replication is deployed dies, then you can activate Failover Plans through the web portal Cloud Connect Portal from any device, including a mobile phone.
Next, we’ll tell you how to get started with Veeam Cloud Connect Replication: connect to a cloud provider, set up replication and create a recovery plan.
Connecting to the service provider cloud
- Pre-found on the partner portal portal Veeam cloud provider that supports Cloud-based disaster recovery (DRaaS) . We rent the necessary amount of cloud resources.
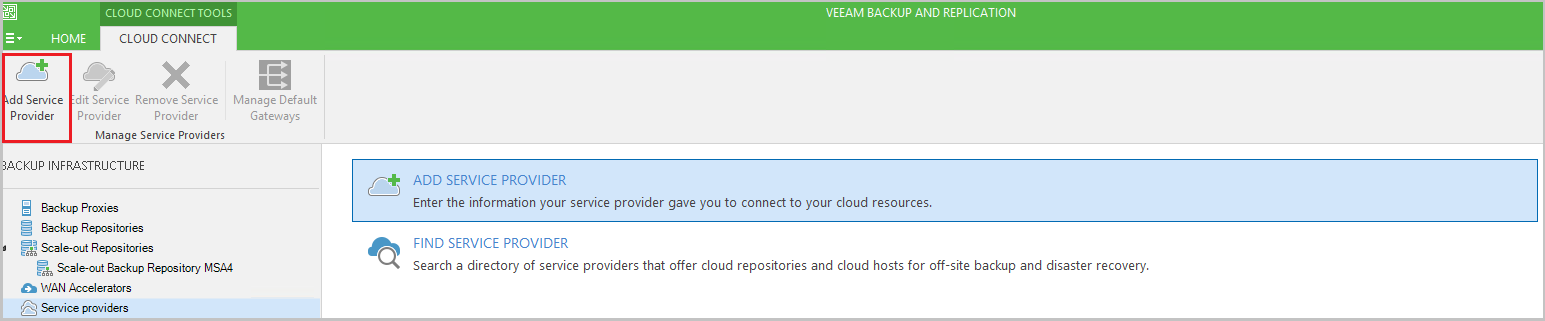
- In Veeam Backup and Replication 9 go click Add Service Provider.
- Specify the address of the service provider and the connection port. Click Next.

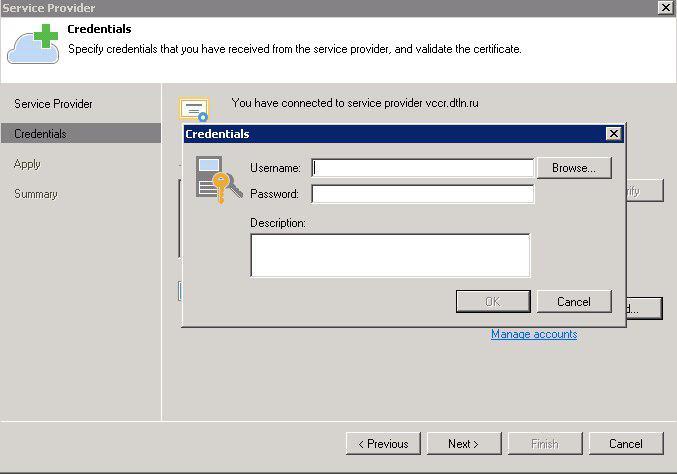
- Click Add to add a new account.

- Enter user credentials issued by the service provider. Click Next and connect.
- After connecting, you will see leased resources that you will use for storing replicas of virtual machines.

- We configure network appliance. Click Edit.
When restoring individual virtual machines (Failover now), the Network Appliance will help maintain connectivity between VMs in the service provider cloud and the machines that continue to operate on the main site.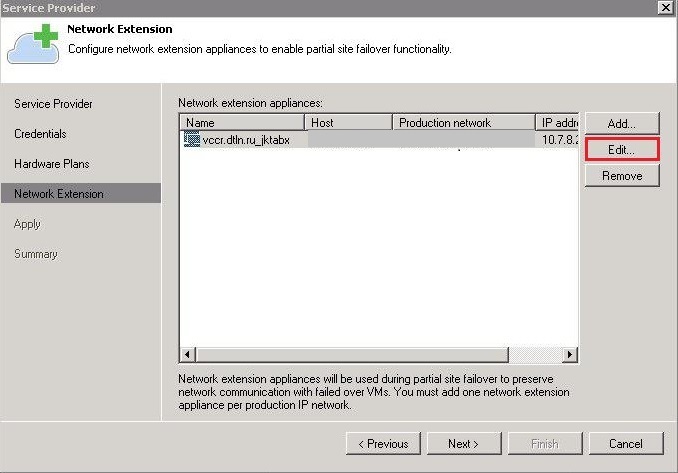
- Enter data about the network infrastructure:
- Hostname
- Resource pool
- Storage Type
- Network
- The IP address is the IP that will be assigned to the Network Appliance. Network and IP must be available from Veeam Backup and Replication to communicate with the Network Appliance. Click Finish and wait until all settings are applied.

Everything, we have connected to the cloud of the service provider. Now you can set up virtual machine replication and create recovery plans.
Replication setup
- To create a replication task in the Veeam Backup and Replication interface, click Replication Job.

- Set the name and job description. To reduce the network load, we recommend activating replica seeding (the replica is created on the basis of a specially created VM backup, not a working VM), network mapping and re-IP. These settings will help reduce the amount of traffic transmitted. Click Next.

- Add virtual machines for replication. Click Add. Here you can choose the order in which the machines will be sent for replication. Use the Up and Down buttons for this.

If a resource pool is added to replication, then using Exclusions, you can exclude individual VMs from this list.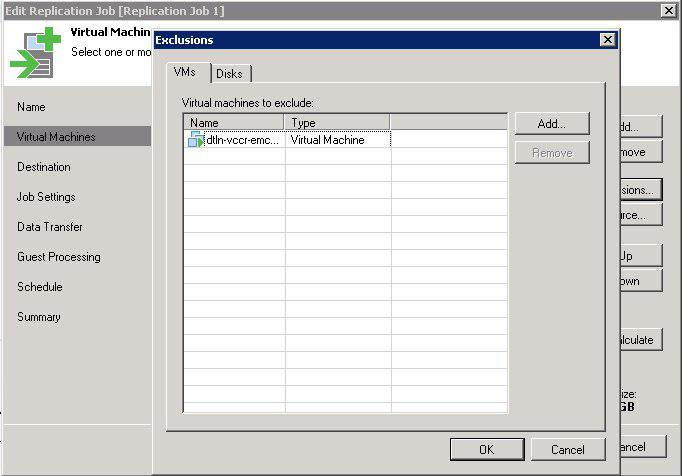
The Source setting determines whether the replica will be made from — from a productive VM or from the last backup.
- Choose a site for replication - Cloud host. Click Next.

- Select the resource pool that the cloud provider has allocated. Specify the type of storage, if you have several (for example, the type of disks). Click Next.

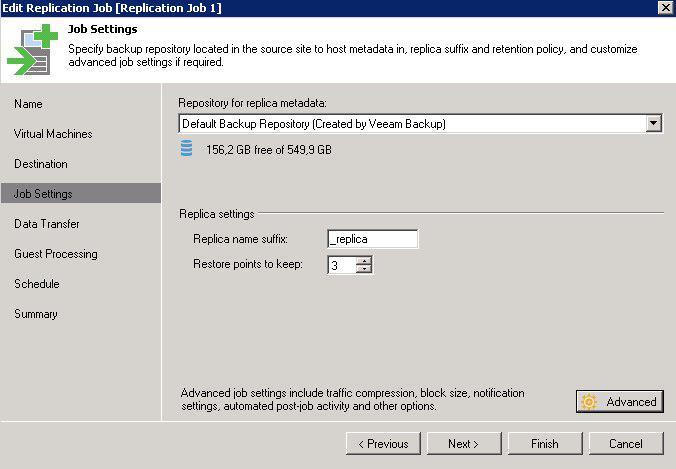
- Specify the repository for storing meta-data, the suffix for the name of the replica and the number of recovery points.
- If your Veeam license includes WAN Accelerators, activate it. It will reduce the load on the network and accelerate the replication of virtual machines with a slow Internet connection.

- Enable Enable application aware-processing if Microsoft applications are running on virtual machines (SQL, Exchange, Active Directory, etc.). This option will ensure the consistency of data in replicas. Enter the administrator credentials of the Guest OS.

- We set the schedule for automatic replication - Run the Job Automatically. Here you need to consider whether the performance of your infrastructure and bandwidth can cope with the selected replication frequency.
Tip: Before you choose a schedule, do some replication tasks manually. So you will get a clear understanding of how at which interval automatic replication will be set up so that it does not cause a degradation of services on productive. Click Finish.
All created replication jobs will appear in the Replication tab.
All current replicas you will find in the Replicas clutch.
Creating a Recovery Plan (Failover Plan)
After replication is configured for machines, you can create a recovery plan. As part of these plans, we choose which replicas of virtual machines will run and in what order.
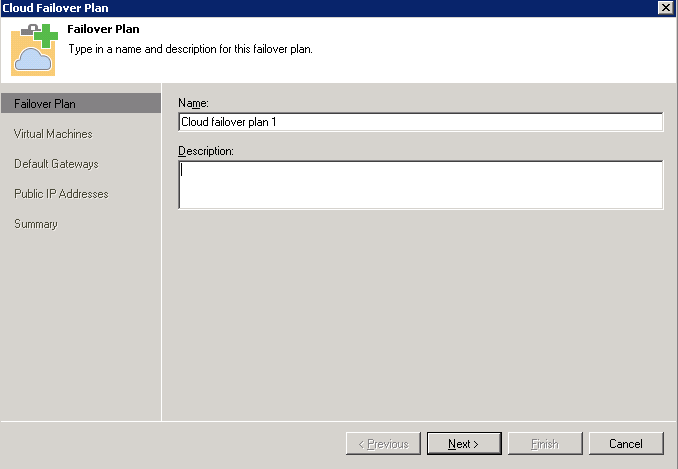
- To create a recovery plan, click the Failover Plan.

- Enter the name and description of the recovery plan.
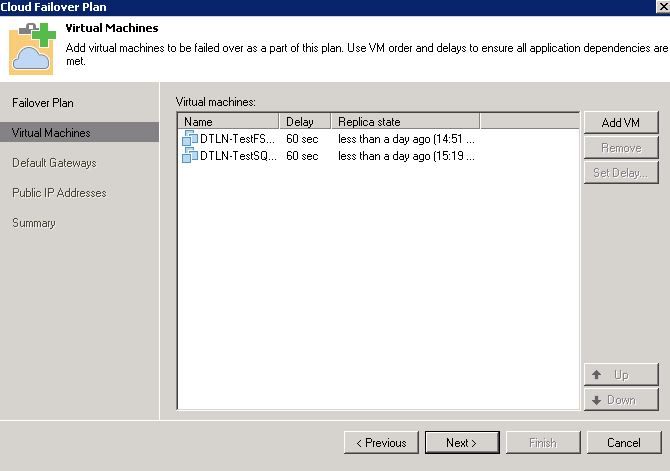
- Click Add to add virtual machines that will be restored as part of this plan. We select from virtual machines for which replication is already configured. Click Next.
- Click Manage default gateways. This information will be used by the Network Appliance during full recovery. Click Next.

- We register external and internal IP for each replica of the virtual machine. So that after the restoration on the external site, virtual machines can be connected via the Internet Click Finish.

Testing a recovery plan
The created recovery plan can be tested. To do this, right-click the desired Failover Plan and click Test.
During the test, we check whether all the machines added to the Failover Plan run successfully in the provider cloud.
Although this test does not allow you to check the network connectivity and operability of applications deployed on the VM, it will show whether the VMs are running on the backup site. For a full check, you need to conduct a scheduled failover: turn off the combat virtual machines, i.e. simulate their failure, run the desired recovery plan. In this case, the virtual machines will start in the service provider cloud along with all the network settings.
Cloud Connect Portal
Finally, a little bit about the worst-case scenario. If there was a real disaster, and Veeam Backup and Replication also became unavailable, then in this case there is a Cloud Connect Portal. This portal is deployed on the side of the service provider, and therefore he will not be afraid of Armageddon on your platform. Cloud Connect Portal is available through any browser.
Here you will find a list of all prepared recovery plans. Choose the one that corresponds to the case, click Start, and wait for the virtual machines to start in the cloud service provider.
In this post we make a small pause in our series about hybrid clouds. Write what you would like to know more on this topic, we will try to tell about it.
Source: https://habr.com/ru/post/308984/
All Articles