Development of the game using plasticine animation
At the end of the first part of the article, general methods for shooting clay animation were described, in this part I will talk about the features of shooting and processing specifically for use in the game and creating a game using the created animation.
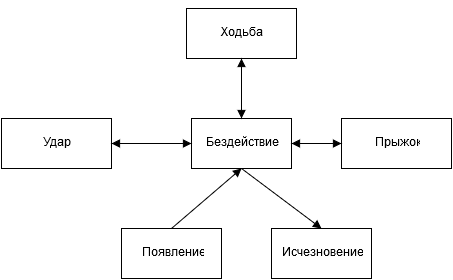
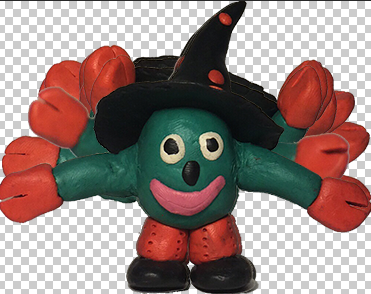
If for shooting a cartoon, you can simply frame all the action from the first to the last second, then the game requires interactivity - it depends on the player what will happen in the frame. Therefore, for models, there must be a transition from one animation to another. The simplest way to organize such transitions is to limit ourselves to the condition that any animation must begin with inaction (the model stands still, hands down) and return to it at the end. A character animation chart might look something like this:
With this restriction, the character will not be able to jump or hit with acceleration without stopping before that, but any animation will begin and end with a conditional zero frame. Often the animation diagram is more complex, in which case it is necessary to start the next action from the position of the model in which it was in the last frame of the previous animation. For example, they shot a jump from a takeoff with a landing into a fixed position, then you need to remove the takeoff run, the model must be transferred from a fixed position to the state of the beginning of the impact in motion. To do this, it is convenient to use onionskin - the function of each program for shooting stop-motion animations, which allows you to display at the same time that is in the frame, a translucent frame already captured:
')
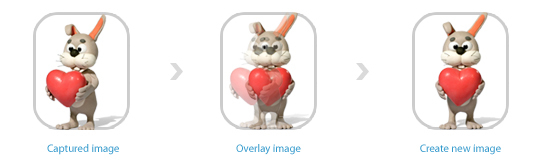
Using this mode, you need to substitute the previously captured frame in which the model is in the desired position, and align the clay model, looking at it in the camera in the program window.
When shooting for interactive use means that from any pose for animation model can be transferred to any other, that is, animations should not destroy the model. If you still want to make a beautiful destruction or morph of the model, then you can either shoot this animation last (if you decide to do this, think three times if you need to finish some more animation with this model), or prepare several copies in advance models in case the main one is corrupted.
Another consequence of the interactivity of the game is that you cannot know in advance which background will be behind the model. From this it follows that all models must be removed on a clean green background (or another color that is not in the model itself). Some programs allow you to automatically do the chroma key - remove the selected color from the frame, but I could not achieve a quality effect, so I cut out the models from each frame using Photoshop .
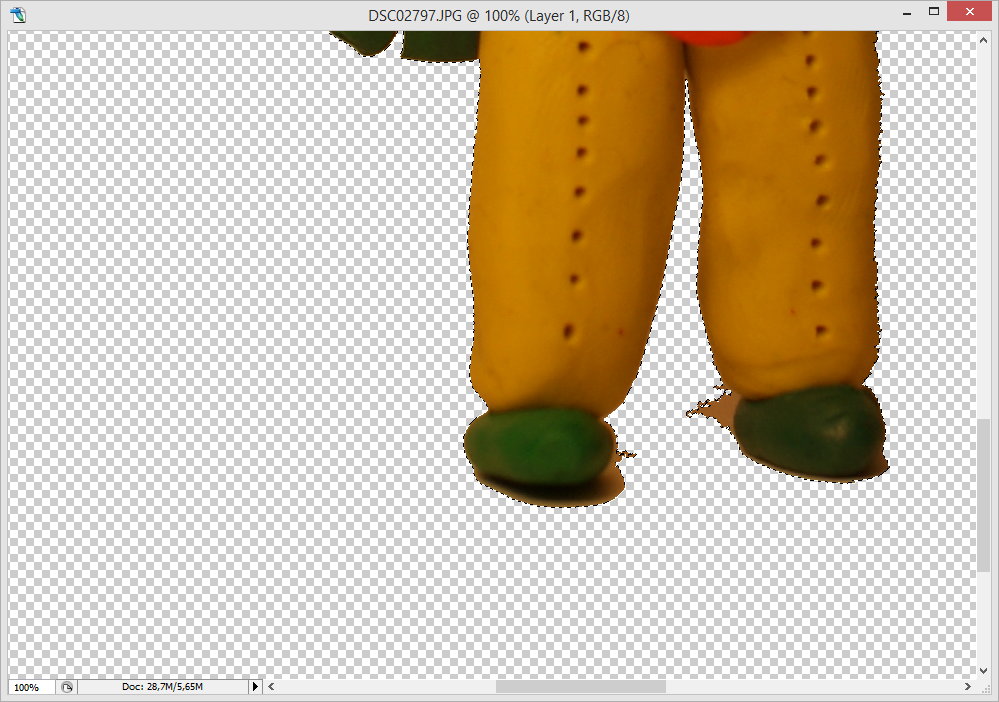
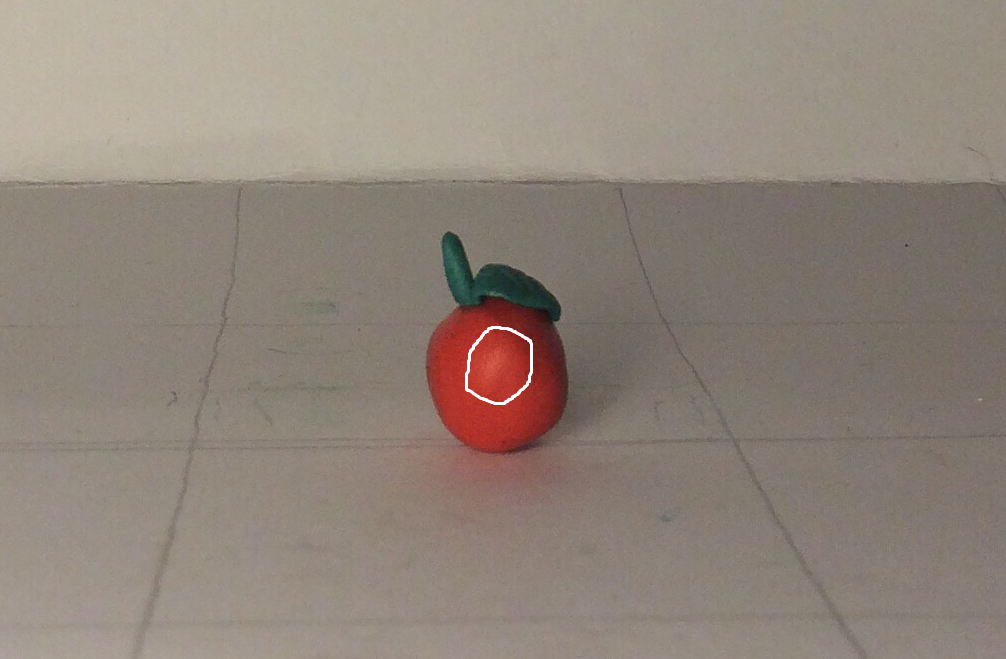
In the case of high-quality shooting, it’s enough to select the background with the Magic Wand tool. If the background with a shadow from the model is not very different from the color of the model itself, when trying to clear the background, this situation may turn out:

Then you have to decide whether to cut out such difficult to separate pieces from each unsuccessfully shot frame manually, or reshoot the animation with the changed lighting and background color. It is better to check whether the frames are processed easily, after shooting the first animations, so as not to do extra work on re-shooting later.
After processing all the frames of the animation, it is worth checking that the model in each frame is in the same place, for this you can combine them in the form of layers in Photoshop and align.
If you filmed, for example, walking, then the model most likely moved in one direction or another. For the animation, it is worth moving it to the starting position - the offset of the sprite coordinates will be provided by the game engine. At the same step, you can trim an empty space in the frame. It will be easier if all the frames of the animation will be the same size, so it is worth cutting out on the combined frames, according to the largest one. The picture can be immediately scaled. Regarding the size, it is necessary to build on the platform on which the game is designed. If you plan to launch on different mobile devices, often the graphics are saved at several different scales, and the selection of the actual occurs at the moment of launch, for the screen 320x240 small sprites are loaded, for the 11-inch retina of the tablet display - the maximum. How to organize it, you can read in this article .
Do not make the graphics larger than necessary, the game of 10 megabytes in size will be downloaded by more users than by 20 megabytes, and certainly by more than the size of 100 megabytes. There are other ways to reduce the size of the animation, for example, the use of repeated frames, or reflected frames. An example - walking left and right can be made up of identical frames reflected in a mirror in one of the cases. Another example is that raising and lowering hands can be made up of identical shots played in reverse order. But you need to use this method carefully, sometimes the movements do not completely coincide, although they seem so. For example, raising hands begins with a short return movement down, then a quick pull up and a smooth slowdown. If you simply turn these frames back, lowering your hands will be wrong due to the lack of return movement upward. An advanced animation system in the game engine can help combat this, for example, if you can adjust the speed and frames of each separate animation stage, and not just the speed of the entire animation.
Illumination in the game will seem more natural if the source of the light was approximately in the same position in which it will be on the game scene. It is possible to slightly correct the illumination during post-processing of frames, or programmatically during rendering, but this does not help to completely correct the problem, if it exists. More or less complex models have self-shadowing, and they are glare from the light source, which are fixed by the eye even during a cursory glance at the scene.
On top of the article, in fact, about creating a game that uses the prepared animation.
I have long wanted to write a learning programming game in which a player will control a character using a series of pre-recorded commands, and decided to use clay graphics for such a game. Once I myself learned to write Robot programs in KuMir , but for a mobile game, writing full programs using text would be brute force, so I decided to simplify the input of commands in the same way as it was done in the game Lightbot . In addition, I wanted to add elements of interactivity to the game (enemies can move across the field), and limit the player in the commands available at each moment, instead allowing the algorithm to be changed at special points of the robot's reprogramming.
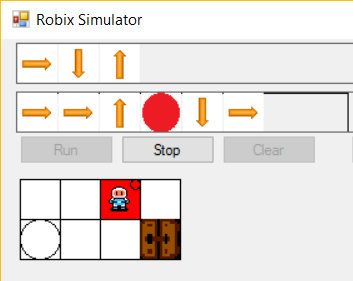
I already had a small prototype of such a game with stub graphics:
... and a level editor for her, in which I could collect tasks. I checked the playability of the prototype, having played with it myself and letting friends play, and decided to make, based on its game for children on programming training, using plasticine graphics.
A little bit about the choice of tools:
- Cross platform . As I finally decided to make the game for smartphones, I wanted to choose a language in which the code with minimal changes will work for Android and iOS.
- Engine . There are no special requirements for it. It is enough for me to display animated sprites, play music and sounds, manage resources (load / unload textures and fonts), and also have a wrapper on the window system and message processing. I didn’t want to take too high a level like Unity or similar systems, since I don’t need such a powerful combine for a small game.
- We need a more or less normal language and debugging system, so I really didn’t want to get involved with various handicrafts such as game designers (GameMaker, Construct2), which, in principle, allow you to collect code for smartphones, but have a lot of flaws then, its own, sometimes esoteric, programming language — brakes when the project grows, etc.
- Free (well, or at least cheap license). By this criterion, I rejected an interesting bunch of Xamarin + MonoGame to create a cross-platform game in C # and an open-source engine, written in the likeness of an abandoned XNA.
I will not go into what engine is better and why, everyone can choose the one that he personally likes, I can only say that I ended up settling on Cocos2d-x .
It supports development in C ++, in its modern version; code that uses the engine looks neat and beautiful. Basically, the game objects on the screen are controlled by the sequence of standard actions defined for them, a small code example:
This is a function to return the player to the start. It is read almost line by line literally - start the sequence of actions:
Play the stop animation twice, then simultaneously play the fly animation and create particles for it, make the object invisible (the call is wrapped in a lambda function, to transfer it to the “Function Call” action designer), wait one second and activate the GUI button.
Together with the engine you will need to use special programs that facilitate the work with the created graphics.
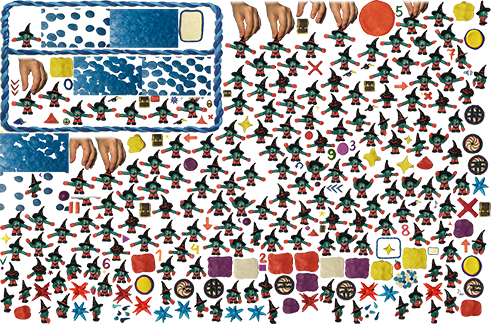
The created plasticine animation can be used in the game as png-files, but for mobile games there are special formats for better image compression, besides, several textures are usually packaged into one atlas to optimize the use of video memory. There are several programs for this; I liked the Texture Packer the most. An example of an atlas with animation frames:
The program is paid, but the author gives an independent developer a free license for a year.
Fonts are the case when I could not use plasticine graphics, I couldn’t do it beautifully, so I took the free font ready and just output the text to them on the plasticine substrate. This is the case when ordinary graphics and plasticine look fine next to each other. The characters of the font in the engine are also packaged in one texture, in addition to which an auxiliary file is used, which describes the storage location of each character. To generate such files from the font, I used the BMFont program.
As I mentioned, I used my editor. If you don’t have your own editor, you can export levels from the beautiful Tiled editor.
Another section in the game in which plasticine graphics will look good is particles. You can fashion simple small figures and use them as special effects at every opportunity. To set up a particle system, the online tool on particle2dx is suitable.
For the sound of the game, I used sites with free sounds, for example, freesounds and the help of a familiar musician. The engine allows you to play music and sounds without the use of additional tools.
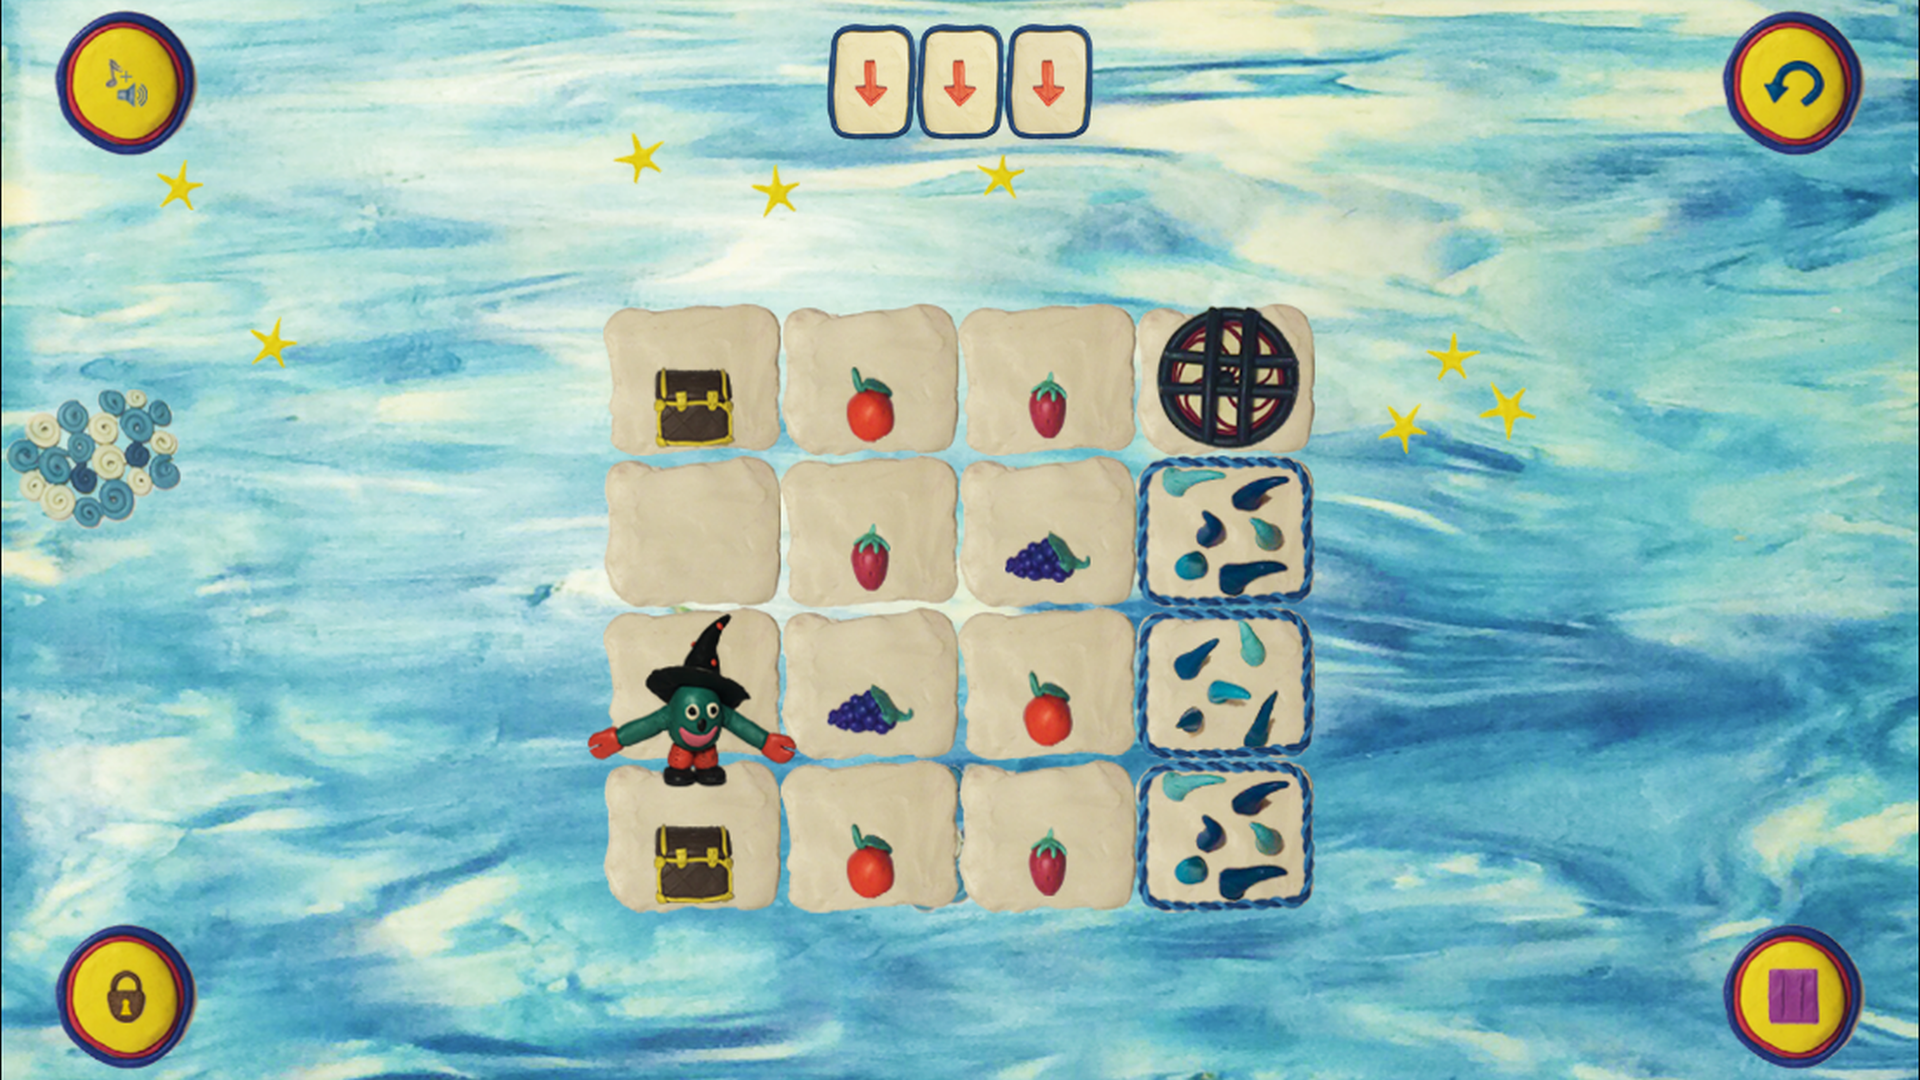
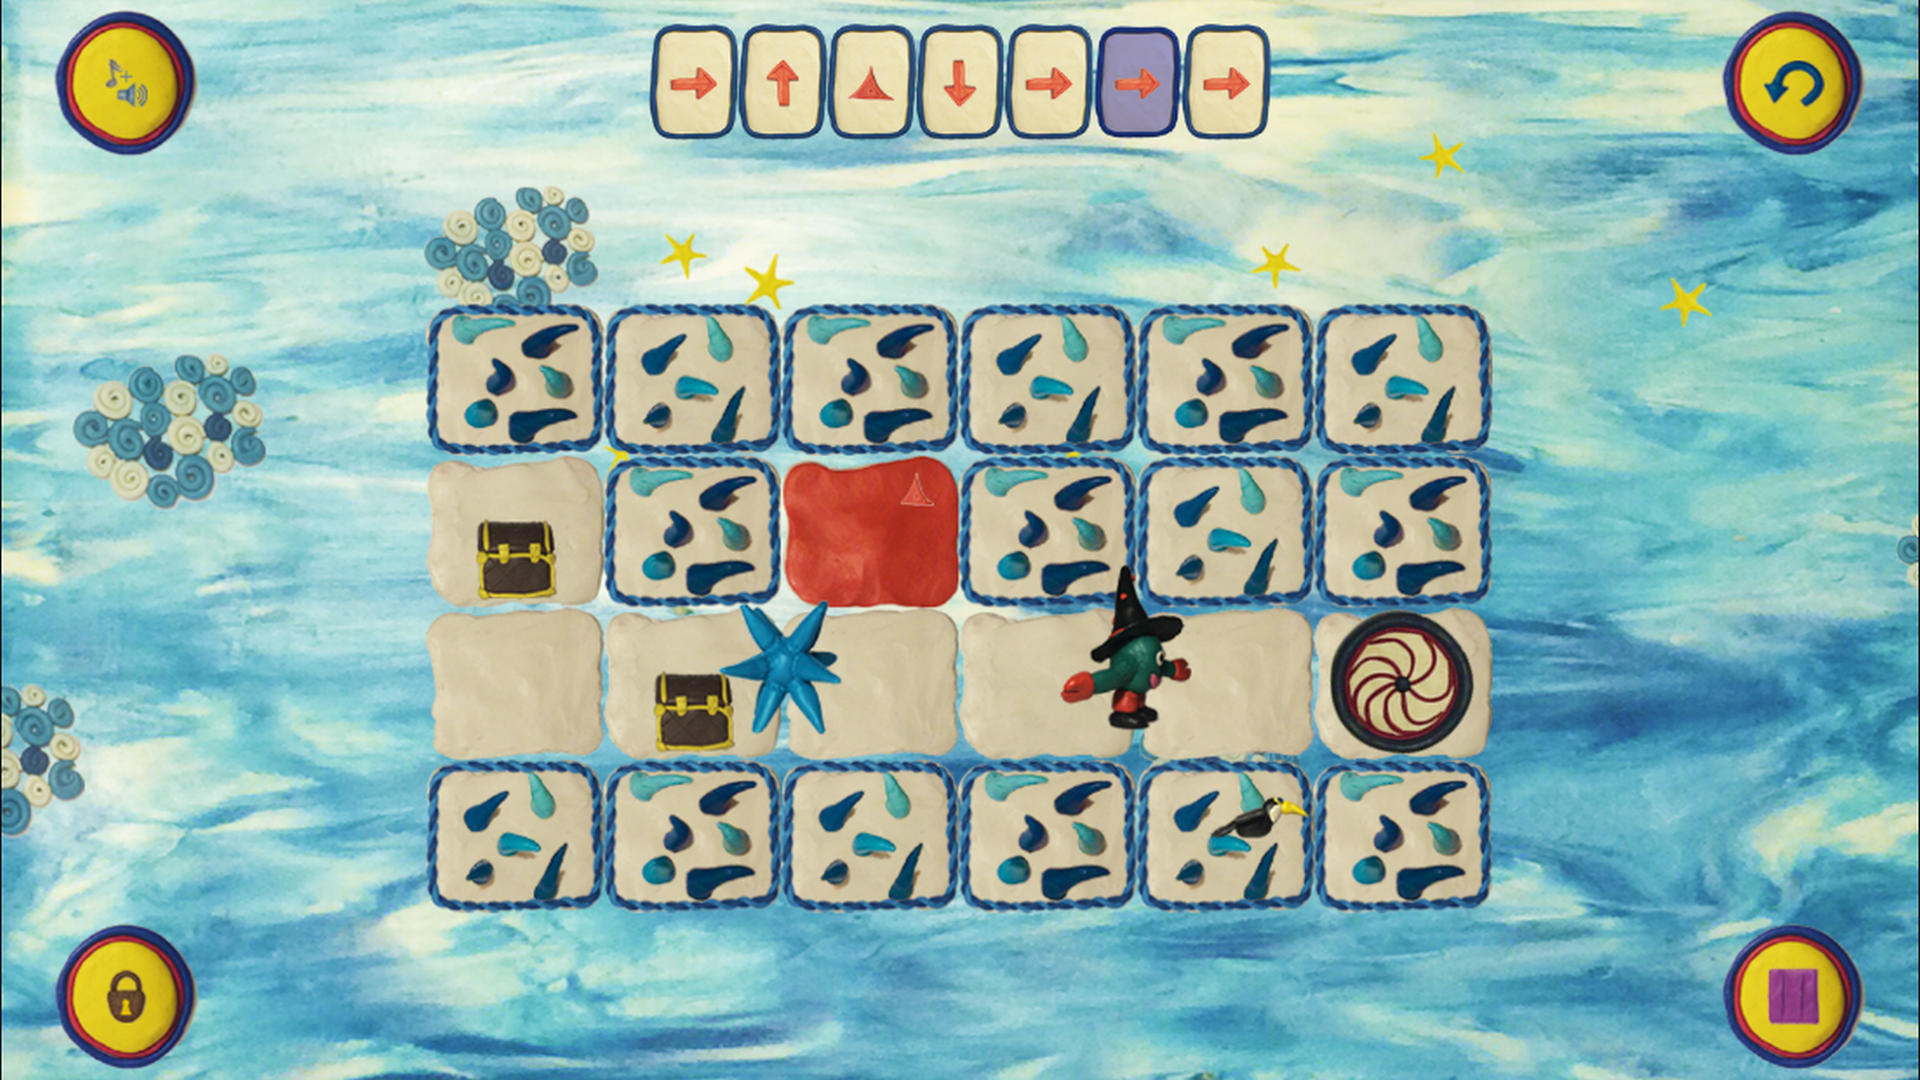
Screenshot of the resulting game:
On this about clay animation for games I have everything.
PS About the created game - the first chapter teaches the use of commands for moving and painting cells of a field in various colors and is available on the App Store, the next one will be devoted to cycles and conditions. Hopefully it will develop further.
Interactivity
If for shooting a cartoon, you can simply frame all the action from the first to the last second, then the game requires interactivity - it depends on the player what will happen in the frame. Therefore, for models, there must be a transition from one animation to another. The simplest way to organize such transitions is to limit ourselves to the condition that any animation must begin with inaction (the model stands still, hands down) and return to it at the end. A character animation chart might look something like this:
With this restriction, the character will not be able to jump or hit with acceleration without stopping before that, but any animation will begin and end with a conditional zero frame. Often the animation diagram is more complex, in which case it is necessary to start the next action from the position of the model in which it was in the last frame of the previous animation. For example, they shot a jump from a takeoff with a landing into a fixed position, then you need to remove the takeoff run, the model must be transferred from a fixed position to the state of the beginning of the impact in motion. To do this, it is convenient to use onionskin - the function of each program for shooting stop-motion animations, which allows you to display at the same time that is in the frame, a translucent frame already captured:
')
Using this mode, you need to substitute the previously captured frame in which the model is in the desired position, and align the clay model, looking at it in the camera in the program window.
When shooting for interactive use means that from any pose for animation model can be transferred to any other, that is, animations should not destroy the model. If you still want to make a beautiful destruction or morph of the model, then you can either shoot this animation last (if you decide to do this, think three times if you need to finish some more animation with this model), or prepare several copies in advance models in case the main one is corrupted.
Background
Another consequence of the interactivity of the game is that you cannot know in advance which background will be behind the model. From this it follows that all models must be removed on a clean green background (or another color that is not in the model itself). Some programs allow you to automatically do the chroma key - remove the selected color from the frame, but I could not achieve a quality effect, so I cut out the models from each frame using Photoshop .
In the case of high-quality shooting, it’s enough to select the background with the Magic Wand tool. If the background with a shadow from the model is not very different from the color of the model itself, when trying to clear the background, this situation may turn out:
Then you have to decide whether to cut out such difficult to separate pieces from each unsuccessfully shot frame manually, or reshoot the animation with the changed lighting and background color. It is better to check whether the frames are processed easily, after shooting the first animations, so as not to do extra work on re-shooting later.
After processing all the frames of the animation, it is worth checking that the model in each frame is in the same place, for this you can combine them in the form of layers in Photoshop and align.
If you filmed, for example, walking, then the model most likely moved in one direction or another. For the animation, it is worth moving it to the starting position - the offset of the sprite coordinates will be provided by the game engine. At the same step, you can trim an empty space in the frame. It will be easier if all the frames of the animation will be the same size, so it is worth cutting out on the combined frames, according to the largest one. The picture can be immediately scaled. Regarding the size, it is necessary to build on the platform on which the game is designed. If you plan to launch on different mobile devices, often the graphics are saved at several different scales, and the selection of the actual occurs at the moment of launch, for the screen 320x240 small sprites are loaded, for the 11-inch retina of the tablet display - the maximum. How to organize it, you can read in this article .
Space saving
Do not make the graphics larger than necessary, the game of 10 megabytes in size will be downloaded by more users than by 20 megabytes, and certainly by more than the size of 100 megabytes. There are other ways to reduce the size of the animation, for example, the use of repeated frames, or reflected frames. An example - walking left and right can be made up of identical frames reflected in a mirror in one of the cases. Another example is that raising and lowering hands can be made up of identical shots played in reverse order. But you need to use this method carefully, sometimes the movements do not completely coincide, although they seem so. For example, raising hands begins with a short return movement down, then a quick pull up and a smooth slowdown. If you simply turn these frames back, lowering your hands will be wrong due to the lack of return movement upward. An advanced animation system in the game engine can help combat this, for example, if you can adjust the speed and frames of each separate animation stage, and not just the speed of the entire animation.
Lighting
Illumination in the game will seem more natural if the source of the light was approximately in the same position in which it will be on the game scene. It is possible to slightly correct the illumination during post-processing of frames, or programmatically during rendering, but this does not help to completely correct the problem, if it exists. More or less complex models have self-shadowing, and they are glare from the light source, which are fixed by the eye even during a cursory glance at the scene.
Game creation
On top of the article, in fact, about creating a game that uses the prepared animation.
I have long wanted to write a learning programming game in which a player will control a character using a series of pre-recorded commands, and decided to use clay graphics for such a game. Once I myself learned to write Robot programs in KuMir , but for a mobile game, writing full programs using text would be brute force, so I decided to simplify the input of commands in the same way as it was done in the game Lightbot . In addition, I wanted to add elements of interactivity to the game (enemies can move across the field), and limit the player in the commands available at each moment, instead allowing the algorithm to be changed at special points of the robot's reprogramming.
I already had a small prototype of such a game with stub graphics:
... and a level editor for her, in which I could collect tasks. I checked the playability of the prototype, having played with it myself and letting friends play, and decided to make, based on its game for children on programming training, using plasticine graphics.
A little bit about the choice of tools:
- Cross platform . As I finally decided to make the game for smartphones, I wanted to choose a language in which the code with minimal changes will work for Android and iOS.
- Engine . There are no special requirements for it. It is enough for me to display animated sprites, play music and sounds, manage resources (load / unload textures and fonts), and also have a wrapper on the window system and message processing. I didn’t want to take too high a level like Unity or similar systems, since I don’t need such a powerful combine for a small game.
- We need a more or less normal language and debugging system, so I really didn’t want to get involved with various handicrafts such as game designers (GameMaker, Construct2), which, in principle, allow you to collect code for smartphones, but have a lot of flaws then, its own, sometimes esoteric, programming language — brakes when the project grows, etc.
- Free (well, or at least cheap license). By this criterion, I rejected an interesting bunch of Xamarin + MonoGame to create a cross-platform game in C # and an open-source engine, written in the likeness of an abandoned XNA.
I will not go into what engine is better and why, everyone can choose the one that he personally likes, I can only say that I ended up settling on Cocos2d-x .
It supports development in C ++, in its modern version; code that uses the engine looks neat and beautiful. Basically, the game objects on the screen are controlled by the sequence of standard actions defined for them, a small code example:
robix->runAction(Sequence::create( Repeat::create(Animate::create(stopAnim), 2), Spawn::createWithTwoActions(Animate::create(flyAwayAnim), makeParticlesFlyaway), CallFunc::create([=]() { this->setVisible(false); }), DelayTime::create(1.0f), enableRunButton, NULL )); This is a function to return the player to the start. It is read almost line by line literally - start the sequence of actions:
Play the stop animation twice, then simultaneously play the fly animation and create particles for it, make the object invisible (the call is wrapped in a lambda function, to transfer it to the “Function Call” action designer), wait one second and activate the GUI button.
Together with the engine you will need to use special programs that facilitate the work with the created graphics.
Texture Packing
The created plasticine animation can be used in the game as png-files, but for mobile games there are special formats for better image compression, besides, several textures are usually packaged into one atlas to optimize the use of video memory. There are several programs for this; I liked the Texture Packer the most. An example of an atlas with animation frames:
The program is paid, but the author gives an independent developer a free license for a year.
Creating fonts
Fonts are the case when I could not use plasticine graphics, I couldn’t do it beautifully, so I took the free font ready and just output the text to them on the plasticine substrate. This is the case when ordinary graphics and plasticine look fine next to each other. The characters of the font in the engine are also packaged in one texture, in addition to which an auxiliary file is used, which describes the storage location of each character. To generate such files from the font, I used the BMFont program.
Creating levels
As I mentioned, I used my editor. If you don’t have your own editor, you can export levels from the beautiful Tiled editor.
Particle systems
Another section in the game in which plasticine graphics will look good is particles. You can fashion simple small figures and use them as special effects at every opportunity. To set up a particle system, the online tool on particle2dx is suitable.
Sounds
For the sound of the game, I used sites with free sounds, for example, freesounds and the help of a familiar musician. The engine allows you to play music and sounds without the use of additional tools.
Screenshot of the resulting game:
On this about clay animation for games I have everything.
PS About the created game - the first chapter teaches the use of commands for moving and painting cells of a field in various colors and is available on the App Store, the next one will be devoted to cycles and conditions. Hopefully it will develop further.
Source: https://habr.com/ru/post/308564/
All Articles