Trello Clone on Phoenix and React. Parts 4-5
- Introduction and selection of technology stack
- Initial setup of the Phoenix Framework project
- User Model and JWT Authentication
- Front-end for registration on React and Redux
- Initial database population and controller to enter the application
- Front-end authentication on React and Redux
- We configure sockets and channels
- We display the list and create new boards
- Add new board users
- We trace the connected users of boards
- Add lists and cards
- We spread the project on Heroku
Front-end for registration on React and Redux
We finished the previous publication by creating a User model with validation and the transformations of the changeset needed to generate an encrypted password; we also updated the router file and created the RegistrationController controller, which processes the request to create a new user and returns user data and its jwt -token to authenticate future requests in JSON format . Now let's move on - to the front-end.
Preparing the React Router
The main goal is to have two public routes, /sign_in and /sign_up , which can be used by any visitor in order to enter the application or register a new account, respectively.
In addition, we will need / as the root route to show all the boards related to the user, and finally the /board/:id route to display the contents of the board selected by the user. To access the last two routes, the user must be authenticated, otherwise we will redirect him to the registration screen.
Update the routes file for react-router to reflect what we want to do:
// web/static/js/routes/index.js import { IndexRoute, Route } from 'react-router'; import React from 'react'; import MainLayout from '../layouts/main'; import AuthenticatedContainer from '../containers/authenticated'; import HomeIndexView from '../views/home'; import RegistrationsNew from '../views/registrations/new'; import SessionsNew from '../views/sessions/new'; import BoardsShowView from '../views/boards/show'; export default ( <Route component={MainLayout}> <Route path="/sign_up" component={RegistrationsNew} /> <Route path="/sign_in" component={SessionsNew} /> <Route path="/" component={AuthenticatedContainer}> <IndexRoute component={HomeIndexView} /> <Route path="/boards/:id" component={BoardsShowView} /> </Route> </Route> ); The tricky moment is the AuthenticatedContainer , let's take a look at it:
// web/static/js/containers/authenticated.js import React from 'react'; import { connect } from 'react-redux'; import { routeActions } from 'redux-simple-router'; class AuthenticatedContainer extends React.Component { componentDidMount() { const { dispatch, currentUser } = this.props; if (localStorage.getItem('phoenixAuthToken')) { dispatch(Actions.currentUser()); } else { dispatch(routeActions.push('/sign_up')); } } render() { // ... } } const mapStateToProps = (state) => ({ currentUser: state.session.currentUser, }); export default connect(mapStateToProps)(AuthenticatedContainer); In short, what we are doing here is: when the component is connected, we check whether the jwt -token is present in the browser’s local storage. Later we will figure out how to save this token, but for now let's imagine that the token does not exist; as a result, thanks to the redux-simple-route library, we will redirect the user to the registration page.
View component for registration
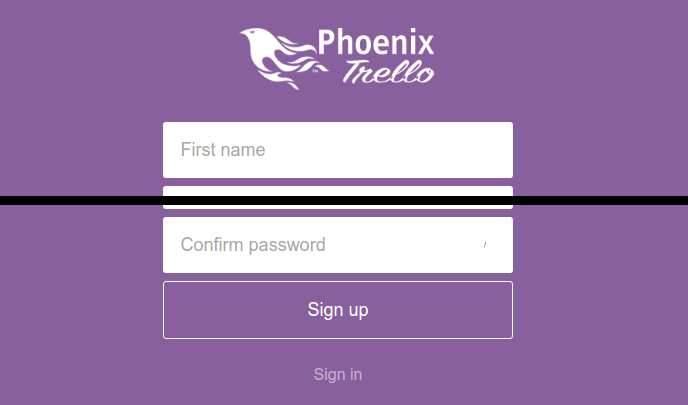
This is what we will show the user if we find that he is not authenticated:
// web/static/js/views/registrations/new.js import React, {PropTypes} from 'react'; import { connect } from 'react-redux'; import { Link } from 'react-router'; import { setDocumentTitle, renderErrorsFor } from '../../utils'; import Actions from '../../actions/registrations'; class RegistrationsNew extends React.Component { componentDidMount() { setDocumentTitle('Sign up'); } _handleSubmit(e) { e.preventDefault(); const { dispatch } = this.props; const data = { first_name: this.refs.firstName.value, last_name: this.refs.lastName.value, email: this.refs.email.value, password: this.refs.password.value, password_confirmation: this.refs.passwordConfirmation.value, }; dispatch(Actions.signUp(data)); } render() { const { errors } = this.props; return ( <div className="view-container registrations new"> <main> <header> <div className="logo" /> </header> <form onSubmit={::this._handleSubmit}> <div className="field"> <input ref="firstName" type="text" placeholder="First name" required={true} /> {renderErrorsFor(errors, 'first_name')} </div> <div className="field"> <input ref="lastName" type="text" placeholder="Last name" required={true} /> {renderErrorsFor(errors, 'last_name')} </div> <div className="field"> <input ref="email" type="email" placeholder="Email" required={true} /> {renderErrorsFor(errors, 'email')} </div> <div className="field"> <input ref="password" type="password" placeholder="Password" required={true} /> {renderErrorsFor(errors, 'password')} </div> <div className="field"> <input ref="passwordConfirmation" type="password" placeholder="Confirm password" required={true} /> {renderErrorsFor(errors, 'password_confirmation')} </div> <button type="submit">Sign up</button> </form> <Link to="/sign_in">Sign in</Link> </main> </div> ); } } const mapStateToProps = (state) => ({ errors: state.registration.errors, }); export default connect(mapStateToProps)(RegistrationsNew); Not much can be said about this component ... it changes the title of the document when it connects, displays the registration form and redirects the result of the action creator of the singUp registration.
Action Creator
When the previous form has been submitted, we need to send the data to the server, where it will be processed:
// web/static/js/actions/registrations.js import { pushPath } from 'redux-simple-router'; import Constants from '../constants'; import { httpPost } from '../utils'; const Actions = {}; Actions.signUp = (data) => { return dispatch => { httpPost('/api/v1/registrations', {user: data}) .then((data) => { localStorage.setItem('phoenixAuthToken', data.jwt); dispatch({ type: Constants.CURRENT_USER, currentUser: data.user, }); dispatch(pushPath('/')); }) .catch((error) => { error.response.json() .then((errorJSON) => { dispatch({ type: Constants.REGISTRATIONS_ERROR, errors: errorJSON.errors, }); }); }); }; }; export default Actions; When the RegistrationsNew component calls the action constructor, passing it form data, a new POST request is sent to the server. The request is filtered by the Phoenix router and processed by the RegistrationController controller that we created in the previous publication . If successful, the jwt- token received from the server is stored in localStorage , the data of the created user is transferred to the CURRENT_USER action, and finally, the user is redirected to the root path. On the contrary, if there are any errors related to the registration data, the action REGISTRATIONS_ERROR with errors in the parameters will be triggered, so that we can show them to the user in the form.
To work with http requests, we are going to rely on the isomorphic-fetch package, called from an auxiliary file, which for this purpose includes several methods:
// web/static/js/utils/index.js import React from 'react'; import fetch from 'isomorphic-fetch'; import { polyfill } from 'es6-promise'; export function checkStatus(response) { if (response.status >= 200 && response.status < 300) { return response; } else { var error = new Error(response.statusText); error.response = response; throw error; } } export function parseJSON(response) { return response.json(); } export function httpPost(url, data) { const headers = { Authorization: localStorage.getItem('phoenixAuthToken'), Accept: 'application/json', 'Content-Type': 'application/json', } const body = JSON.stringify(data); return fetch(url, { method: 'post', headers: headers, body: body, }) .then(checkStatus) .then(parseJSON); } // ... Reducers
The final step is to process these results of actions with the help of converters, with the result that we can create a new state tree that is required by our application. First, take a look at the session converter, in which the currentUser will be saved:
// web/static/js/reducers/session.js import Constants from '../constants'; const initialState = { currentUser: null, }; export default function reducer(state = initialState, action = {}) { switch (action.type) { case Constants.CURRENT_USER: return { ...state, currentUser: action.currentUser }; default: return state; } } In the case of any type of registration errors, you must add them to the new state so that we can show them to the user. Add them to the registration converter:
// web/static/js/reducers/registration.js import Constants from '../constants'; const initialState = { errors: null, }; export default function reducer(state = initialState, action = {}) { switch (action.type) { case Constants.REGISTRATIONS_ERROR: return {...state, errors: action.errors}; default: return state; } } Please note that for error output we refer to the function renderErrorsFor from this auxiliary file:
// web/static/js/utils/index.js // ... export function renderErrorsFor(errors, ref) { if (!errors) return false; return errors.map((error, i) => { if (error[ref]) { return ( <div key={i} className="error"> {error[ref]} </div> ); } }); } In general, this is all that is needed for the registration process. Next, we will see how an existing user can authenticate with the application and access their own content.
Initial database population and controller to enter the application
User login to the application
Previously, we have prepared everything so that visitors can register and create new user accounts. In this part we are going to implement the functionality necessary to allow visitors to authenticate to the application using e-mail and password. In the end, we will create a mechanism for obtaining user data using their authentication tokens.
Initial database population
If you have experience with Rails, you will see that the initial population of the database in Phoenix looks very similar. All we need for this is the presence of the file seeds.exs :
# priv/repo/seeds.exs alias PhoenixTrello.{Repo, User} [ %{ first_name: "John", last_name: "Doe", email: "john@phoenix-trello.com", password: "12345678" }, ] |> Enum.map(&User.changeset(%User{}, &1)) |> Enum.each(&Repo.insert!(&1)) In fact, in this file we simply add to the database all the data that we would like to provide to our application as initial data. If you want to register any other user - just add him to the list and start filling the database:
$ mix run priv/repo/seeds.exs Application Login Controller
Before you create a controller, you need to make some changes to the file router.ex :
# web/router.ex defmodule PhoenixTrello.Router do use PhoenixTrello.Web, :router #... pipeline :api do # ... plug Guardian.Plug.VerifyHeader plug Guardian.Plug.LoadResource end scope "/api", PhoenixTrello do pipe_through :api scope "/v1" do # ... post "/sessions", SessionController, :create delete "/sessions", SessionController, :delete # ... end end #... end The first addition to be made is to add to the chain :api two inserts ( plugs , then the original term will be used - plug, - since the word "insert" reflects the letter of the essence, but does not convey, as it seems to me, full sense; but if I'm wrong, I will be glad to have a normal Russian term. It also makes sense to read the translation material about plug and plug pipeline (interpreter's note ):
- VerifyHeader : this plug just checks for the presence of a token in the
Authorizationheader ( in fact, it also tries to decrypt it, simultaneously checking for correctness, and creates a structure with the contents of the token - comment of the translator ) - LoadResource : if the token is present, it makes the current resource ( in this case, the specific entry from the
Usermodel - translator's comment ) available as a result of the call toGuardian.Plug.current_resource(conn)
You also need to add two more routes to the /api/v1 for creating and deleting a user session, both processed by the SessionController controller. Let's start with the :create handler:
# web/controllers/api/v1/session_controller.ex defmodule PhoenixTrello.SessionController do use PhoenixTrello.Web, :controller plug :scrub_params, "session" when action in [:create] def create(conn, %{"session" => session_params}) do case PhoenixTrello.Session.authenticate(session_params) do {:ok, user} -> {:ok, jwt, _full_claims} = user |> Guardian.encode_and_sign(:token) conn |> put_status(:created) |> render("show.json", jwt: jwt, user: user) :error -> conn |> put_status(:unprocessable_entity) |> render("error.json") end end # ... end To authenticate the user with the received parameters, we will use the PhoenixTrello.Session helper module. If everything :ok , then we will encrypt the user ID and let it in (encode and sign in - a somewhat free, but more understandable translation - comment of the translator ). This will give us a jwt- token, which we will be able to return with the user record as JSON . Before continuing, let's take a look at the Session helper module:
# web/helpers/session.ex defmodule PhoenixTrello.Session do alias PhoenixTrello.{Repo, User} def authenticate(%{"email" => email, "password" => password}) do user = Repo.get_by(User, email: String.downcase(email)) case check_password(user, password) do true -> {:ok, user} _ -> :error end end defp check_password(user, password) do case user do nil -> false _ -> Comeonin.Bcrypt.checkpw(password, user.encrypted_password) end end end He tries to find the user by e-mail and checks if the incoming password matches the encrypted user password. If the user exists and the password is correct, a tuple containing {:ok, user} returned. Otherwise, if the user is not found or the password is incorrect, the atom is returned :error .
Returning to the SessionController controller, SessionController that it interprets the error.json template if the user authentication result is the atom mentioned earlier :error . Finally, you need to create a SessionView module to display both results:
# web/views/session_view.ex defmodule PhoenixTrello.SessionView do use PhoenixTrello.Web, :view def render("show.json", %{jwt: jwt, user: user}) do %{ jwt: jwt, user: user } end def render("error.json", _) do %{error: "Invalid email or password"} end end Users already logged in
Another reason to return the user's JSON representation during application authentication is that we may need this data for different purposes; for example, to show the username in the application header. This corresponds to what we have already done. But what if the user refreshes the browser page while on the first screen? Everything is simple: the state of the application managed by Redux will be reset, and the information received earlier will disappear, which can lead to undesirable errors. And this is not what we want, so to prevent such a situation, we can create a new controller responsible for returning, if necessary, the data of an authenticated user.
Add a new route to the file router.ex :
# web/router.ex defmodule PhoenixTrello.Router do use PhoenixTrello.Web, :router #... scope "/api", PhoenixTrello do pipe_through :api scope "/v1" do # ... get "/current_user", CurrentUserController, :show # ... end end #... end Now we need a CurrentUserController controller that looks like this:
# web/controllers/api/v1/current_user_controller.ex defmodule PhoenixTrello.CurrentUserController do use PhoenixTrello.Web, :controller plug Guardian.Plug.EnsureAuthenticated, handler: PhoenixTrello.SessionController def show(conn, _) do user = Guardian.Plug.current_resource(conn) conn |> put_status(:ok) |> render("show.json", user: user) end end Guardian.Plug.EnsureAuthenticated checks for the presence of a previously verified token, and if it is not available, redirects the request to the :unauthenticated SessionController . In this way, we will protect private controllers, so if there is a desire to make certain routes available only to authenticated users, all that is needed is to add this plug to the appropriate controllers. Other functionality is quite simple: after confirming the presence of an authenticated token, current_resource will be translated, which in our case is the user's data.
Finally, you need to add an unauthenticated handler to the unauthenticated :
# web/controllers/api/v1/session_controller.ex defmodule PhoenixTrello.SessionController do use PhoenixTrello.Web, :controller # ... def unauthenticated(conn, _params) do conn |> put_status(:forbidden) |> render(PhoenixTrello.SessionView, "forbidden.json", error: "Not Authenticated") end end It will return 403 - Forbidden code along with a simple textual description of the error in JSON . At this point, we ended up with the back-end functionality related to logging into the application and subsequent authentication . In the next post, we will cover how to handle this in the front-end and how to connect to UserSocket , the heart of all real-time snacks. In the meantime, do not forget to take a look at the live demo and source code of the final result.
')
Source: https://habr.com/ru/post/308100/
All Articles