Website development based on ASP.NET Core and Platformus CMS
In this article I want to introduce you to Platformus CMS - a young content management system for websites (the 10th alpha at the time of this writing), built on the basis of no less young ASP.NET Core and ExtCore framework. We will not consider architecture and other technical details in detail now, we will limit ourselves to mentioning several interesting facts and then immediately try CMS in order - we will create a small test project based on it.
Platformus is a free, open source content management system. It is cross-platform, modular and extensible. The data in it are presented in the form of objects that are described by classes. Multilanguage is supported.
CMS written in C #. Thanks to the features of ASP.NET Core, it can work equally well on Windows, Linux and Mac. The executable environment itself, necessary for the operation of any application on the .NET Core, can be either installed separately or integrated directly into the application itself. IIS or Kestrel can be used as a web server (in the second case, the application becomes a web server for itself and can work independently or be built into a container like IIS or Nginx). Microsoft SQL Server, SQLite and PostgreSQL are currently supported as a data warehouse. Taking into account all of the above, we can get a configuration that doesn’t require anything else at all - copied, launched and used (it can be convenient for testing, for example).
')
(There are several dozen screenshots in the article.)
If you have not worked with ASP.NET Core, then here there are links to everything that is needed for this.
So, download the archive with the 10th Alpha Platformus for a direct link (~ 9 MB). Unpack it. (Alternatively, in order not to carry out all the actions described in the article, you can download a ready-made demo, a link to it is at the end of the article.)
To start the application, you need to execute 2 commands on the command line (we assume that you are currently working in a Windows environment):
The result should be something like:

Now open the browser and go to http: // localhost: 5000 / :
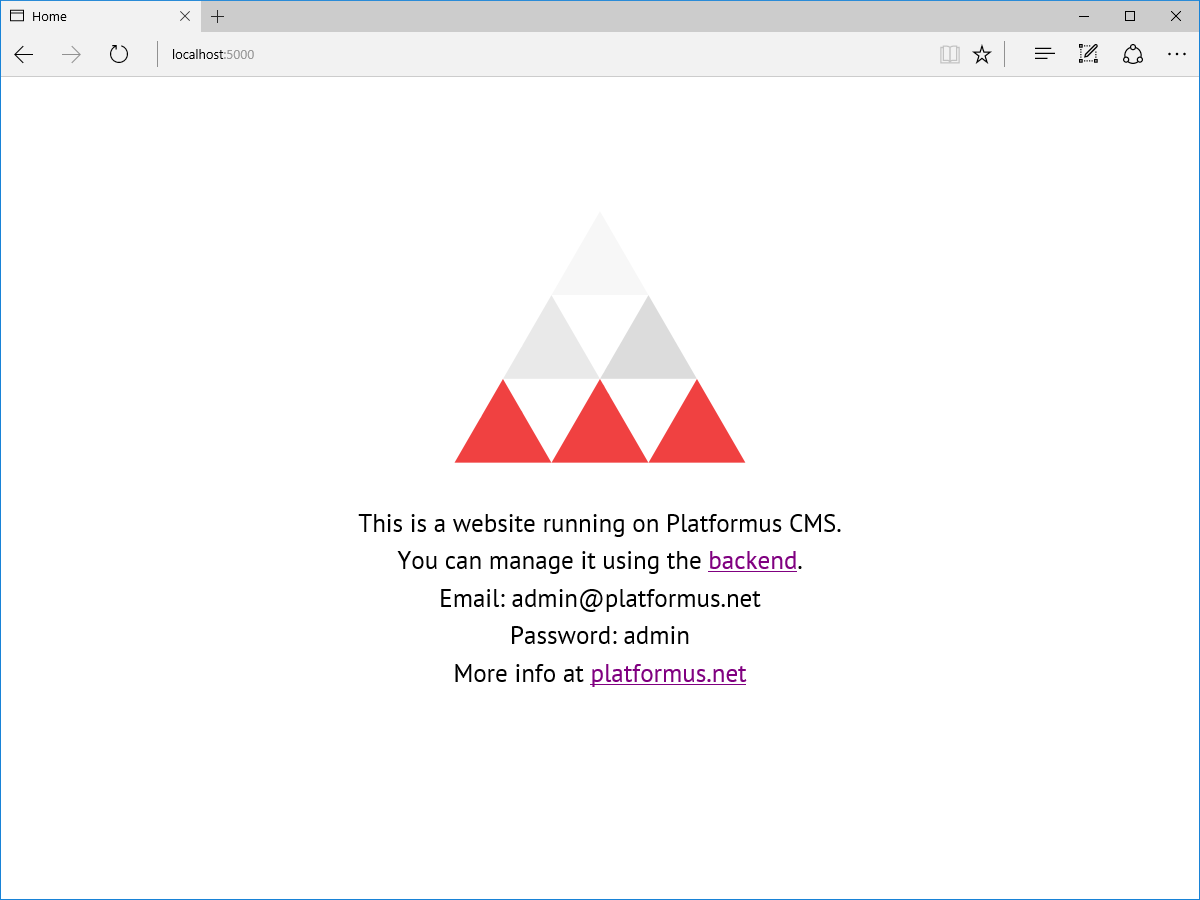
Platformus works! Let's start filling our website, for which we will go to the backend (admin area) by clicking on the appropriate link on the blank page:

As I mentioned above, the data in Platformus are presented as objects. For example, any page is an object. If the page needs to display a list of news, then each news will also be a separate object, optionally, with its own separate page (objects are autonomous and embedded).
Objects are described by classes. Each class, in turn, is described by class members representing properties or relationships of objects of this class, and data sources. By default, the database already has two classes: Base Page and Page. The first is abstract and contains such basic page properties as the title, META-description and META-keywords, grouped in an SEO tab. Most autonomous objects require these properties, therefore, in order not to duplicate them in each class, it is enough to inherit the corresponding classes from Base Page. The second class represents a regular page with HTML content. It is inherited from Base Page and has one more additional property - Content. Here is the default class list:

As an example that can demonstrate the many features of CMS, let's add a news section to our website. Each news item will be tagged and have its own page with detailed information. First, create a News Page class:

Since each news page should have a heading, META-description and META-keywords, we will inherit our class from Base Page, selecting it in the drop-down list Parent class. Next, we indicate the name of our class in the singular and plural. It is not necessary to add the word Page, but perhaps it is more obvious. Set the flag Is standalone, meaning that objects of this class will be autonomous (that is, they will have their own URLs). And finally, we specify the name of the default view for future objects of our class. Click Save. Our News Page class has been created and added to the list:

Now create another class - Tag. This time the objects will be embedded, so the parent class is not selected and the flag Is standalone is not set. Also, there is no need to specify the name of the default view:

Now we define the members of the News Page class. Click the Members link in the corresponding line and go to the empty list (the class members inherited from Base Page are not displayed here):

Class members are of two types - properties and relationships.
The property value is plain text, edited by various editors, depending on the data type of the property. For example, there is a single-line text, multi-line text, HTML, or an image (in the latter case, the property value is the URL of the image). The property can optionally be localized (i.e. its value differs depending on the culture (language)). In this case, when editing a property, a separate editor is displayed for each culture. You can also display the values of key properties in the list of objects of the corresponding class.
The link value is another object or other objects of the specified class. Also, if one object of one class can be associated with only one object of another class (for example, an article can be included in only one category), these “child” objects can be grouped relative to their “parent”. This may seem a bit confusing. At the end of the article there is a link to the example on GitHub, where this technique is used.
First we describe the Name property - the name of the news:

On the General tab, we specify the code, name and position of the class member. According to the code, we will then get the value of the properties (but not the links!) Of the object, the name is displayed in the property or link editor, and the position determines the order of these editors.

On the Property tab, we specify the data type of our property. For the title, select Single line plain text - single-line plain text. Set the flag Is property localizable, because the name of the news will be different for different cultures. Also, since the name is a key property, set the Is property visible in list flag so that the value of this property is displayed in the list of News Page objects.
Since we are describing a property, not a relationship, we don’t refer to the Relation tab. Click Save, our new class member is added.
Now, similarly, we describe the property Preview - the shortened text of the news, which will be displayed in the news list. Since there will be more text in the preview than in the title, we’ll select Multiline plain text as the property data type and we’ll not set the property visible in list flag. Further, in the same way we will add also property with the main contents of news - Content. Choose the Html data type to be able to conveniently format the content.
The last property I would like to add is an illustration of the news. Everything is exactly the same as with other properties, but we select Image as the data type and do not set the Is property localizable flag, because the illustration does not depend on the current culture.
Now let's add a link to our class with the Tag class, so that you can specify tags for news:

On the General tab, everything is familiar. Go to the Relation tab this time:

In the drop-down list of the Relation class, select the class whose objects will be bound to the objects of the News Page class.
Everything, now everything is ready. It should turn out like this:

Similarly, we describe the only property of the Tag class - Name. (Recall that the Is property localizable and Is property visible in list flags must be set.)
Despite the fact that we described the relationship between News Page and Tag, tagged objects of the Tag class will not be loaded along with the corresponding object of the News Page class. For this to happen, we need to add something else to the News Page class - the data source. Data sources determine which objects are loaded with the current object and how. For example, if there are links between a news item and several tagged objects, then using data sources, based on links, we can both download all news tags and all news tags. Also, we can load objects even if there is no connection with the current one. For example, to display news on the main page. All data sources are described by C # classes that implement the IDataSource interface, and we can add new such classes. For example, you can add a data source that will display 100 recent news broken down by 10 per page. Or a data source that displays the most popular products online store. Conveniently, in the end, all data is grouped in a single object, which is a model for its presentation. This is quite in the spirit of MVC.
So, back to the list of our classes and click on the Data sources link in the row row of the News Page class. Add a new data source:

We save and get the following list:

Well, now you can proceed directly to the content of our website. Go to the section Objects:
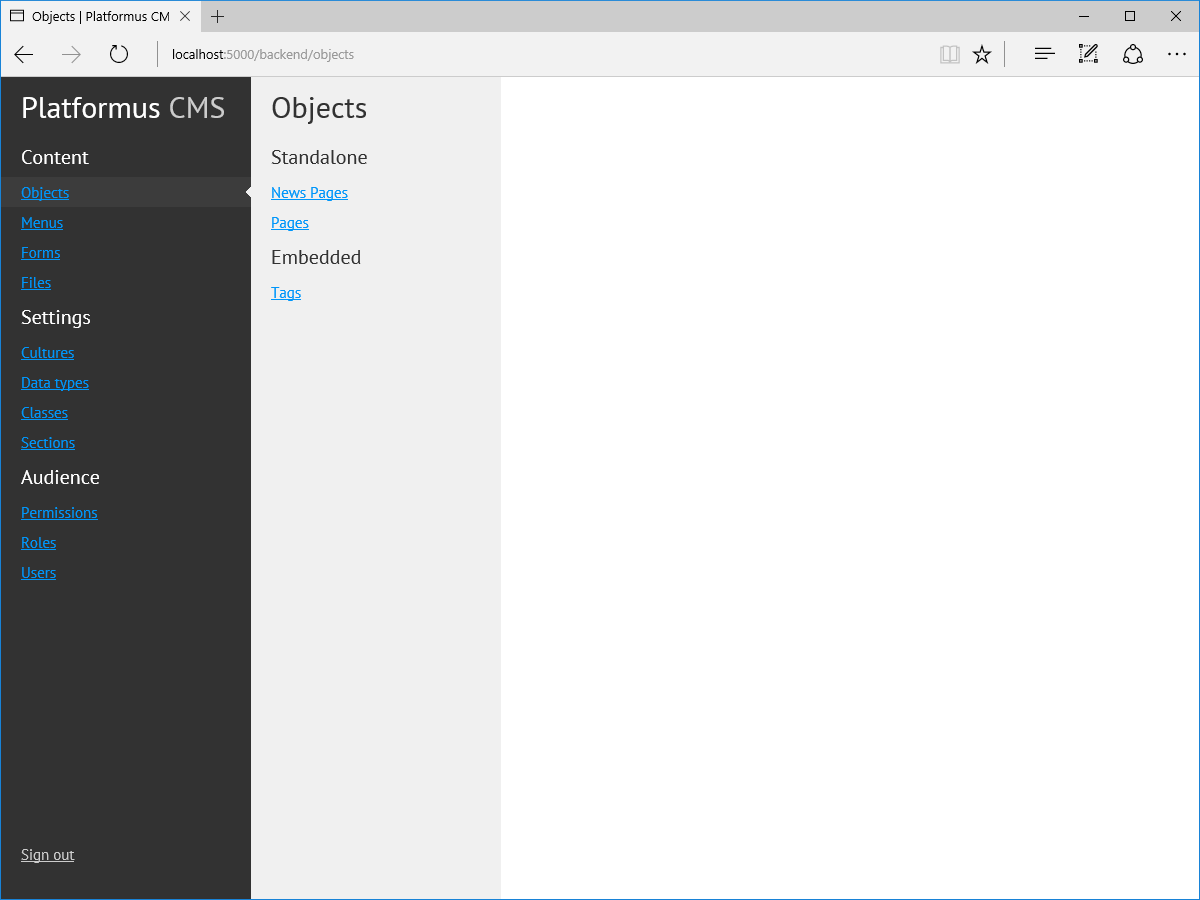
All objects are divided into 2 groups - autonomous (Standalone) and embedded (Embedded). Within these groups, they are displayed by class. Since the objects of the News Page class need objects of the Tag class, let's start the content with the latter:

Create our first object:

As you can see, the object editing page is very simple and contains only 2 fields: View name (for embedded objects, it can be left empty, but hardcoded later in the parent view if there is no need to be able to change the view from the back end) and Name. The Name property we described in our Tag class. Let's create some tags, I did it like this:

Finally, let's move on to our news. Create an object of the News Page class. There are more fields here:

For properties that have the Image data type, images are loaded using such a loader-cutter (currently, image manipulation in ASP.NET Core is not supported yet, so the real framing does not occur on the server, the image is saved as is, completely, out of depending on the selected area):

And here is what the link editor looks like, the choice of tags in our case:

Let's create some more news to make it clearer, and try to test what we finally got. Let's go to one of the URLs of our news, after adding the culture identifier before it: http: // localhost: 5000 / en / news / 2016-olympic-games . And ... we get the 500th error. If you look at the console, it becomes obvious that we have not created the NewsPage view for our object:

Let's try to create a presentation for the news page. Go to the folder \ Views \ Default of our application. Here we will see the only presentation of Page.cshtml (our main page). Copy it, name the copy NewsPage.cshtml and open it for editing in any text editor:

The data type of the view model is dynamic, but we all know that in reality it will be a C # object of the ObjectViewModel class, containing data from our News Page object.
Access to the property values of the object is as follows:
Access to objects in data sources is as follows:
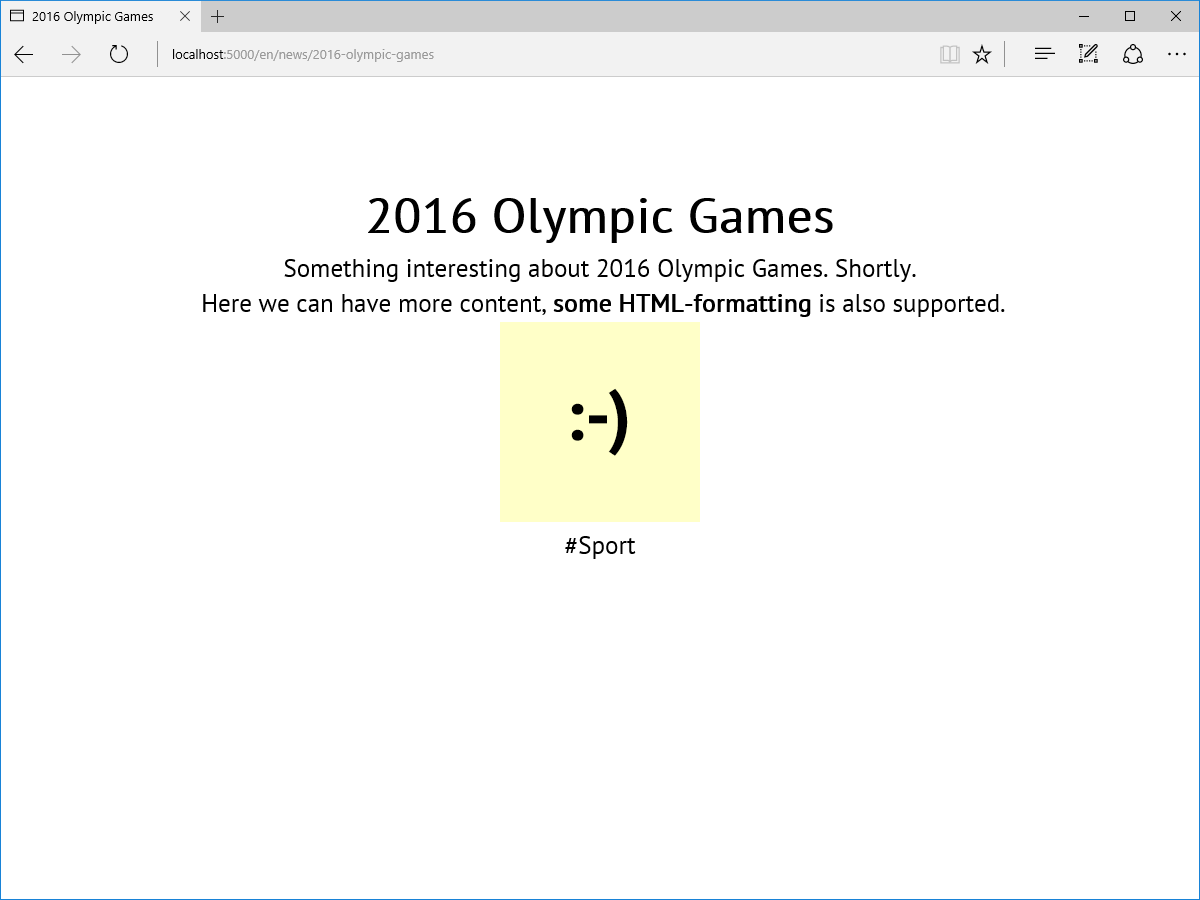
We modify our view, for example, in this way (of course, it would be better not to describe the markup needed to display the tag right here, but to make a separate partial _Tag view for this; we did this for simplicity and clarity):

Now we update the page in the browser and see the following result:
That's great, it works! It remains only to display a list of news on the main. To do this, add the following data source to the Page class:

As you can see, the C # class of the data source is different from the one we used before. This is a more generalized data source that does not take into account the connections between objects. Also, pay attention to the Parameters field. Here is the ID of the class whose objects you want to load. In the current version of Platformus, this is done not quite elegantly, without any visual selector.
We now turn to editing the object of the main page, remove all unnecessary content. (You can also not change the content, but open it for editing and then save the object after adding the data source to its class, otherwise this information will not be pulled into the cached object and will not be available to the view.)
Now let's open for editing the Page.cshtml presentation and change it approximately as follows:

Here is what we get now if we go to the main page of our website in a browser:

All is ready! Of course, it would be right to add here, at a minimum, a menu or feedback form, but it is very easy to do (see the link below), so we will not focus on this.
I think the first question that you need to answer yourself before starting the development of the next CMS is “Why?”. If you don’t go into details, at least now there are not so many CMS on ASP.NET Core, and I really like this platform and I believe in its future.
I sincerely hope that it was interesting to you, and also that I will receive criticism, ideas, food for thought for further improvement of the product - we are only at the beginning. Thank!
I did not post the code for this particular project on GitHub, since it is very similar to another example , which you can download and see in order not to do everything manually.
Some interesting facts
Platformus is a free, open source content management system. It is cross-platform, modular and extensible. The data in it are presented in the form of objects that are described by classes. Multilanguage is supported.
CMS written in C #. Thanks to the features of ASP.NET Core, it can work equally well on Windows, Linux and Mac. The executable environment itself, necessary for the operation of any application on the .NET Core, can be either installed separately or integrated directly into the application itself. IIS or Kestrel can be used as a web server (in the second case, the application becomes a web server for itself and can work independently or be built into a container like IIS or Nginx). Microsoft SQL Server, SQLite and PostgreSQL are currently supported as a data warehouse. Taking into account all of the above, we can get a configuration that doesn’t require anything else at all - copied, launched and used (it can be convenient for testing, for example).
')
(There are several dozen screenshots in the article.)
Getting started
If you have not worked with ASP.NET Core, then here there are links to everything that is needed for this.
So, download the archive with the 10th Alpha Platformus for a direct link (~ 9 MB). Unpack it. (Alternatively, in order not to carry out all the actions described in the article, you can download a ready-made demo, a link to it is at the end of the article.)
To start the application, you need to execute 2 commands on the command line (we assume that you are currently working in a Windows environment):
cd dotnet webapplication.dll The result should be something like:
Now open the browser and go to http: // localhost: 5000 / :
Platformus works! Let's start filling our website, for which we will go to the backend (admin area) by clicking on the appropriate link on the blank page:
Description of the data structure
As I mentioned above, the data in Platformus are presented as objects. For example, any page is an object. If the page needs to display a list of news, then each news will also be a separate object, optionally, with its own separate page (objects are autonomous and embedded).
Objects are described by classes. Each class, in turn, is described by class members representing properties or relationships of objects of this class, and data sources. By default, the database already has two classes: Base Page and Page. The first is abstract and contains such basic page properties as the title, META-description and META-keywords, grouped in an SEO tab. Most autonomous objects require these properties, therefore, in order not to duplicate them in each class, it is enough to inherit the corresponding classes from Base Page. The second class represents a regular page with HTML content. It is inherited from Base Page and has one more additional property - Content. Here is the default class list:
Classes
As an example that can demonstrate the many features of CMS, let's add a news section to our website. Each news item will be tagged and have its own page with detailed information. First, create a News Page class:
Since each news page should have a heading, META-description and META-keywords, we will inherit our class from Base Page, selecting it in the drop-down list Parent class. Next, we indicate the name of our class in the singular and plural. It is not necessary to add the word Page, but perhaps it is more obvious. Set the flag Is standalone, meaning that objects of this class will be autonomous (that is, they will have their own URLs). And finally, we specify the name of the default view for future objects of our class. Click Save. Our News Page class has been created and added to the list:
Now create another class - Tag. This time the objects will be embedded, so the parent class is not selected and the flag Is standalone is not set. Also, there is no need to specify the name of the default view:
Class members
Now we define the members of the News Page class. Click the Members link in the corresponding line and go to the empty list (the class members inherited from Base Page are not displayed here):
Class members are of two types - properties and relationships.
The property value is plain text, edited by various editors, depending on the data type of the property. For example, there is a single-line text, multi-line text, HTML, or an image (in the latter case, the property value is the URL of the image). The property can optionally be localized (i.e. its value differs depending on the culture (language)). In this case, when editing a property, a separate editor is displayed for each culture. You can also display the values of key properties in the list of objects of the corresponding class.
The link value is another object or other objects of the specified class. Also, if one object of one class can be associated with only one object of another class (for example, an article can be included in only one category), these “child” objects can be grouped relative to their “parent”. This may seem a bit confusing. At the end of the article there is a link to the example on GitHub, where this technique is used.
First we describe the Name property - the name of the news:
On the General tab, we specify the code, name and position of the class member. According to the code, we will then get the value of the properties (but not the links!) Of the object, the name is displayed in the property or link editor, and the position determines the order of these editors.
On the Property tab, we specify the data type of our property. For the title, select Single line plain text - single-line plain text. Set the flag Is property localizable, because the name of the news will be different for different cultures. Also, since the name is a key property, set the Is property visible in list flag so that the value of this property is displayed in the list of News Page objects.
Since we are describing a property, not a relationship, we don’t refer to the Relation tab. Click Save, our new class member is added.
Now, similarly, we describe the property Preview - the shortened text of the news, which will be displayed in the news list. Since there will be more text in the preview than in the title, we’ll select Multiline plain text as the property data type and we’ll not set the property visible in list flag. Further, in the same way we will add also property with the main contents of news - Content. Choose the Html data type to be able to conveniently format the content.
The last property I would like to add is an illustration of the news. Everything is exactly the same as with other properties, but we select Image as the data type and do not set the Is property localizable flag, because the illustration does not depend on the current culture.
Now let's add a link to our class with the Tag class, so that you can specify tags for news:
On the General tab, everything is familiar. Go to the Relation tab this time:
In the drop-down list of the Relation class, select the class whose objects will be bound to the objects of the News Page class.
Everything, now everything is ready. It should turn out like this:
Similarly, we describe the only property of the Tag class - Name. (Recall that the Is property localizable and Is property visible in list flags must be set.)
Data sources
Despite the fact that we described the relationship between News Page and Tag, tagged objects of the Tag class will not be loaded along with the corresponding object of the News Page class. For this to happen, we need to add something else to the News Page class - the data source. Data sources determine which objects are loaded with the current object and how. For example, if there are links between a news item and several tagged objects, then using data sources, based on links, we can both download all news tags and all news tags. Also, we can load objects even if there is no connection with the current one. For example, to display news on the main page. All data sources are described by C # classes that implement the IDataSource interface, and we can add new such classes. For example, you can add a data source that will display 100 recent news broken down by 10 per page. Or a data source that displays the most popular products online store. Conveniently, in the end, all data is grouped in a single object, which is a model for its presentation. This is quite in the spirit of MVC.
So, back to the list of our classes and click on the Data sources link in the row row of the News Page class. Add a new data source:
We save and get the following list:
Filling content
Well, now you can proceed directly to the content of our website. Go to the section Objects:
All objects are divided into 2 groups - autonomous (Standalone) and embedded (Embedded). Within these groups, they are displayed by class. Since the objects of the News Page class need objects of the Tag class, let's start the content with the latter:
Create our first object:
As you can see, the object editing page is very simple and contains only 2 fields: View name (for embedded objects, it can be left empty, but hardcoded later in the parent view if there is no need to be able to change the view from the back end) and Name. The Name property we described in our Tag class. Let's create some tags, I did it like this:
Finally, let's move on to our news. Create an object of the News Page class. There are more fields here:
For properties that have the Image data type, images are loaded using such a loader-cutter (currently, image manipulation in ASP.NET Core is not supported yet, so the real framing does not occur on the server, the image is saved as is, completely, out of depending on the selected area):
And here is what the link editor looks like, the choice of tags in our case:
Let's create some more news to make it clearer, and try to test what we finally got. Let's go to one of the URLs of our news, after adding the culture identifier before it: http: // localhost: 5000 / en / news / 2016-olympic-games . And ... we get the 500th error. If you look at the console, it becomes obvious that we have not created the NewsPage view for our object:
Submissions and final customization
Let's try to create a presentation for the news page. Go to the folder \ Views \ Default of our application. Here we will see the only presentation of Page.cshtml (our main page). Copy it, name the copy NewsPage.cshtml and open it for editing in any text editor:
The data type of the view model is dynamic, but we all know that in reality it will be a C # object of the ObjectViewModel class, containing data from our News Page object.
Access to the property values of the object is as follows:
Model.Properties["MemberCode"].Html Access to objects in data sources is as follows:
Model.DataSources["DataSourceCode"].Objects We modify our view, for example, in this way (of course, it would be better not to describe the markup needed to display the tag right here, but to make a separate partial _Tag view for this; we did this for simplicity and clarity):
Now we update the page in the browser and see the following result:
That's great, it works! It remains only to display a list of news on the main. To do this, add the following data source to the Page class:
As you can see, the C # class of the data source is different from the one we used before. This is a more generalized data source that does not take into account the connections between objects. Also, pay attention to the Parameters field. Here is the ID of the class whose objects you want to load. In the current version of Platformus, this is done not quite elegantly, without any visual selector.
We now turn to editing the object of the main page, remove all unnecessary content. (You can also not change the content, but open it for editing and then save the object after adding the data source to its class, otherwise this information will not be pulled into the cached object and will not be available to the view.)
Now let's open for editing the Page.cshtml presentation and change it approximately as follows:
Here is what we get now if we go to the main page of our website in a browser:
All is ready! Of course, it would be right to add here, at a minimum, a menu or feedback form, but it is very easy to do (see the link below), so we will not focus on this.
Conclusion
I think the first question that you need to answer yourself before starting the development of the next CMS is “Why?”. If you don’t go into details, at least now there are not so many CMS on ASP.NET Core, and I really like this platform and I believe in its future.
I sincerely hope that it was interesting to you, and also that I will receive criticism, ideas, food for thought for further improvement of the product - we are only at the beginning. Thank!
I did not post the code for this particular project on GitHub, since it is very similar to another example , which you can download and see in order not to do everything manually.
Source: https://habr.com/ru/post/308080/
All Articles