Working with screen states in Xamarin.Forms
Friends! We are pleased to present new material on the development of mobile applications on Xamarin.In the new article, we will look at how Xamarin.Forms implements window state management (data loading, Internet and other is in progress) on XAML.
All articles from the column can be found and read on the link #xamarincolumn
One screen, many states
The vast majority of modern business applications actively interact with external Internet services in order to obtain data for display. In addition, there are often situations in which the same screen can show different data sets, up to a change of appearance.
Mobile applications, unlike websites, should interact with the user much faster, so displaying a blank screen for a long time while loading data is considered not very correct. Additionally, the application must notify the user of data download errors or the absence of an Internet connection. Lazy developers can do with the display of pop-up notifications in the spirit of “Error loading data”, but we will go the other way.

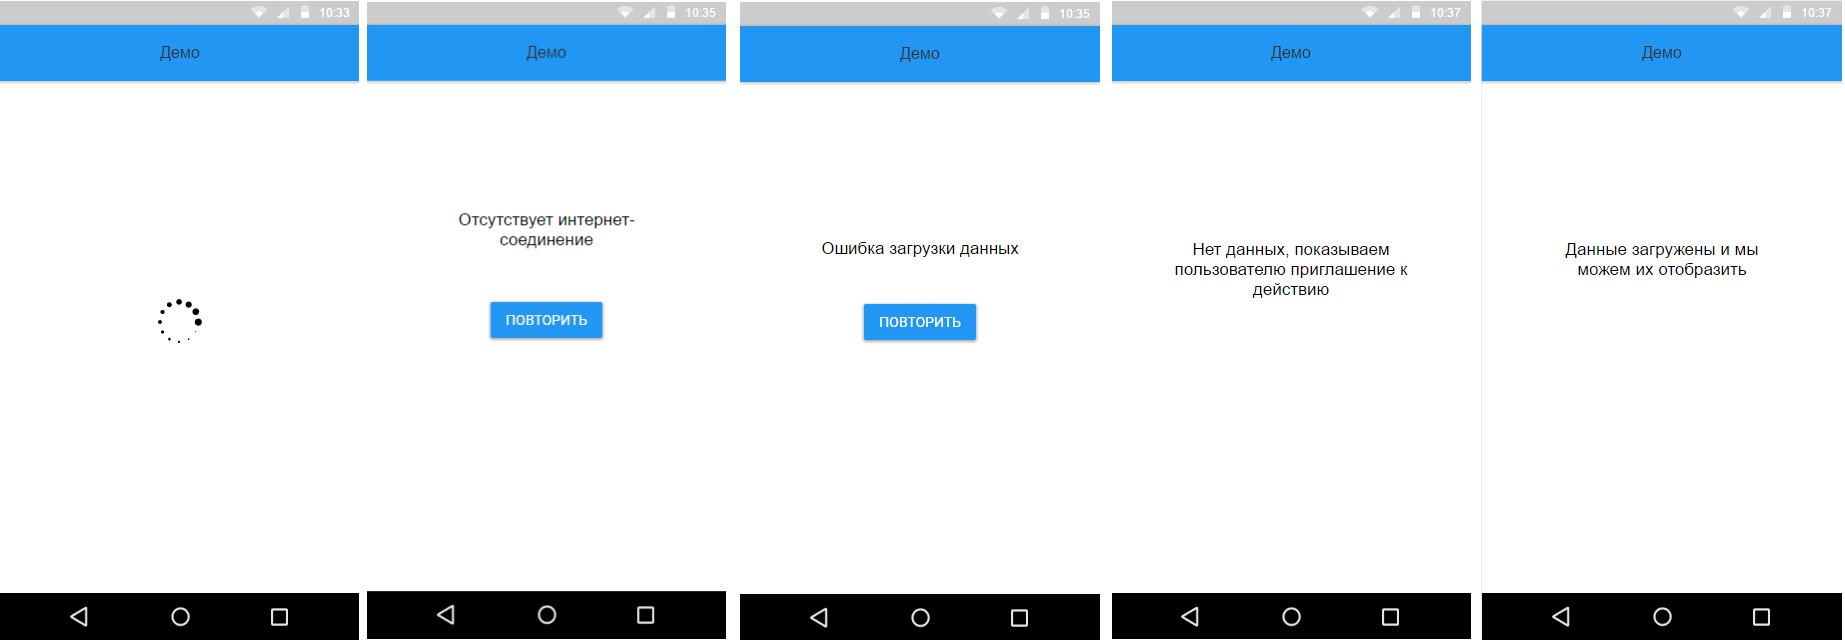
So, let's select the basic states of one (!) Screen:
- data loading (loading indicator in the center of the screen)
- no internet connection (accompanying text, possibly a beautiful picture and the “Repeat” button)
- data loading error (accompanying text, possibly a beautiful picture and the “Repeat” button)
- no data (for example, empty shopping cart)
- data display (for example, loaded list of goods)
')
A programmer may begin to move his hair when thinking about how much code will have to be written to replace the contents of one screen, while calculating that there may be dozens of such screens, and each of the states can be quite complicated. Early to panic, a simple and elegant solution offered by Patrick McCurley . We will take this decision as a basis and refine it a bit.
Meet - This is a StateContainer
At the core of this approach is the idea of describing all screen states in XAML and controlling their change using the ViewModel. Looking ahead, we note that the solution is quite simple and can be used not only to manage the states of the entire window, but also its individual parts.
This is how the XAML description of a single page with support for state transition will look like:
<?xml version="1.0" encoding="utf-8" ?> <ContentPage x:Class="ApiDemo.DemoPage" xmlns="http://xamarin.com/schemas/2014/forms" xmlns:x="http://schemas.microsoft.com/winfx/2009/xaml" xmlns:stateContainerDemo="clr-namespace:StateContainerDemo;assembly=ApiDemo"> <stateContainerDemo:StateContainer State="{Binding State}"> <stateContainerDemo:StateCondition State="Loading"> <ActivityIndicator IsRunning="True" /> </stateContainerDemo:StateCondition> <stateContainerDemo:StateCondition State="Normal"> <Label Text=" "/> </stateContainerDemo:StateCondition> <stateContainerDemo:StateCondition State="Error"> <StackLayout> <Label Text=" " /> <Button Command="{Binding LoadDataCommand}" Text="" /> </StackLayout> </stateContainerDemo:StateCondition> <stateContainerDemo:StateCondition State="NoInternet"> <StackLayout> <Label Text=" -" /> <Button Command="{Binding LoadDataCommand}" Text="" /> </StackLayout> </stateContainerDemo:StateCondition> <stateContainerDemo:StateCondition State="NoData"> <Label Text=" , " /> </stateContainerDemo:StateCondition> </stateContainerDemo:StateContainer> </ContentPage> Simple and clear. In this case, large blocks for states can be rendered as a separate View for reuse.
This is how the wrapper will be described for one state:
[ContentProperty("Content")] public class StateCondition : View { public object State { get; set; } public View Content { get; set; } } And here is the enum (enum) of possible screen states:
public enum States { Loading, Normal, Error, NoInternet, NoData } We modified Patrick McCurley's State Container a bit by adding simple animations of state transitions to make everything work smoothly:
[ContentProperty("Conditions")] public class StateContainer : ContentView { public List<StateCondition> Conditions { get; set; } = new List<StateCondition>(); public static readonly BindableProperty StateProperty = BindableProperty.Create(nameof(State), typeof(object), typeof(StateContainer), null, BindingMode.Default, null, StateChanged); public static void Init() { //for linker } private static async void StateChanged(BindableObject bindable, object oldValue, object newValue) { var parent = bindable as StateContainer; if (parent != null) await parent.ChooseStateProperty(newValue); } public object State { get { return GetValue(StateProperty); } set { SetValue(StateProperty, value); } } private async Task ChooseStateProperty(object newValue) { if (Conditions == null && Conditions?.Count == 0) return; try { foreach (var stateCondition in Conditions.Where(stateCondition => stateCondition.State != null && stateCondition.State.ToString().Equals(newValue.ToString()))) { if (Content != null) { await Content.FadeTo(0, 100U); // Content.IsVisible = false; // await Task.Delay(30); // UI- } // stateCondition.Content.Opacity = 0; Content = stateCondition.Content; Content.IsVisible = true; await Content.FadeTo(1); break; } } catch (Exception e) { Debug.WriteLine($"StateContainer ChooseStateProperty {newValue} error: {e}"); } } } To get Internet connection status, we connected the ConnectivityPlugin library.
if (!CrossConnectivity.Current.IsConnected) { State = States.NoInternet; // ViewModel return; } As you can see, the StateContainer is not an add-on over the Page, but an ordinary ContentView and can easily be placed on the screen with static or already loaded content. This will allow the implementation of partial data reloading mechanisms, for example, when we already have a name and a link to a photo that can be displayed to the user without having to wait.

Conclusion
So, today we looked at working with screen states using a simple and elegant StateContainer, which allows us to improve the user experience. And simple animations of state transitions add smoothness and give the application a finished look.
In the next article, we will look at integrating with the external REST API using Refit , ModernHttpClient and Polly .
About the authors

Vyacheslav Chernikov - head of development at Binwell . In the past, he was one of the Nokia Champion and Qt Certified Specialists, currently he is the Xamarin and Azure platform specialist. He came to the sphere of mobile in 2005, since 2008 he has been developing mobile applications: he started with Symbian, Maemo, Meego, Windows Mobile, then switched to iOS, Android and Windows Phone.
Other articles by the author:
- OAuth Authorization for Xamarin Applications
- Deploy mobile software with Microsoft devops pipeline
- DevOps in the service of man
- Automate non-automated, or about Xamarin in real projects
- Convenient REST for Xamarin Applications
- Quickly create MVP (minimum viable product) based on Microsoft Azure and Xamarin.Forms
- Preparing Xamarin.Forms: Setting Up the Environment and First Steps
- Increase work efficiency in Xamarin.Forms
- Connecting Facebook SDK for Xamarin.Forms
- We connect VKontakte SDK for Xamarin.Forms
useful links
- Announcement of free Xamarin tools for developing cross-platform C # applications by reference
- Visual Studio 2015 Community, Visual Studio Team Services, Visual Studio Code: free offers for developers
- Additional free tools and services in Visual Studio Dev Essentials
Source: https://habr.com/ru/post/307890/
All Articles