Acquaintance: BBC micro: bit and mbed OS 5
As noted at geektimes, the BBC micro: bit microcomputer began to be sent to British schoolchildren this spring, and a couple of months ago it went on sale at a price of £ 13 apiece.
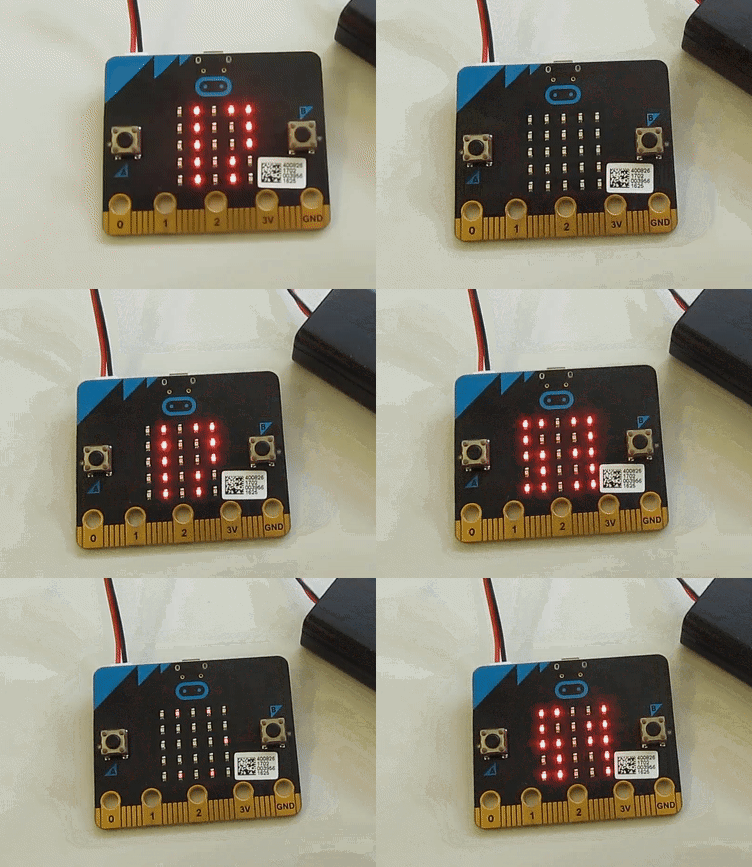
Suppose micro: bit is acquired; what to do next? I decided to make it a watch, because my wrist just broke.

Instructions for using micro: bit with the old version of mbed OS are on the website of Lancaster University ; But ARM two weeks ago released a new version of mbed OS 5 , and the microbit-dal support out-of-the- box library does not work with this new version.
')
As far as I understand, even in ARM no one has yet tried to use mbed OS 5 on micro: bit; I wanted to be the first.
To get started, you need to install the mbed CLI development environment. It is written in Python (version 2.7.6+ is required for work), and is distributed via PyPI:
Or, if we work on a machine without root rights, and even without
In addition, you need to install the GNU ARM Embedded compiler. If the tarball with the compiler is unpacked into
Now we create a working environment for our project:
The next step is to add the micro: bit support library to our work environment:
The Lancaster library contains an assembler file
In addition, there are several other problems with the Lancaster library:
The first two problems are fixed in my fork of the Lancaster library; for the third, the following low-technology workflow is proposed:
The last problem is solved by the compilation settings: in order for the heap to be enough for microbit-dal to work, the system stack must be 512 bytes in size or less. (The interrupt handlers that use it are enough for half of it.)
Now the most interesting thing is the actual implementation of the clock. There are only two nontrivial moments in it:
When this code is saved (say, in the file
Done!
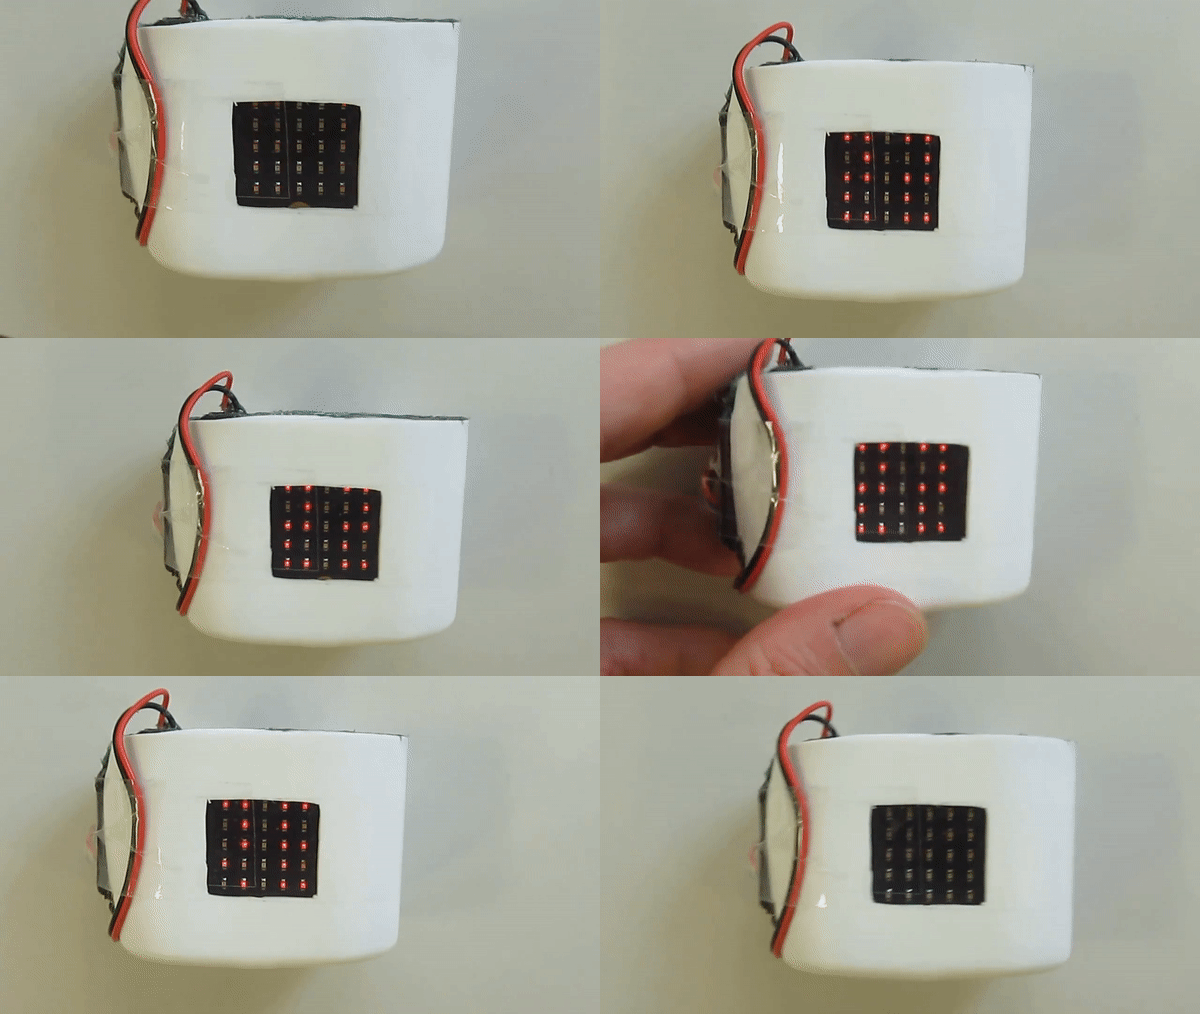
If desired, for the resulting watch you can make a protective case from a jar from under the vitamins and hot melt:

Suppose micro: bit is acquired; what to do next? I decided to make it a watch, because my wrist just broke.

Instructions for using micro: bit with the old version of mbed OS are on the website of Lancaster University ; But ARM two weeks ago released a new version of mbed OS 5 , and the microbit-dal support out-of-the- box library does not work with this new version.
')
As far as I understand, even in ARM no one has yet tried to use mbed OS 5 on micro: bit; I wanted to be the first.
To get started, you need to install the mbed CLI development environment. It is written in Python (version 2.7.6+ is required for work), and is distributed via PyPI:
$ sudo pip install mbed-cli Or, if we work on a machine without root rights, and even without
pip : $ wget http://bootstrap.pypa.io/ez_setup.py $ python ez_setup.py --user $ ~/.local/bin/pip install virtualenv --user $ ~/.local/bin/virtualenv venv $ source venv/bin/activate (venv) $ pip install mbed-cli In addition, you need to install the GNU ARM Embedded compiler. If the tarball with the compiler is unpacked into
/work/gcc-arm-none-eabi-5_4-2016q2/ , then it is registered in the mbed CLI command $ mbed config --global GCC_ARM_PATH /work/gcc-arm-none-eabi-5_4-2016q2/bin/ Now we create a working environment for our project:
$ mbed new mb_clock $ cd mb_clock $ mbed target NRF51_MICROBIT $ mbed toolchain GCC_ARM If thembed newcommand is executed as root and / or inside venv, then it will automatically install the necessary Python modules into the system. Otherwise, she will ask$ sudo pip install -r mbed-os/requirements.txt
The next step is to add the micro: bit support library to our work environment:
$ mbed add https://github.com/lancaster-university/microbit # $ mbed add https://github.com/tyomitch/microbit-dal # The Lancaster library contains an assembler file
CortexContextSwitch.s , which comes in two versions: for GNU as and for armasm . The library for mbed OS 3 included the CMakeLists.txt file, in which the automatic selection of the desired option was registered. Alas, mbed OS 5 ignores CMakeLists.txt , so you have to manually select the option for GNU as: $ cp microbit-dal/source/asm/CortexContextSwitch.s.gcc microbit-dal/source/asm/CortexContextSwitch.s In addition, there are several other problems with the Lancaster library:
- mbed OS 5 includes multithreading support, so the microbit-dal code is now executed with a “user-defined” stack (PSP), and not with a “system” stack (MSP), as in previous versions of mbed OS;
- The system API for working with BLE in mbed OS 5 has changed;
- BLE support in mbed OS 5 takes up too much memory, and on micro: a bit with its 16KB of RAM, it just doesn't fit;
- The default stack size (2 KB) is too large: with such a stack, there is no free memory in the system for dynamic allocation (“heap”).
The first two problems are fixed in my fork of the Lancaster library; for the third, the following low-technology workflow is proposed:
$ rm mbed-os/features/FEATURE_BLE/targets/TARGET_NORDIC/TARGET_MCU_NRF51822/source/nRF5xn.cpp The last problem is solved by the compilation settings: in order for the heap to be enough for microbit-dal to work, the system stack must be 512 bytes in size or less. (The interrupt handlers that use it are enough for half of it.)
Now the most interesting thing is the actual implementation of the clock. There are only two nontrivial moments in it:
- In order to display on a micro: bit display with a size of 5x5 LEDs, two digits at a time, I had to take a creative approach to creating a font. I decided to make a zero in the form of a dot in the middle of familiarity (similarly, it looks in Arabic numerals ), an eight in the form of a colon, according to the logic “two zeros one above the other.” All other numbers are recognizable without any difficulty.
- Micro: bit does not have non-volatile "real-time clocks", so time is counted from the initial load. The initial display value is set at compile time; after launch, using two micro: bit buttons, the displayed time can be adjusted in one direction or another, in one minute increments.
Listing
#include "MicroBit.h" MicroBit uBit; const uint8_t digit_bits[10][10] = { { 0, 0, 0, 0, 0, 1, 0, 0, 0, 0 }, { 0, 1, 0, 1, 0, 1, 0, 1, 0, 1 }, { 1, 1, 0, 1, 1, 1, 1, 0, 1, 1 }, { 1, 1, 0, 1, 1, 1, 0, 1, 1, 1 }, { 0, 1, 1, 1, 1, 1, 0, 1, 0, 1 }, { 1, 1, 1, 0, 1, 1, 0, 1, 1, 1 }, { 0, 1, 1, 0, 1, 0, 1, 1, 1, 1 }, { 1, 1, 0, 1, 0, 1, 1, 0, 1, 0 }, { 0, 0, 0, 1, 0, 0, 0, 1, 0, 0 }, { 1, 1, 1, 1, 0, 1, 0, 1, 1, 0 } }; MicroBitImage digits[] = { MicroBitImage(2,5,digit_bits[0]), MicroBitImage(2,5,digit_bits[1]), MicroBitImage(2,5,digit_bits[2]), MicroBitImage(2,5,digit_bits[3]), MicroBitImage(2,5,digit_bits[4]), MicroBitImage(2,5,digit_bits[5]), MicroBitImage(2,5,digit_bits[6]), MicroBitImage(2,5,digit_bits[7]), MicroBitImage(2,5,digit_bits[8]), MicroBitImage(2,5,digit_bits[9]) }; int started_at = 18*60+53; void onButtonAClick(MicroBitEvent evt) { started_at--; } void onButtonBClick(MicroBitEvent evt) { started_at++; } int main() { uBit.init(); uBit.messageBus.listen(MICROBIT_ID_BUTTON_A, MICROBIT_BUTTON_EVT_CLICK, onButtonAClick); uBit.messageBus.listen(MICROBIT_ID_BUTTON_B, MICROBIT_BUTTON_EVT_CLICK, onButtonBClick); while(1) { int cur_time = (started_at + uBit.systemTime() / 60000L) % (24*60); int hours = cur_time / 60; int minutes = cur_time % 60; uBit.display.image.paste(digits[hours/10],0,0,0); uBit.display.image.paste(digits[hours%10],3,0,0); uBit.sleep(300); uBit.display.image.paste(digits[minutes/10],0,0,0); uBit.display.image.paste(digits[minutes%10],3,0,0); uBit.sleep(300); uBit.display.clear(); uBit.sleep(600); } } When this code is saved (say, in the file
mb_clock.cpp ), the whole project can be compiled and downloaded to the device: $ mbed compile -D __STACK_SIZE=512 -D ISR_STACK_SIZE=512 -D MICROBIT_BLE_ENABLED=0 $ cp ./.build/NRF51_MICROBIT/GCC_ARM/mb_clock.hex /media/MICROBIT Done!
If desired, for the resulting watch you can make a protective case from a jar from under the vitamins and hot melt:

Source: https://habr.com/ru/post/307806/
All Articles