Adobe AIR + Starling + rasterizing vector graphics
Some time has passed since I started making games for iOS and Android on Adobe AIR. Today I want to share a way to create games for different screen resolutions - I successfully apply this approach in my projects.
As you know, there are several ways to prepare game graphics for different screen resolutions:
Use multiple packs with graphics.
The most popular approach to the formation of game graphics. Allows for each permission to work out their own schedule. For example, on small screens, the elaboration and detailing of various elements is reduced to a minimum, and some details are completely omitted. But, such a set weighs quite a lot, and not at all resolutions, after texture scaling, it looks good. After the appearance of retina displays with brutal screen resolutions, the developers had to add one more to the already existing three texture packs.
')
Draw pixel art
Allows you to use in the game pack of atlases with small textures for only one resolution of the screen, which can be mated to any size. The square is square. At least on sd, at least on xxxhd pixel art will look like pixel art. Plus pixel art is relatively easy to draw.
Vector graphics
Allows you to use in the game one pack of atlases for the current screen resolution, weighs almost nothing, stretches to any resolution without loss of quality, looks very good and is quite simply drawn. This is what I wanted.
But not everything is so simple. The fact is that all vector graphics are processed on the CPU, which means the game with such graphics on the phone is doomed to brake, and you don’t run away much (there are few objects on the screen and they should be simple without too much detail). Although the first version of my game City 2048 was just that, and surprisingly worked quite well for me, gave out 25-40 fps. When launching the test version of the game, I expected the phone to freeze right in my hands and melt from this, but no. I can also say that another one of my games, Dots Tails, is still working using vector graphics, for good reason.
To increase performance, it is necessary to draw all the game graphics on the GPU, for this we will use Stage3D and Starling. It turns out that of the individual vector elements, you need to make raster sprititshite right size in the process of the application. We will talk about how to implement this.
Before use, vector graphics must be stretched to the desired size, decomposed into an atlas and baked. For these purposes, I used a slightly modified class from Emiliano Angelini "Dynamic Texture Atlas and Bitmap Font Generator" , leaving him only to create a simple texture atlas without animations.
The principle of operation is as follows:
1. Draw art for playing in Adobe Flash Pro (or any other vector editor and transfer to Flash Pro)
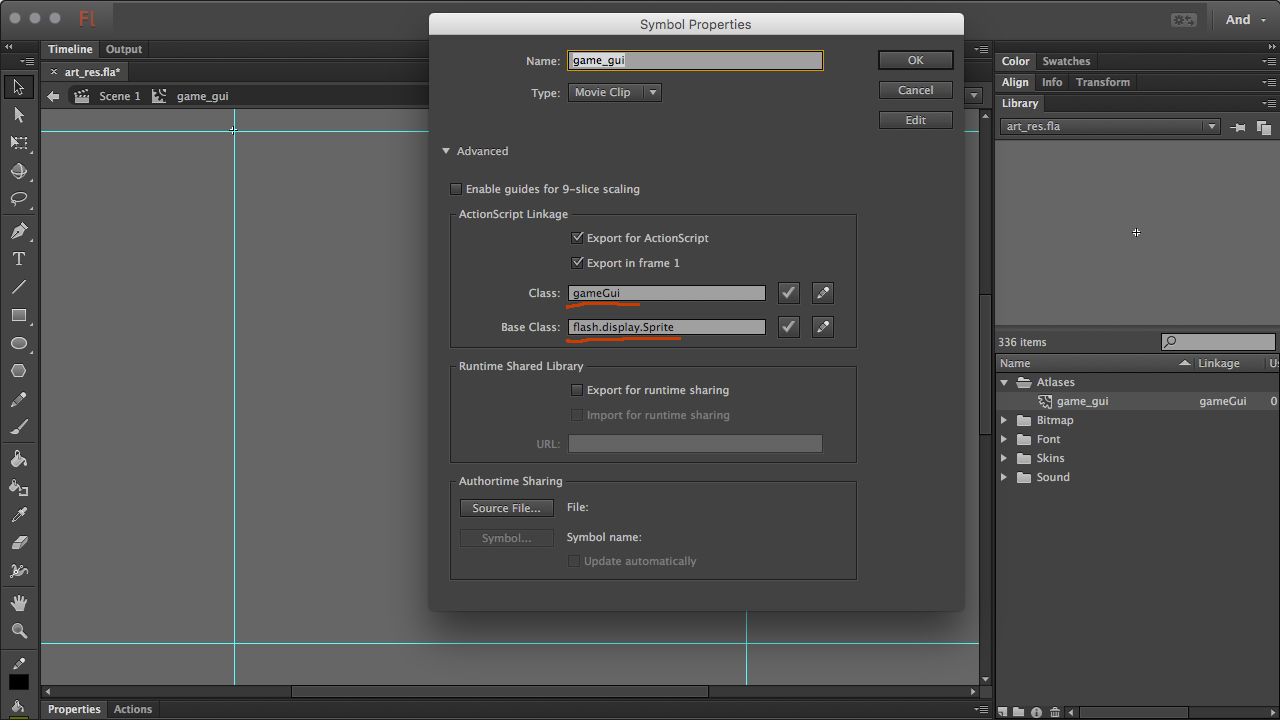
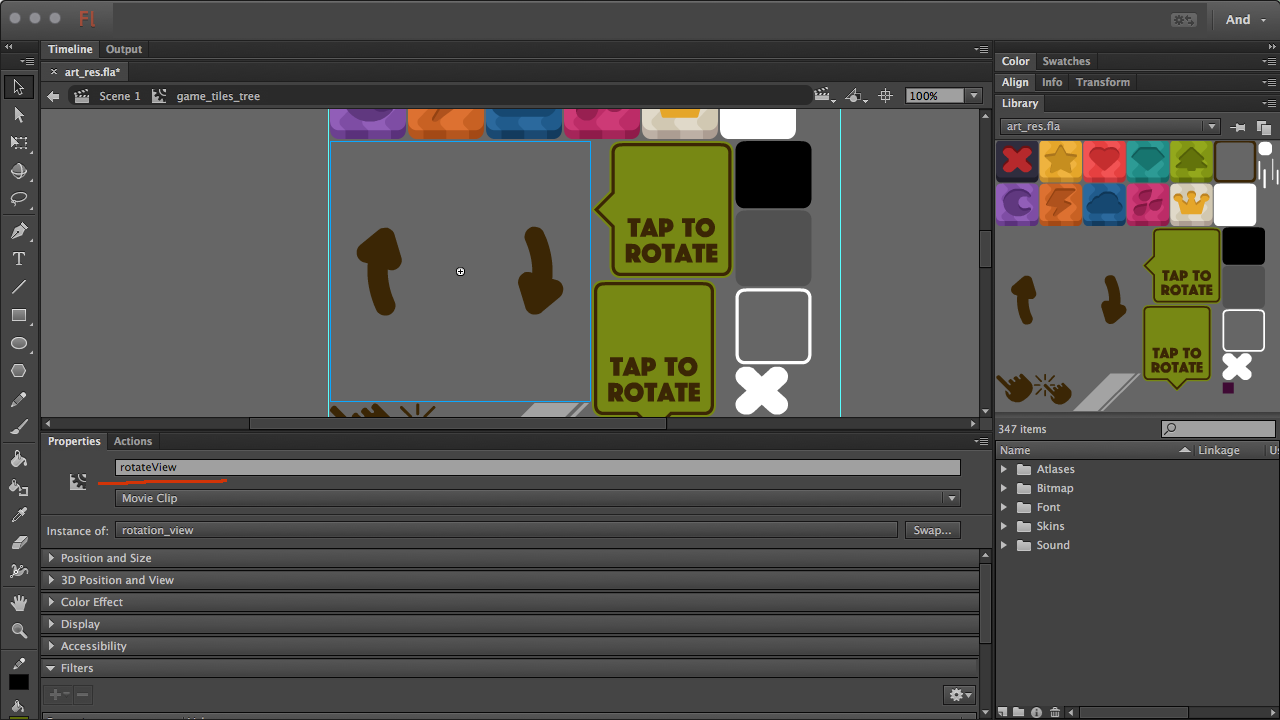
2. Create a sprite that will contain graphic elements, make it available for AS. It is from him that we will make sprites.
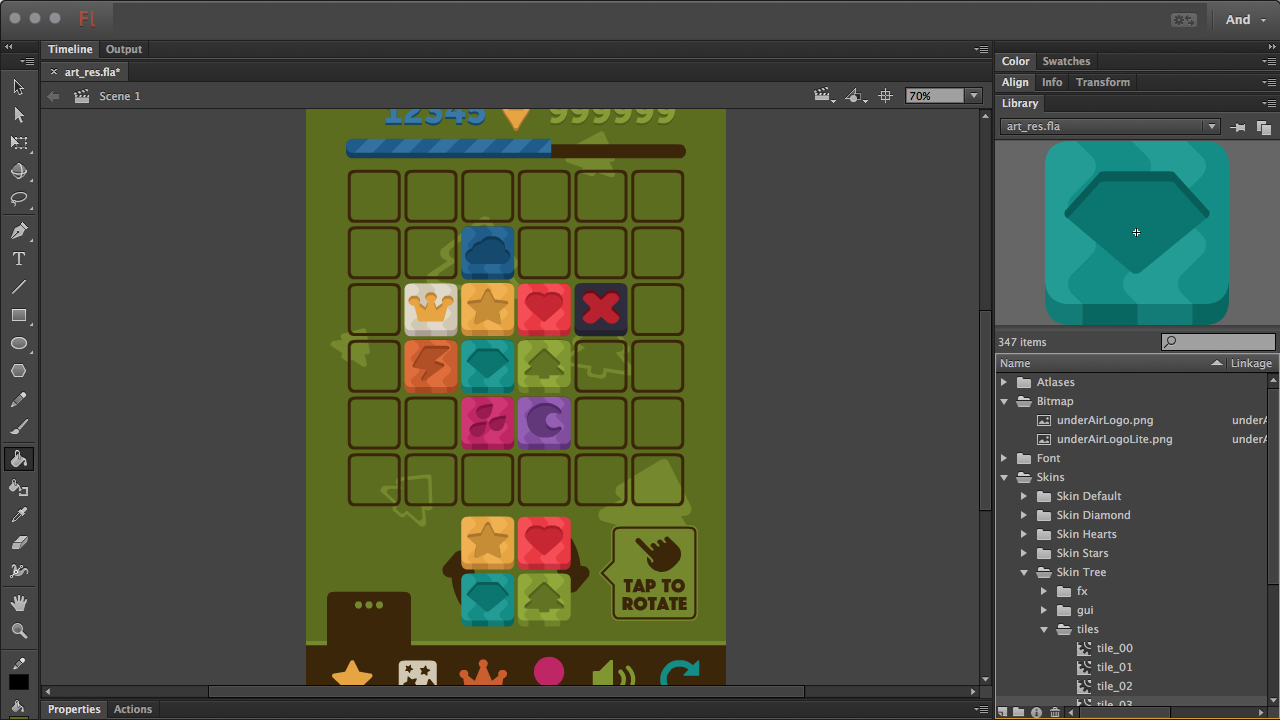
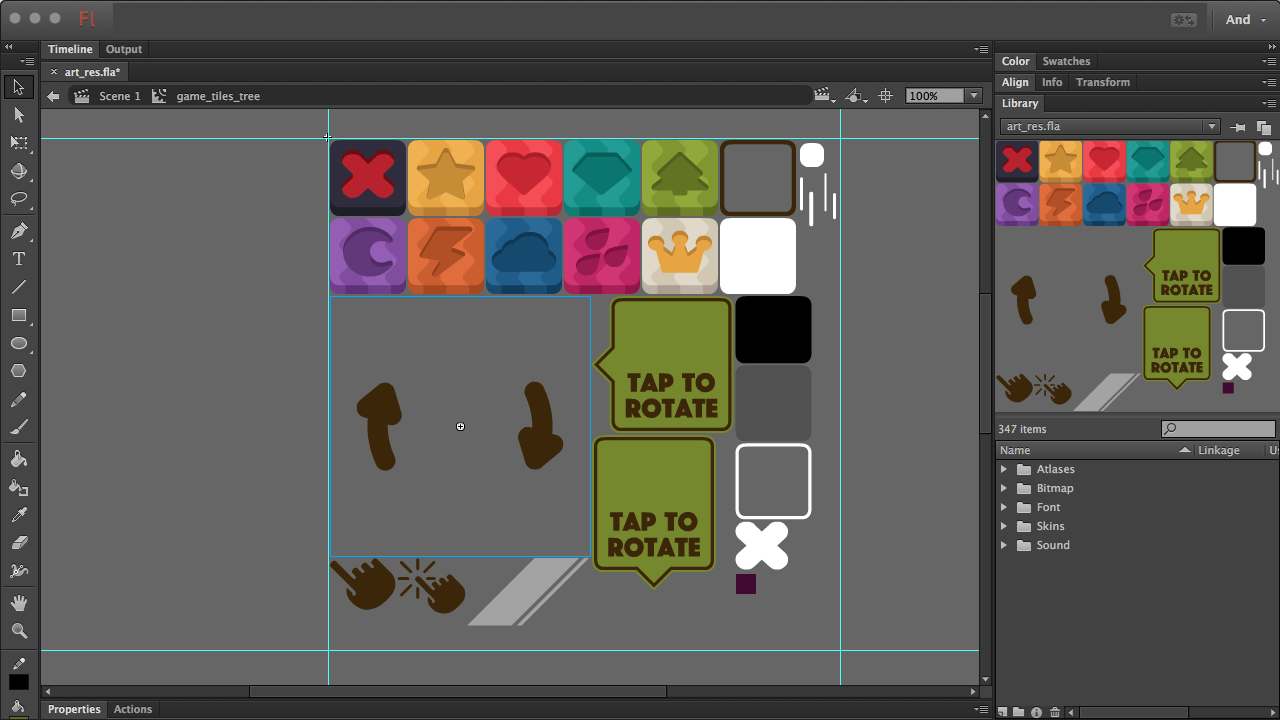
3. We stuff the graphics we need into this sprite. I tried to place the elements so that they fit in size 512x512. This is necessary, since at the scale the size of the atlas should not be more than 4k. For the design of the layout, I always use the size of 600x800, so the drawn and assembled elements look good and do not crawl over the size of 2k. The same graphic elements should be arranged by subject, for example, in my games, the GUI layer lies above the game graphics, so I make two separate atlas with GUI and with game elements + if in a game there are several visually different levels, then it’s better to scatter these elements on different atlases. This will help reduce the number of drawlins.
4. We do not forget to assign a name to each element in the atlas.
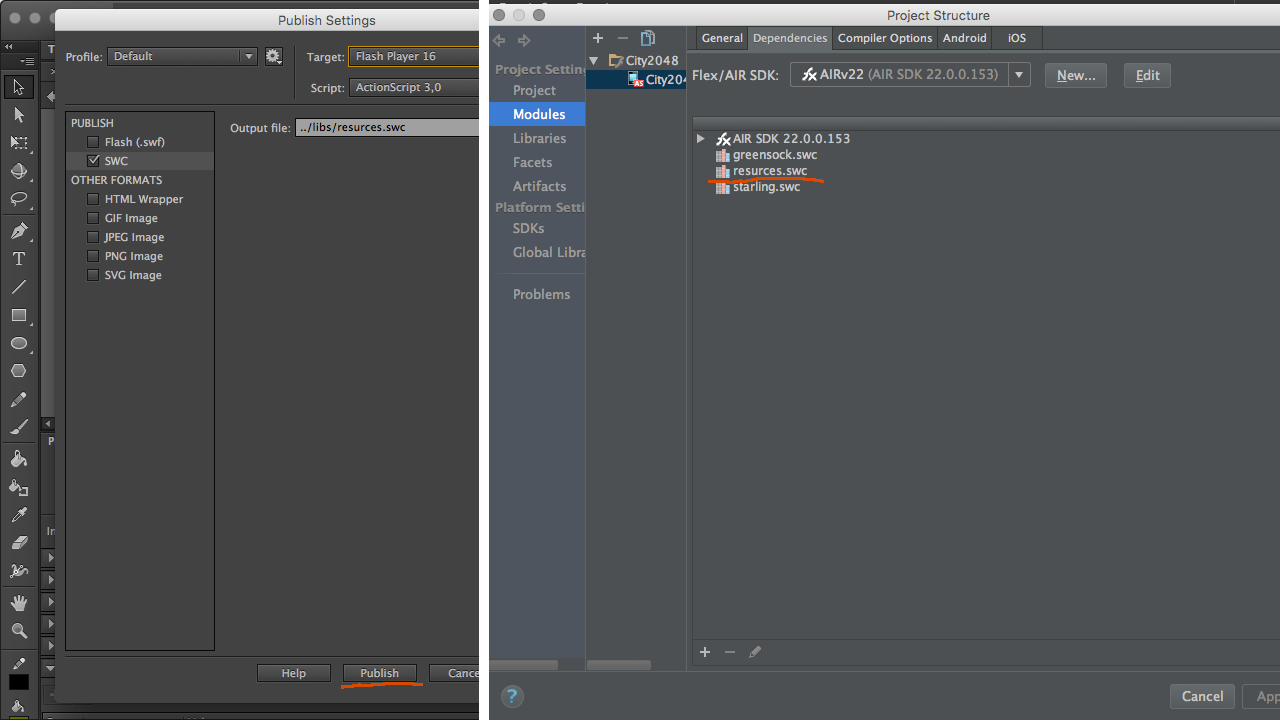
5. Export .swc with resources and connect it to the project.
6. Getting to the software part. To begin with, we calculate the skele, on which we will pull resources:
// , iPad2 var _stageWidth:Number = 768; var _stageHeight:Number = 1024; // - var defaultScreenWidth:Number = 600; var defaultScreenHeight:Number = 800; // , . _scaleX = _stageWidth / defaultScreenWidth; _scaleY = _stageHeight / defaultScreenHeight; _minScale = Math.min(_scaleX, _scaleY); 7. Add the TextureManager.as class to the project and write atlas names from SWC in it
Content Class TextureManager
package com.Extension { import avmplus.getQualifiedClassName; import com.Event.GameActiveEvent; import com.Module.EventBus; import com.greensock.TweenNano; import flash.display.Bitmap; import flash.display.BitmapData; import flash.display.DisplayObject; import flash.display.Sprite; import flash.display.StageQuality; import flash.geom.Matrix; import flash.geom.Rectangle; import starling.display.Image; import starling.display.Sprite; import starling.textures.Texture; import starling.textures.TextureAtlas; public class TextureManager { // , PivotPoint SWC private static var textureAdditionalData:Object = {}; // private static var textureAtlases:Vector.<TextureAtlas> = new <TextureAtlas>[]; // // !!! ( SWC ) private static var toParse:Array = [ [guiAtlas, ScaleManager.minScale], [gameAtlas, ScaleManager.minScale] ]; // public static function getSprite(textureName:String, smooth:String = "none"):starling.display.Sprite { if (textureAdditionalData.hasOwnProperty(textureName)) { var addition:Object = textureAdditionalData[textureName]; var image:Image = new Image(findTexture(textureName)); image.x = -addition["x"]; image.y = -addition["y"]; image.textureSmoothing = smooth; var result:starling.display.Sprite = new starling.display.Sprite(); result.addChild(image); return result; } throw new Error("[!!!] Texture '" + textureName + "' not found."); } // public static function getTexture(textureName:String):Texture { return findTexture(textureName); } // , . , . public static function createAtlases():void { if (!textureAtlases.length) { nextParseStep(); return; } throw new Error("[!!!] Texture atlases already."); } // private static function nextParseStep():void { if (toParse.length) { var nextStep:Array = toParse.pop(); TweenNano.delayedCall(.15, TextureManager.createAtlas, nextStep); } else { // , . EventBus.dispatcher.dispatchEvent(new GameActiveEvent(GameActiveEvent.GAME_START, true)); } } // private static function findTexture(textureName:String):Texture { var result:Texture; for each (var atlas:TextureAtlas in textureAtlases) { result = atlas.getTexture(textureName); if (result) { return result; } } throw new Error("[!!!] Texture '" + textureName + "' not found."); } // SWC private static function createAtlas(swcPack:Class, scaleFactor:Number):void { var pack:flash.display.Sprite = (new swcPack()) as flash.display.Sprite; var itemsHolder:Array = []; var canvas:flash.display.Sprite = new flash.display.Sprite(); var children:uint = pack.numChildren; for (var i:uint = 0; i < children; i++) { var selected:DisplayObject = pack.getChildAt(i); var realX:Number = selected.x; var realY:Number = selected.y; selected.scaleX *= scaleFactor; selected.scaleY *= scaleFactor; var bounds:Rectangle = selected.getBounds(selected.parent); bounds.x = Math.floor(bounds.x - 1); bounds.y = Math.floor(bounds.y - 1); bounds.height = Math.round(bounds.height + 2); bounds.width = Math.round(bounds.width + 2); var drawRect:Rectangle = new Rectangle(0, 0, bounds.width, bounds.height); var bData:BitmapData = new BitmapData(bounds.width, bounds.height, true, 0); var mat:Matrix = selected.transform.matrix; mat.translate(-bounds.x, -bounds.y); bData.drawWithQuality(selected, mat, null, null, drawRect, false, StageQuality.BEST); var pivotX:int = Math.round(realX - bounds.x); var pivotY:int = Math.round(realY - bounds.y); textureAdditionalData[selected.name] = {x:pivotX, y:pivotY}; var item:flash.display.Sprite = new flash.display.Sprite(); item.name = selected.name; item.addChild(new Bitmap(bData, "auto", false)); itemsHolder.push(item); canvas.addChild(item); } layoutChildren(); var canvasData:BitmapData = new BitmapData(canvas.width, canvas.height, true, 0x000000); canvasData.draw(canvas); var xml:XML = new XML(<TextureAtlas></TextureAtlas>); xml.@imagePath = (getQualifiedClassName(swcPack) + ".png"); var itemsLen:int = itemsHolder.length; for (var k:uint = 0; k < itemsLen; k++) { var itm:flash.display.Sprite = itemsHolder[k]; var subText:XML = new XML(<SubTexture />); subText.@name = itm.name; subText.@x = itm.x; subText.@y = itm.y; subText.@width = itm.width; subText.@height = itm.height; xml.appendChild(subText); } var texture:Texture = Texture.fromBitmapData(canvasData); var atlas:TextureAtlas = new TextureAtlas(texture, xml); textureAtlases.push(atlas); function layoutChildren():void { var xPos:Number = 0; var yPos:Number = 0; var maxY:Number = 0; var maxW:uint = 512 * ScaleManager.atlasSize; var len:int = itemsHolder.length; var itm:flash.display.Sprite; for (var i:uint = 0; i < len; i++) { itm = itemsHolder[i]; if ((xPos + itm.width) > maxW) { xPos = 0; yPos += maxY; maxY = 0; } if (itm.height + 1 > maxY) { maxY = itm.height + 1; } itm.x = xPos; itm.y = yPos; xPos += itm.width + 1; } } nextParseStep(); } public function TextureManager() { throw new Error("[!!!] Used private class."); } } } A little more about what happens in the createAtlas method:
7.1. Each element in the atlas from SWC is a scale, save the coordinates for PivotPoint, draw in Bitmap and add to the canvas container.
7.2. We arrange the elements in the canvas container one after another, so that they fit into the desired size of the atlas
" 7.3. Canvas container draw in BitmapData and .XML gene
» 7.4. From the received BitmapData and .XML create a high-ranking TextureAtlas
7.5. The resulting atlas is added to the container textureAtlases
8. At the start of the game we create atlases for starling
TextureManager.createAtlases(); 9. Add the sprite we need to the scene
var tileView:starling.display.Sprite = TextureManager.getSprite("rotateView"); this.addChild(tileView); What we get in the end? Beautiful graphics, which weighs almost nothing, stretches to an arbitrarily large screen size without loss of quality. At the same time the game works at a stable 60fps. Well, for me personally, another plus is that in a vector it is enough just to draw, even though I am not an artist, but I can do something in a vector.
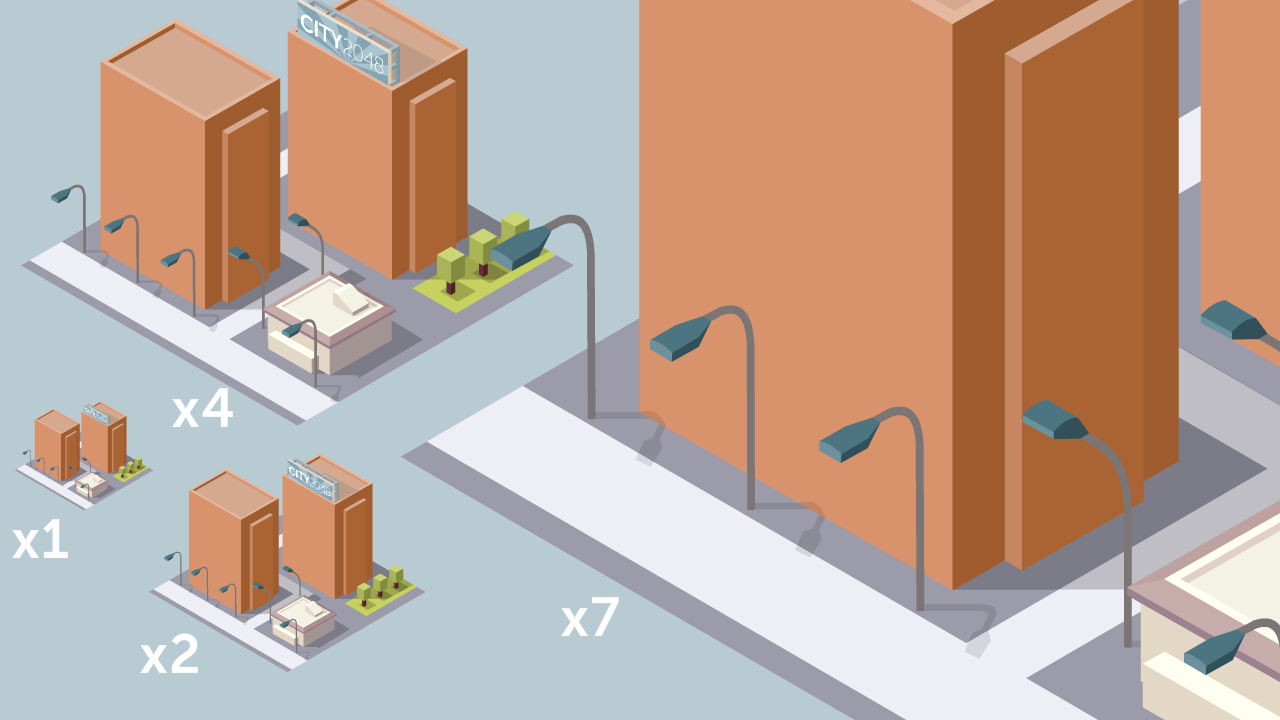
I use rasterization of vector graphics in my games City 2048, Quadtris and Placid Place. Which can be found in the Apple App Store and Google Play, if you are interested to see this approach in action. Unfortunately, direct links to applications can not be left.
That's all. Thanks for attention.
Source: https://habr.com/ru/post/307766/
All Articles