Restore from backup using Veeam Agent for Linux
The ultimate goal of creating a backup is to provide data recovery in the event of a failure, and today I will briefly describe how the new Veeam Agent for Linux can handle this. Take as the "guinea pig" the same backup, the creation of which was described in the previous post , and see how you can recover from it. For this, welcome under cat.
As you remember, Veeam Agent for Linux successfully saved the backup to the NFS server. Run the UI already familiar to us by entering the command
Check the clock, that is, the data on the last session of the backup task:
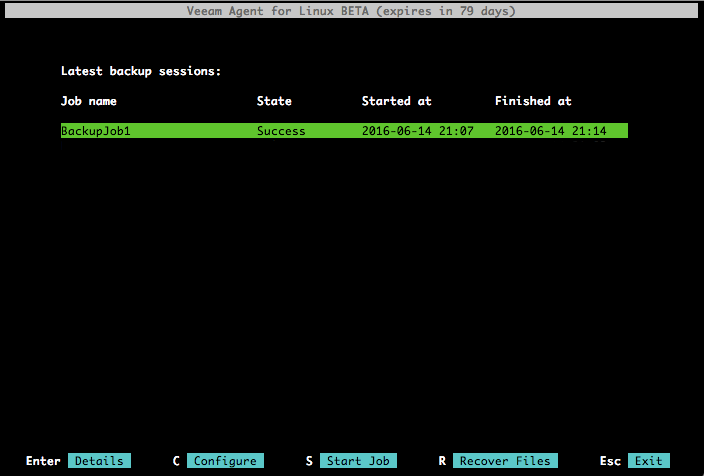
Below, in the list of commands, the R command now appears (Recover Files) - recover files. It will display information about the available backups: what host was in operation, what task created backup, how many recovery points (in our case, one) and at what time.
')

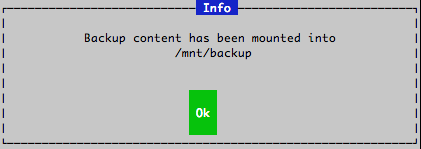
Press Enter twice, and the selected backup is mounted on our host's file system in the / mnt / backup folder:
Why did we decide to limit this operation? Just thought that users usually have their own preferences in working with files, and there is no need to reinvent the wheel. So after the mount has passed, you can use your usual method - for example, the command line or the popular Midnight Commander ( mc ):

Now let's see how the entire volume recovery is performed. To begin with, we perform a machine boot using Veeam Recovery Media (downloaded with the installation package of the Veeam Agent for Linux solution). It is launched using the ISO file.
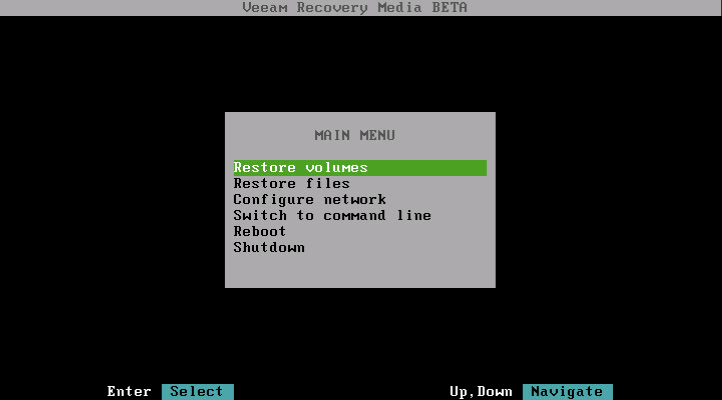
Veeam Recovery Media opens us a graphical interface with the following set of commands:
Here you can restore volumes ( Restore volumes ), restore files ( Restore files ), network settings ( Configure network ), go to the command line ( Switch to command line ), and also reboot ( Reboot ) and shutdown ( Shutdown ).
If, as in our example (and as recommended!), The backup is not stored on the local machine, but on the network storage system, then before starting the recovery procedure you must ensure that you have access to the backup storage location, and during the procedure you need to configure the settings network. You can set the settings manually. For this:
After completing the process, we finish working with Veeam Recovery Media:
Here, in general, is the whole story about how the restoration is performed using Veeam Agent for Linux.
UPD: Please note - the link for downloading from September 1 issued beta # 2. Instructions for downloading and the password can still be found on the product forum .
File level recovery
As you remember, Veeam Agent for Linux successfully saved the backup to the NFS server. Run the UI already familiar to us by entering the command
veeamCheck the clock, that is, the data on the last session of the backup task:
Below, in the list of commands, the R command now appears (Recover Files) - recover files. It will display information about the available backups: what host was in operation, what task created backup, how many recovery points (in our case, one) and at what time.
')
Press Enter twice, and the selected backup is mounted on our host's file system in the / mnt / backup folder:
Why did we decide to limit this operation? Just thought that users usually have their own preferences in working with files, and there is no need to reinvent the wheel. So after the mount has passed, you can use your usual method - for example, the command line or the popular Midnight Commander ( mc ):
Volume Recovery
Now let's see how the entire volume recovery is performed. To begin with, we perform a machine boot using Veeam Recovery Media (downloaded with the installation package of the Veeam Agent for Linux solution). It is launched using the ISO file.
Veeam Recovery Media opens us a graphical interface with the following set of commands:
Here you can restore volumes ( Restore volumes ), restore files ( Restore files ), network settings ( Configure network ), go to the command line ( Switch to command line ), and also reboot ( Reboot ) and shutdown ( Shutdown ).
If, as in our example (and as recommended!), The backup is not stored on the local machine, but on the network storage system, then before starting the recovery procedure you must ensure that you have access to the backup storage location, and during the procedure you need to configure the settings network. You can set the settings manually. For this:
- In this menu, select the Configure network item, then select the desired network adapter in the list, which will be used to connect to the storage system, and press Enter .
- In the Configure adapter dialog, select Manual (manual configuration) and press Enter .
- In the Adapter settings dialog, specify the required: IP address, subnet mask, default gateway, DNS server
- Click Apply and click Enter .
If you are working with a DHCP server, Veeam Agent for Linux will automatically make the necessary settings - if you select Auto in the Configure adapter dialog. - We continue to restore the volume: select the appropriate operation from the list of commands - this is Restore volumes .
- Next, in the Select Backup Location step, you need to specify the location of our backup. For our example, you need to select the option to add balls Add shared folder ...
- Then, on the Mount Shared Folder step, we indicate that we have NFS:
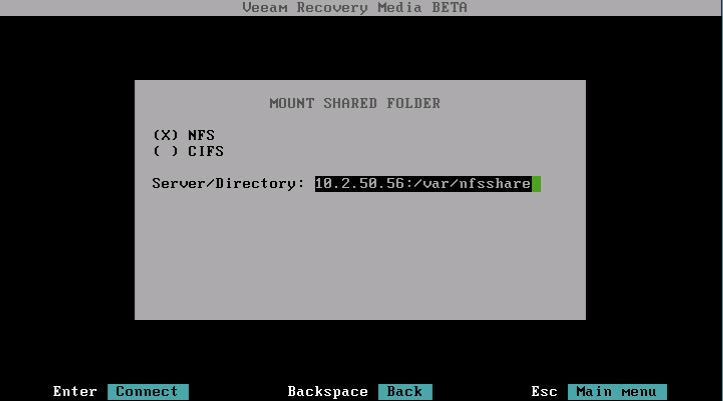
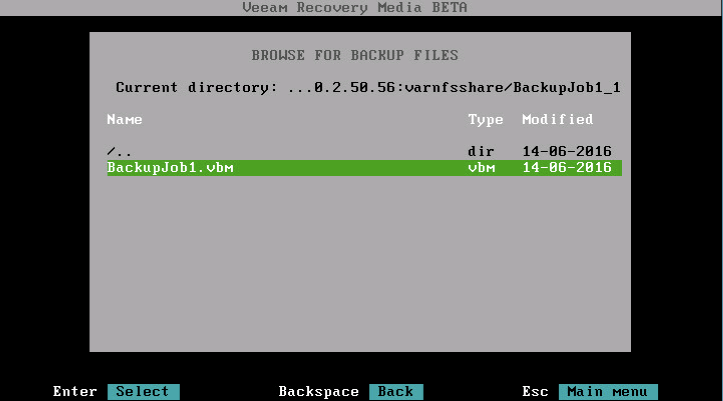
- In the Server / Directory field, enter the name of the network orbs in which the backup files are located. Veeam Agent for Linux mounts it to the / media folder on our recovery image file system and displays the contents of the mounted volume. In the Browse for Backup Files step, you can select the desired restore point to import it:
Useful: If your backups are stored on one of the local devices, then in the Select Backup Location step, you will naturally select the Mount local disk option. At the same time, it will be possible to perform mounting repeatedly for several devices on which backup files live. To do this, go back to the step of choosing the location of the Backup Backup Location backup and again select the Mount local disk option. - On the Backup step, select the required backup and in it the restore point.
- Then, at the Disk Mapping step, you can see which volumes the machine has in production (that is, the local host, Current System ) and in the backup. Veeam Agent for Linux displays detailed information for the selected volume, including partition type, file system, location of the mount point, volume size, and also lists the available commands:
- Restore volume from (restore volume) - restore this volume from backup.
- Delete partition - allows you to re-partition the disk before recovering the volume. After deleting the partition, you can create a new one and put a volume on it from the backup.
- [to restore LVM volumes] Create LVM physical volume — create a LVM physical volume on the selected partition and add it to an existing volume group (VG) or create a new group. This will restore LVM logical volumes or volume groups to the selected VG.
- Close - close the dialog and select another volume.
Here we select Restore volume from and press Enter . - Restore volume from (restore volume) - restore this volume from backup.
- In the Current system pane, in the Restore field, the name of the volume to be restored will appear next to the selected volume:
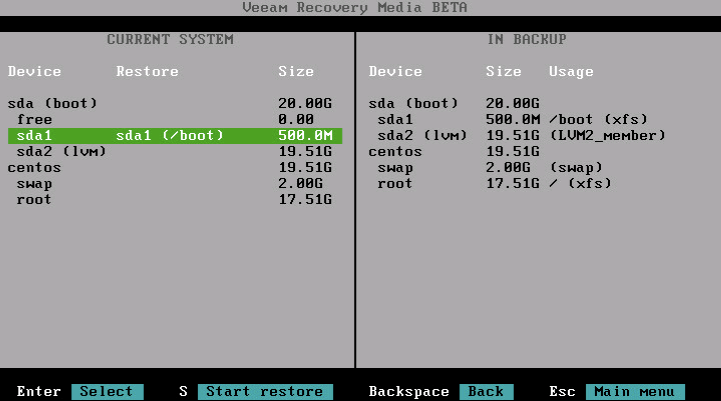
- We confirm the choice (be careful, an oversight can be costly, because the data will be overwritten by those in the backup!), Click (Start restore) .
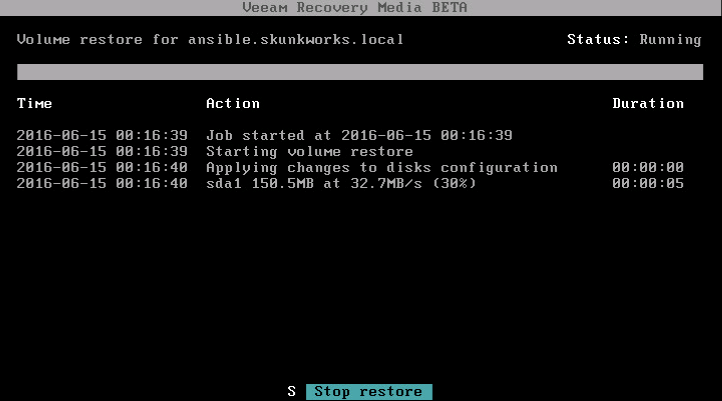
- Look at the brief summary, confirm the choice once again and watch the progress:
After completing the process, we finish working with Veeam Recovery Media:
- Press Esc to return to the main menu.
- Disable media with recovery image.
- In the main menu, select Reboot and press Enter .
- We are waiting for the OS to start.
Here, in general, is the whole story about how the restoration is performed using Veeam Agent for Linux.
useful links
- Read the article about backup using Veeam Agent for Linux
- Learn more about working with Veeam Agent for Linux at the upcoming 'live' webinar (in English)
- Take part in beta testing
UPD: Please note - the link for downloading from September 1 issued beta # 2. Instructions for downloading and the password can still be found on the product forum .
Source: https://habr.com/ru/post/307758/
All Articles