Create a multilanguage blog using OctoberCMS - Part 2
In the last article, we made a multilingual website with navigation and static pages. In this article we will finish the creation of the site, adding to his blog.
What we have to do:
- Blog page - contains a list of posts and categories;
- Page view post;
- Browse category page;
- Displays the last post on the main page.

In addition to those plugins that we have already used, we will need another one - the RainLab Blog plugin . This is a flexible blog platform that uses Markdown to create and edit posts.
With the help of the "Translate" plugin, we can make our blog completely multilingual: you can translate categories, headlines, and any site content. All that will be described in this article is in the official documentation for the plugin.
Before continuing, install the "Blog" plugin. Create and publish several posts for test purposes.
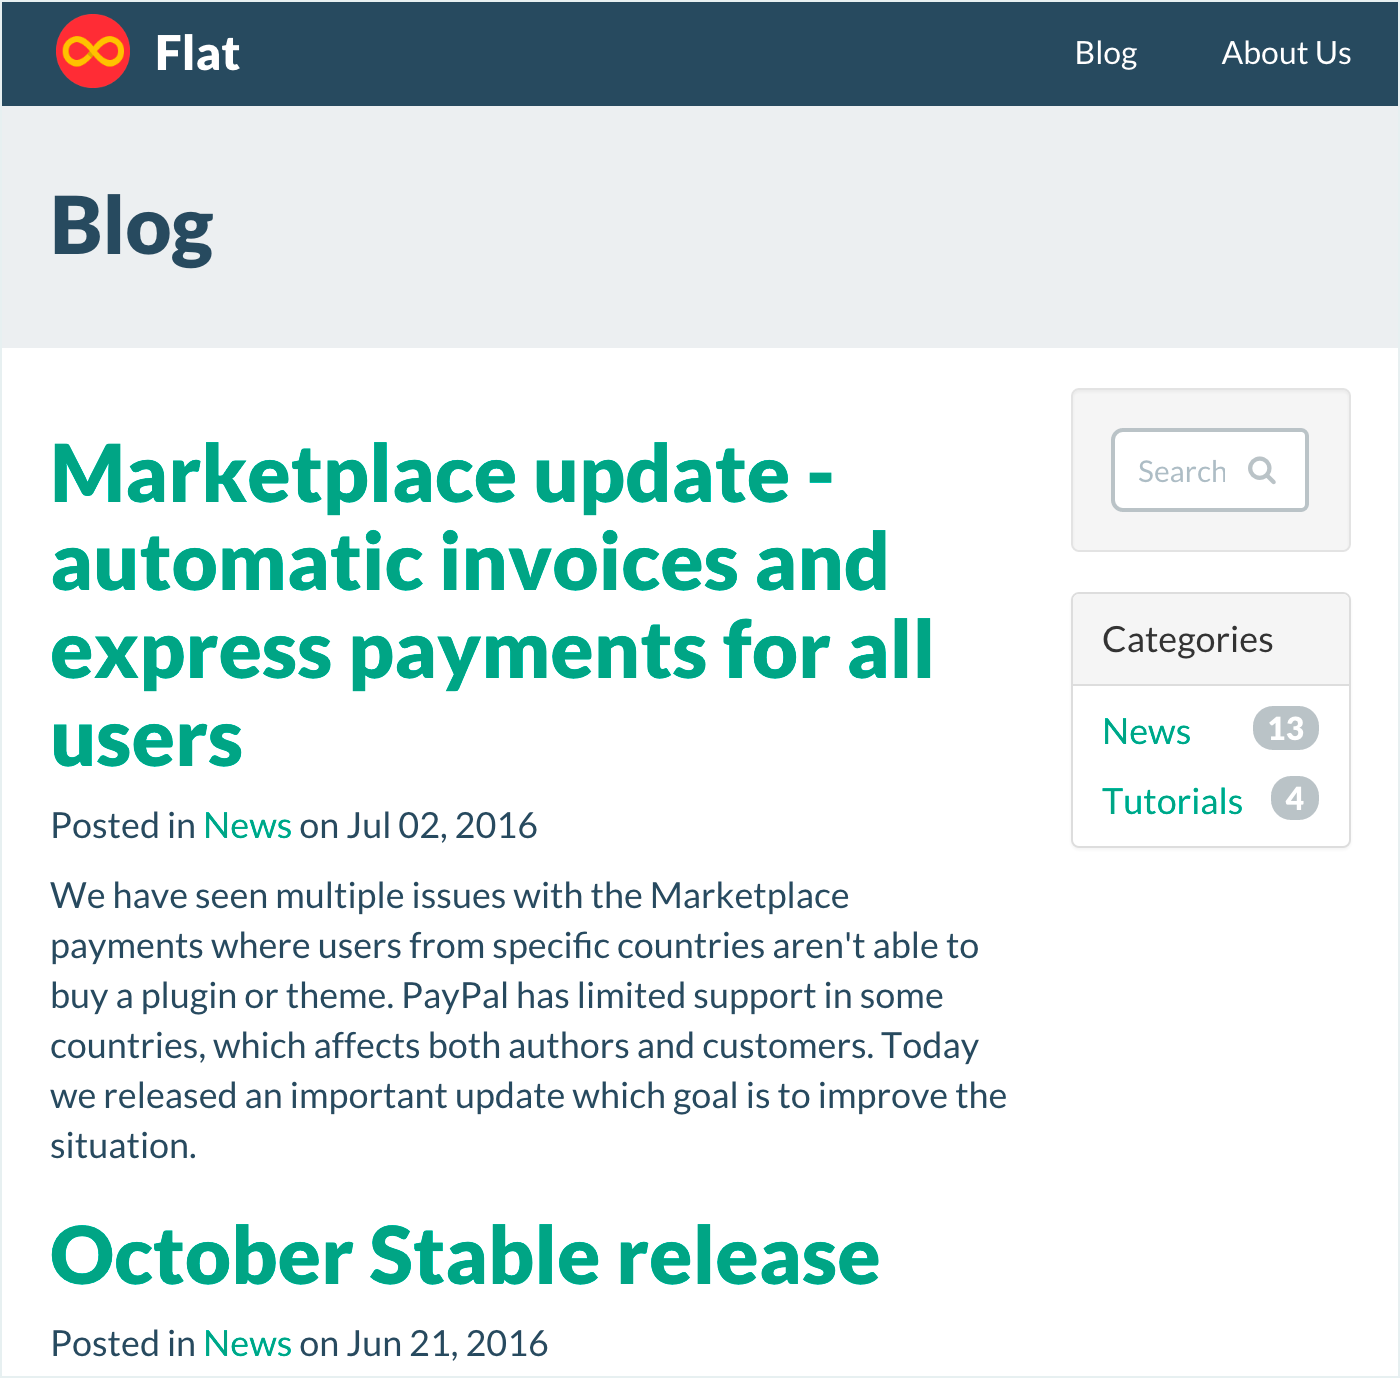
Creating a blog page
This page will display a list of published posts, pagination and a list of categories. Flat UI theme already contains a demo blog page with demo content that we take as a basis.
The Blog plugin provides the Post list component , which displays a list of posts (both full and in a specific category).
Go to the admin area and open the blog/blog page in the editor. Delete all unnecessary content like "Blog post # 1", "Pagination".
Open the list of components, find the Post list and transfer it to the editor, to the place where you just deleted the demo content. If done correctly, you will see the following:
<div class="col-sm-9"> {% component 'blogPosts' %} <div class="clearfix"></div> </div> Since we need pagination, we will add the necessary parameter to the URL template of the page. Replace URL value with url = "/blog/:page?" . The :page parameter :page defined by the Post list component .
Note that many plugin components allow you to use custom URL parameters. This means that instead of :page you may have another parameter. This can be done by changing the configuration of the desired component (in this case, the Post list).
Save the page and click the Preview button. If you did everything right, then you will see a page with a blog and pagination.
If you don’t like the standard blog layout, then October allows you to override it. You can also place a "caret" for input on the word component and click on the component expansion button in the upper left corner of the editor. This will add the component markup directly to the editor, where you can edit it as you like. This feature is relevant for all components in October CMS.
Category List
Our theme has a blog/sidebar template that displays a list of categories. Now it contains demo content. Remove it.
Open the blog/sidebar in the admin and delete the entire UL tag. Find the Category List in the component list and drag it to the location from which you just removed the UL:
<div class="panel panel-default"> <div class="panel-heading"> Categories </div> {% component 'blogCategories' %} </div> Save the template and go to the /blog page. Now the sidebar displays a list of categories, but the links in the list do not yet lead anywhere. Now we fix it.
Create a category page
Our theme does not contain a category page, so we will create it from scratch. On it we will display a list of posts that belong to the selected category.
Go to the admin area, go to the Pages page and click on Add . In the Title field, enter "Blog category", and in the URL field - /blog/category/:slug/:page? (URL template taken from the official documentation for the plugin). Then in the file name, type blog/category , select default in the list of templates and save the file.
Copy the markup code from the blog's main page and add it to the category page. We added the Post list component on the main blog page, so here we need to do it again. In the list of components, select Post list and add to the page you want.

The Post list component must be configured to display posts of only a specific category. The category we need will be passed through the parameter :slug in the URL. Click on the component, and then on the icon> _ in the Category filter and enter there :slug . Save the page.
To display the category name on the page, you need to replace
<h3>Blog</h3> on
{% if not category %} <h3>Category not found</h3> {% else %} <h3>{{ category.name }}</h3> {% endif %} You can use a similar condition to hide the list of posts if it is empty.
Return to the main page and click on the Post list component. Expand the property list, locate the "Category page" in it and select the page of the category you just created. Close and save the template. The same thing needs to be done with the Category list component in the sidebar.
Go to the blog page and see how categories work.
Creating a post page
This page is already in the subject, so you just need to add the component to the right place. Go to the admin area and open the blog/post in the editor, then delete the unnecessary code under Blog post #1 and Pagination .
The Blog plugin has a Post component that shows the desired post by parameter in the URL. Drag the component from the list to the place where you just deleted the html.
By default, the parameter in the URL is called slug . In the URL box, enter /blog/post/:slug and save the page. Also replace <h3>Blog post</h3> with <h3>{{ post.title }}</h3> .
After that, go to the blog, open any post and make sure that everything works correctly.
In order to display the message “Post not found”, we can use the following condition:
{% if post %} Normal blog post markup- {% else %} Post not found message {% endif %} Show the latest posts on the main page
To display the latest posts on the main page, we will use the Post list component already familiar to us. It allows you to specify a limit for displayed posts, which is set by the postsPerPage property.
Go to the admin area and open the main page in the editor; drag the component to the desired location:
<!-- Latest blog post --> <h3>Latest from the blog</h3> {% component 'blogPosts' %} Open the component's properties and change the value of postsPerPage to 1.
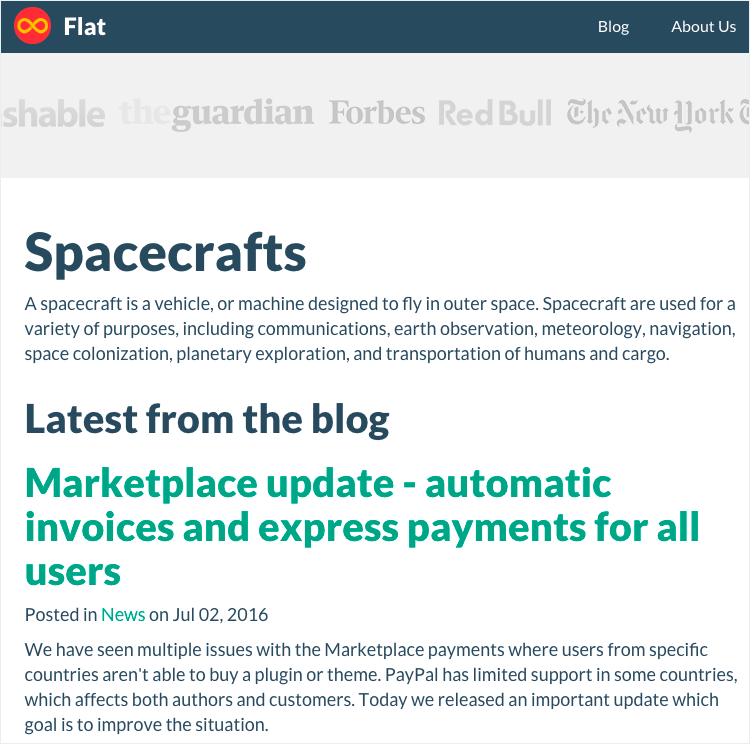
Save the page and go to the main page, check whether you did everything correctly.
To hide the pagination that the component displays by default, you can use css:
.page-home { .pagination { display: none; } } You can also override the component template or simply open the component code and remove all unnecessary from there.
Translation of blog posts
We don’t need much time to make a blog translatable. In the last article, we set up the Translate plugin, so you just need to select the desired language while writing the post.

This is where we finish creating the blog. Wait for new lessons in which we will tell you how to set up a working environment. Thanks for attention.
')
Source: https://habr.com/ru/post/307726/
All Articles