We raise micromonitoring on icinga2 with minimal costs
Sometimes there is a desire to control the situation in disparate networks, individual hosts behind the network or simply monitor the computers of parents or friends, but there are almost no resources for this. We will seek a solution using icinga2. Now VDS providers have offers of VDS servers in minimal configurations for ridiculous money. Well, let's use this.
For example, a server with one core, 512 MB of RAM and a 10 GB disk will cost only 90 rubles per month. Install icinga2 on such a server. But to save resources, we will not store data and instead of the standard web interface (icingaweb2) we will make our own which will access the icinga2 API.
Installing icinga2 more than once described and does not cause great difficulties. Briefly run through the main stages of the installation. We will install on ubuntu.
')
Run the wizard:
We want to set up a master host, so we answer "no" to the first question of the wizard. The Configuration Assistant generates a certificate, initializes the configuration files, and includes api functionality, which is disabled by default.
After making changes to the configuration, if we want them to take effect, you must restart the service:
If something went wrong, we look at what our system does not like and sort out the errors:
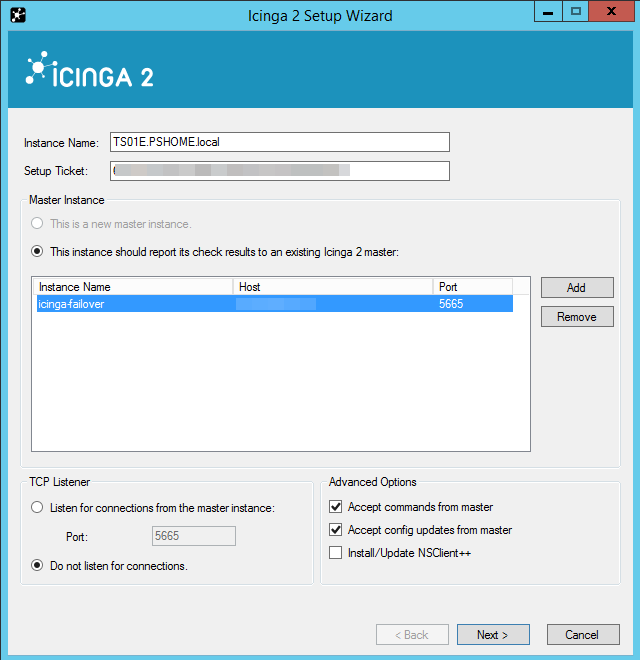
The server is ready for monitoring. We are starting to install icinga2 on a Windows host, which we will monitor. With the installation of Windows client should not have problems, you need NET. Framework. We start the wizard, if you wish, you can change the host name (the register in the name matters), add the server, indicate that we want to accept commands and configuration from the wizard.
On the server, we generate an installation ticket for the client and enter in the client wizard:
After the client wizard finishes its work and starts the service, check the created node on the server and update the configuration:
Similarly, install other clients. Now our hosts are monitored.
Getting to the advanced configuration settings. First of all, let's write our email in the /etc/icinga2/conf.d/users.conf file, to which the alerts will be sent:
Configure smtp on the server if it is not already done:
Specify the mail for the user from under which icinga2 works:
Approximate contents of the /etc/ssmtp/ssmtp.conf file for sending mail via Yandex smtp:
Since our monitoring does not save data, we need something more operational than email. Set up pushover . To do this, create a script /etc/icinga2/scripts/pushovernotify.sh:
Add the following lines to the /etc/icinga2/conf.d/commands.conf file:
Add the following lines to the /etc/icinga2/conf.d/templates.conf file:
Add the following lines to the /etc/icinga2/conf.d/notifications.conf file:
Add the pushover keys in the /etc/icinga2/conf.d/users.conf file
At this stage, we already hear when something is wrong with our monitoring objects, of course, I would like to see the big picture. For this we need a web server with php, which, for example, can be placed on a home computer or on the same VDS as icinga2.
So, we draw a web-muzzle for requests to the icinga2 API. The setup wizard also created the /etc/icinga2/conf.d/api-users.conf file from which we take the username and password to access the api. The web interface project consists of a page displaying a list of all hosts and a detailed information page for a particular host. From the assumption that the placement of the web interface can be on a separate server, we use a php script written in a hurry to proxying cross-domain requests.
We would like to see the list of all hosts up to date and preferably without reloading the page, for this we use jQuery.GetJSON () .
The repository of the web interface project can be found here .
Using the Material Design Lite styles, our web interface will look like this:
For this option with minimal icinga2 functionality, you can think of many applications. For example, not large projects, maintenance of unrelated computers by an individual, or integration into existing technical support systems (HelpDesk). Maybe next time we will teach our Windows hosts to download the scripts signed by powershell and execute them on our demand, monitor other computers without an installed agent, network active equipment and all this with minimal cost, but with great potential for scaling and expanding functionality.
Official documentation icinga2 - Installation
Official documentation icinga2 - API
For example, a server with one core, 512 MB of RAM and a 10 GB disk will cost only 90 rubles per month. Install icinga2 on such a server. But to save resources, we will not store data and instead of the standard web interface (icingaweb2) we will make our own which will access the icinga2 API.
Installing icinga2 more than once described and does not cause great difficulties. Briefly run through the main stages of the installation. We will install on ubuntu.
wget -O - http://debmon.org/debmon/repo.key 2>/dev/null | apt-key add - echo 'deb http://debmon.org/debmon debmon-jessie main' >/etc/apt/sources.list.d/debmon.list apt-get update apt-get install icinga2 ')
Run the wizard:
icinga2 node wizard We want to set up a master host, so we answer "no" to the first question of the wizard. The Configuration Assistant generates a certificate, initializes the configuration files, and includes api functionality, which is disabled by default.
After making changes to the configuration, if we want them to take effect, you must restart the service:
service icinga2 reload If something went wrong, we look at what our system does not like and sort out the errors:
service icinga2 checkconfig The server is ready for monitoring. We are starting to install icinga2 on a Windows host, which we will monitor. With the installation of Windows client should not have problems, you need NET. Framework. We start the wizard, if you wish, you can change the host name (the register in the name matters), add the server, indicate that we want to accept commands and configuration from the wizard.
On the server, we generate an installation ticket for the client and enter in the client wizard:
icinga2 pki ticket --cn TS01E.PSHOME.local After the client wizard finishes its work and starts the service, check the created node on the server and update the configuration:
icinga2 node list icinga2 node update-config service icinga2 reload Similarly, install other clients. Now our hosts are monitored.
Getting to the advanced configuration settings. First of all, let's write our email in the /etc/icinga2/conf.d/users.conf file, to which the alerts will be sent:
object User "icingaadmin" { import "generic-user" display_name = "Icinga 2 Admin" groups = [ "icingaadmins" ] email = "icingaadmin@yandex.ru" } object UserGroup "icingaadmins" { display_name = "Icinga 2 Admin Group" } Configure smtp on the server if it is not already done:
apt-get install ssmtp Specify the mail for the user from under which icinga2 works:
echo nagios:icingarobot@yandex.ru >> /etc/ssmtp/revaliases Approximate contents of the /etc/ssmtp/ssmtp.conf file for sending mail via Yandex smtp:
root=postmaster mailhub=smtp.yandex.ru:465 hostname=icinga-failover FromLineOverride=YES AuthUser=icingarobot@yandex.ru AuthPass=password UseTLS=YES Since our monitoring does not save data, we need something more operational than email. Set up pushover . To do this, create a script /etc/icinga2/scripts/pushovernotify.sh:
#!/bin/sh curl -F "token=$PUSHOVERTOKEN" \ -F "user=$PUSHOVERUSER" \ -F "title=$PUSHOVERTITLE" \ -F "message=$PUSHOVERMESSAGE" \ -F "html=$PUSHOVERHTML" \ https://api.pushover.net/1/messages exit 0 Add the following lines to the /etc/icinga2/conf.d/commands.conf file:
object NotificationCommand "pushover-host-notification" { import "plugin-notification-command" command = [ SysconfDir + "/icinga2/scripts/pushovernotify.sh" ] env = { PUSHOVERUSER = "$user.vars.pushover_user$" PUSHOVERTOKEN = "$user.vars.pushover_token$" PUSHOVERTITLE = "Icinga2 Host Notification" PUSHOVERMESSAGE = " <b>$notification.type$</b> <a href='http://__/host.php?host=$host.display_name$'>$host.display_name$</a> <b>$host.state$</b> $icinga.long_date_time$" PUSHOVERHTML = "1" } } object NotificationCommand "pushover-service-notification" { import "plugin-notification-command" command = [ SysconfDir + "/icinga2/scripts/notifybypushover2.sh" ] env = { PUSHOVERUSER = "$user.vars.pushover_user$" PUSHOVERTOKEN = "$user.vars.pushover_token$" PUSHOVERTITLE = "Icinga2 Service Notification" PUSHOVERMESSAGE = " <b>$notification.type$</b> <a href='http://__/host.php?host=$host.display_name$'>$host.display_name$</a> $service.display_name$ <b>$service.state$</b> $icinga.long_date_time$" PUSHOVERHTML = "1" } } Add the following lines to the /etc/icinga2/conf.d/templates.conf file:
template Notification "pushover-host-notification" { command = "pushover-host-notification" states = [ Up, Down ] types = [ Problem, Acknowledgement, Recovery, Custom, FlappingStart, FlappingEnd, DowntimeStart, DowntimeEnd, DowntimeRemoved ] period = "24x7" } template Notification "pushover-service-notification" { command = "pushover-service-notification" states = [ OK, Warning, Critical, Unknown ] types = [ Problem, Acknowledgement, Recovery, Custom, FlappingStart, FlappingEnd, DowntimeStart, DowntimeEnd, DowntimeRemoved ] period = "24x7" } Add the following lines to the /etc/icinga2/conf.d/notifications.conf file:
apply Notification "pushover-icingaadmin" to Host { import "pushover-host-notification" user_groups = host.vars.notification.mail.groups users = host.vars.notification.mail.users assign where host.vars.notification.mail interval = 0 // disable re-notification } apply Notification "pushover-icingaadmin" to Service { import "pushover-service-notification" user_groups = host.vars.notification.mail.groups users = host.vars.notification.mail.users assign where host.vars.notification.mail interval = 0 // disable re-notification } Add the pushover keys in the /etc/icinga2/conf.d/users.conf file
object User "icingaadmin" { import "generic-user" display_name = "Icinga 2 Admin" groups = [ "icingaadmins" ] email = "icingaadmin@yandex.ru" vars.pushover_user = "1111111111111111111111111111111" vars.pushover_token = "1111111111111111111111111111111" } At this stage, we already hear when something is wrong with our monitoring objects, of course, I would like to see the big picture. For this we need a web server with php, which, for example, can be placed on a home computer or on the same VDS as icinga2.
So, we draw a web-muzzle for requests to the icinga2 API. The setup wizard also created the /etc/icinga2/conf.d/api-users.conf file from which we take the username and password to access the api. The web interface project consists of a page displaying a list of all hosts and a detailed information page for a particular host. From the assumption that the placement of the web interface can be on a separate server, we use a php script written in a hurry to proxying cross-domain requests.
Script text icinga-proxy.php:
<?php require_once( "config.php" ); if (!empty($_GET['host'])) { $host = trim($_GET['host']); $json_url = "https://".ICINGA2_HOST.":5665/v1/objects/hosts/".$host."/"; try { $ch = curl_init(); if (FALSE === $ch) throw new Exception('failed to initialize'); curl_setopt($ch, CURLOPT_URL, $json_url); curl_setopt($ch, CURLOPT_RETURNTRANSFER, true); curl_setopt($ch, CURLOPT_SSL_VERIFYPEER, false); curl_setopt($ch, CURLOPT_SSL_VERIFYHOST, false); curl_setopt($ch, CURLOPT_USERPWD, "$username:$password"); curl_setopt($ch, CURLOPT_HTTPAUTH, CURLAUTH_BASIC); $content = curl_exec($ch); echo $content; if (FALSE === $content) throw new Exception(curl_error($ch), curl_errno($ch)); } catch(Exception $e) { trigger_error(sprintf( 'Curl failed with error #%d: %s', $e->getCode(), $e->getMessage()), E_USER_ERROR); } } else { if (!empty($_GET['domain'])) { $domain = trim($_GET['domain']); $json_url = "https://".ICINGA2_HOST.":5665/v1/objects/hosts?filter=match%28%22*" . $domain . "*%22%2Chost%2Ename%29"; } else { $json_url = "https://".ICINGA2_HOST.":5665/v1/objects/hosts"; } try { $ch = curl_init(); if (FALSE === $ch) throw new Exception('failed to initialize'); curl_setopt($ch, CURLOPT_URL, $json_url); curl_setopt($ch, CURLOPT_RETURNTRANSFER, true); curl_setopt($ch, CURLOPT_SSL_VERIFYPEER, false); curl_setopt($ch, CURLOPT_SSL_VERIFYHOST, false); curl_setopt($ch, CURLOPT_USERPWD, "$username:$password"); curl_setopt($ch, CURLOPT_HTTPAUTH, CURLAUTH_BASIC); $content = curl_exec($ch); echo $content; if (FALSE === $content) throw new Exception(curl_error($ch), curl_errno($ch)); } catch(Exception $e) { trigger_error(sprintf( 'Curl failed with error #%d: %s', $e->getCode(), $e->getMessage()), E_USER_ERROR); } } ?> We would like to see the list of all hosts up to date and preferably without reloading the page, for this we use jQuery.GetJSON () .
Script text icinga-get-host.js:
$(document).ready(function () { $('#get-data').click(function () { var showData = $('#show-data'); var www_path = ""; var json_url = 'icinga-proxy.php?domain=' + domainFilter.value; $.getJSON(json_url, function (data) { var data0 = data.results; var items = data0.map(function (item) { var hostdown = item.attrs.state; var icon_image_src = item.attrs.icon_image; var hostdown_bage; var hostdown_bage_span; if (hostdown == 1) { hostdown_bage = "<span class='mdl-badge mdl-badge--overlap' data-badge='!'>"; hostdown_bage_span = "</span>"; icon_image_src = item.attrs.icon_image.slice(0, -4) + "_gray.png"; } else { hostdown_bage = ""; hostdown_bage_span = ""; if (item.attrs.icon_image) { icon_image_src = item.attrs.icon_image; } else { icon_image_src = "img/my/dot.png"; } } return "<td class='mdl-data-table__cell--non-numeric'><img src='" + www_path + icon_image_src + "' id='host" + item.attrs.display_name.split('.')[0] + "' />" + "<div class='mdl-tooltip' for='host" + item.attrs.display_name.split('.')[0] + "'>" + item.attrs.display_name + "</div>" + hostdown_bage_span + "</td><td class='mdl-data-table__cell--non-numeric' onclick='location=\"host.php?host=" + item.attrs.__name + "\"'>" + hostdown_bage + hostdown_bage_span + item.attrs.display_name + "</td>" + "<td class='mdl-data-table__cell--non-numeric'>" + item.attrs.vars.domain_name + "</td>" //+ "<td class='mdl-data-table__cell--non-numeric'>" + item.attrs.vars.os + "</td>" ; }); showData.empty(); if (items.length) { var content = '<tr>' + items.join('</tr><tr>') + '</tr>'; var list = $('<table class="mdl-data-table mdl-js-data-table" style="margin: auto; width: 100%" />').html(content); showData.append(list); } }); showData.text('Loading the JSON file.'); }); $('#get-data').click(); setInterval(function(){$('#get-data').click();},60*1000); }); The repository of the web interface project can be found here .
Using the Material Design Lite styles, our web interface will look like this:
Host list
The list of hosts with the mapping is not available one of them
Detailed Host Information
For this option with minimal icinga2 functionality, you can think of many applications. For example, not large projects, maintenance of unrelated computers by an individual, or integration into existing technical support systems (HelpDesk). Maybe next time we will teach our Windows hosts to download the scripts signed by powershell and execute them on our demand, monitor other computers without an installed agent, network active equipment and all this with minimal cost, but with great potential for scaling and expanding functionality.
Links
Official documentation icinga2 - Installation
Official documentation icinga2 - API
Source: https://habr.com/ru/post/307358/
All Articles