10 tricks to feel like a specialist, working with Google Drive
Do you think you know a set of measures to improve the performance of online work in Google tools? Regardless of whether you use the Google Disk service for five minutes or five years, it always has something to learn, and therefore we present below 10 useful tips and tricks to enhance your skills when working with this service.
1. Enable offline access to Google Disk
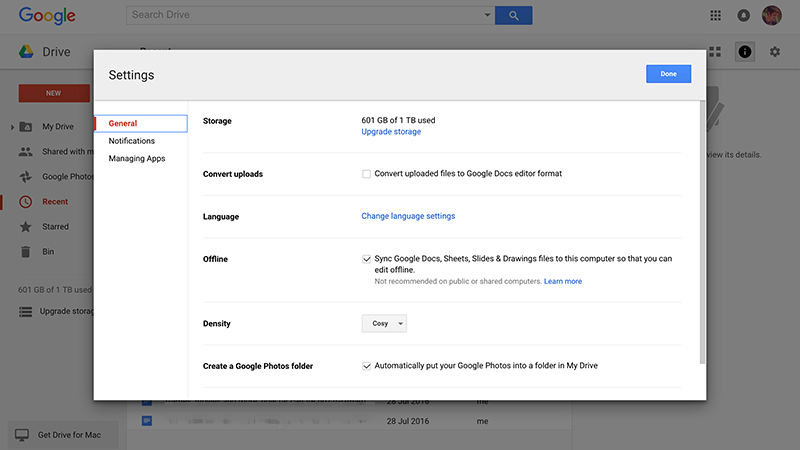
Google Disk may work offline, but to do this you first need to activate the corresponding characteristic: click the gear icon on the main Google Disk page , then select Settings . On the General tab in the Offline row, check the box next to Sync ... , and the Google Disk will start caching existing documents, tables, slides and pictures on your computer. You cannot watch videos or open photos while you are offline, but you can view, edit and create files in the original Google Disk formats when you do not have a connection to the network.
')
2. Search inside PDF and image files
Do you know that Google Disk can scan text in PDF and image files, making them fully searchable? Just upload a photo of a reasonably clear PDF file and try. You can even open and edit these files: right-click on the PDF file or on the image, then select Open with and Google Docs . Depending on the quality of the file and the readability of the text, not every time an excellent result can be obtained, but this is a useful option for working with scanned documents.
3. Easier search for your files
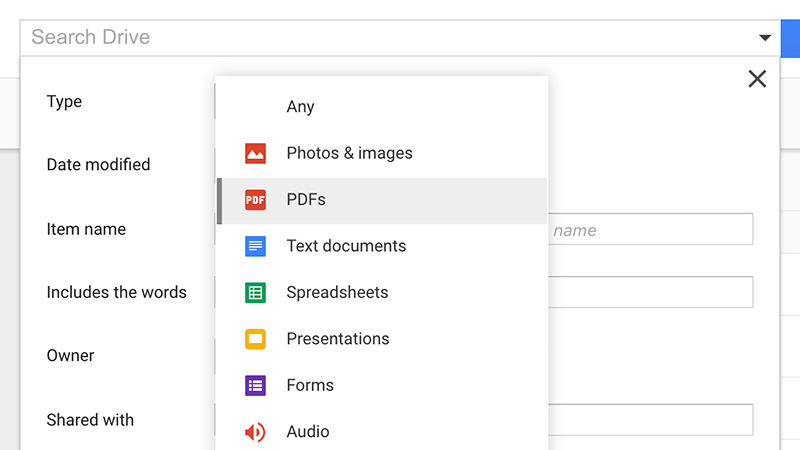
Google does a very good search, and therefore you can expect that Google Disk has many advanced search functions — click the drop-down arrow next to the search field to see some of them. Use "owner: person@gmail.com" to search for documents shared by someone, or "before: yyyy-mm-dd" or "after: yyyy-mm-dd" to limit your search to dates. You can add “title: searchterms” to search for document titles, not their full text.
4. Scan images on a photo
If the Google Disk app for Android is installed, you can use the phone as a portable scanner (this feature is, unfortunately, not available on iOS). In the application on the front window, click on the icon with a big plus, then select Scan from the pop-up menu. Images can be rotated and cropped manually (although automatic detection also works fine), you can create multi-page documents, while your scans will be constantly downloaded to Google Disk as PDF files.
5. The ability to return over time to your files
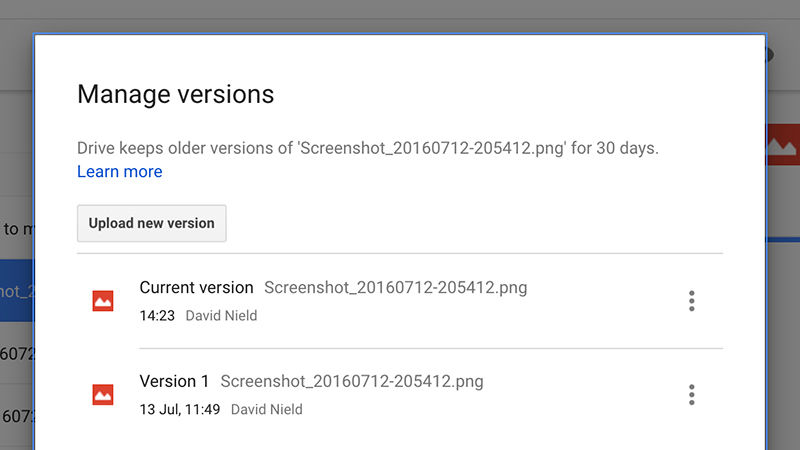
Google Disk saves old versions of your files in case you want to go back to them (very handy when you work with documents together with other people). For the original Google-Disk file, open it and select File , then See revision history . For any other type of file, right-click on it in the list of documents and select Manage versions . The drop-down menu on the side of each version allows you to down load the file, delete it and store it for a standard period of 30 days.
6. Voice input of documents
Typing on the keyboard has existed for a long time, but this is not the only way to create documents - the document can be dictated, and this may be a faster process for you. From the document, select Tools (Tools), then Voice typing (Voice input) and click the microphone - you can start: right-click the underlined words to see the alternative if you need it. There are also different voice commands, such as “italics” (“italics”), “go to the end of the line” (“go to the end of the line”) or “question mark” (“question mark”).
7. Search files using Google Now Virtual Assistant

Another tip for finding files on your Google Disk account: use Google Now Virtual Assistant for this. Run the Google app - voice search (note that it currently only works on Android). Then say “search drive for” and your query. For now, you can only search for special search words, not something advanced, but this is also a very useful option. To return to the main Google Disk page, click the back arrow (top left).
8. View the largest files on your Google Disk account.
Do you want to free up some space on your Google Disk in order not to go beyond your limit? This is easy to do: from the front window of the web application, click the link to the left, and you will be shown how much disk space is occupied by you. Then click Drive (or just go to this link ). The largest files will be shown at the top. You can click on the Quota used header to replace the smallest files from above (remember that the original Google-Disk files are not included in the amount of allocated memory (quota) for you).
9. Insert links to documents
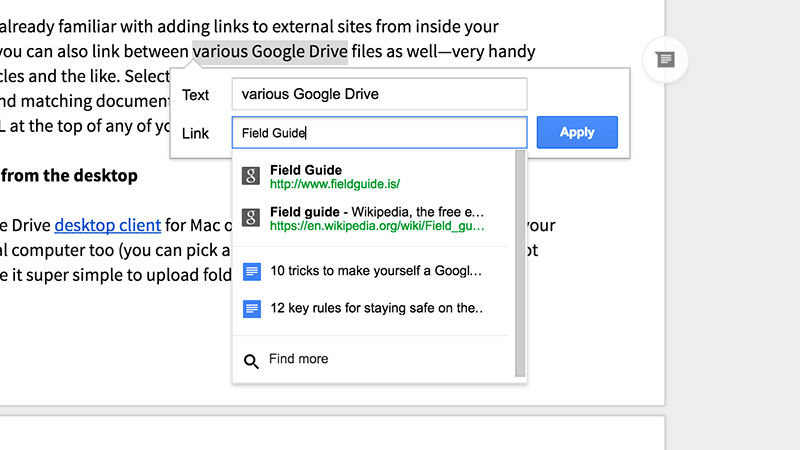
You are probably already familiar with inserting links to external sites from your documents, but you can also link various Google-Disk files, which is very convenient for searching articles, etc. Select Insert , then Link as usual and enter one or two search terms to find the corresponding documents in your Google Disk account. If you prefer, you can copy the URL from the top of any of your files on Google Drive and paste it into the link field.
10. Synchronization with the desktop computer in both directions
Install the Google Desktop client for Mac or Windows and you will also get access to all your files on your local computer (you can view and select folders to be synchronized). This not only makes the process of uploading folders and files extremely simple (just copying them to the Google Disk folder), but also gives you the opportunity to offline access to any of your files that you may need while on the go. In this case, the changes will be automatically transferred to the cloud when you enter the network.
Source: https://habr.com/ru/post/307198/
All Articles