Connecting Intel Internet of Things Gateways to IBM Watson
When it comes to developing for the Internet of things, speed and quality come to the fore. The faster the idea turns into a stable working prototype, the more chances it has to develop further, go into production and become a real “thing”, which may well be considered useful by millions. What is needed for such a transformation? Intel and IBM have prepared an answer to this and many other pressing issues of IoT developers. Namely, we are talking about a joint initiative of companies, which is aimed at giving everyone modern hardware solutions ( Intel IoT Developer Kit ) and a cloud platform designed for the needs of the Internet of things ( IBM Watson IoT ).
If you describe this initiative in a nutshell, it turns out that using components from the Developer Kit, you can quickly assemble a prototype IoT device, write programs for it and connect all this to the IBM Watson cloud platform. As a result, for example, there may be some kind of intelligent system that collects data, possibly performs their preliminary processing, and sends information to the cloud, where it can be stored and analyzed. In fact, this is a very simple scenario, the tools of Intel and IBM allow, without exaggeration, to create in the field of IoT everything that the imagination of developers suffices.
If you feel that the tools from Intel and IBM are exactly what you need, we offer you a story about how to connect the Intel IoT Gateway to IBM Watson. Once such a connection is established, you can start developing for this platform.
In order to test what is being discussed, you will need an Intel IoT gateway with IDP version 3.1 or higher, connected to the Internet. In the same network to which the gateway is connected, there must be a development computer. In addition, you need to have terminal access to the gateway from this computer. If your gateway needs additional configuration, take a look at this material .
')
First of all, upload the IoT Cloud repository to the gateway. To do this, follow these steps:
1. Connect to the gateway console. You can work with it either remotely, via SSH, or by connecting a monitor and keyboard to the gateway.
2. Add a PGP key for the cloud repository using the following command:
3. On the development computer, open a browser and, by entering the gateway IP address in the address bar, connect to the IoT Gateway Developer Hub web interface. In order to find out the IP address of the gateway, you can use the
4. Log in by entering root as the name and password.
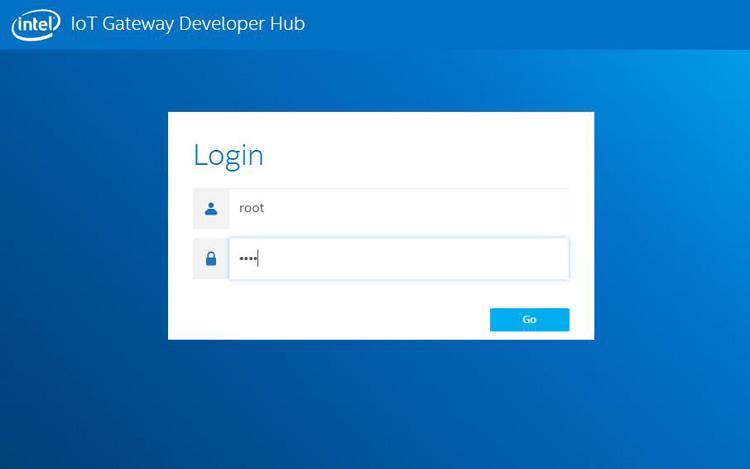
Sign in to IoT Gateway Developer Hub after connecting to the gateway
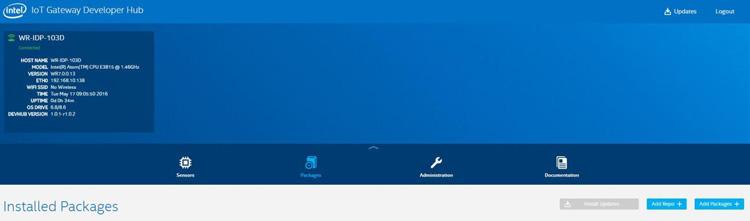
5. Add the IoT Cloud repository to the system. To do this, go to the Packages section and click on the Add Repo + button.
Adding a new repository
6. Fill in the fields in the window that appears as follows:
7. At the end of the installation, click the Update Repositories button to update the package list.
Now we’ll work on setting up IBM Watson support. In order to do this, you need to do the following:
1. Click the Add Packages + button to list the packages that can be installed.
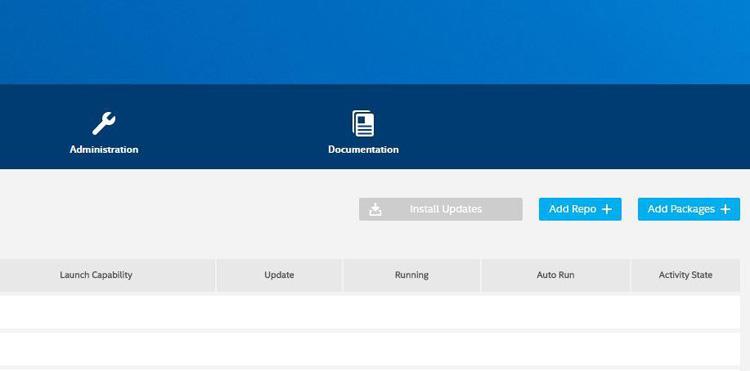
Add Package Button
2. Search for the words “ cloud ibm ” by entering a query in the field that is located at the top of the page.
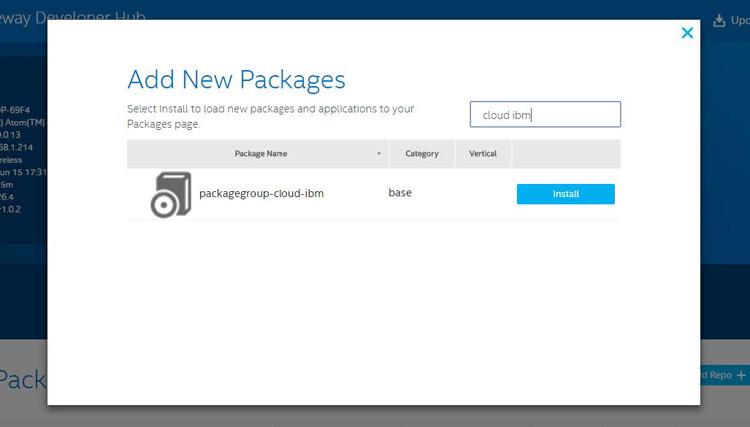
Package Search
3. Click on the Install button, which is next to the packagegroup-cloud-ibm entry.
Now let's talk about working with IBM Watson using Node-RED.
1. After the IBM cloud services package is installed, the Node-RED service must be restarted. As a result, she will be able to see the packages just installed and will be able to work with them. To restart Node-RED, run the following command in the console:
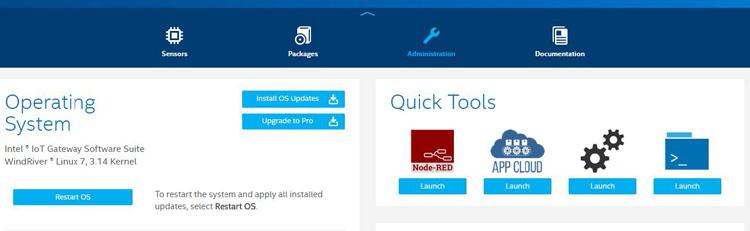
2. Open the Node-RED interface. To do this, go to the Administration section in the IoT Gateway Developer Hub and click on the Launch button located under the Node-RED icon.
Transition to the Node-RED interface
3. In the Node-RED window, click on the Menu icon, which is located on the right, go to Import - Examples - ibm watson-iot and select Time Inject .
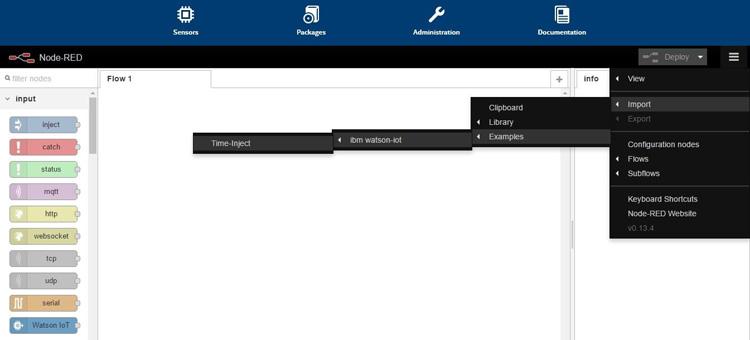
Menu operation
4. Add a Time Inject example to the current flowchart and click the red Deploy button to initiate the deployment and launch of the application.
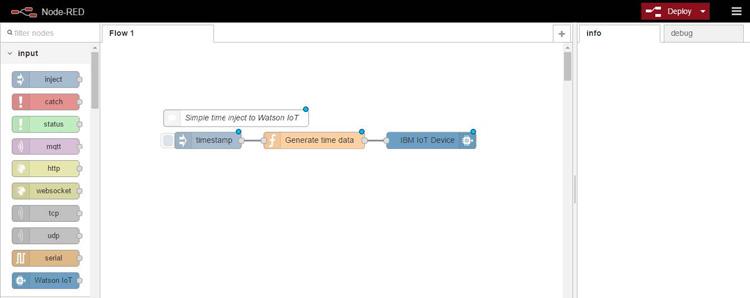
Creating an application in Node-RED
5. Double-click the IBM IoT Device node to open the settings dialog box.
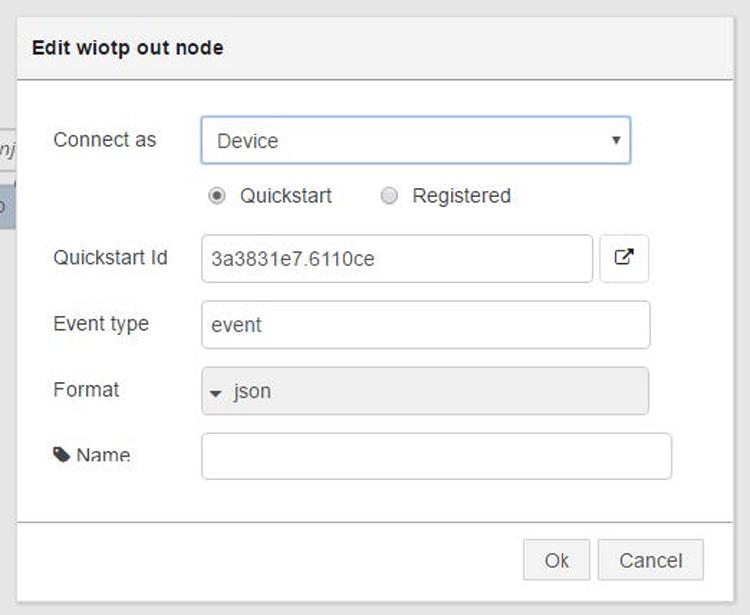
IBM IoT Device Settings
6. Click the Link button in the settings window, the IBM Watson Quickstart control panel opens for the Quickstart identifier that is used in the project.
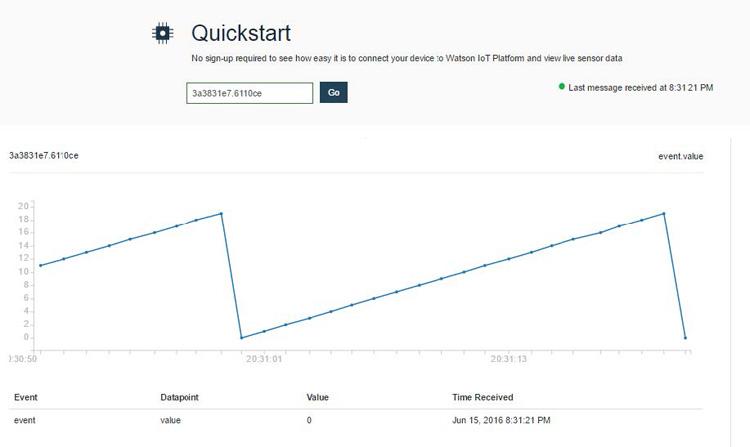
IBM Watson Quickstart Control Panel and Data Visualization
7. After loading the control panel on it you can see the data that comes from the gateway in real time.
Congratulations! Your gateway is now connected to IBM Watson. But this, as you understand, is just the beginning. Next time we will go further - let's talk about how to connect the Arduino 101 board to Watson, to which several sensors are connected.
If you describe this initiative in a nutshell, it turns out that using components from the Developer Kit, you can quickly assemble a prototype IoT device, write programs for it and connect all this to the IBM Watson cloud platform. As a result, for example, there may be some kind of intelligent system that collects data, possibly performs their preliminary processing, and sends information to the cloud, where it can be stored and analyzed. In fact, this is a very simple scenario, the tools of Intel and IBM allow, without exaggeration, to create in the field of IoT everything that the imagination of developers suffices.
If you feel that the tools from Intel and IBM are exactly what you need, we offer you a story about how to connect the Intel IoT Gateway to IBM Watson. Once such a connection is established, you can start developing for this platform.
In order to test what is being discussed, you will need an Intel IoT gateway with IDP version 3.1 or higher, connected to the Internet. In the same network to which the gateway is connected, there must be a development computer. In addition, you need to have terminal access to the gateway from this computer. If your gateway needs additional configuration, take a look at this material .
')
IoT Cloud Repository
First of all, upload the IoT Cloud repository to the gateway. To do this, follow these steps:
1. Connect to the gateway console. You can work with it either remotely, via SSH, or by connecting a monitor and keyboard to the gateway.
2. Add a PGP key for the cloud repository using the following command:
rpm --import http://iotdk.intel.com/misc/iot_pub.key 3. On the development computer, open a browser and, by entering the gateway IP address in the address bar, connect to the IoT Gateway Developer Hub web interface. In order to find out the IP address of the gateway, you can use the
ifconfig command.4. Log in by entering root as the name and password.
Sign in to IoT Gateway Developer Hub after connecting to the gateway
5. Add the IoT Cloud repository to the system. To do this, go to the Packages section and click on the Add Repo + button.
Adding a new repository
6. Fill in the fields in the window that appears as follows:
Name : IoT_CloudAfter that, click on the Add Repository button.
URL : iotdk.intel.com/repos/iot-cloud/wrlinux7/rcpl13
7. At the end of the installation, click the Update Repositories button to update the package list.
Configuring IBM Watson support on the gateway
Now we’ll work on setting up IBM Watson support. In order to do this, you need to do the following:
1. Click the Add Packages + button to list the packages that can be installed.
Add Package Button
2. Search for the words “ cloud ibm ” by entering a query in the field that is located at the top of the page.
Package Search
3. Click on the Install button, which is next to the packagegroup-cloud-ibm entry.
Connect to IBM Watson with Node-RED
Now let's talk about working with IBM Watson using Node-RED.
1. After the IBM cloud services package is installed, the Node-RED service must be restarted. As a result, she will be able to see the packages just installed and will be able to work with them. To restart Node-RED, run the following command in the console:
systemctl restart node-red-experience 2. Open the Node-RED interface. To do this, go to the Administration section in the IoT Gateway Developer Hub and click on the Launch button located under the Node-RED icon.
Transition to the Node-RED interface
3. In the Node-RED window, click on the Menu icon, which is located on the right, go to Import - Examples - ibm watson-iot and select Time Inject .
Menu operation
4. Add a Time Inject example to the current flowchart and click the red Deploy button to initiate the deployment and launch of the application.
Creating an application in Node-RED
5. Double-click the IBM IoT Device node to open the settings dialog box.
IBM IoT Device Settings
6. Click the Link button in the settings window, the IBM Watson Quickstart control panel opens for the Quickstart identifier that is used in the project.
IBM Watson Quickstart Control Panel and Data Visualization
7. After loading the control panel on it you can see the data that comes from the gateway in real time.
Results
Congratulations! Your gateway is now connected to IBM Watson. But this, as you understand, is just the beginning. Next time we will go further - let's talk about how to connect the Arduino 101 board to Watson, to which several sensors are connected.
Source: https://habr.com/ru/post/306868/
All Articles