ViaLatM and social functions
This article describes the functions of the social purpose ViaLatM service, which allows you to share your current real-time movement and static routes of your walks, trips and travels equipped with your photos.
Before describing how to work with these functions, small notes:
')
The service supports the OSMAND protocol (OSM automated navigation directions) and now you can connect the Traccar Client and Maps & Navigation - OsmAnd applications to the service. These applications have an implementation for both Android and iPhone. Connection settings can be viewed on the Protocols, mobile applications, trackers and devices supported by ViaLatM service. If the readers of the article are aware of other applications with this (or other protocols whose descriptions are available), please let them know.
The https protocol becomes the main protocol of the service, the http protocol is still available, but soon the service will work only via a secure protocol.
Real Time Monitoring
Partly it was described in previous articles, briefly recall how it works.

Next to each object in the list is an eye icon. If it is green, then the object is available for monitoring in real time. When you click on this icon, you switch to the settings for observers. You set the time until which observation is possible. At any time, you can prohibit the possibility of observation, or vice versa, to extend it. Observers see (screen on the right) your current location and trail of movement in the last 15 minutes. Accordingly, if there is no trace, then you are standing at this point for more than 15 minutes. The link for observation is also allowed for objects from the “Internet of Things” sphere. Moreover, if a location is defined for an object, then it is displayed on the map, and a mini widget is also displayed, with a graph of the parameter that you selected to display.
Creating routes for public access
Before you send a link to your static route, you must save it in the set of selected routes. To do this, open the Report menu and select the Track for the interval (a set of reports with which you constantly work, you create your own using the Organizer reports menu). In the panel that opens, select the object and the date interval for which you want to get the track.
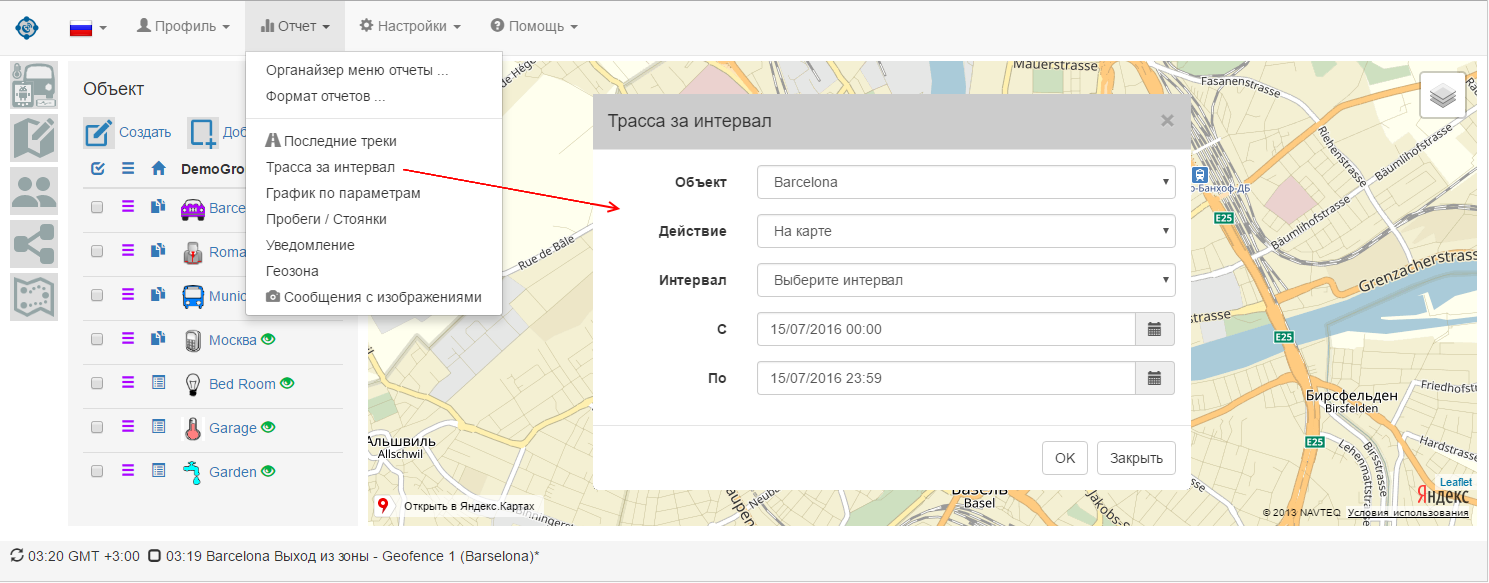
Making sure that this route is the one you want to save, in the Actions field, select Save to Favorite Trails and click OK. When closing the route using the button on the map (highlighted in red), if the last action was to display the route, then it returns to the display of the road definition panel.

The list of favorite tracks is displayed on the bottom icon in the left pane. If the “eye” icon (under the context menu icon) is green, then the link for the track is active for other observers.

When you click on the selected route, it is displayed on the map. Using the context menu, you can enter a comment (notes) for the route, export it to kml format, remove it from the favorites (the route remains in the service, it is deleted only from the Selected routes). To activate the link, you must set a short password.
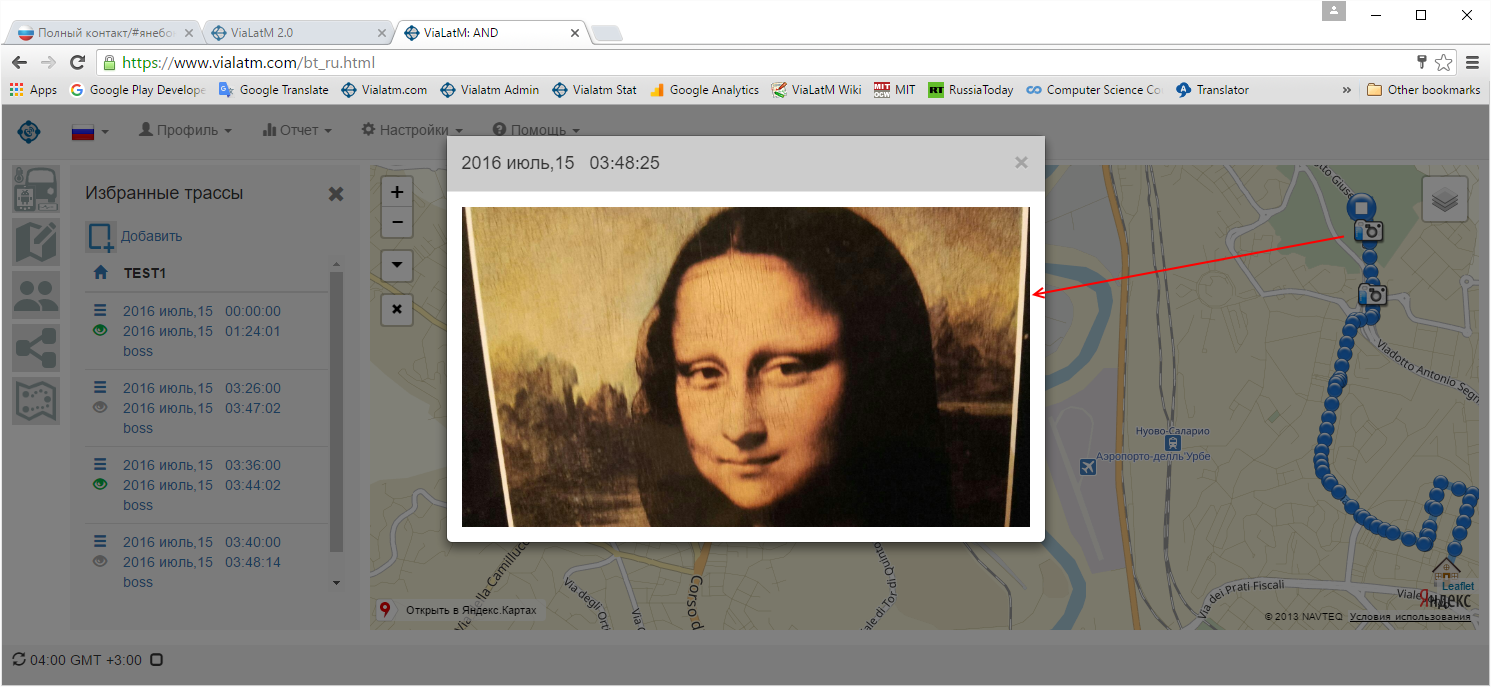
When opening a generated link in the browser, the observers see the following picture:

When you click on the points of the tracks, additional information about the parameters at the point (speed, height, ...) is displayed. If you use My Location Companion as a tracker, you can take photos while tracking and they will be tied to specific locations. When you click on the photo icon, the photo taken is displayed in a separate window (this is shown on the first image in the article). A link to the track can be placed in the iframe and display it on your Internet resources.
Source: https://habr.com/ru/post/305712/
All Articles