Render to texture using Three.js
Everything that you render in Three.js is displayed by default on the screen. Why do we need rendering at all if you can't see the result? It turns out, then, to collect data before they are displayed on the screen (and, therefore, will be lost). This greatly simplifies the use of post-processing effects such as color correction / distortion and image blur, and is also very useful for shader effects. This technique is called rendering to a texture or rendering to a frame buffer. The end result is stored in a texture, which can then be displayed on the screen. In this article, I will show how this is done using a specific example of rendering an animated cube to the surface of another animated cube.

Note: this article is intended for those who already have the basic knowledge of Three.js. If you are not familiar with this library, first I recommend reading the article How to Learn Three.js for Game Development.
')
Base implementation
There are many similar examples on the Internet that show more complex effects. But this article presents only the most necessary minimum.
For a start, we have the usual scene settings. Then we create another one - bufferScene. Any object added to this scene will be rendered not to the screen, but to an offscreen buffer. Then we create the bufferTexture texture, which is the WebGLRenderTarget buffer that is used in Three.js for off-screen rendering. It remains to set the bufferScene drawing:
In fact, this is the same as rendering a regular scene, only with the indication of the third argument - the buffer. So, the main stages:
1. Creating a scene in which objects will be stored.
2. Creating a texture in which the result of the render will be stored.
3. Render the scene to texture.
That's all. But so far nothing is visible. Even if you added objects to bufferScene, you will not see anything, because you first need to visualize the created texture in the main scene. Next we look at how to do this.
Usage example
We will create a cube, draw it into a texture, and then use it as a texture for the new cube.

bufferTexture - screen
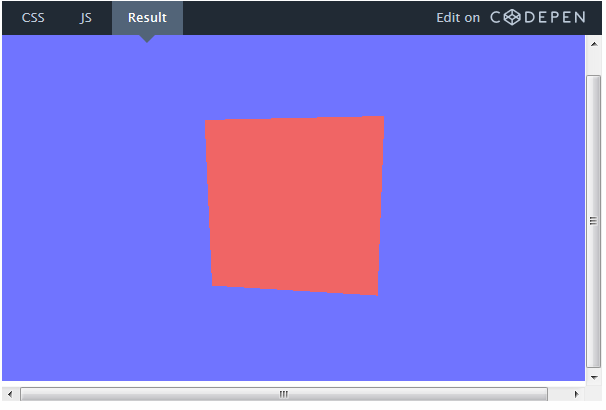
1. Starting from the regular scene.
Here is our scene with a rotating red cube on a blue background. If you're interested, you can view the code by switching between the CSS and JS tabs on CodePen.
2. Render the scene to texture.
Now draw the resulting scene into the texture. To do this, just create bufferScene, as described in the previous section, and add objects to it.
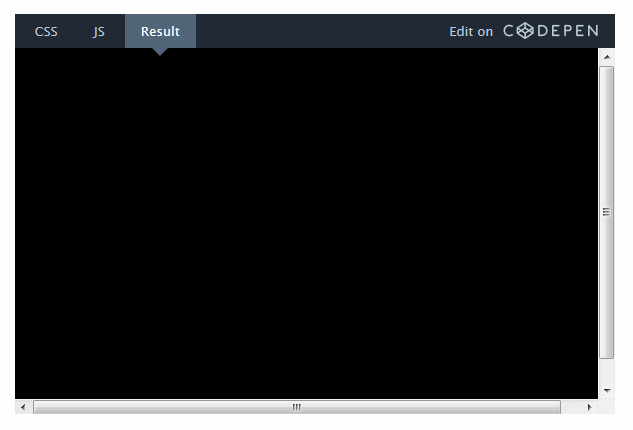
Even if you did everything right, you will not see anything , because now our scene is being rendered not on the screen, but in bufferTexture.
3. Render the cube texture
bufferTexture is no different from any other texture. We can simply create a new object and use it as a texture:
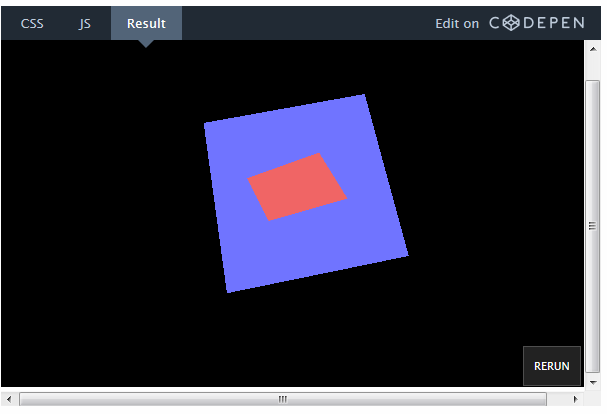
In motion, the object can be viewed here.
On the first texture, you can draw anything and render it on any surface.
Use cases
This rendering is very well suited for any post-processing effects. Suppose you want to make a correction or distortion of colors in the scene. Instead of changing every single object, you can render the entire scene into a texture and apply the desired effect to it before displaying it on the screen.
Render to texture can also be used in any shader consisting of several passes (for example, Blur). In a previous article, I explained how to use personnel buffers to create a smoke effect.
Note: this article is intended for those who already have the basic knowledge of Three.js. If you are not familiar with this library, first I recommend reading the article How to Learn Three.js for Game Development.
')
Base implementation
There are many similar examples on the Internet that show more complex effects. But this article presents only the most necessary minimum.
// @: . 2016. // Three.js : // http://cdnjs.com/libraries/three.js/ //// //// var scene = new THREE.Scene(); var width, height = window.innerWidth, window.innerHeight; var camera = new THREE.PerspectiveCamera( 70, width/height, 1, 1000 ); var renderer = new THREE.WebGLRenderer(); renderer.setSize( width,height); document.body.appendChild( renderer.domElement ); //// //// // , var bufferScene = new THREE.Scene(); // , var bufferTexture = new THREE.WebGLRenderTarget( window.innerWidth, window.innerHeight, { minFilter: THREE.LinearFilter, magFilter: THREE.NearestFilter}); //// // bufferScene // //// function render() { requestAnimationFrame( render ); // renderer.render(bufferScene, camera, bufferTexture); // , , renderer.render( scene, camera ); } render(); // ! For a start, we have the usual scene settings. Then we create another one - bufferScene. Any object added to this scene will be rendered not to the screen, but to an offscreen buffer. Then we create the bufferTexture texture, which is the WebGLRenderTarget buffer that is used in Three.js for off-screen rendering. It remains to set the bufferScene drawing:
renderer.render(bufferScene, camera, bufferTexture); In fact, this is the same as rendering a regular scene, only with the indication of the third argument - the buffer. So, the main stages:
1. Creating a scene in which objects will be stored.
2. Creating a texture in which the result of the render will be stored.
3. Render the scene to texture.
That's all. But so far nothing is visible. Even if you added objects to bufferScene, you will not see anything, because you first need to visualize the created texture in the main scene. Next we look at how to do this.
Usage example
We will create a cube, draw it into a texture, and then use it as a texture for the new cube.
bufferTexture - screen
1. Starting from the regular scene.
Here is our scene with a rotating red cube on a blue background. If you're interested, you can view the code by switching between the CSS and JS tabs on CodePen.
2. Render the scene to texture.
Now draw the resulting scene into the texture. To do this, just create bufferScene, as described in the previous section, and add objects to it.
Even if you did everything right, you will not see anything , because now our scene is being rendered not on the screen, but in bufferTexture.
3. Render the cube texture
bufferTexture is no different from any other texture. We can simply create a new object and use it as a texture:
var boxMaterial = new THREE.MeshBasicMaterial({map:bufferTexture}); var boxGeometry2 = new THREE.BoxGeometry( 5, 5, 5 ); var mainBoxObject = new THREE.Mesh(boxGeometry2,boxMaterial); // Move it back so we can see it mainBoxObject.position.z = -10; // Add it to the main scene scene.add(mainBoxObject); In motion, the object can be viewed here.
On the first texture, you can draw anything and render it on any surface.
Use cases
This rendering is very well suited for any post-processing effects. Suppose you want to make a correction or distortion of colors in the scene. Instead of changing every single object, you can render the entire scene into a texture and apply the desired effect to it before displaying it on the screen.
Render to texture can also be used in any shader consisting of several passes (for example, Blur). In a previous article, I explained how to use personnel buffers to create a smoke effect.
Source: https://habr.com/ru/post/305408/
All Articles