Making cool Single Page Application on basis.js - part 3. Client for VKontakte

Good day to all.
I continue the most interesting series of articles about the creation of advanced Single Page Application on basis.js .
Last time we learned how to work with collections and implemented a full interactive list.
This time we will start creating a full-fledged client for VKontakte.
Namely: we implement authorization, download news, friends and music.
Menu and navigation
To begin with, we will implement a simple page with a title and a menu.
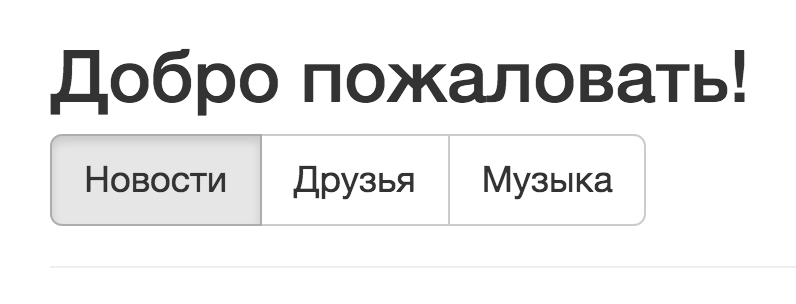
When you click on menu items (tabs), you navigate to different url and highlight the active menu item.
Let's look at the code of the main file of our future application:
let Node = require('basis.ui').Node; let Header = require('app.ui.header.component'); let Menu = require('app.ui.menu.component'); require('basis.app').create({ title: 'VK Client by Basis.JS', element: new Node({ template: resource('./template.tmpl'), binding: { header: 'satellite:', menu: 'satellite:' }, satellite: { header: Header, menu: Menu } }) }); We connect the necessary modules: Node , as well as the components of the title and menu (which will be discussed below).
Next, an application is created using the basis.app.create () method. You can, of course, do without it and do as we did before - create a new Node and place it in some element on the page.
But in basis.js there is a helper basis.app that encapsulates some logic related to the page title and the placement of the application root component on the page.
Also, look at the pattern of our application:
<div class="container"> <!--{header}--> <!--{menu}--> <hr/> </div> The title and menu are satellites of the root component of our application.
At the moment, the header component is very simple:
let Node = require('basis.ui').Node; module.exports = Node.subclass({ template: resource('./template.tmpl') // <h1> !</h1> }); His task is to display a greeting. Later we will improve it.
But the menu component is of particular interest to us:
let Node = require('basis.ui').Node; let Value = require('basis.data').Value; let router = require('basis.router'); let currentPage = Value.from(router.route(':page').param('page')); module.exports = Node.subclass({ template: resource('./template.tmpl'), // <div class="btn-group btn-group-lg"/> childClass: { template: resource('./item.tmpl'), selected: currentPage.compute((node, page) => node.url == page), binding: { title: 'title' }, action: { click() { router.navigate(this.url); } } }, childNodes: [ {title: '', url: 'news'}, {title: '', url: 'friends'}, {title: '', url: 'audio'} ] }); Let's immediately notice the contents of the currentPage variable.
The current route will always be stored here, the changes of which we can track.
We use this value in the selected property of menu items.
That is, the activity of a particular menu item depends on the current route.
If the url of the current menu item coincides with the current route, then this menu item has the property selected = true .
Thus, only one menu item will be selected at a time.
When you click on a specific item, it navigates to the specified url.
You can read more about the router embedded in basis.js in the corresponding section of the documentation .
Now look at the menu item template:
<b:define name="active" from="selected" type="bool"/> <button type="button" class="btn btn-default {active}" event-click="click"> {title} </button> Each menu item is a button. If the selected item is true , then we add the class active to the button, otherwise we remove.
That's all. Navigation menu is done.
Now, when you click on the menu items, it will go to the corresponding url.
There is a small detail - the default route.
If you simply open our application without specifying a route, then no menu item will be selected.
Let's fix this so that the default route is News .
We modify the main file of our application:
// ... let router = require('basis.router'); let defaultRoute = 'news'; require('basis.app').create({ title: 'VK Client by Basis.JS', element: new Node({ // ... }) }).ready(() => { router.route('*page').param('page').as(page => page || router.navigate(defaultRoute, true)); }); As soon as the application is initialized, we begin to track the change in the route.
If the route is not specified, then we transfer the user to the default route.
')
Authorization
Now we use VKontakte API and implement authorization with it.
Look at the wrapper over the VK API (hereinafter simply the API). We will not consider it completely, and look only at key points.
Please note that the API itself is derived from basis.data.Value .
This means that it, like any data source, has states:
- UNDEFINED when the user is not authorized
- PROCESSING during authorization
- READY after successful login
- ERROR in case of error
Let's look at how the change of states of the model is implemented. To do this, refer to the login () and logout () methods:
login() { this.setState(STATE.PROCESSING); this.isLoggedIn().then( () => this.setState(STATE.READY), () => { global.VK.Auth.login(response => { this.setState(response.session ? STATE.READY : STATE.UNDEFINED); }, config.perms); } ); }, logout() { global.VK.Auth.logout(); this.setState(STATE.UNDEFINED); } By calling login () , the API will be moved to the PROCESSING state.
Next comes the check - if the user is already authorized, then we immediately translate the API into the READY state. If not, then log in using the VK.Auth.login () method from the VK API. The authorization process through VK API is reduced to the fact that you are shown a window with a proposal to enter a login and password.

When the window is closed (the authorization was successful or was canceled), the transferred callback will be called, which will set the final state of our model: READY , in case of successful authorization and UNDEFINED , in case of cancellation of authorization.
By calling logout () , we destroy the session using the VK.Auth.logout () method and set the API to the UNDEFINED state.
Now let's look at another important method - callApi () :
callApi(method, params = {}) { return this.isLoggedIn() .catch(e => Promise.reject(new Error(' !'))) .then( () => { return new Promise((resolve, reject) => { basis.object.complete(params, {v: config.version}); global.VK.api(method, params, response => { if (response.error) { reject(new Error(response.error.error_msg)); } else { resolve(response.response); } }); }); }, e => { this.setState(STATE.ERROR, e.message); throw e; } ); } The essence of this method is to send a request through the VK API. Before each request, we check the availability of authorization. If there is no authorization (for example, we opened our application in two browser tabs and clicked exit in one of them), then we throw out the error and translate the API into the ERROR state. If the authorization is good, then we execute the request. If the server, in response to a request, notifies us about an error, we throw an error and translate the API into the ERROR state. Otherwise, we return the result.
Due to this, we can abstract away from the nuances of working with the VK API and operate only on the model states:
let STATE = require('basis.data').STATE; let Value = require('basis.data').Value; let Node = require('basis.ui').Node; let router = require('basis.router'); let Header = require('app.ui.header.component'); let Menu = require('app.ui.menu.component'); let vkApi = require('app.vkApi'); let apiState = Value.state(vkApi); let defaultRoute = 'news'; require('basis.app').create({ title: 'VK Client by Basis.JS', element: new Node({ // , active: apiState.as(state => state == STATE.READY), // disabled: apiState.as(state => state == STATE.PROCESSING), template: resource('./template.tmpl'), binding: { header: 'satellite:', menu: 'satellite:', // , error: apiState.as(state => state == STATE.ERROR && state.data) }, satellite: { header: Header, menu: Menu }, action: { // "" login() { vkApi.login(); } } }) }).ready(() => { router.route('*page').param('page').as(page => page || router.navigate(defaultRoute, true)); // vkApi.login(); }); Now apply these properties in the template:
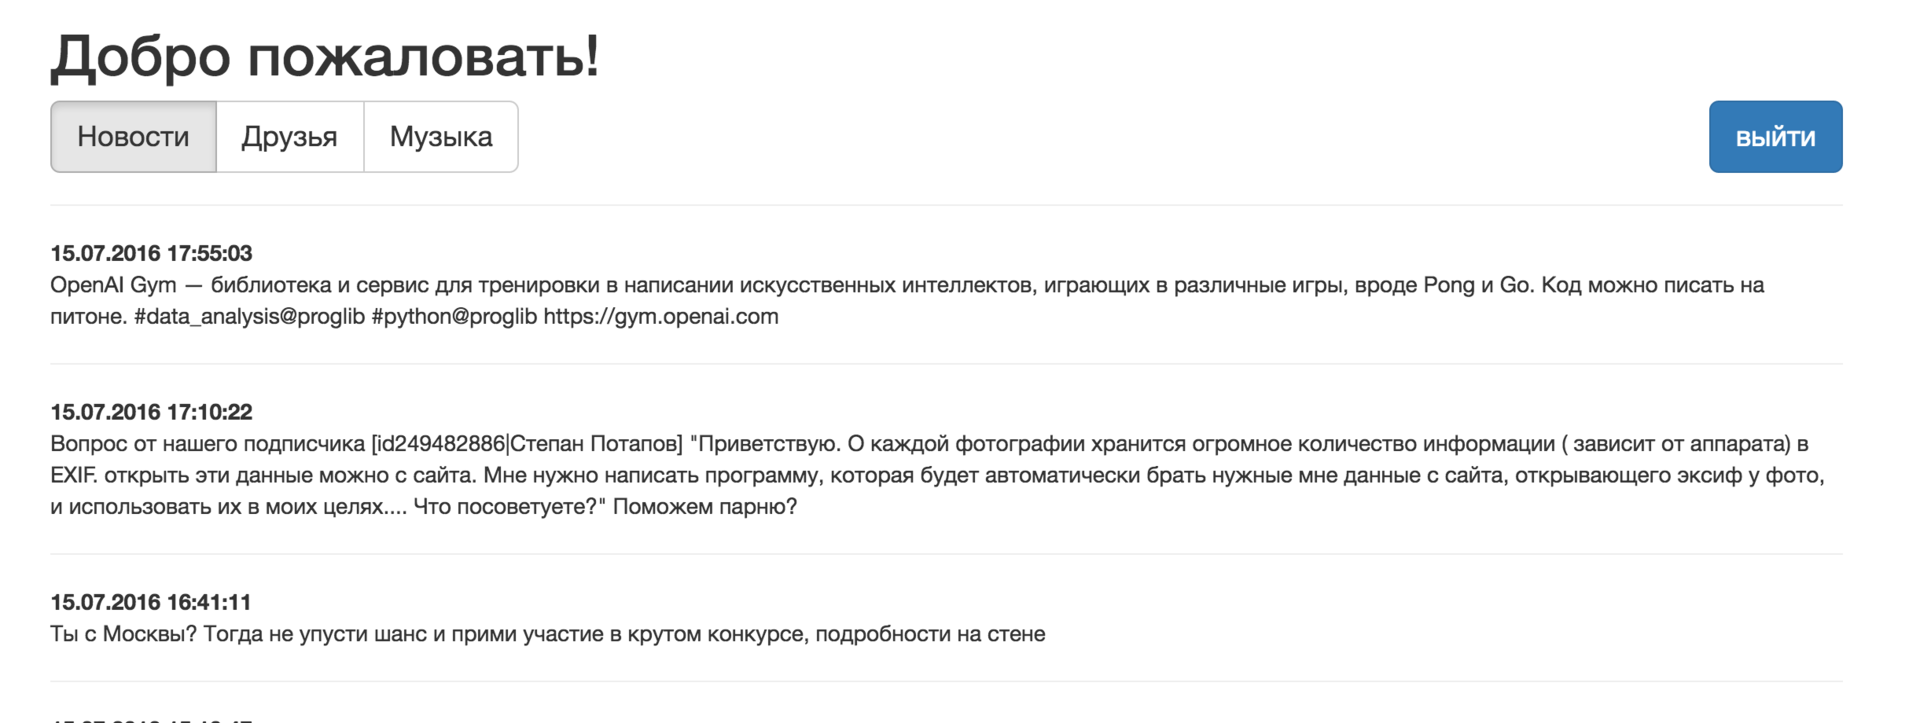
<div class="container"> <div b:show="{active}"> <!--{header}--> <!--{menu}--> <hr/> </div> <div class="jumbotron text-center" b:hide="{active}"> <h1> VK Client <small> powered by basis.js</small> </h1> <div class="alert alert-danger" b:show="{error}"> {error} </div> <button class="btn btn-primary btn-lg" event-click="login" disabled="{disabled}"></button> </div> </div> We show the welcome screen while the user is not authorized, otherwise we show the menu and title.
The Authorization button will be locked during the authorization process.
Also, add a button to exit to the main menu:
<div> <div{childNodesElement} class="btn-group btn-group-lg"/> <button class="btn btn-primary btn-lg pull-right" event-click="logout"></button> </div> And, in the menu component, we will process the click on this button:
let vkApi = require('app.vkApi'); // ... module.exports = Node.subclass({ // ... action: { logout() { vkApi.logout(); } } // ... }); 
Fine! Now we have an application that can log in to VKontakte, as well as a convenient mechanism for tracking model states. Moving on.
Pages
In this article, we are implementing three pages: news, friends and audio recordings.
When switching between menu items, the corresponding page should be displayed.
To begin with, we will create a common page, from which we will inherit all the rest:
let Value = require('basis.data').Value; let Expression = require('basis.data.value').Expression; let STATE = require('basis.data').STATE; let Node = require('basis.ui').Node; module.exports = Node.subclass({ active: basis.PROXY, binding: { loading: Value.query('childNodesState').as(state => state == STATE.PROCESSING), error: Value.query('childNodesState').as(state => state == STATE.ERROR && state.data), empty: node => new Expression( Value.query(node, 'childNodesState'), Value.query(node, 'childNodes.length'), (state, itemCount) => !itemCount && state == STATE.READY ) }, handler: { activeChanged() { if (this.active) { this.dataSource.deprecate(); } } } }); <div> <div class="alert alert-info" b:show="{loading}">...</div> <div class="alert alert-warning" b:show="{empty}"> </div> <div class="alert alert-danger" b:show="{error}">{error}</div> <div{page} b:hide="{loading}"/> </div> It so happens that all three pages have a common logic of work:
- upload a list of something
- when loading to show the inscription is loading
- in case of an error, display the text of the error
- if an empty list has been loaded, then show list is empty
Something similar we already did last time.
In order not to duplicate the code in the components of all three pages, we place it in a separate file.
Let's take a closer look at what is happening there:
Our abstract page is just a Node with specific binders and a couple more details.
I will not now dwell on these binders, as they were thoroughly discussed last time .
Now we are more interested in another.
What is active: basis.PROXY ?
Last time, we found that the data set starts synchronization only when its state is UNDEFINED or DEPRECATED and it has an active consumer. These two conditions must be met in order to start the dialing synchronization process. Now we are more interested in the part about " when there is an active consumer ."
The consumer is an entity (heir of basis.data.AbstractData ), which needs data (and, moreover , relevant), represented in another data object.
An active consumer is a consumer with the property active = true .
By default, when a dataSource is assigned to a Node , the Node automatically becomes a consumer of this set.
Great, the consumer is. But is he active?
Again, by default, Node is not an active consumer ( active property = false ).
" And let's just add active: true to the description of Node and the problem will be solved, " you can suggest.
Not so simple. After all, we are making a smart application? So, the set should not just be synchronized once when the application is started, but also update its data as needed.
We have three pages and three sets for each of them (news, friends and audio recordings). We will start synchronization of a set only when we switch to a tab that needs this set. Thus, we not only implement the data update mechanism, but also add a “ lazy ” data synchronization. That is, synchronization only when necessary.
Based on this, when switching to a tab, we must transfer the state of the corresponding set to DEPRECATED .
But how do you know that we have switched to any tab?
Most likely, you have already begun to think that we are moving further and further away from the initial question.
But it is not. A little bit more and you will see how all the plot lines merge together, clarifying the big picture.
So, how do you know that we have switched to any tab?
As in the case of the dataSource , Node automatically becomes the consumer of all its satellites, as well as their owner. We will make it so that when switching between tabs, the corresponding page will become a satellite of the root Node of our application.
So you can force the page to react at the moment when it becomes a satellite and at this moment to transfer the state of its set to DEPRECATED :
// ... module.exports = Node.subclass({ // ... handler: { ownerChanged() { if (this.owner) { this.dataSource.deprecate(); } } } }); Fine! At that moment, when the page becomes a satellite of the root component of our application, the data set will transition to the DEPRECATED state.
But let's say it again: " The data set starts synchronization only when its state is UNDEFINED or DEPRECATED and it has an active consumer. "
With the switch state of the set and the presence of the consumer, we figured out. But what about the activity? If you simply add to the page active: true , then it will always be active and its data source will try to synchronize data immediately upon creation, regardless of whether we need this data now or not.
It does not quite suit us, because there are cases when synchronization is simply impossible. For example, when we have not yet passed the authorization procedure or the Internet is disabled.
In order not to stop processing these cases in the page itself, we will add the active: basis.PROXY property to it , which will translate Node into a special mode in which the Node will be active only when it has an active consumer.
Knowing this, there is no need to track ownerChanged , but rather subscribe to activeChanged . Thus, we will set the set to synchronize data only at the moment of the appearance of the active consumer.
Take another look at the final code of the page component:
let Value = require('basis.data').Value; let Expression = require('basis.data.value').Expression; let STATE = require('basis.data').STATE; let Node = require('basis.ui').Node; module.exports = Node.subclass({ active: basis.PROXY, binding: { loading: Value.query('childNodesState').as(state => state == STATE.PROCESSING), error: Value.query('childNodesState').as(state => state == STATE.ERROR && state.data), empty: node => new Expression( Value.query(node, 'childNodesState'), Value.query(node, 'childNodes.length'), (state, itemCount) => !itemCount && state == STATE.READY ) }, handler: { activeChanged() { if (this.active) { this.dataSource.deprecate(); } } } }); Thus, the page will be active only when it has an active consumer.
As mentioned above, the page user will be a component of our application, and, if you remember, it is active only when the user is authorized.
At the time of activation of the page, the status of its data source goes to DEPRECATED .
So we delegated responsibilities for handling various cases to the main application.
Now the picture should clear up:
- there are three pages (news, friends, audio)
- Each page has its own set of data that can receive data using the VK API
- when switching between tabs, the satellite of the main component of the application will become the corresponding tab page
- page is active only when it has an active consumer
We now turn to the creation of the heirs of the considered component of the page.
Let's start with the news:
let Page = require('../Page'); module.exports = new Page({ template: resource('./list.tmpl'), childClass: { template: resource('./item.tmpl'), binding: { text: 'data:', date: Value.query('data.date').as(format('%D.%M.%Y %H:%I:%S')) } } }); Template leave at your discretion.
The code for the remaining two pages is similar.
The page still has no data source. We will return to this question, but for now let's take a look at how to display the page that corresponds to the open tab.
We modify the main file of our application:
// ... let pageByName = { news: resource('./ui/pages/news/component.js'), friends: resource('./ui/pages/friends/component.js'), audio: resource('./ui/pages/audio/component.js') }; require('basis.app').create({ title: 'VK Client by Basis.JS', element: new Node({ // ... binding: { // ... page: 'satellite:' }, satellite: { // ... page: router.route(':page').param('page').as(page => pageByName[page]) } }) }) // ... A satellite named page will be a component that corresponds to the current route based on the map in the pageByName variable. Now you need to add the use of this satellite to the template:
<div class="container"> <div b:show="{active}"> <!--{header}--> <!--{menu}--> <hr/> <!--{page}--> </div> ... </div> Now, if the pages had a data source, then our application would start working.
Data source
Above was shown a wrapper over the VK API. Among other things, there are methods for getting a list of news, friends and audio recordings. As a data source, we will use basis.entity - typed entities.
We describe the type for the news:
let STATE = require('basis.data').STATE; let entity = require('basis.entity'); let vkApi = require('app.vkApi'); let News = entity.createType('News', { text: String, date: Date }); News.extendReader(data => data.date *= 1000); News.all.setSyncAction(() => vkApi.news().then(News.all.set)); module.exports = News; Each news item consists of two fields - text and date.
Notice that we are expanding the reader . This feature is used in cases where it is necessary to modify the data before they become an instance of the type.
Also, each type has an all property, which is a set of all created objects of this type.
Wherever we create an instance of the News type, it will be placed in the News.all set.
For this set, we define syncAction , that is, the method that will be called when synchronization is needed.
All we need to do is get the data from VKontakte and transfer it to the News.all.set () method, which will replace existing instances of the News type with new ones.
Note that there is no need to explicitly specify the method context as follows: News.all.set.bind (News.all) .
This method is already linked to the context of News.all for ease of use.
Also note that if the method specified in syncAction returns a promise, then the state of the data set will be determined automatically, depending on the state of the promise.
Now News.all can be transferred as a data source for a news page. Accordingly, when the page is activated, the News.all state will be transferred to DEPRECATED and the synchronization process described in the syncAction set will start .
News.all .
Similarly, we describe the remaining two types:
Friends entity
let entity = require('basis.entity'); let vkApi = require('app.vkApi'); let Friends = entity.createType('Friends', { photo: String, first_name: String, last_name: String }); Friends.extendReader(data => data.photo = data.photo_100); Friends.all.setSyncAction(() => vkApi.friends().then(Friends.all.set)); module.exports = Friends; Audio entity
let entity = require('basis.entity'); let vkApi = require('app.vkApi'); let Audio = entity.createType('Audio', { artist: String, title: String, duration: Date }); Audio.extendReader(data => data.duration *= 1000); Audio.all.setSyncAction(() => vkApi.audio().then(Audio.all.set)); module.exports = Audio; Now select News.all as the data source for the page:
let Value = require('basis.data').Value; let Page = require('../Page'); let News = require('app.type.news'); let format = require('basis.date').format; let dataSource = News.all; module.exports = new Page({ template: resource('./list.tmpl'), dataSource: dataSource, childClass: { template: resource('./item.tmpl'), binding: { text: 'data:', date: Value.query('data.date').as(format('%D.%M.%Y %H:%I:%S')) } } }); Similarly, we will point out the corresponding sets to other pages.
Friends page
let Page = require('../Page'); let Friends = require('app.type.friends'); let dataSource = Friends.all; module.exports = new Page({ template: resource('./list.tmpl'), dataSource: dataSource, childClass: { template: resource('./item.tmpl'), binding: { photo: 'data:', first_name: 'data:', last_name: 'data:' } } }); Audio page
let Value = require('basis.data').Value; let Page = require('../Page'); let Audio = require('app.type.audio'); let format = require('basis.date').format; let dataSource = Audio.all; module.exports = new Page({ template: resource('./list.tmpl'), dataSource: dataSource, childClass: { template: resource('./item.tmpl'), binding: { artist: 'data:', title: 'data:', duration: Value.query('data.duration').as(format('%I:%S')) } } }); The markup is either at your discretion, or by reference to the repository at the end of the article.
Notice that the type of markup is not important for the presentation, it can be any.
Everything is ready, but let's add some more improvements.
Add page 404. To do this, modify our main file:
// ... let pageByName = { news: resource('./ui/pages/news/component.js'), friends: resource('./ui/pages/friends/component.js'), audio: resource('./ui/pages/audio/component.js'), notFound: resource('./ui/pages/404/component.js') }; require('basis.app').create({ title: 'VK Client by Basis.JS', element: new Node({ satellite: { header: Header, menu: Menu, page: router.route(':page').param('page').as(page => pageByName[page] || pageByName.notFound) } // ... }) }) // ... All we did was add a new route to the route map and modify the tracking of the route change. If the required route is not found in the route map, then use the notFound route .

By the way, did you notice that the components are connected through a resource and not through require?
resource allows you to implement lazy initialization of components.
That is, the component will not be initialized immediately, but only at the moment when it is needed for the first time.
More information about resources can be read in the relevant section of the documentation .
And one moment.The fact is that on your VKontakte wall you can come across not only text news, but also video / photos without text. We will deal with the processing of these cases another time, but for now let's just filter the news so that only the news that has the text is displayed. To do this, we modify the news component:
let Page = require('../Page'); let Value = require('basis.data').Value; let News = require('app.type.news'); let format = require('basis.date').format; let Filter = require('basis.data.dataset').Filter; let textOnlyNews = new Filter({ source: News.all, state: Value.query('source.state'), rule: 'data.text', deprecate() { this.source.deprecate(); } }); module.exports = new Page({ template: resource('./list.tmpl'), dataSource: textOnlyNews, childClass: { template: resource('./item.tmpl'), binding: { text: 'data:', date: Value.query('data.date').as(format('%D.%M.%Y %H:%I:%S')) } } }); All that we have done is to replace the data source of the news page with a filter that will drop all news without text.
And finally ... revive the header component:
let Node = require('basis.ui').Node; let STATE = require('basis.data').STATE; let DataObject = require('basis.data').Object; let vkApi = require('app.vkApi'); let dataSource = new DataObject({ data: { firstName: '', lastName: '' }, syncAction() { return vkApi.me().then(me => { this.update({ firstName: me.first_name, lastName: me.last_name }); }); } }); module.exports = Node.subclass({ active: basis.PROXY, delegate: dataSource, template: '<h1> {firstName} {lastName}!</h1>', binding: { firstName: 'data:', lastName: 'data:' } }); Thus, the title component learned to receive and display the name and surname of the account holder.
Conclusion, but not the end
So, today we have created a full-fledged client for VKontakte on basis.js. The application can log in and synchronize data with the server.
Please note that, like last time, we follow the FRP path and focus on working with data. In other words: we build the data flow in such a way that the application performs its tasks. At the same time, the specificity of basis.js is such that the client code turns out to be rather linear due to the absence of loops and a large number of branches. At least the indicated tasks can be solved without them.
In the following articles we will improve our client and increase its functionality.
Thank you for your interest in basis.js!
Great thanks to lahmatiyfor invaluable advice;)
Some useful links:
- Repository with code from the article
- Documentation basis.js
- Source code basis.js
- gitter-chat where you can ask questions both to me and the author basis.js
Source: https://habr.com/ru/post/305292/
All Articles