2D magic in detail. Part one. Shine

Games are large and three-dimensional have long been pleasing the eye with realistic lighting, soft shadows, highlights and other lighting beauty. In the same two-dimensional games - at the head of the table are the direct hands of the artist, who will highlight and shade where necessary, sprite behind sprite, or even pixel by pixel. And if you want dynamics without an artist, and yes, in pixel art?
Small note
Imagine:
Battle mage enters the field in front of an ancient castle. The grass is crushed under his boots, the evening sun blinds his eyes. The magician waves his staff - a flash! The fireball hits the ground in front of the castle, the shock wave picks up dust and bends blades of grass. Clods of burnt green mixed with the ground fly apart. On the stone wall - burning and soot. Persevered.
And now we will make a small, but highly technological, toy out of this imaginary and spectacular image and share our achievements in the Unity3D Asset store.
A series of articles is planned in which they will be described: light, mesh generation, own particle systems, work with samopisnymi editors, ragdoll on Verlet integration. In the articles there will be descriptions of algorithms, both invented from the head, and those found in the vast world wide web. In the articles there will be no descriptions of the form "Let's add a sprite and a camera to the stage, call it an article worthy of Habr, and put good people on the court." At the time of writing this (first) article, the project has not yet been brought to mind, so the final part is planned to analyze errors and other additions.
Article cycle
Part one. Shine.
Part two. Structure.
Part Three Global coverage.
What is light in 2D?
Let's be honest - "realistic light" means "good looking," and not at all "reliably simulating optical laws." Yes, and 2D - is also not quite true, because if the light source is in the same plane as the sprites - we will see absolutely nothing. So let's decide what to consider as lighting.
Bonfires, lanterns, fireballs and other magic are our main sources of light. They are located approximately in the same plane where the main gameplay takes place. And also - the sky, which illuminates the whole scene, and the sun / moon, which are not visible only in the interior.
Apparently, all light sources can be broken as follows: Point. Point source of light, for which we can specify the position, brightness, color and radius of action.
 Ambient. A light source that is not limited in distance, such as the sun. Its light does not penetrate the premises. Determined by position (to cast shadows correctly), brightness and color.
 Diffuse ambient "Real" diffused light, penetrating anywhere. It would be great if the color of the sky would correlate with light sources of this type. Determined by color and brightness.
Icons of the types of sources that you see above are also involved in the project. Unity3D has a special mechanism for rendering "debugging" information in the editor - Gizmo. And with the help of them you can draw your icons, which is very convenient for working with objects:

Interested - google in the direction of Gizmos.DrawIcon and MonoBehaviour.OnDrawGizmos .
And now we divide the game scene into layers, starting with the nearest one, and see what and how to light:

Walls and other obstacles. Solid objects, they cast shadows and are illuminated only by diffused light (since all other sources are "behind them").

Game characters, grass, particles, etc. Here is the main gameplay. All objects should be illuminated by light sources, taking into account the shadows from the walls.
And still background walls. These objects are behind the gameplay, but close enough to also be illuminated by point light sources. Shadows from obstacles are also counted.

Mountains, castles and other background. They are far from point sources, illuminated only by diffused light.
Sky. It is in itself a source of diffuse lighting. Point sources do not affect it (this is not entirely true, but I am running ahead).
Shadowing
So, we dealt with light sources, with game objects too. It's time to do the shadows.
Our sources of light are point (the diffuse illumination of shadows does not cast), so if a source of light is not “visible” from a pixel (the ray from the pixel to the source crosses obstacles) - there is a shadow. Cool! It remains only to run through all the pixels and look for intersections for each ... No, no, no, we will not go this way, do not worry! In 3d games there is a method called Shadow volumes. The idea is quite simple: take a mesh that casts a shadow, “pull it out” from the light source, and then, when rendering, look where the pixel is - inside the mesh or outside. Let's try the same! Let's take meshes for our obstacles, draw them out ... Yes, yes, there is no mesh. However, it does not matter - there is a texture with sprites, and we will use it.
The idea is as follows: pull information about sprites from textures, find faces in each sprite, and build mesh on these faces. All this is done in ScriptableObject'e, through a button in the editor. The output is an associative array, where the key is the sprite, and the value is information about the faces.
For reasons that are unclear to me, there are ScriptableObjects in Unity3D, but for some reason there is no way to create it without writing code. So, if you want to make your objects, this is useful.
There are quite a few functions with assets in the editor, they are in the AssetDatabase class, and are used, for example, to get sprites from a texture:
Sprite[] GetSprites(Texture2D texture) { var path = AssetDatabase.GetAssetPath(texture); return AssetDatabase.LoadAllAssetsAtPath(path).OfType<Sprite>().ToArray(); } Then we get the pixel colors through texture.GetPixels (), we run our hands and compare the neighboring pixels, whether the value of the alpha channel has changed.
At the output, we get two arrays (vertical and horizontal) of such structures (the values are whole, because we measure in pixels):
public struct BasisLine { public int normal; public int position; public int start; public int end; } And finally, to fully work with ScriptableObjects (and anything else!), Self-written editors are very useful. The benefit in Unity3D is done quite simply:
[CustomEditor(typeof(Edges.SpriteGenerator))] public class SpriteGeneratorEditor : Editor { public override void OnInspectorGUI() { this.DrawDefaultInspector(); if (targets.Length != 1) return; var generator = (Edges.SpriteGenerator)target; if (GUILayout.Button("Generate")) { generator.UpdateMeshes(true); serializedObject.ApplyModifiedProperties(); } } } Do not repeat my mistakes - carefully watch that the private serializable fields are marked with [SerializeField] and the classes with [System.Serializable], otherwise you will then look for where the data from the objects in the build got to (everything will be fine in the editor, restart Unity3D).
Another point: when placing obstacles on the scene, it makes sense to remove unnecessary edges (those that are in other obstacles). First, it optimizes the mesh with the shadows. Secondly, it simplifies life in the following articles (for example, information on the surface of obstacles is used for planting grass). In short: when generating information about sprites, in addition to the faces, we find rectangles that completely fill the sprite. I make several passes — top-down, left-to-right, etc., and then choose the one that has fewer rectangles. When placed on the stage, we run over obstacle sprites, find the intersections of AABB sprites, and then the faces of one sprite with the rectangles of the other. Of course, there are all sorts of tricky moments, such as sprites, sides touching each other (and the face needs to be partially removed), or sprites that are superimposed so that the edge of one continues the edge of the other (and these faces must be merged into one). But the result is worth it.

Finally, we have everything to finally build shadow meshes. The idea is quite simple. For each face of SF with normal N, we construct a rectangle ABCD, where the coordinates and normals are:
A.vertex = D.vertex = S; B.vertex = C.vertex = F; A.normal = B.normal = 0; C.normal = D.normal = 0; That is, the thickness of the rectangle is zero, but two faces have a normal, and two have a normal zero. Now we can extend those vertices in the shader where the non-zero normal is directed away from the light source. This will be our shadow:

Shader "NEngine/Light/Shadow" { Properties { _LightPosition ("Light position", Vector) = (0, 0, 0, 0) _ShadowLength ("Shadow length", Range(0, 30)) = 0.1 _ShadowColor ("Shadow color", Color) = (0, 0, 0, 1) } SubShader { Pass { Tags { "Queue"="Transparent" "IgnoreProjector"="True" "RenderType"="Transparent" } Cull Off CGPROGRAM #pragma vertex vert #pragma fragment frag struct appdata { fixed4 vertex : POSITION; fixed4 normal : NORMAL; }; struct v2f { fixed4 vertex : SV_POSITION; fixed4 color : COLOR; }; fixed2 _LightPosition; fixed _ShadowLength; fixed4 _ShadowColor; v2f vert(appdata v) { v2f o; fixed2 normal = v.normal.xy; fixed2 position = v.vertex.xy; fixed2 delta = normalize(_LightPosition - position); if (dot(delta, normal) > 0) { o.vertex = 0; o.color = 0; return o; } if (v.normal.z == 0) { o.color = _ShadowColor; o.vertex = mul(UNITY_MATRIX_MVP, v.vertex); return o; } o.color = _ShadowColor; fixed2 direction = -delta * _ShadowLength; fixed4 vertex = v.vertex + fixed4(direction.xy, 0, 0); o.vertex = mul(UNITY_MATRIX_MVP, vertex); return o; } fixed4 frag(v2f i) : SV_Target { return i.color; } ENDCG } } } And at the output we get the following image:

Shading, pixels and light
Initially, I made the shadows in this way, and I had no real light sources. Just some abstract grayish shadows. They were superimposed on objects with the stencil buffer — all the sprites on which the shadow can be displayed, recorded the value in the buffer, and the shadows checked the buffer before drawing the pixel. But not only does it look unrealistic, it also knocks itself out of the style - the pixels are large. We think further.
And after thinking, we do Light2DManager, in which the light sources are recorded when they appear, and then drawn into the texture with a small resolution. Each source is drawn as:
- First, in the material with shadows we record the position of the current source;
- Take a special sprite (for Point - this is a sprite with a radial gradient, for Ambient - just a rectangular sprite the size of a camera screen) and change its position to the source position;
- We draw the shadows and the sprite of the light into the texture (the light is cut off by the shader using the stencil buffer).
But with the conclusion on the screen of this lighting there is an interesting moment. The fact is that the color of a pixel on the screen is usually calculated as follows:
OBJECT_COLOR * LIGHT_COLOR Since the color of the pixel and the color of the light source range from 0 to 1, the result will be from zero to one. And more "from zero" than "to one" - the sprites are not white and do their bit. And sometimes you want to make such a bright source of light so that even the dark stones of the castle corridors shine like the morning sky. Add an additional coefficient HDRRatio, equal to, for example 10. And in the shader of the light source we will get the result like this:
fixed4(light.a * _Amount / _HDRRatio, 0, 0, light.a) And when mixing light and scene, multiply by this factor. Thus, we lose the lighting gradations (how much we lose - we define HDRRatio), but we can re-highlight the scene.
We will mix the light with the scene through the post-effect - a small shader that will impose light depending on the value in the stencil buffer (remember that not all elements need to be lit?). And we will summarize all Diffuse ambient sources, with some coefficient set as the background color on the main camera and as the background lighting for all objects in the scene.

Soft shadows
In pixel art there is an important rule, it can be found almost in any tutorial on this kind of visual art. When drawing a straight oblique line, you need to make sure that the pixels do not look broken, the transitions should be soft and not noticeable.

The upper lines are broken, coarse. Lower - more smooth.
But the lines of shadows cannot observe this rule now, after all, the shader lacks the talent of artists (so, gentlemen designers, do not worry, your work will never replace the soulless graphics card conveyor). Anyway, since when are the sun's shadows so harsh? But without smoothing out the shadows it will not work - the light is cut off by the stencil buffer, and there either there is a shadow or not, the middle does not exist.
Google issues scary words to our requests - umbra and penumbra, gives pictures of someone's projects from which drooling. Their general idea is to make more complex meshes, in which there is both a shadow and a penumbra. But we will go the other way.
Note that the closer the shadow is to the source of the shadow, the clearer it is. So, we need to somehow blur the shadow, taking into account the distance to the object.
Draw a sprite of light in only one channel (for example, red). Draw a shadow in another channel (blue). And also, draw the most distant points of the shadow (remember how it is built? The most distant ones are those whose normal is not zero) in the remaining green channel. We will get just such a picture, which has everything you need: light, shadow and distance from the source of the shadow:

Blur this image, but if usually with a blur (if you take the neighboring pixels), we do something like this:
(current + top + bottom + right + left) / 5.0 now we will consider the value from the green channel as weight:
(current + top * top.g + bottom * bottom.g + right * right.g + left * left.g) / (top.g + bottom.g + right.g + left.g + 1) Now we mix the R-channel with the light and the B-channel with the shadow without a gradient (in fact, simply multiply the two channels and the color of the light source). We get neat blurry shadows:


')
Beautiful
In the previous screenshot, the grass is so bright because it is lit by the sun, but it seems as if it is glowing by itself. Add light on the verge of sprites obstacles.
In the shadow shader, which is hidden somewhere in this article, the shadows that shine "inside" the object are cut off. Now we need them to make self-shadowing for the edges. The faces themselves will receive the light thanks to our post-effect for mixing the lighting and the scene (again, using stencil buffer). Dirty hack - so that the object does not obscure the edges nearest to the source, we will move the shadow points in which the normal is zero away from the light source (by one pixel).
... Then we also move in the direction of the normal, if only one pixel is exactly without a shadow. It looks something like this:
fixed2 direction = -delta * _PixelSize; fixed2 normalDirection = -v.normal.xy * _PixelSize; if (abs(direction.x) < abs(normalDirection.x)) direction.x = normalDirection.x; if (abs(direction.y) < abs(normalDirection.y)) direction.y = normalDirection.y; o.color = fixed4(0, 0, 1, 1); o.vertex = mul(UNITY_MATRIX_MVP, v.vertex + fixed4(direction, 0, 0)); return o; That's better:

It also happens that there is a lot of vapor, dust or smoke in the air, and the particles reflect light, forming beautiful rays in the air, which are called "twilight rays" or "god rays". We already have everything we need to make them - we just need to allow the post-effect to draw light where nothing is written in the stencil buffer. There are two points: first, add a certain factor to adjust the strength of such lighting, and secondly, this light should be added to the sky color, not multiplied: the rays do not depend on the sky color, only on dustiness.

Conclusion
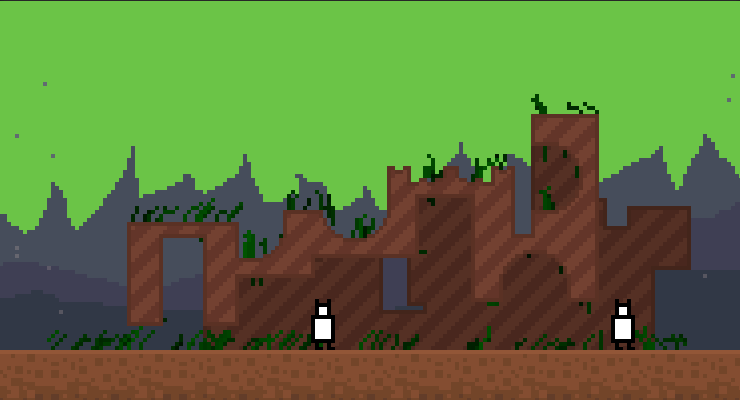
It remains to see how it all looks in the dynamics:
With Gizmo lights, bots, wind and obstacles included:

So, we have quite a working light for a pixelart project. It supports dynamic objects, soft shadows and other effects. It is possible to move on! At the moment there are several areas in the project, which are partially completed, and about which, I hope, it will be interesting to read. Therefore, what the next article will be about - I leave it to you.
Of course, there are enough unsolved issues, for example, optimization and work on mobile devices. But about this - in the next times.
Source: https://habr.com/ru/post/305252/
All Articles