Increase work efficiency in Xamarin.Forms

Friends! Another article on the development of mobile applications on Xamarin. We do not stop to consider the features of using Xamarin.Forms when developing business applications for iOS and Android. All articles from the column can be found and read on the link #xamarincolumnIn the last article, we looked at how to increase productivity when developing mobile applications using Xamarin, and also noted the basic mechanisms for improving the performance of business applications based on Xamarin.Forms.
In today's article we will continue the chosen course and tell you about using Fody to shorten the necessary program code, and also learn about the use of icon fonts and the NControlView library to manually draw the interface elements.
')
What is a business application?
In order for us to be on the same page and use the same concepts, let's first define what the business applications are different from games and other types of programs.
Mobile applications, like any other software products, are created for specific purposes, based on which you can already decide on the choice of suitable development tools.
For simplicity, we divide the types of mobile applications by the following criteria:
- Interface complexity (UI) - the availability and use of their animations and specials. effects, its own user interface concept.
- Using the capabilities of the OS - optimization for different hardware, the use of system mechanisms.
- Frequency of use - how often the user will run the application.
Based on these criteria, we conditionally (there are always exceptions!) We divide all applications into the following main segments:
- games (high UI complexity, high use of OS functionality, frequent use),
- entertainment / multimedia (medium UI complexity, high use of OS functionality, frequent use),
- business applications (medium and low UI complexity, low use of OS capabilities, medium and low frequency of use),
- communication (medium and low UI complexity, low use of OS capabilities, high frequency of use).
In the past, we have been involved in the creation of all these types of applications, so we know the specifics of developing each of them. If we look at games, here we would recommend using Unity3D or a similar mature framework. For multimedia and communication, it is better to choose classic Xamarin.iOS and Xamarin.Android. But for business applications, Xamarin.Forms is excellent, especially given the reduction in labor costs for development and maintenance by an average of 60% relative to the creation of separate versions on iOS and Android.
So, with the fact that such a business application, we decided.
Reducing code size with Fody
One of the reasons why we came to Xamarin, and then to Xamarin.Forms for developing business applications, is the high productivity of development (“the same result with less effort”). Therefore, today we want to talk about a small tweak, which can significantly reduce the amount of code when describing the ViewModel. This will help us a great tool Fody ( useful article on Habré ).
Recall that in order to implement the MVVM pattern and property binding, the ViewModel should trigger the PropertyChanged event, after which the actual data transfer for display in the View occurs.
The classical approach involves the creation of private variables and the manual call of PropertyChanged, which leads to the creation of a fairly voluminous ViewModel:
using System.Runtime.CompilerServices; using System.ComponentModel; public class LoginViewModel : INotifyPropertyChanged { public event PropertyChangedEventHandler PropertyChanged; private string _login; public string Login { get { return _login; } set { if (value != _login) { _login = value; NotifyPropertyChanged (); } } } private string _password; public string Password { get { return _password; } set { if (value != _password) { _password = value; NotifyPropertyChanged (); } } } private void NotifyPropertyChanged ([CallerMemberName] string propertyName = "") { if (PropertyChanged != null) { PropertyChanged (this, new PropertyChangedEventArgs (propertyName)); } } } Volumetric, isn't it?
And here's what the same ViewModel will look like when using the PropertyChanged.Fody plugin:
using PropertyChanged; [ImplementPropertyChanged] public class LoginViewModel { public string Login { get; set; } public string Password { get; set; } } Noticeable reduction of the routine :) For this you just need to add this plugin via Nuget.

In Xamarin Studio, you may need to manually set the Build Action -> Content, and Quick Properties -> Copy to Output Directory properties of the FodyWeavers.xml file, plus add the plugin information to the FodyWeavers.xml file:
<?xml version="1.0" encoding="utf-8" ?> <Weavers> <PropertyChanged /> </Weavers> In our practice, we also use the following Fody plugins (others have not yet taken root):
Icon Fonts
In modern practice, mobile development has to work with a large number of screen resolutions, so earlier in the application you had to have a large number of images of different sizes so that the icons were displayed correctly, without artifacts and unnecessary memory usage. A few years ago, in the world of web development, the iconic fonts Font Awesome began to be actively used, which made it possible to escape from a large number of images and flexibly adapt the layout to various resolutions and display density. Over time, this approach has migrated to the field of mobile development.
Now there are a large number of free and open icon fonts, but the most appropriate would be to create their own icon fonts containing the necessary sets of images for each platform.
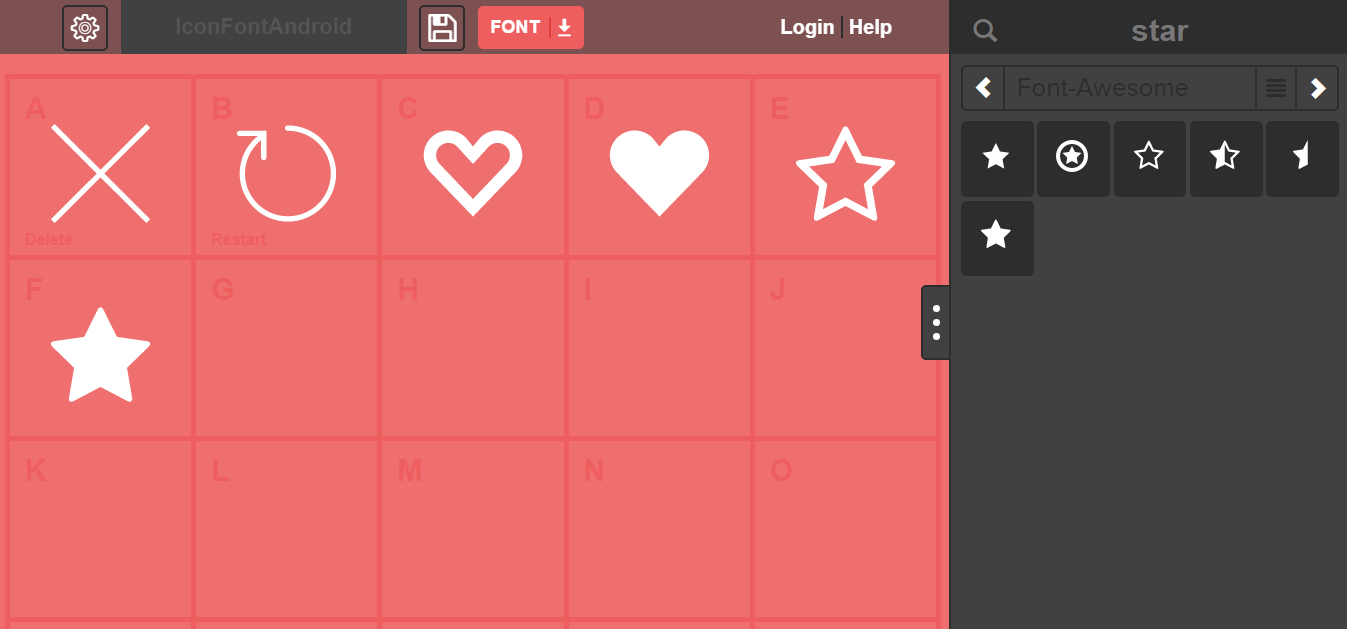
We will start by creating an icon font. For this we need images in the SVG format and the free Glyphter service, which out of the box allows you to use a large number of icons.
We recommend creating the icons themselves in the style of the target platform or using ready-made sets (for example, icons8 ).
Next, we need to download these fonts in TTF format and put them in the correct folders:
- Assets \ Fonts for Android
- Resources \ Fonts for iOS (plus they need to be registered in Info.plist)
In order to use their icon font, you will need to create your own simple Label heir with renders for each platform. For details, see the Xamarin documentation.
And finally, for those who will have enough ready-made fonts (there are already all renderers and the necessary resources have been added), they can use the ready-made Iconize library for Xamarin.Forms (assemblies are available in Nuget ).
Draw with NControl
Sometimes, although not so often, when developing applications, it becomes necessary to implement the manual drawing of an interface element. Yes, you can instead use ready-made images (for all resolutions, with the preservation of proportions and other small difficult) or use 9-patch SVG . However, you can often do a simple manual drawing the desired item. For this purpose, the NControl component was created. In short, this is the mechanism of virtualization of rendering on top of the standard iOS, Android and Windows mechanisms.
First of all (like many other custom controls and libraries), you need to initialize the component: add the NControlViewRenderer.Init () line after Forms.Init () in the AppDelegate classes for iOS and MainActivity for Android.
Then you can directly add the necessary component in the C # code:
var myView = new NControlView { DrawingFunction = (canvas, rect) => { canvas.DrawLine(rect.Left, rect.Top, rect.Width, rect.Height, NGraphics.Colors.Red); canvas.DrawLine(rect.Width, rect.Top, rect.Left, rect.Height, NGraphics.Colors.Yellow); } }; But in our opinion it is better to create your successor from NControlView and use it in Xaml:
public class MyControl: NControlView { public override void Draw(NGraphics.ICanvas canvas, NGraphics.Rect rect) { canvas.DrawLine(rect.Left, rect.Top, rect.Width, rect.Height, NGraphics.Colors.Red); canvas.DrawLine(rect.Width, rect.Top, rect.Left, rect.Height, NGraphics.Colors.Yellow); } } You can also use NControl to create various user interface animations — an example of the implementation of opening a dialog in the spirit of Skype .
For more examples, see the component description page: github.com/chrfalch/NControl
Conclusion
So, today we have defined a class of applications for which Xamarin.Forms is well suited, met Fody, icon fonts and the NControl library, which allow us to simplify and speed up the creation of business applications.
In the next article, we will take a closer look at working with screens and states, as well as small tweaks to make applications complete.
Stay in touch and add your comments and questions!
About the authors

Vyacheslav Chernikov - head of development at Binwell . In the past, he was one of the Nokia Champion and Qt Certified Specialists, currently he is the Xamarin and Azure platform specialist. He came to the sphere of mobile in 2005, since 2008 he has been developing mobile applications: he started with Symbian, Maemo, Meego, Windows Mobile, then switched to iOS, Android and Windows Phone.
Other articles by the author:
- OAuth Authorization for Xamarin Applications
- Deploy mobile software with Microsoft devops pipeline
- DevOps in the service of man
- Automate non-automated, or about Xamarin in real projects
- Convenient REST for Xamarin Applications
- Quickly create MVP (minimum viable product) based on Microsoft Azure and Xamarin.Forms
- Preparing Xamarin.Forms: Setting Up the Environment and First Steps
- Working with screen states in Xamarin.Forms
- Connecting Facebook SDK for Xamarin.Forms
- We connect VKontakte SDK for Xamarin.Forms
useful links
- Announcement of free Xamarin tools for developing cross-platform C # applications by reference
- Visual Studio 2015 Community, Visual Studio Team Services, Visual Studio Code: free offers for developers
- Additional and free tools and services in Visual Studio Dev Essentials
- Laboratory work on the development, testing and management of the life cycle of software for Visual Studio 2015
Source: https://habr.com/ru/post/304678/
All Articles