We work with Azure IoT devices from UWP applications

In continuation of the article Send data from the Arduino to the Azure IoT Hub, I’ll talk about how you can read and send data to the IoT Hub of the Azure cloud from a UWP application. This is done using the Microsoft.Azure.Devices.Client client library. To monitor these messages sent to the cloud, you can use Device Explorer or iothub-explorer .
In addition, I will talk about how to create a simple UWP application that sends data from the cloud to a device. Finally, I will give an example of how you can get a message from the Azure IoT hub on the Arduino MKR1000.
Simulate an Azure IoT device using a UWP application
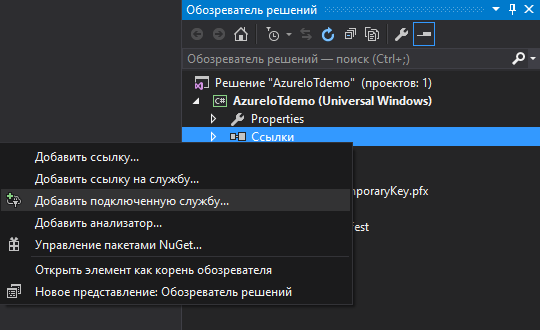
Download the Connected Service for Azure IoT Hub (current version 1.5). Install. Create a universal application project. Add a link to the connected service
')
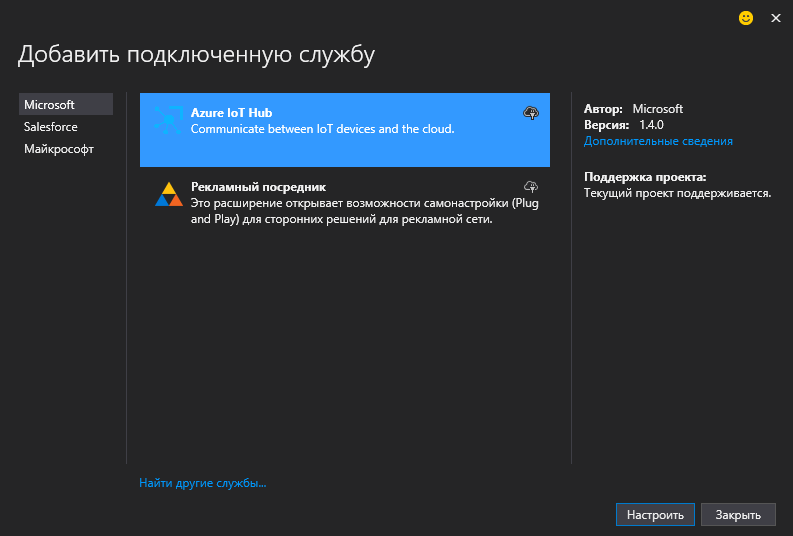
Click "Customize." The choice will be offered to us 2 options.
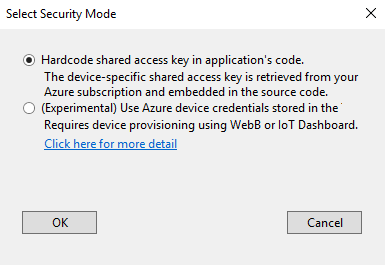
The first version is classic. If we have a normal project without special security requirements. The connection string to the IoT hub will be stored in the code.
The second option is experimental. The device is registered on the Windows Device Portal. Then, after selecting the TPM configuration item in the menu, you need to install the TPM (Trusted Platform Module) on the device and enter the key data from the Azure hub. As a result, the device will not store the primary access key to Azure. Instead, TPM devices will generate SAS tokens with a short lifespan.
Selecting the first option and entering your Azure user ID will result in a hub selection window:
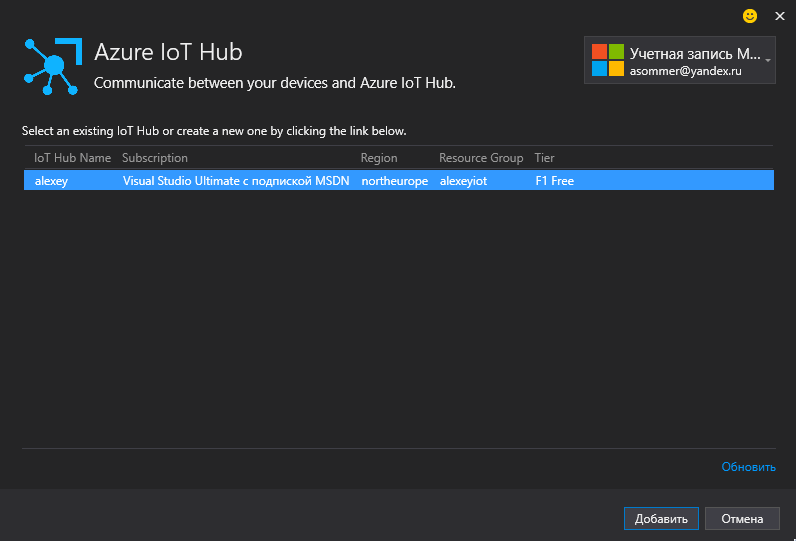
In my case, the choice is not particularly necessary, since I created only one hub. I add it.
I get an invitation to choose a device. Again, in my case, only one device is registered (I use the free features of Azure)
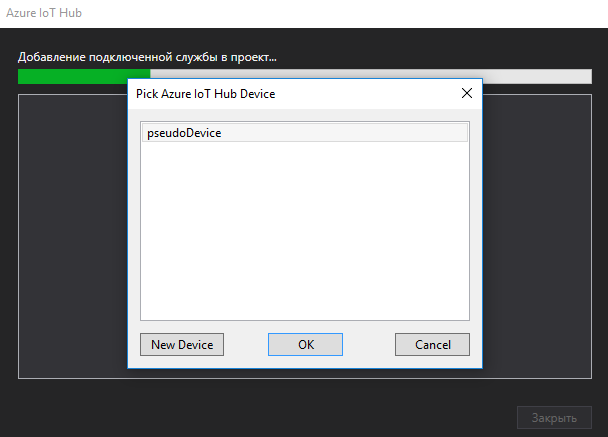
After selecting the device, the installation of various necessary packages:
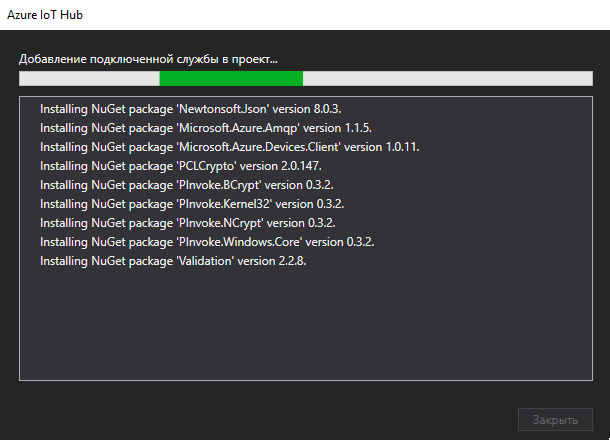
Upon completion of the installation, we will open a page with a manual that suggests using:
SendDeviceToCloudMessageAsync() to send messages. And to receive messages:
ReceiveCloudToDeviceMessageAsync() Add a button and check if we receive a message sent via DeviceExplorer:
private async void btnCheck_Click(object sender, RoutedEventArgs e) { string message = await AzureIoTHub.ReceiveCloudToDeviceMessageAsync(); } If with the receipt everything should be clear, then when sending messages using SendDeviceToCloudMessageAsync, the same line of text is always sent. Consider the code that is in the AzureIoTHub.cs file:
public static async Task SendDeviceToCloudMessageAsync() { var deviceClient = DeviceClient.CreateFromConnectionString(deviceConnectionString, TransportType.Amqp); #if WINDOWS_UWP var str = "Hello, Cloud from a UWP C# app!"; #else var str = "Hello, Cloud from a C# app!"; #endif var message = new Message(Encoding.ASCII.GetBytes(str)); await deviceClient.SendEventAsync(message); } Initially, I did not quite understand why Task does not accept a string of text as a parameter to send exactly it, but sends a hard-coded value of "Hello ...". It turned out that this was done specifically so that the developers did not copy the code, but changed it. So we can take out the creation of the deviceClient object somewhere in a separate method and call it in the right place (when loading the page, for example). Well, the task that sends the message, we can already make the receiving parameter. By the way, I managed to send a message in UTF8 encoding:
public static async Task SendDeviceToCloudMessageAsync(string texttosend) { var message = new Message(Encoding.UTF8.GetBytes(texttosend)); await deviceClient.SendEventAsync(message); } Now you can get a message using Device Explorer or send it to the UWP application.
»Link to English article: Connect your Windows app to Azure IoT Hub with Visual Studio
" Link to the GitHub project page of the Connected Service for Azure IoT Hub (if something is suddenly wrong, there is where to submit a bug)
Once again I will clarify that there may be confusion. You can send a message both from the device to the cloud and from the cloud to the device. I will give an example of a UWP application, which this time sends a message from the cloud to the device.
We send a message from the cloud to the device using the UWP application
In the NuGet package manager, you need to search for the Microsoft.Azure.Devices package and install it. Just in case, direct link: Microsoft Azure IoT Service SDK
Add namespaces:
using Microsoft.Azure.Devices; using System.Threading.Tasks; using System.Text; And the following variables:
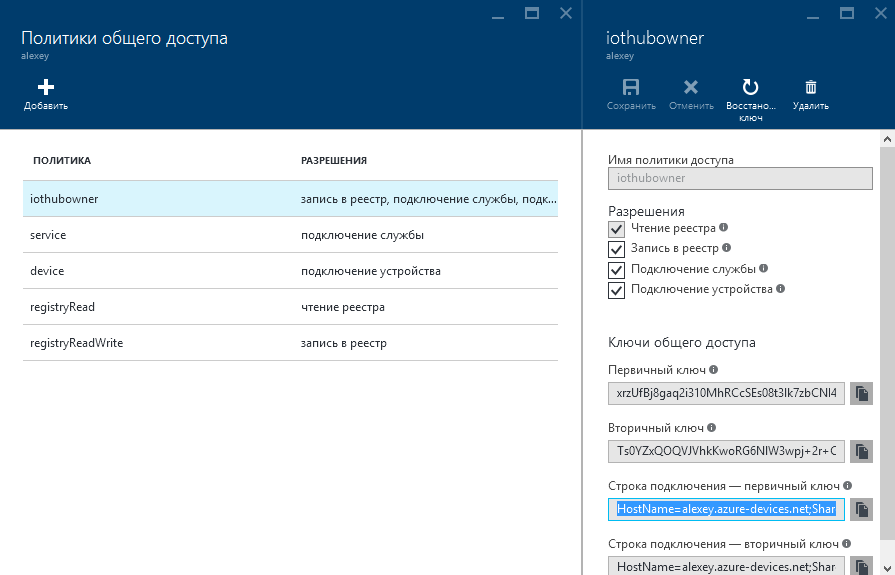
static ServiceClient serviceClient; static string connectionString = "{ iot hub}"; Where the connection string is taken from the Azure portal:
We will need a method that sends text to the device.
private async static Task SendCloudToDeviceMessageAsync() { var commandMessage = new Message(Encoding.UTF8.GetBytes("light on")); // await serviceClient.SendAsync("pseudoDevice", commandMessage); } Here pseudoDevice is the device id to which the message will be sent.
It remains to add in MainPage after this.InitializeComponent ():
serviceClient = ServiceClient.CreateFromConnectionString(connectionString); And somewhere in the event of pressing the button, you can call a task that sends a message to the device:
private async void Button_Click(object sender, RoutedEventArgs e) { await SendCloudToDeviceMessageAsync(); } Our UWP application is ready. Now you can send the "light on" command to our device.
Receiving a message from Azure IoT hub with Arduino MKR1000
Using the following sketch, you can get a message from the hub. In case a message with the text “light on” is received, the Arduino MKR1000 will turn on the LED.
The sketch needs to be slightly configured. Enter the data of your Wi-Fi network:
char ssid[] = "xxx"; // SSID Wi-Fi char pass[] = "xxxxxxxx"; // And the data of your Azure IoT hub:
char hostname[] = "xxxxxx.azure-devices.net"; // host name address for your Azure IoT Hub char feeduri[] = "/devices/xxxxxxx/messages/devicebound?api-version=2016-02-03"; // xxxxxxx id char authSAS[] = "xxxxxxxxxxxxxxxxxxxxxxxxxxxxxxxxxxxxxxxxxxxx"; How to get the authSAS string (SAS Token) using the Device Explorer I described in the last article . This is a string that starts with “SharedAccessSignature sr =”.
Source: https://habr.com/ru/post/303866/
All Articles