[iOS 10] We build Siri support into your iOS application

Apple showed new iOS 10 and macOS Sierra at WWDC 2016 , and I did not miss the opportunity to immediately upgrade my devices.
One of the key updates is the emergence of SiriKit for developers, now you and I have the opportunity to use Siri in our own applications. And today we will make our first application with support for Siri (project sources at the end of the article)
(!) Dear Habrahabra readers, please send all errors and edits to this article to private messages.
')
My impressions of iOS 10 and macOS
In the new macOS Siri appeared - it is immediately evident, with new features. Finally, the exchange of links between iOS and macOS has started - as soon as you open the page on the iPhone / iPad - the Safari icon on the mac immediately opens this page (Previously, this function worked through time). And of course it is very cool - that copying text on iOS - it can be pasted on macOS. With pictures and photos is the same - one click on the iPhone, and the photo is already on the laptop, you no longer need to mail the photo to yourself. By default, telemetry is enabled on macOS, which I immediately turned off (screenshot). Of the minuses, iOS 10 is really slow, sometimes (not always) on the iPhone 5S and iPad Air slows down the scroll, but overall, the interface looks more stylish, more contrast, the UI changes are minor, but overall “more stylish and minimalist” :) In terms of Design UI is also worth noting the updated form for IN-APP notifications.

(!) If someone installed iOS 10, then in order to work with the device in the old xcode (7.3), you just need to copy the folder “DeviceSupport / 10.0” from the same xcode 8.0 to the same place.
From the catalog:
Xcode-beta.app/Contents/Developer/Platforms/iPhoneOS.platform/DeviceSupport/10.0 (14A5261u) /
To folder:
Xcode.app/Contents/Developer/Platforms/iPhoneOS.platform/DeviceSupport/10.0 (14A5261u) /
Apple offers several scenarios for third-party Siri use:
- Audio and video calls
- Work with messages and contacts
- Making payments using Siri
- Search for photos
- Trainings
- Work with cards (taxi call)
In this article, I will show you how to create a StoryBoard interface for Siri and call our functions using a voice assistant.
First, download and install Xcode 8 and create a new application with a single ViewController and call it, for example “DemoApp”.
To add voice support, we will have to add a new extension, to do this, select the top line (project file) in the left pane of the file manager and select Editor -> Add target ...

Let's call our extension “DemoAppSiriIntent”, just do not forget to check the presence of a tick in front of “Include UI Extension”

Also for Siri to work, we need to add the CoreLocation.framework library to the project.

We have new files in the project.
- IntentHandler.m - file with CallBack functions returned by Siri
- IntentViewController.m - file for working with StoryBoard interface, which is located next to, in the MainInterface.storyboard file
To begin with, we will teach our application to run “Fitness Activity” (Workout), for this, the following Delegates must be declared in the IntentHandler.m file:
@interface IntentHandler () <INStartWorkoutIntentHandling, INPauseWorkoutIntentHandling, INResumeWorkoutIntentHandling, INCancelWorkoutIntentHandling, INEndWorkoutIntentHandling> @end To designate methods of interaction with Siri, Apple uses the word “Intent”, now while holding down the CMD key, click on “INStartWorkoutIntentHandling” and see what functions this deligate uses.
Required for inclusion in the project method:
- handleStartWorkout
Additional methods that may not be included in the project:
- confirmStartWorkout
- resolveWorkoutNameForStartWorkout
- resolveGoalValueForStartWorkout
- resolveWorkoutGoalUnitTypeForStartWorkout
- resolveWorkoutLocationTypeForStartWorkout
- resolveIsOpenEndedForStartWorkout
The confirmStartWorkout method calls the following Callback functions in order, which are already automatically created in our IntentHandler.m file:
- resolveWorkoutNameForStartWorkout
- resolveGoalValueForStartWorkout
- DemoAppSiriIntent
- resolveWorkoutLocationTypeForStartWorkout
- resolveIsOpenEndedForStartWorkout
- confirmStartWorkout
- handleStartWorkout
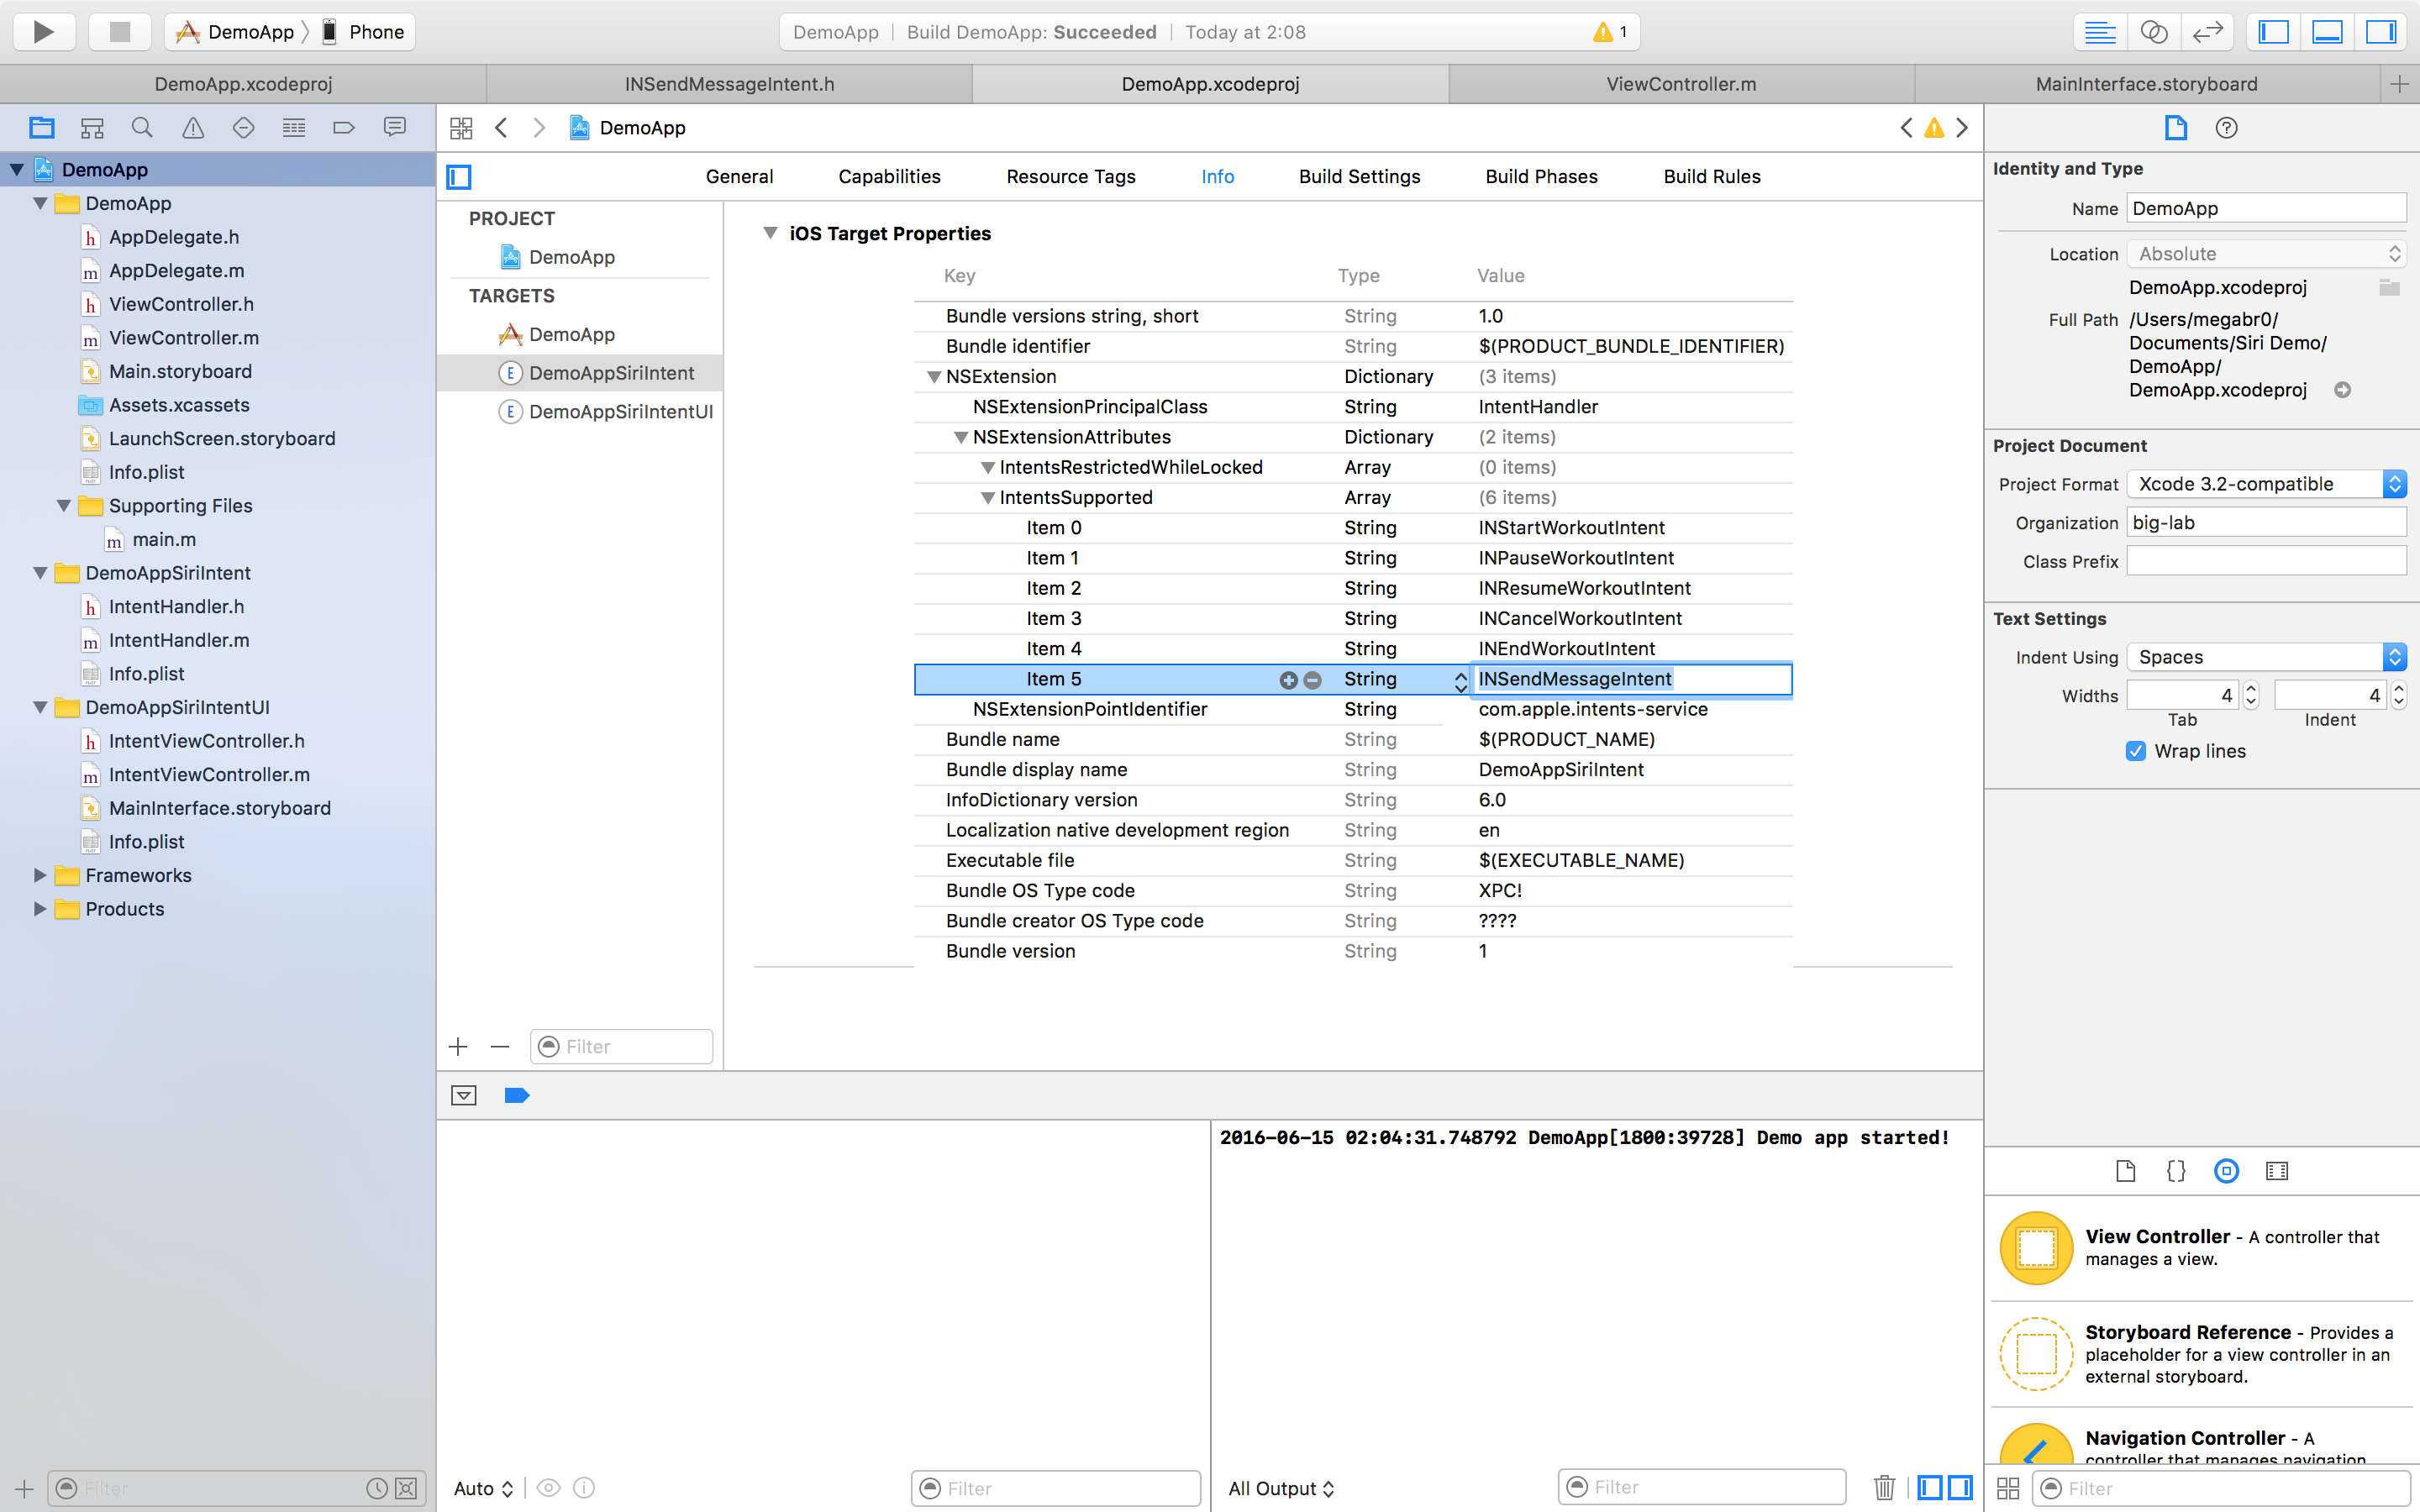
Next to the file “IntentHandler.m” we see a plist with the settings of our “Intent” extension, “Info.plist”.
We check that the “ NSExtension -> NSExtensionAttributes -> IntentsSupported ” branch lists all our Intents for working with Siri Workout:
- Item 0: INStartWorkoutIntent
- Item 1: INPauseWorkoutIntent
- Item 2: INResumeWorkoutIntent
- Item 3: INCancelWorkoutIntent
- Item 4: INEndWorkoutIntent

If we duplicate the “Intents” data into the " NSExtension -> NSExtensionAttributes -> IntentsRestrictedWhileLocked " branch , then Siri can call functions from our application even from a locked device.
Now, go to the “MainInterface.storyboard” file and add two UILabels to the demo application, one of them will be a counter to demonstrate that our UI interface inside Siri can be updated in real time.

It is important to note that this interface cannot contain “gesture recognizers” and interceptors of finger pressure events and, when this window is closed, Siri will release all objects in memory.
In the following diagram we can get acquainted with the life cycle of our “Siri view interface”.

So, it's time to compile our application and check if the voice commands work. Testing this example will only work on a real device, first we build the application as usual:
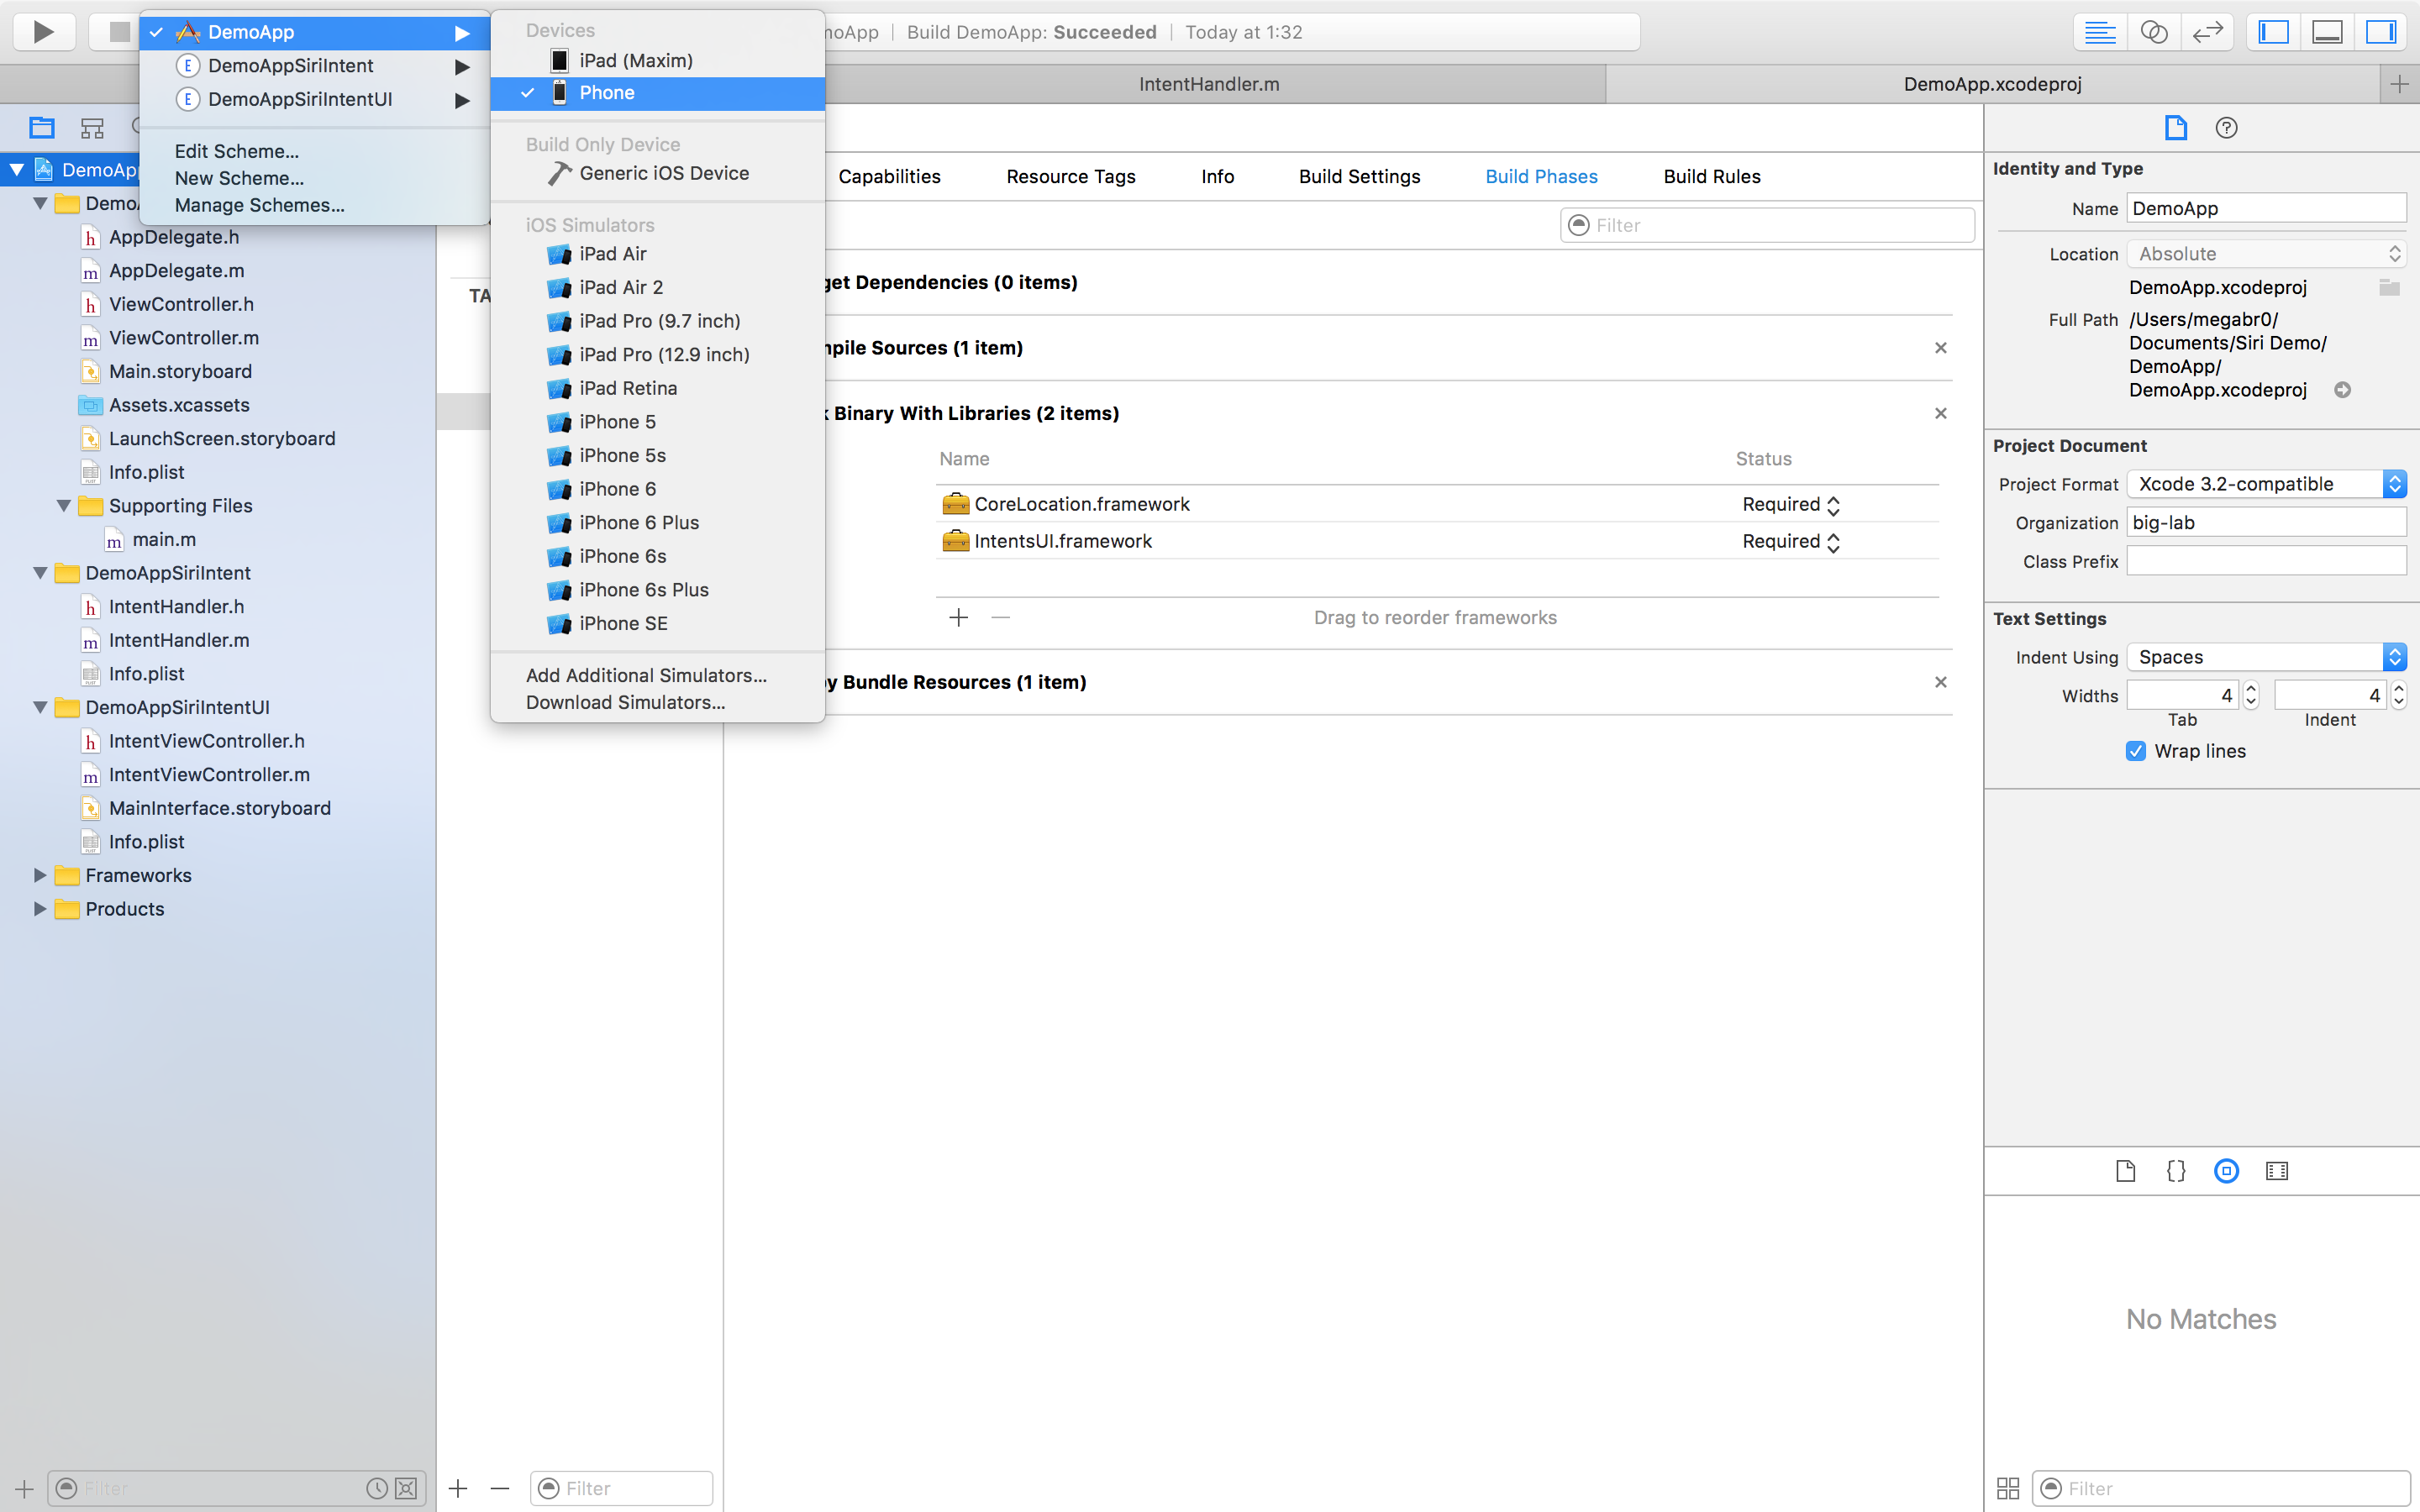
Then click on Stop and separately compile our extension by selecting the “DemoAppSiriIntent” scheme. At compile time, Xcode will ask us for which application we are building this extension, and we specify “DemoApp” in the list.

At this stage, we will see that our application appears for a second and disappears right away, this is not a “crash”, all the NSLog output functions from the “IntentHandler.m” file show us that everything works.
Oh yeah, I almost forgot, in the settings of our iOS device, go to the Siri section and check the box next to our “DemoApp” program:

So, it's time to say out loud "Hey, Siri, start workout in DemoApp"
You can see the result in this video:
Now we are convinced that everything works, let's add support for messages in our application.
By clicking on this link, you can familiarize yourself with all the “Intent” methods that are currently supported by Siri:
https: //developer.apple.com / ...
Now we are interested in the “Messaging” section, open our “IntentHandler.m” file, set the delegate for the messages:
@interface IntentHandler () <INSendMessageIntentHandling> Keeping the CMD clamped - click on “INSendMessageIntentHandling” and see that the necessary function at this time is “handleSendMessage”. To begin with, assign “Intent” for messages in the “handlerForIntent” function:
- (id)handlerForIntent:(INIntent *)intent { id handler = nil; if ([intent isKindOfClass:[INSendMessageIntent class]]) { handler = self; } handler = self; return handler; } And then we write the callback function for our “Intent”:
- (void)handleSendMessage:(INSendMessageIntent *)intent completion:(void (^)(INSendMessageIntentResponse * _Nonnull))completion { NSUserActivity *userActivity = [[NSUserActivity alloc] initWithActivityType:NSStringFromClass([INSendMessageIntent class])]; INSendMessageIntentResponse *response = [[INSendMessageIntentResponse alloc] initWithCode: INSendMessageIntentResponseCodeSuccess userActivity:userActivity]; NSLog(@"handleSendMessage"); completion(response); } Do not forget to register our new "Intent" in plist.info, in the " NSExtension -> NSExtensionAttributes -> IntentsSupported " branch :
That's all, I wrote this article in very succinct lines, but if you are interested in this topic, let me know in the comments, I can write a more extended publication that includes such nuances as the localization of Siri commands in our application, working with maps, making synonyms for voice phrases and training phrases for Siri, and of course the problems of the beta version of Xcode 8.
The project source files from this article can be downloaded here:
http://big-lab.com/images/articles/sirikit/DemoApp.zip
Source: https://habr.com/ru/post/303316/
All Articles