iOS Localization: XLIFF
On the Internet, it is easy to find articles on the localization of iOS, which describes all the main stages. The problem is that more often we come across the option of manually filling in the * .strings file. This is a rather dreary approach, and even a small automation in this would be useful to us. Back in iOS 8, Apple added the ability to partially automate the translation of an application by exporting and importing localized strings via an XLIFF document.
XLIFF (XML Localization Interchange File Format) is ordinary XML that conforms to the standard for exchanging localized data.
I considered that this method was unjustly bypassed or mentioned in passing. But it allows you to get all the lines for translation from source ( m, swift) and resources ( .storyboard, .xib) and merge them into one * .xliff file. And then it can insert a translation from it into the project. It only remains to remember to use NSLocalizedString.
NSLocalizedString
The markup of an XLIFF document easily falls on NSLocalizedString, which by default is used to work with localized strings. If we write Swift, then this is a function:
public func NSLocalizedString(key: String, tableName: String? = default, bundle: NSBundle = default, value: String = default, comment: String) -> String If we still write in Objective-C, then you need to use C macros:
#define NSLocalizedString(key, comment) #define NSLocalizedStringFromTable(key, tbl, comment) #define NSLocalizedStringFromTableInBundle(key, tbl, bundle, comment) #define NSLocalizedStringWithDefaultValue(key, tbl, bundle, val, comment) They have the same arguments and identical functionality.
- key The key that contains the translated string.
- tableName The table where the key is located. Corresponds to the file name with the extension tableName.strings. Optional parameter. The default is Localizable.strings.
- bundle A bundle containing a table with keys and translations. Optional parameter. The default is NSBundle.mainBundle ().
- comment Comment for translator. Be sure to write it! He will help you in the future to orient in the code.
- value The value returned if the localized string for the key was not found in the table.
The NSLocalizedString arguments match the contents of the XLIFF file:
- Tables with keys, on the basis of which Xcode will create files of type * .strings. The names for them are taken during the creation of the xliff file from the tableName parameter.
- The original text from the key parameter.
- Text to translate to be filled.
- Comment for translator from comment parameter.
To iOS 8
In the old days, we had to become secretaries for a few hours to go for a run and do a few monotonous things:
- Insert an NSLocalizedString if it is not done right away.
- Come up with the NSLocalizedString tag ("TITLE", comment: "The title of the first screen") and write a comment if we have time.
- Copy this tag to the Localizable.strings file.
- Insert translation for the tag. "TITLE" = "My App".
- Copy the new line into a separate document (for example, Google Docs) to make it easier for the translator to translate.
Conditions were added to this algorithm when the tag already exists and you need to use it or come up with a new one when the translations are split into different files or bundles. In this sequence of routine copy-paste, it was easy to make a mistake or “fall asleep”. In addition, we have .storyboard or .xib files, and we have to make IBOutlet in them in order to translate all the text into them from the code.
After iOS 8
With XLIFF, our workflow has changed a bit.
- In the code, when we add text for the UI, we immediately write it in NSLocalizedString ("My App", comment: "First screen title"). If the application development language is English and you have not changed it.
- When it is time to translate the application, export the XLIFF document. As a result, we get files that correspond to the supported languages. For example: ru.xliff, de.xliff.
- After the translations are completed, we import them.
As a result, Xcode itself will create all the necessary * .strings files based on the xliff file.
What about .storyboard and .xib?
Xcode also exports rows from them to tables with names like their source files.
XLIFFy
But one problem remains. How to open xliff files? When Apple introduced this feature, there were almost no editors for these files, and those that did have an awkward interface. Now the Mac App Store is full of them for every taste. But at that time I did not find a suitable program for myself and decided to write myself. XLIFFy
Example
We have a demo application with an authorization window, in which we will have to add Russian localization. By default, Xcode creates a project with English language development. This means that all your UI text will be on it.
Add Russian to the project.
- Project
- Project settings
- Info tab
+at the bottom of the Localization list

After adding a new language. The .strings files for .storyboard or * .xib will be generated.

Let's start by ViewController.swift and ViewController.swift look at the signInAction(:_) method.
class ViewController: UIViewController { @IBOutlet weak var usernameTextField: UITextField! @IBOutlet weak var passwordTextField: UITextField! @IBOutlet weak var signInButton: UIButton! @IBAction func signInAction(sender: AnyObject) { if usernameTextField.text == "user" && passwordTextField.text == "pass" { // success } else { // fail let alert = UIAlertController( title: "Error", message: "Username or Password is not correct", preferredStyle: .Alert ) let okAction = UIAlertAction( title: "OK", style: .Cancel, handler: nil ) alert.addAction(okAction) presentViewController(alert, animated: true, completion: nil) } } } We have UIAlertController, which should show the user a description of the error, if he entered the wrong username or password.
Translate the title.
let alert = UIAlertController( title: NSLocalizedString("Error", comment: ""), message: "Username or Password is not correct", preferredStyle: .Alert ) Often the project repeats one line, for example “Error”, and it would be good if there is only one translation for it. In this case, we everywhere, where this string is used, need to call a method with it as an argument.
NSLocalizedString("Error", comment: "") As a result, the translation of this string will be in a single copy in the Localizable.strings file. This file is used by default unless the name of another is specified.
Add an error message.
let message = NSLocalizedString( "Username or Password is not correct", tableName: "Auth", comment: " " ) let alert = UIAlertController( title: NSLocalizedString("Error", comment: ""), message: message, preferredStyle: .Alert ) Now we have added a tableName, so that all strings related to the authorization script are in a separate Auth.strings file, and a comment, so that the translator understands what context the text to translate belongs to.
We still have a lot of lines to translate into Main.storyboard. But we will not do anything with them, except for adding comments. To add a comment to the Interface Builder element, select the "Sign In" button and in the Identity Inspector find the Document block with the Notes section and write the "Authorization button".

Now you can export from our project file for localization.
- Project
- In the menu bar, Editor
- In the drop-down menu Export For Localization ...

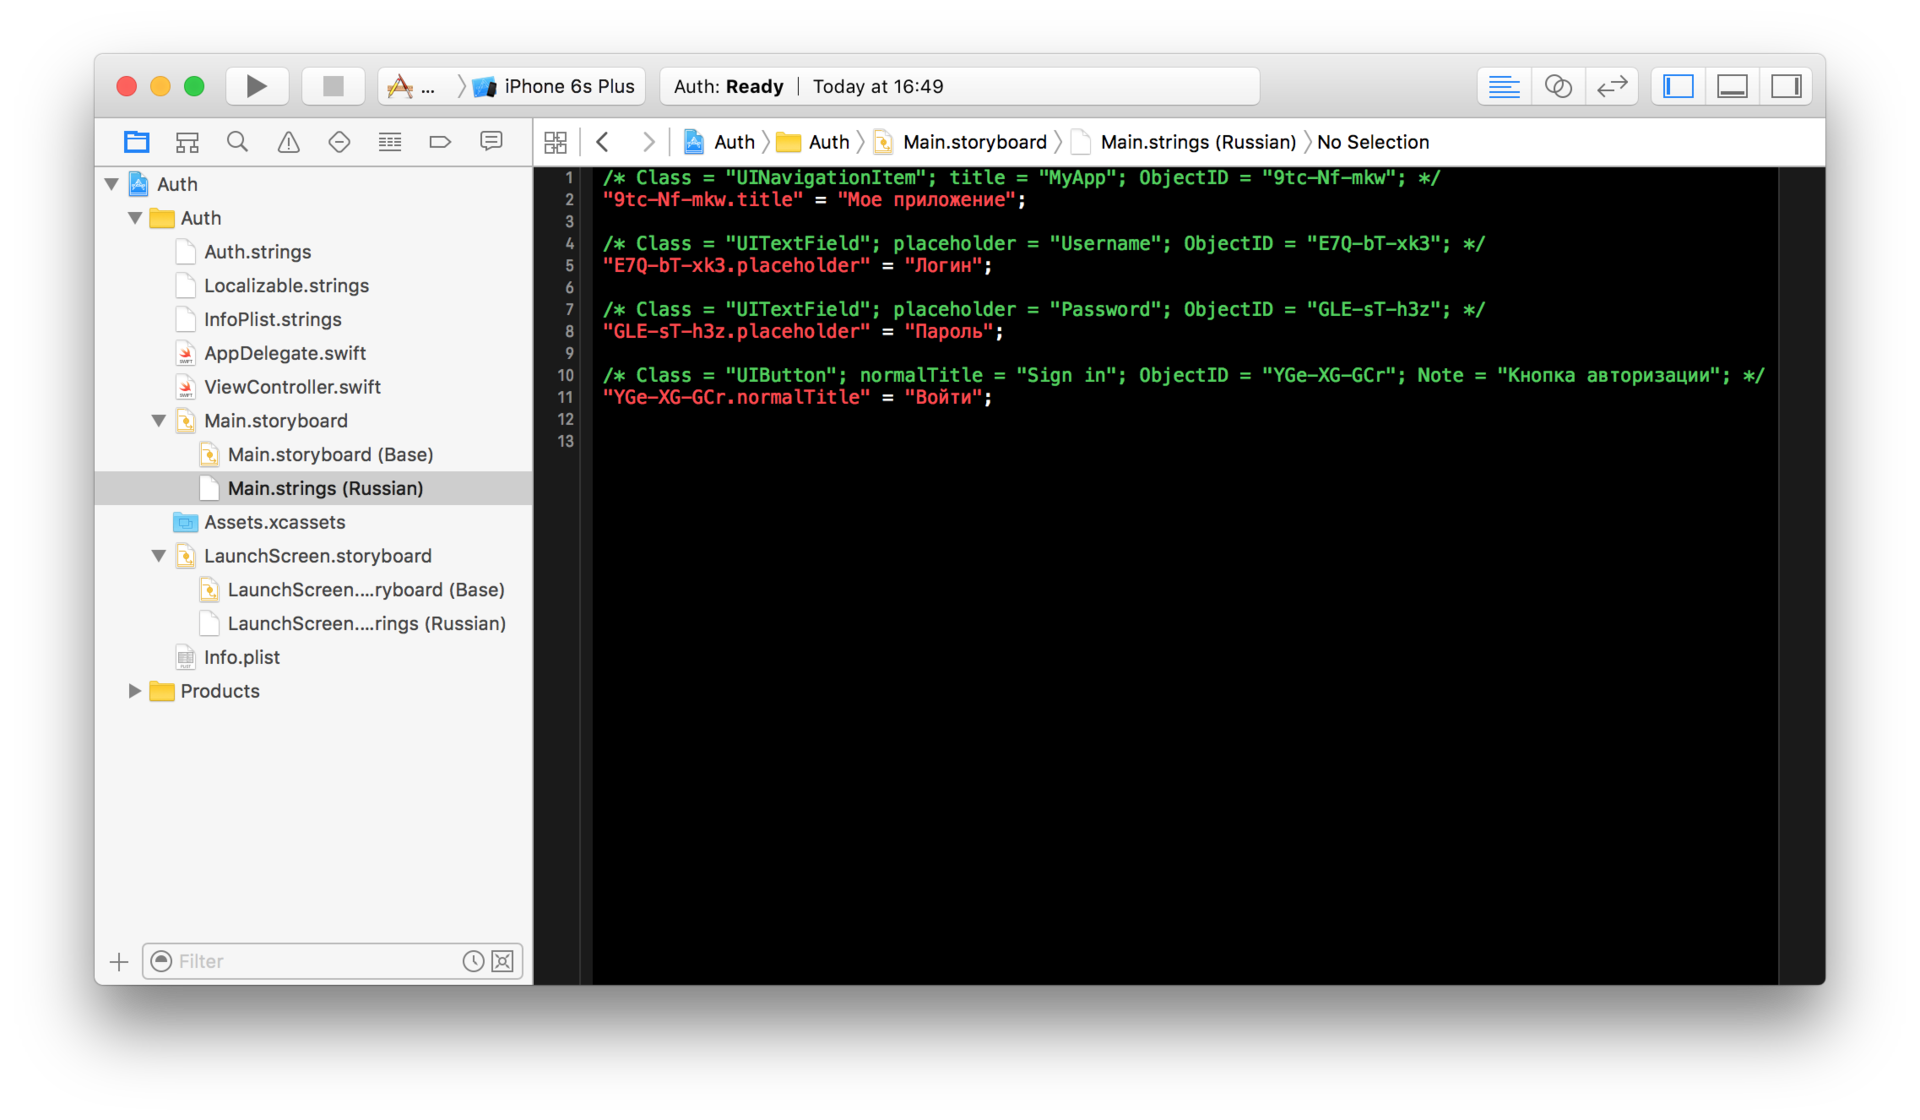
As a result, we have a file ru.xliff. Open it in the XLIFFy editor or use the free equivalent from the Mac App Store. If you select XLIFFy, the names of the translation tables will be listed on the right. This is the standard translation file Localizable.strings, and tables with names like the .storyboard or .xib files from which they were derived. There is also a table for info.plist in which you can translate the name of the application for different countries. There is also the Auth.strings table, with which we have linked the error test to the translation code.

After we have everything translated, import into Xcode.
- Project
- In the menu bar, Editor
- In the drop-down menu Import Localizations ...

A warning window may appear if some lines are left without translation. This is especially common, due to untranslated info.plist. During import, Xcode creates * .strings files based on translation tables, if not, and inserts a key, value, and comment into them. It’s better not to edit them manually; if formatted incorrectly, export / import may stop working.
After importing translations, it's time to check how our application is displayed in different languages. Restarting it on the simulator or on the device, of course, is necessary, but for quite some time. Much faster this can be done in Interface Builder.
Open Main.storyboard, turn on the Assistant Editor and select Preview from its drop-down list. In this mode, you can view how your application will look on different devices and in different localizations.

Change Development Language
In very rare cases, you may need to change Development Language, for example, to Russian, because your entire design is first created with Russian text.
You will need to close Xcode, open the project file in the text editor <project_name> .xcodeproj / project.pbxproj, find a couple of lines
developmentRegion = English; hasScannedForEncodings = 0; knownRegions = ( en, Base, ); and replace them with
developmentRegion = Russian; hasScannedForEncodings = 0; knownRegions = ( ru, Base, ); You can read more here.
Total
Using xliff files has both advantages and disadvantages:
Pros:
- No longer need to engage in monotonous copy-paste.
- Easy translation of .storyboard and .xib.
- The whole management of * .strings files takes over Xcode.
- All localization work comes down to using NSLocalizedString.
Minuses:
- The key is not an abstract line, but the text on Development Language. If the original text changes, it has to be re-translated.
- For duplicate lines from .storyboard and .xib, it’s not possible to add one translation for all. This is done because the strings are associated with different UI elements, and one translation may be too large or inappropriate for the context of use in the second case.
- There is no processing of numerals and units of measurement. For this you need to create a special file * .stringsdict. Handling Noun Plurals and Units of Measurement
Additional information on application localization:
')
Source: https://habr.com/ru/post/302682/
All Articles