How to solve family differences with 4 controllers and 2 smart hours in 1 month
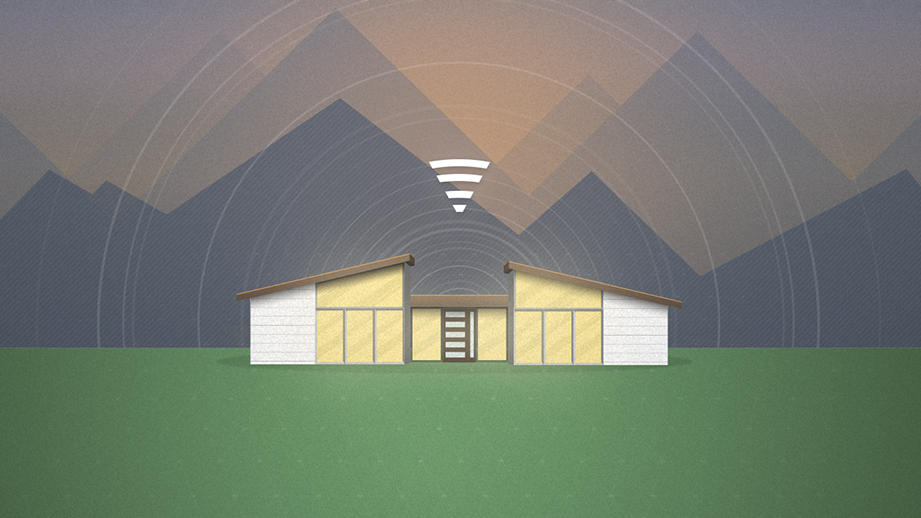
“Smart Home” is increasingly confidently migrating from the sphere of geek-exotic in the direction of fairly affordable technologies, with the help of which you can make your home more comfortable, more convenient, more energy-efficient and generally “nice!”. And in this article I would like to share with you my own experience of creating a “smart home” system in my apartment.
Little about sockets
My wife loves to turn off all the outlets. When she leaves, she pulls everything out, and then I return home and insert it back. I do not like it. I tried different things: I asked, persuaded, convinced, threatened - nothing helped. And then I decided that it was necessary to find a high-tech way to settle the conflict: somehow switch the sockets so that it would not be necessary to physically pull out the plugs throughout the apartment.
Well, there is a soldering iron, hands too. I started thinking about the implementation. But immediately a lot of questions arose. For example, which controller to use for control? I had programming experience with Atmel AVR controllers. Everything looks quite simple: a relay, a transistor for decoupling and control of one pin of the controller. There were two tasks. First, the controller and the relay must be powered, and secondly, the controller must be controlled. With food presented three options. The easiest is to power the batteries, but the batteries will sit down and have to be changed, which is inconvenient. The second option is to place the 220 -> 5 converters right next to the controller in each outlet. The method is excellent, but I did not find ready-made compact converters, but I didn’t want to mess around with the converter myself, and I was also afraid to tinker and burn an apartment. The third option is to connect external power to each outlet. The issue of controlling the controller fell into two principal ways: radio control and wire control. The wire version looks the simplest, but again requires the connection of a cord to each outlet. For myself, I decided that when I would do the next repair in the apartment, I would foresee this and bring a wire to each outlet, for example, UTP 5th category. But so far it was necessary to deal with the available untied sockets.
')
The last question that finally made me abandon the development of my own management system is “testing for the living”. Debugging minor bugs of architecture and firmware would have to be done right during the operation, which, of course, would have caused discontent of others.

I began to study the existing ready-made systems on which to build a "smart home". I immediately decided that the communication modules should be wireless. It remains to choose the technology. First, there were two options - Wi-Fi and Bluetooth. They are very common, for them a lot of ready-made solutions. But Wi-Fi, running at 2.4 GHz, is not very convenient in terms of networking. High distribution and the absence of any regulation when installing access points makes this frequency very noisy, but I want to have a more or less stable system so that I do not have to switch outlets when the neighbor router is working. But this was not the most serious problem. Much more terrible enemy Wi-Fi - microwave. Its magnetron radiates at a frequency of 2.45 GHz, so when my home microwave turns on, nothing works around it. Bluetooth audio streaming goes off, video streaming over Wi-Fi goes off, files don't download, pages don't open - nothing. And no matter what design you have a microwave - built-in or free-standing, it will make noise in any way.

Therefore, I also refused to use Wi-Fi and Bluetooth.
Z-wave
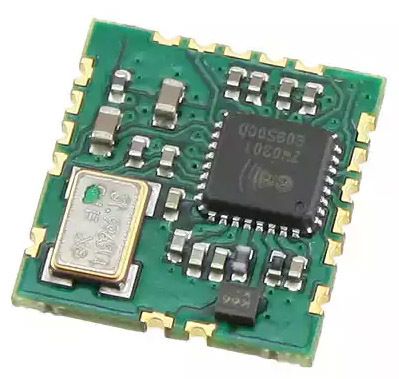
Began to study what other solutions exist. For example, ZigBee has several frequency standards: there is 2.4 GHz, and there are around 1 GHz. But then I came across an article on Habré, which told about Z-Wave. I was impressed. The basic Z-Wave modules are now being produced by only two companies in the world - these are Sigma and Mitsumi. Its size is about a centimeter per centimeter. In fact, it is a microcontroller with a transceiver. It can even be reflashed, but most often, in finished form, they are mounted on top of the board, the UART is connected to it, and it works as a transceiver.
All devices that want to get a “Z-Wave Compatible” badge must be certified. The platform is closed, which gives some advantage in terms of compatibility. For comparison: on sale there are a lot of Bluetooth solutions for homes, and almost all of them are incompatible with each other. And all Z-Wave devices are compatible thanks to a single closed standard, which nevertheless evolves. Paid SDK is available, it costs about 2 thousand dollars. That is, if you are going to solder one thing at home - this is expensive. And if you intend to set up production, then, dividing into 2 thousand devices, you will get only a dollar of difference - quite well.
The communication range of the Z-Wave standard is about 30 m. One of its advantages is that the devices are lined up in a mesh network and there is a routing table in almost every module. Any module, having caught a signal, knows whether to transmit it further or not. That is, almost every module is also a repeater. Almost, because in Z-Wave there are “sleeping” devices that do not participate in relaying. Such devices usually run on batteries and get in touch when needed.
To prevent your network from adopting a neighbor network as its own, a token generated for each head controller is used. Within the network there is a head controller and there are peripherals. When the controller is first installed, its token is generated, after which the binding procedure occurs: any actuating device first binds to the controller, remembers its token, and after that the device is connected to the network.
Amazon sells a mass of Z-Wave devices. There are modules embedded in the socket and switches, there are modules for building a security system. Locks, sirens, lights, smoke detectors, water leakage sensors - anything. I even found an automatic cat feeder.
As for the operating frequency, it is in the region of 900 kHz. This frequency is not open to all countries in the world, so each country needs to be certified and get permission to use this technology, therefore carrier frequencies are slightly different in different countries. For example, in Europe, the frequency is 868.42 MHz, in Russia - 869.0 MHz, in the USA and Canada - 908.42 MHz, in Hong Kong - 919.82 MHz, in Australia - 921.42 MHz.
If you buy a module that is made for Europe, then you can programmatically convert it to the Russian frequency. Similarly, you can programmatically switch the frequencies of devices made for Hong Kong and Australia. But the American devices do not switch. Therefore, there are three categories of identical devices, and you need to pay attention to what region they are made for. Hong Kong and Australia, you are unlikely to meet, so pay attention only to the United States, Russia and Europe.
When building a mesh network, the Explorer Frame mode is used. In this mode, all devices go quiet, the controller starts a network scan, and the devices start responding in turn. There is a kind of roll call, when each device builds its own routing table. For example, it is recommended to turn on this mode after rearranging the furniture, because there is a possibility that the moved closet began to shield the signal between some devices, but opened the space between the others. In general, it is believed that the standard ensures stable operation at a distance of 30 m in open spaces, and in apartments up to 10 m. Of course, the distance of stable communication between modules located in socket niches will be even less, but due to routing everything works quite stably.
Now let's talk about commercial controllers. The most common are two brands: Fibaro and Vera. Fibaro has a series - Home Center and Home Center Light. Vera also has two series of controllers, one more expensive, the second cheaper. All of them support the basic sets of rules, and you can easily make it so that when you turn on one device, another is activated, and after a while it turns off or does something else. But if you need to implement more complex behavior, you will have to program yourself. Lua is used as a language.
There is a third, less common brand - Zipabox, but these controllers, judging by the description, do not support advanced automation. Nevertheless, Zipabox is interesting because it has expansion modules that fit together like a constructor.
But we will now talk about another project related to Raspberry Pi. This is a community project that has decided to make its own, as cheap as possible iron. Today Raspberry Pi retail costs about 4,000 rubles. On Amazon, you can buy for $ 50, with the current rate it is almost one and a half times cheaper. On the Raspberry Pi, a web server with a user interface comes up, for which you can write automation on JS.
As an iron expansion card is used, which was called RaZberry, it looks like this:

It is put on the port of expansion Raspberry Pi:

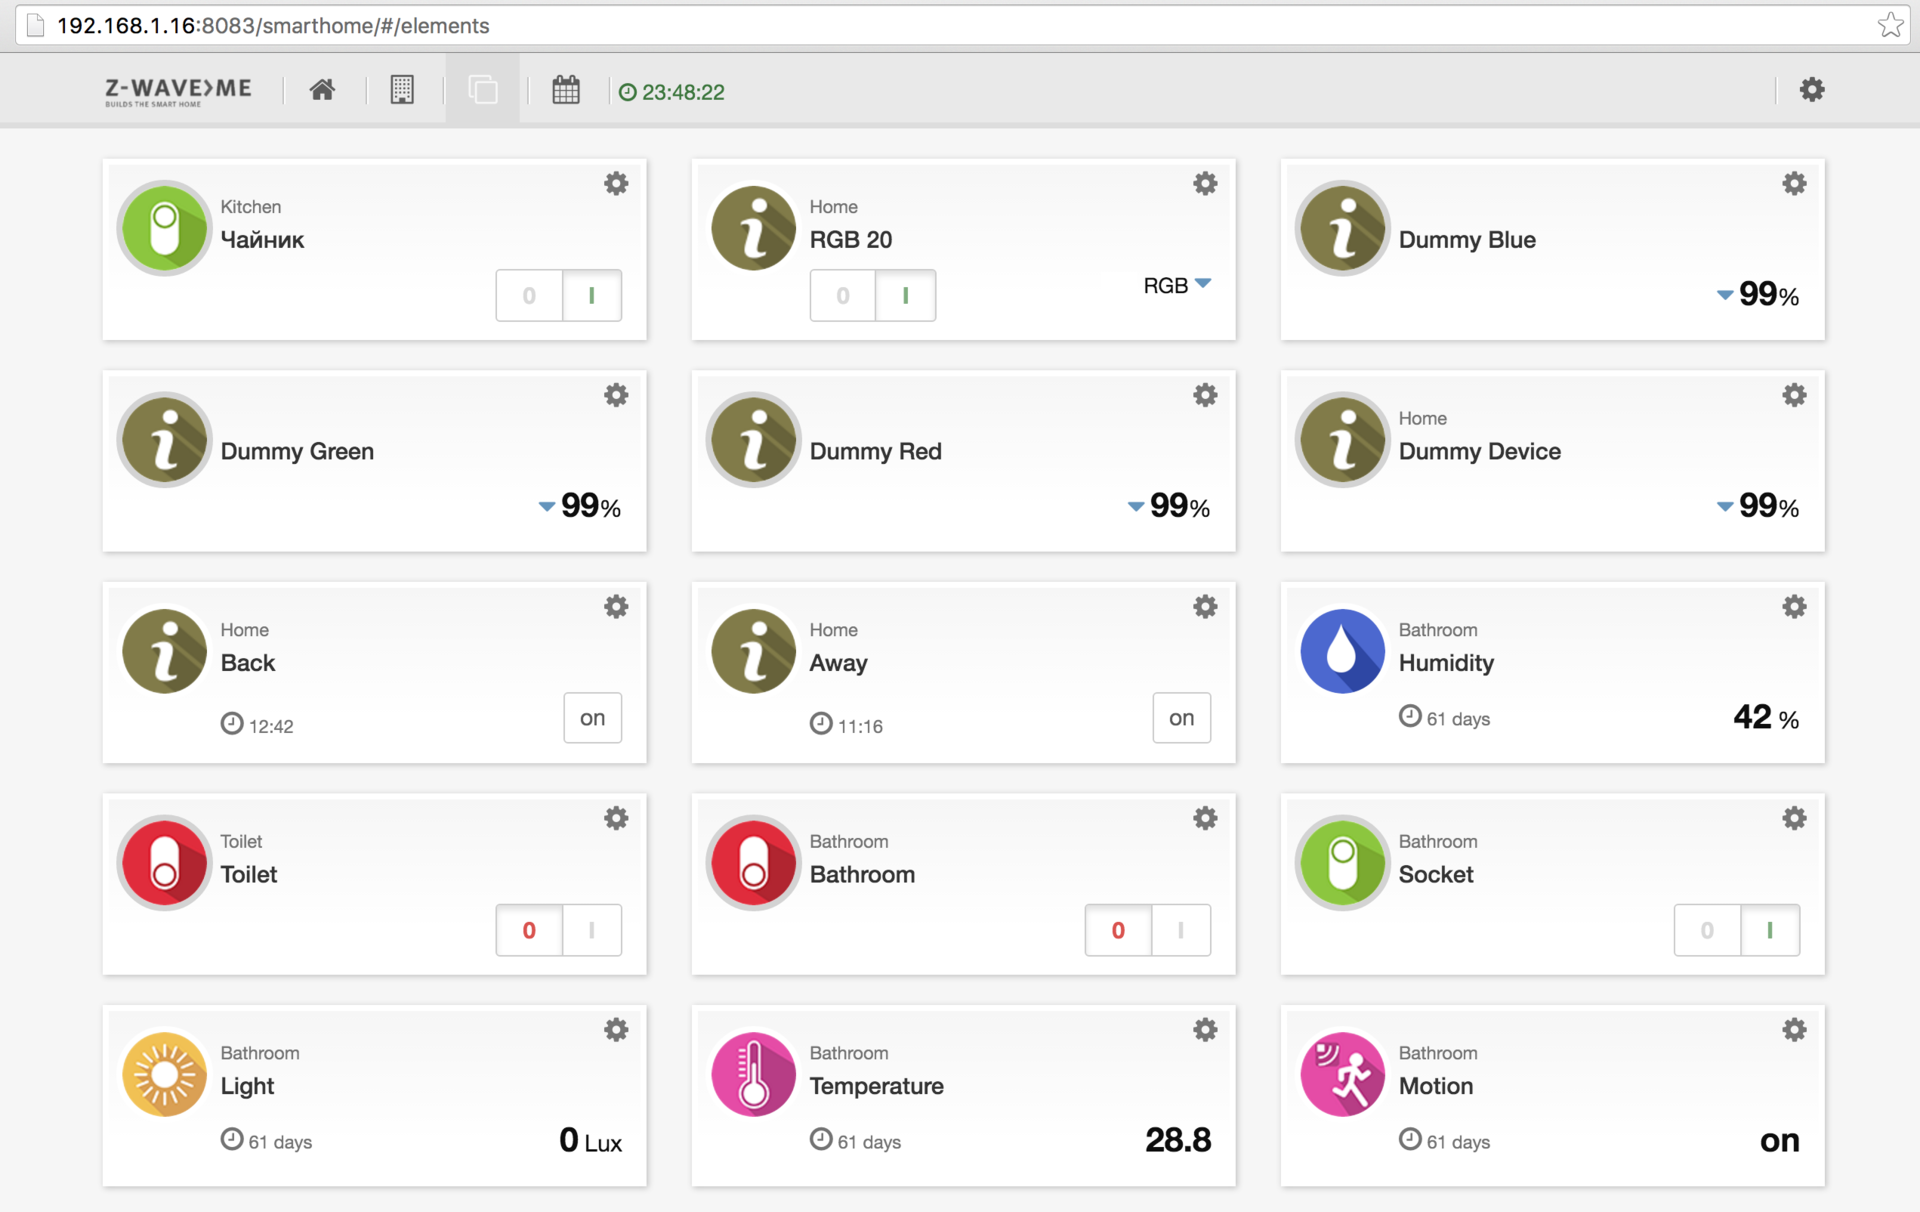
Here is an example of a control panel interface. It is displayed in the browser, works well on tablets.
Below is an example of settings. You can see where all devices are working at what time, check connectivity, see the routing table, and so on.


One of the advantages of Z-Wave.Me is a project open, here is a link to GitHub github.com/Z-Wave-Me/home-automation . The development team is scattered around different countries - Russia, Germany and Switzerland, “with an office on the Internet,” as they write about themselves. The interface can be downloaded for free from GitHub, if you wish, you can rebuild something yourself.
All this is perfectly controlled from the admin panel, but this is not convenient for everyone:

Control
I began to think how to implement a more convenient system management than from a computer through the admin panel. Today there are applications for Android and iOS, and two years ago the official Android client left much to be desired. I did not understand how to use it. That is, I found, configured, connected, but could not use it. At that time I was an adept of Windows Phone, for which there was no client. I wrote a client on my knee for myself, and when the switches were out of sync, my wife turned to me for help.
A year ago, in February-March 2015, the Pebble company launched a fundraiser to create a new version of the watch, called Pebble Time. I supported the project, and by October the clock was already at my disposal. I thought it was a great thing to manage a smart home. After all, the phone is not always in my pocket, at home I just put it somewhere, and the watch is usually on my hand. In addition, Pebble, in contrast to the watch on Android Wear or Apple Watch, connects to both iPhones (which I used by that time) and Android phones.
Pebble
Pebble has quite a few virtues.

First, they work for a week on one charge. Apple Watch users know this pain, when by the evening you need to look for exercises. In addition, the Pebble screen always shows the time, because it is made on the basis of color electronic ink. There is support for two main operating systems. The watch is waterproof. And they also have a hardware port. Connect smart straps that you can do yourself (there is a detailed description on the site Pebble).
But you have to pay for everything. No touch screen - push-button control (four buttons). But you do not need to constantly poll the touch screen, so that the clock is so long without recharging. The second drawback - the display shows 64 colors.
Work Pebble provides the operating system based on OpenRTOS. Watch apps resemble web apps. The frontend is executed on the clock and is written in C, and the backend works on the phone and is written in JS. Web application developers are now horrified: where have you seen it - the front-end on C, and the backend on JS? But this is easily explained: C, as the most compact language for compiling, is very convenient for creating embedded applications, and the plus JS is that it is equally well executed on the iPhone and Android. JS works inside the phone and provides an interface for accessing the Internet and accessing GPS. The clock itself has a built-in accelerometer, gyroscope and magnetic compass, that is, a basic set of iron.
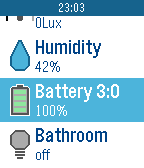
As a result, I wrote an application to manage my smart home system. First for the latest version of the watch, and then realized support for the very first Pebble model, with a black and white screen:


A little about the settings. They are made in the form of an HTML page. For Pebble development, it is advised to use the Slate Frontend Framework. The page should be located on the web, which in itself is strange, because without connecting to the Internet you will not configure anything, but apparently, something was due to it.
After I wrote the application, I put it in the official app store and forgot about it. It was installed by 40 people, and I began to receive feedback.
I have not programmed in C for a long time and remembered with horror that with memory allocation, and even worse, with its release, you need to work manually. Therefore, in the first version, I made a static array for the eight devices that I had, and all this worked fine in my home. But in networks, where more than eight devices, of course, did not work. And the first response was from Denmark: “Is it possible to do more?” I, of course, said: “It is possible”, and in one evening I transferred the application to dynamic arrays. Comrade was happy, but not very long.
It turned out that he had about 54 logical devices - switches and sensors, and one physical module can be several logical devices at once. I, for example, have a sensor at home that is simultaneously a sensor for movement, temperature, humidity and illumination, and in the system it is visible as four sensors. And the Dane is over 50, and he complained that in order to turn off something, he had to watch the entire list for hours on end. I thought exactly one evening and came up with one thing. In the admin panel of Z-Wave.Me you can hang tags on the device, and I decided to add a Pebble tag. And in the clock settings, enter the mode when the screen displays only those devices that are marked with this tag. That is, the user himself chooses what he wants to see, and marks the corresponding devices with this tag. Fellow wrote it was just great. Now he has five devices that he controls directly from his watch, and he is very pleased.
Then another user of my program wrote to me; he had a different problem. The application is able to display sensors, and could only control switches, with switches of type On / Off. But there are many other controlled devices, such as dimmers, for which values from 0 to 100% can be set. Or RGB-modules on which you can set any color. I agreed to add support for such devices, but asked to send the structure of its network to see how they look alive. He sent, I looked - they look cool, but it's not clear what to do with it. I got into the settings and found out that there are virtual devices in Z-Wave.Me. Such a device can be set to type, for example, Multilevel Switch, and it turns into a virtual dimmer.

Manages nothing, but pretends that he is a dimmer. But why “does not control anything”? Manages itself. I can set the value from the clock, and he will show it to me in the dashboard. This was enough for me to implement support for dimmers.
Then I took up RGB. This control LED stripes that can display any color. RGB-lighting appeared in the standard Z-Wave not so long ago, so initially it looked like three dimmers in the system. That is, all devices reported that they were three dimmers, and it was possible to separately control the red, green and blue channel. For convenient work with old devices in modern control systems, a virtual RGB-lighting device has been created in which three dimmers can be set.

Since we can already set Dummy Dimmer, we can do Dummy RGB. It also worked well, but I haven’t yet implemented color management support, I sent only the dimmer control to the “customer”. And for him, I was just setting up support for a black and white clock.
Virtual devices
What else is the power of virtual devices in Z-Wave? Take a virtual HTTP device. And may you have any other device that is incompatible with the Z-Wave standard, but which is controlled by HTTP requests.

Then we write an HTTP request for inclusion: the address to pull, the request for shutdown and the request that needs to be sent to get the status of the device. Most likely, a device that does not support Z-Wave does not support the answer in the On / Off format.
To support it, you can enter Inline JavaScript, which will convert the response from your device to on or off. And having a virtual device, we can continue to do anything. For example, to integrate into this system any device based on ESP8266 controllers. That is, we make three ends to which the device is able to respond, and then any strapping.
Scenes
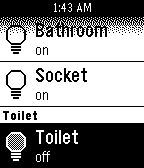
This is a set of states of logic devices. The scene cannot be turned on or off, it can only be activated. I, for example, made the scene Away, which I activate when leaving the house.

She turns off the lights in the bathroom, in the toilet, turns off the sockets in the bathroom and in the kitchen. Activating the scene Away turns off everything that I have at home managed. I also have a back scene. It turns back two sockets, but not the light. After all, when you return, you turn on the light when you need it.
As a plan, there is an idea to put mechanized valves and shut off the water with one touch, leaving home. The valves are quite expensive. But the flooding of neighbors can cost even more. Again, there are autonomous leakage sensors. Put them in the bathroom, in the toilet, in the kitchen, and in the event of a leak, the valves will automatically overlap.
And the last. Managing the clock is good, but you can only manage it at home. And if you want to manage from the outside, you can make a bot for Telegram. He is simple, he is sent a Light command, he asks: “Where?” - and shows the pictograms of the toilet and bathroom. Choose a place, he asks: "What to do?" - And shows a glowing light bulb and a black one. You choose black, and he says: “Ok, the lights in the bathroom are turned off.”


Conclusion
I had a fascination with the "smart home" in rush. At some point I got the idea, ordered the modules, built one that controlled only the light in the toilet and bathroom. I also ordered a motion sensor, temperature and humidity. Hanged in the bathroom and made a cool automation: the light in the toilet automatically turns off after 15 minutes, if you forget to turn it off, and the light in the bathroom turns on at the entrance, according to the motion sensor, and turns off after 15 minutes. Everything is cool, except that it is impossible to live with it. It turned out that 15 minutes in the toilet is actually not enough, especially if Wi-Fi is well caught there. And he is caught well. The increase in the waiting period did not help, so I have turned off this automation and ordered another motion sensor.
Automation in the bathroom is simple: you enter - the light turns on, you exit - it turns off. Conveniently. However, at first I set it up not very well. The motion sensor stood at the entrance, and when you enter the shower and pull the curtain, it does not see you. Therefore, after 15 minutes the light goes out. It is necessary to open the curtain, give up and pull the curtain back. The problem was solved by moving the sensor to the middle of the bathroom so that it would react to movement on either side of the curtain.
Now we mainly use the activation of scenes when leaving and returning home. But in the future, when there will be more controlled devices, there will be more interesting rules for management.
Source: https://habr.com/ru/post/301562/
All Articles