Exploration and engineering: 3D-models of buildings, junctions and quarries by photo
At some point, we came across a man in civilian clothes with a whole hard disk of photographs of a single engineering object (for definiteness, let's call it a railroad overpass). The task was reduced to the traditional "once built for a long time, and then lost the original documentation," and you need to restore the project with an error of a centimeter or two.
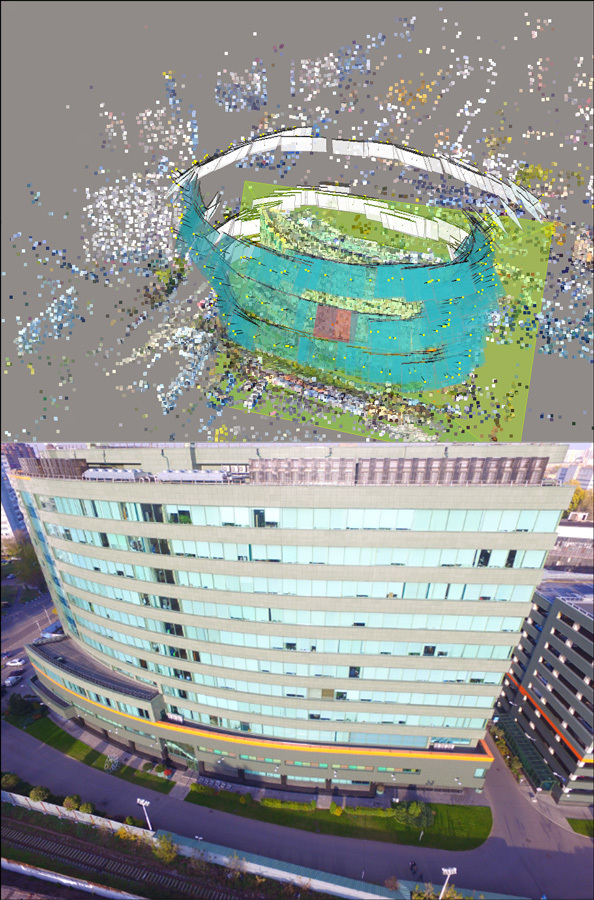
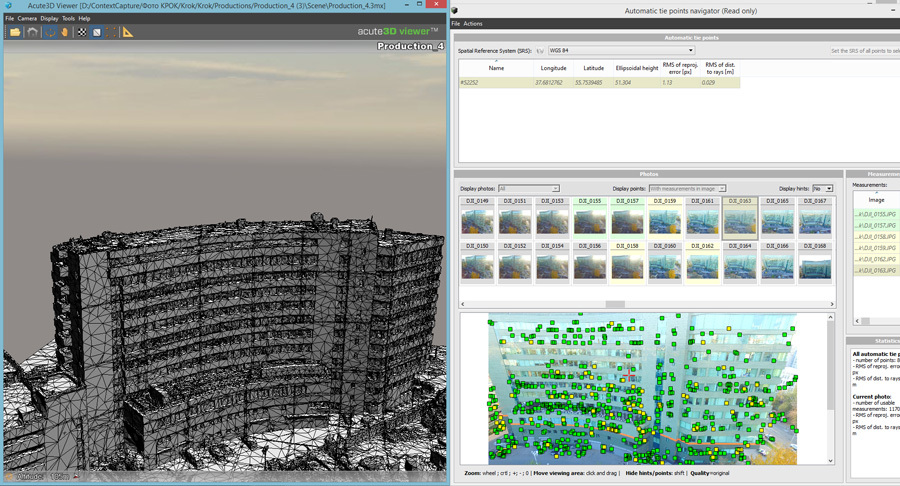
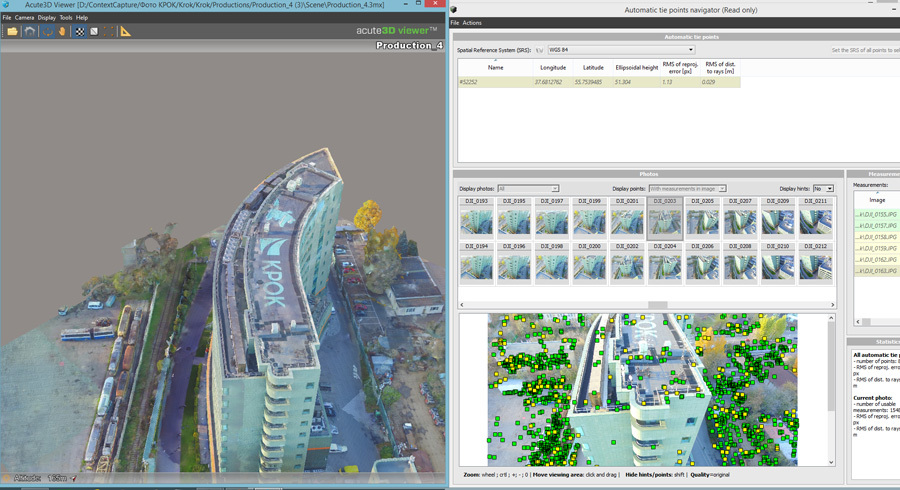
To understand how good accuracy can be obtained in architecture and engineering research of this kind, we decided to shoot our 11-story office and create a 3D model. At the end of the work, we received a building model and measured a pair of windows on it. Then we went and measured the same windows in the real world - the average discrepancy was within a centimeter, the maximum was two.
')
By the way, one of our partners had a somewhat similar task - it was necessary to remove a quarry with an area of 470 hectares and:
- Determine the volume of rock production.
- Calculate the volume of the warehouse of products.
- Get the surface to clarify the level of the hydraulic mine dump.
- Get a 3D model of the whole territory.
Part of the routes
She was decided with the help of a drone, long nails, a GPS-receiver and two packs of plastic plates for 5 rubles per piece.
Tasks and vendors
The task of obtaining a 3D model from the prototype of the object or the object itself is quite easily solved in the gaming industry and other similar areas by 3D scanning of the object. We have our own 3D scanners, but putting something larger than a dog inside them seems rather difficult. Most buildings, alas, are larger than dogs. Of course, there are still hand-held scanners and industrial technologies, where you can drive a helicopter at least, but this is all quite a separate specialized area. Incidentally, it is also suitable for buildings. But the use of photogrammetry and drone more advantageous in time.
In the case of a building, the model is used the same as for the scanner, but there are nuances:
- Both technologies assume the presence of a multitude of images from different points, and for each image there is meta information with camera location.
- The scanner works in "sterile" conditions, so filtering and preparing images is not needed. For large surveys, the lighting is different (elementary - during the shooting the cloud covered the sun), so the algorithms require more explicit reference points.
- Shooting engineering objects is usually done with drones, helicopters or different high-altitude, so the set of shooting points is much more limited, and plus we need to filter images made during the platform-shake anti-missile maneuver.
The principle of operation is as follows: on the basis of photo metadata and the search for similar image fragments, clearly defined reference points are built. As a rule, these are different angles, contrasting elements of the drawings, and borders of objects. Each pixel in the photo is searched for color matching in other photos based on the hypothesis of exactly where the pixel will be, taking into account the rotation and change of the camera position.
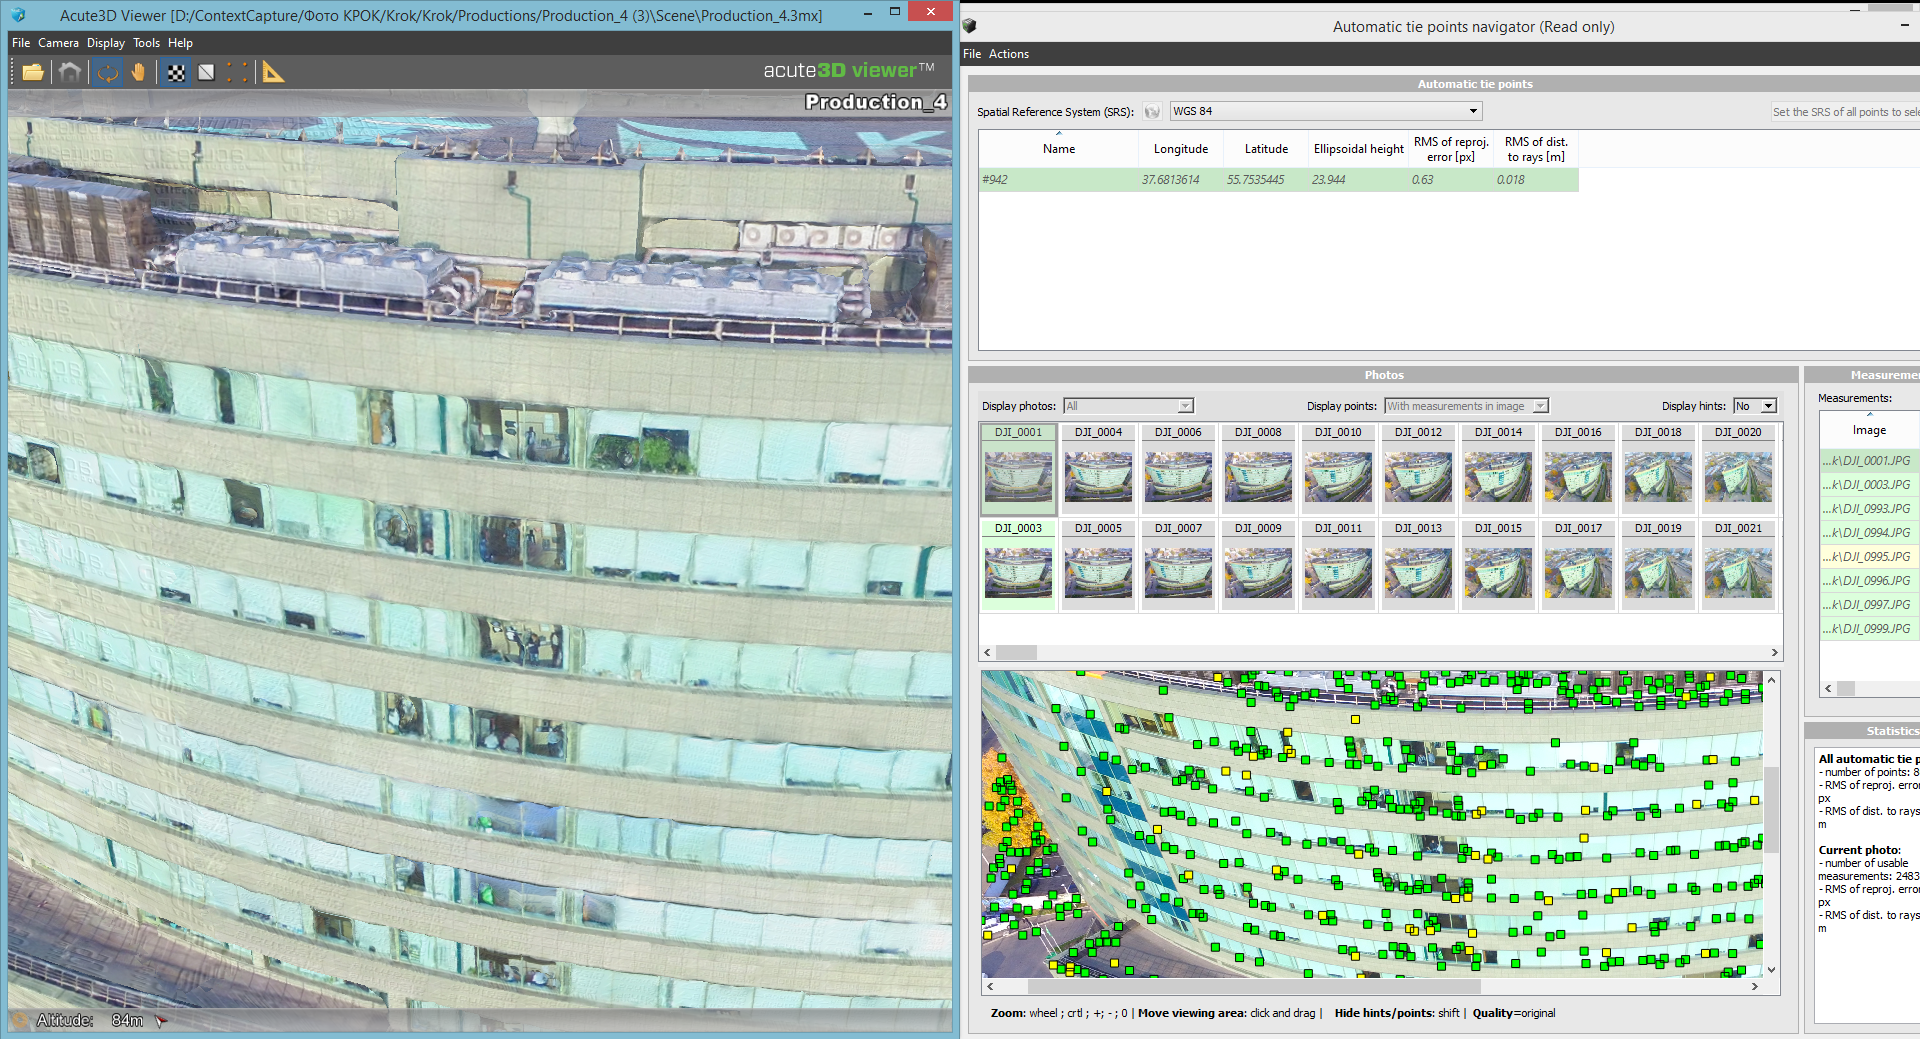
Matches found become key points. If there are at least three reference photos, this point is already built in the 3D model. Spatial coordinates are triangulated: directresses are drawn from each point of the survey to the selected point, and their intersection gives the desired value.
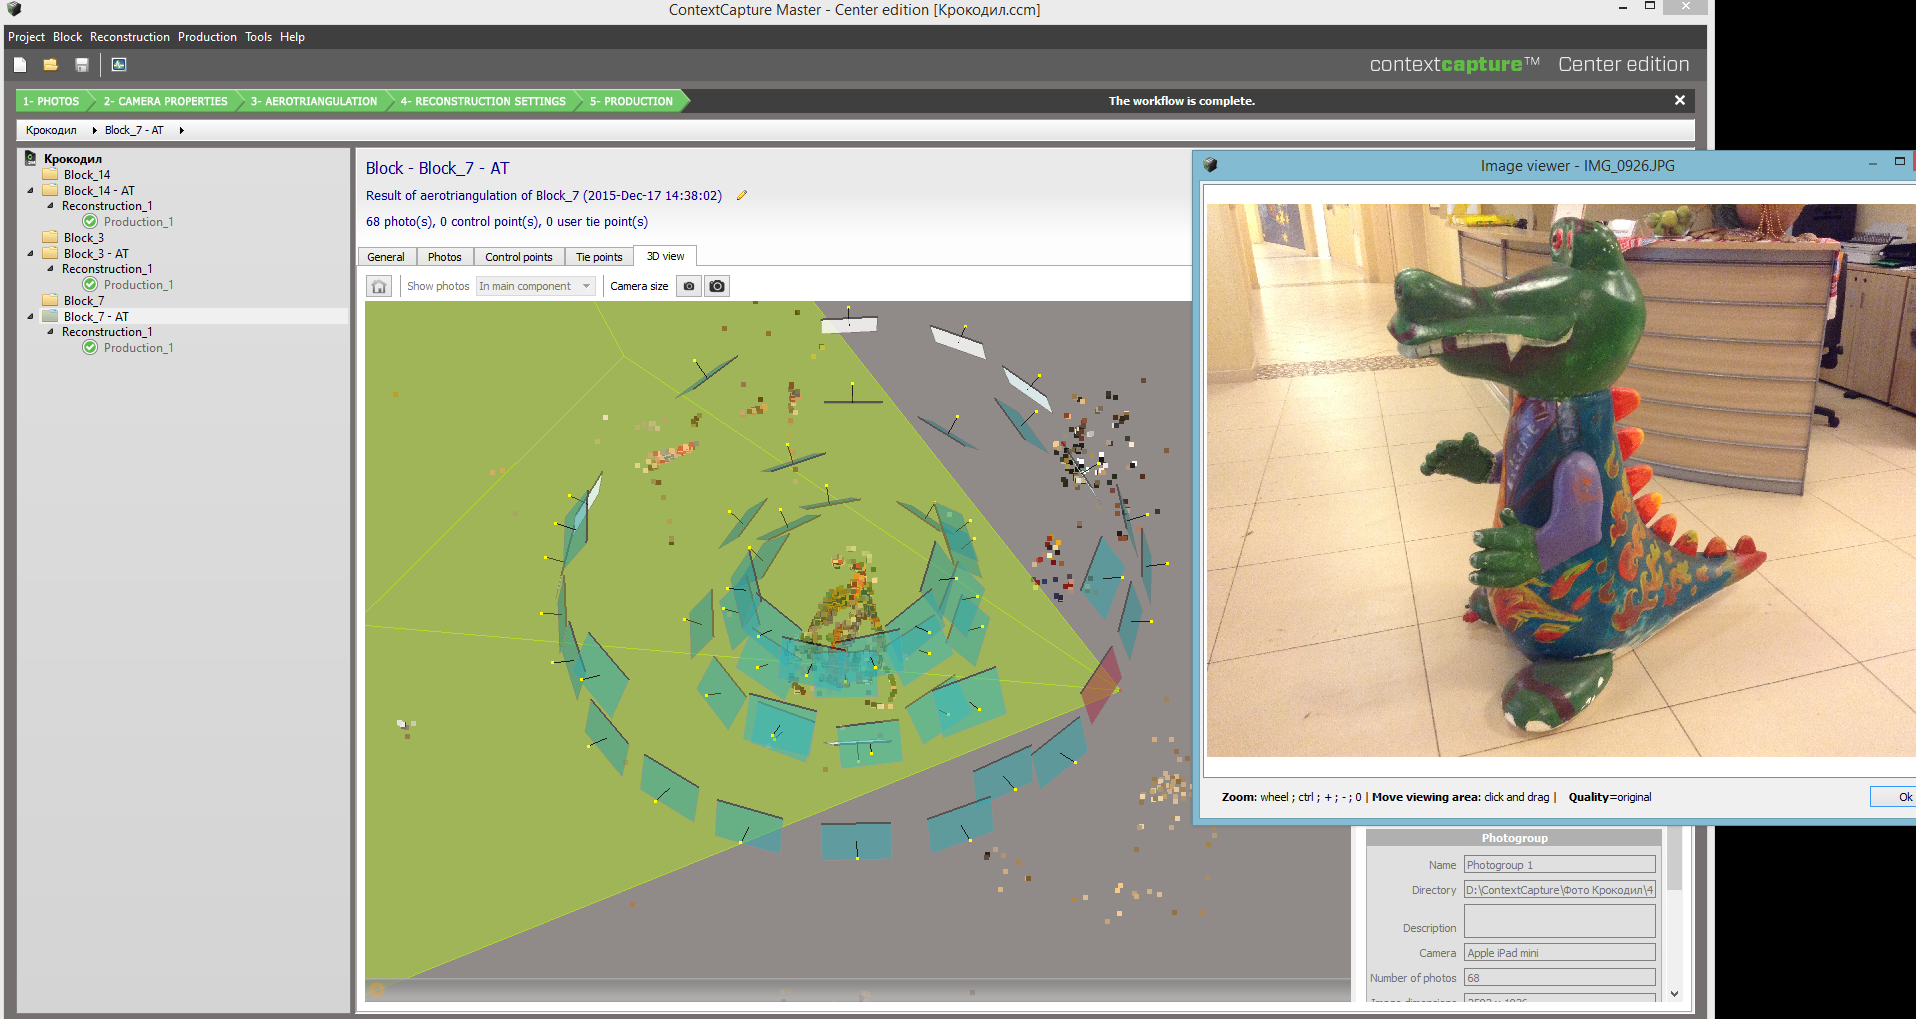
These planes - the estimated shooting plans, and in the middle - a crocodile. Below is an example of how this looks for a building.
To improve the signal / noise ratio, filtering methods are also used. The most popular is the Levenberg-Marquardt algorithm (or the bundle method) for specifying the coordinates of points. Then, on the basis of the reference points, the remaining points are restored with some accuracy, and all this is covered by polygons.

The next step is texturing. The 3D model is expanded into a plane, and then the spatial position of the point is aligned with the original photo to set the color.
Our task was best answered by ready-made packages Photoscan from Agisoft, Pix4Dmapper from Pix4D, ContexCapture from Bentley.
Photoscan is a Russian “semi-professional” package that is fairly affordable, but hardly applicable on farms. Pix4Dmapper is a Swiss product for processing aerial reconnaissance drone data. It is considered one of the best solutions for working with orthophotomaps, point clouds and digital terrain models. As a rule, well out of the box takes metadata from drones. Slow, dear. ContexCapture is a versatile French product. Difficult to configure, but very convenient for work, because it knows how to work with very noisy data and fits well with large infrastructures, obviously industrial. As a result, we stopped at it.
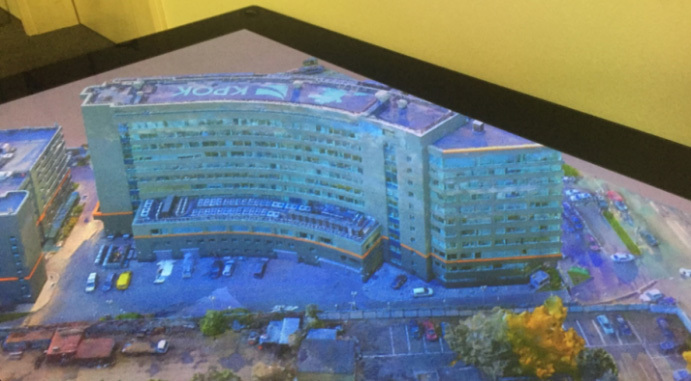
The resulting holographic 3D-model based on 290 photos. We used it for demonstration on 3D-tables.
Practice
First of all, we started not from the building, but from tests in the laboratory. It was necessary to understand how many photos on a complex object is minimal and sufficient. It turned out that a very small number of photos naturally leads to a deterioration of the model (this is understandable intuitively), but a large number too. It is important not to overdo it, because with a significantly excessive amount of source images, the filtering algorithms begin to wonder and "blur" the coordinates. This results in uneven outlines of objects. Surely this is solved by fine tuning the input parameters, but it is much easier to select only suitable images of good quality in the right quantity.
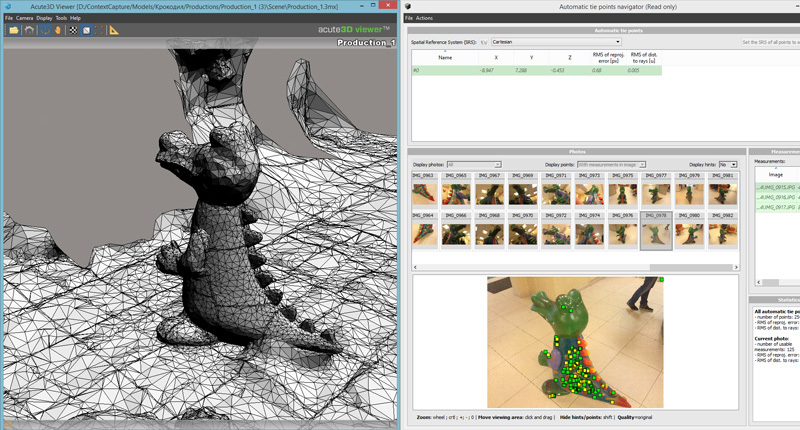
Test Crocodile
On a cluster of 6 cars, difficult terrain was calculated overnight.
As a result, all the work on the building took less than one working day. Naturally, the resulting model cannot yet replace the elaborated model created by the engineer manually, since there are quite a few errors or inaccuracies of the image in the layout. Hence, the third task has grown - to make it beautifully, that is, to finalize it with my hands after the calculation. The fact is that we showed the results to different people, and they reacted differently.
- We show the reconstruction of an archaeological find to a museum representative. The reaction is just wow.
- We show the pit to the engineer - it is keenly wondering whether it will be possible for the drone to fly even from inside the building (it’s not possible, for this purpose to use laser scanners correctly).
- We show the building to the architect - delighted.
- We show it to the construction company financial director: “What kind of cartoon sucks?”
In general, the result at the output of the calculation module is not the most aesthetic, although quite good. Let's just say, for a commercial result like architecture presentations, tailored textures with pure colors and precise outlines are exactly needed. For us, the first model was enough for our measurement task.
Career
While we were experimenting with the building, we found out that a similar problem was already being solved by our partners - Photometer LLC. Their task was to quickly and cheaply remove a quarry of 4 square kilometers:
- Determine the volume of rock production.
- Calculate the volume of the warehouse of products.
- Get the surface to clarify the level of the hydraulic mine dump.
- Get a 3D model of the whole territory.
Of course, the task of calculating the size of the warehouse promised excellent civil and not very application. For the decision was taken Quadcopter DJI Fantom 3, 5 batteries, a laptop and a GPS receiver for coordination on the ground. They decided to place “beacons” on the spot for greater accuracy: on 470 hectares they took 24 white plastic disposable plates, which were fastened with nails-weave. The coordinates of each plate were taken from the receiver with the minimum possible error.
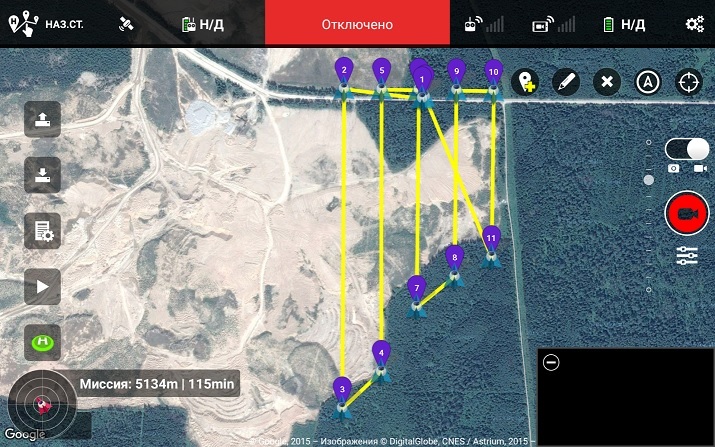
Flight plan
A strong wind was blowing (about 10 m / s) and it was snowing. It was difficult to fly, so it took about 5 hours to shoot, all 5 batteries were consumed, 27 GB of material was filmed. The total length of the route is 45 km.

An example of the image from the video
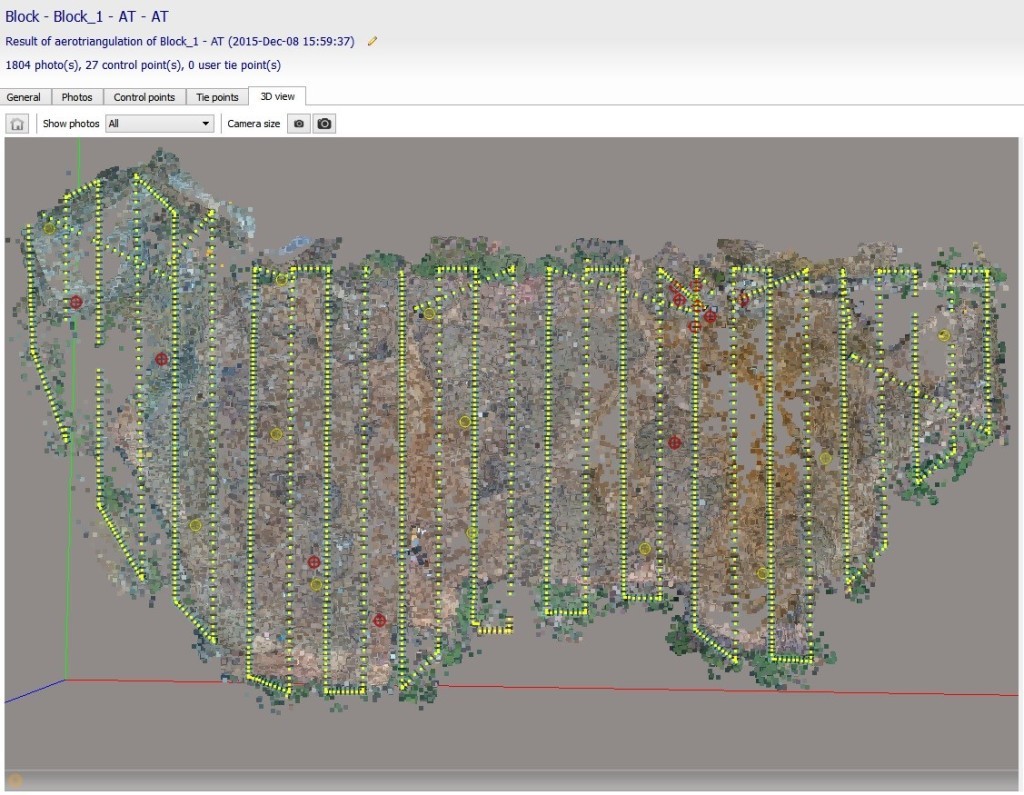
In the same Context Capture, they downloaded 27 GB of video and coordinates in the WGS 84 system. They started the video processing process and the aerial triangulation process. Calculation - 2.5 hours on a dual-core office computer. Then another 28 hours for a 3D model. The machine processed as a result of 1860 photos and built a three-dimensional model of the entire career (470 Ha). The required formats were obtained from this model: Las (point cloud), OBJ (textured model), FBX (three-dimensional graphics) and orthophotomap. At this stage of processing photographic ended.
Las 1.5 GB was transferred to the customer to compare the results of aerial photography and the classical method used in the career. Unfortunately, they were unable to open this file on-site, because when they tried to “chew on” AutoCAD Civil 3D, they refused to give at least some signs of life. It was decided to discharge the cloud of points 300 times.
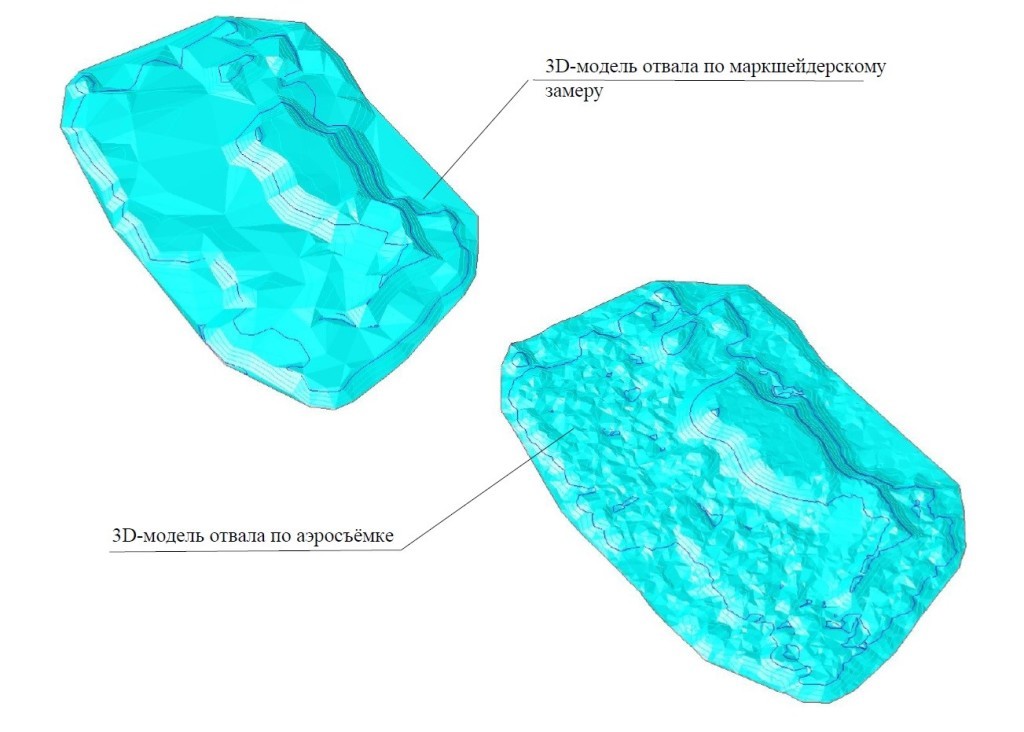
The result - in this simplified file, the difference between the work of the surveyor with the total station and the aerial photography was 0.5% with an allowance in mining up to 5% (according to the standard depending on the volume).
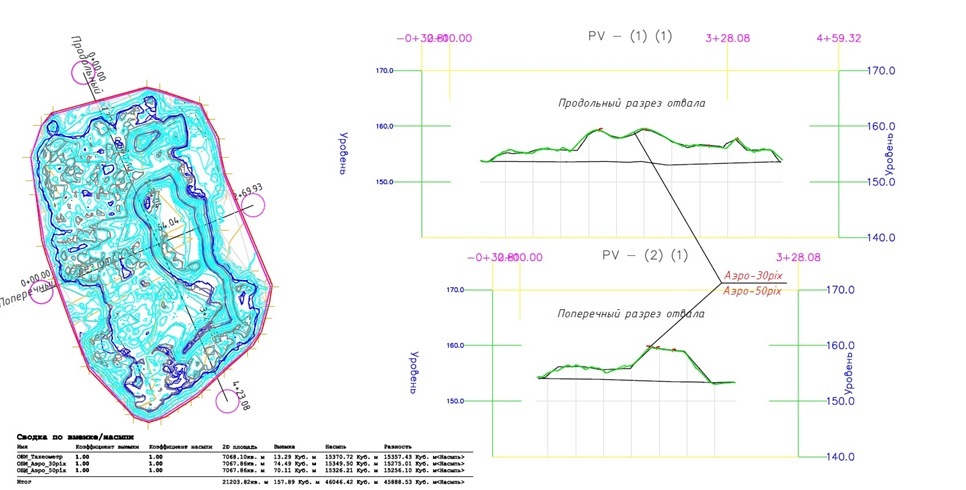
The accuracy of aerial photography is higher because the model is built on a surface with millions of points, while the surveyor gains them much less. On the other hand, 3 days for all work (or 1–2 days when calculating in a cluster) instead of a month, and from equipment - an available drone for 100 thousand rubles, and it was launched almost from the knees.
Summary
Previously, photogrammetry was used in geology, topography and archaeological excavations. Then - after one epic survey of the junction for the restoration of the project and a few more surveys to control the state of the project - gained fame in construction. Recently, photometry began to be applied in the film industry. As you can see, something has changed since 1852, since French engineer E. Losseda was shooting Paris from a balloon.
Links
- The task of the career on the website of partners
- Why else are 3D solutions used by engineers?
- My mail is YChalyy@croc.ru
Source: https://habr.com/ru/post/301178/
All Articles