Citavi Scientific Organizer: Installation and Initial Setup

Citavi is a bibliographic manager and knowledge organizer for Microsoft Windows, developed by the Swiss company Swiss Academic Software (Wädenswil, Switzerland). >> Source: Wikipedia
There is not much information about the Citavi bibliographic manager in RuNet. To familiarize yourself with the main functions of the organizer, you can read the first three sources listed in the basement of the article.
This article describes the process of installation and initial configuration of the bibliographic organizer Citavi for Windows version 5.1.0.0. and work in a local project program.
')
So, what is needed to start working with Citavi:
Step 1. Check the technical requirements
To install the program, developers state the following requirements:
- Operating system: Windows 10, Windows 8.1, Windows 8, Windows 7, Windows Vista, can also be installed on Windows Server 2008 (with all updates) or Windows Server 2012.
- RAM: 4 GB (recommended).
- The space on the hard disk: 260 MB is occupied by the program itself + space for your research project (in addition to the bibliographic base itself, the project directory stores files of books, articles, journals, etc.).
- Internet access (to connect to library catalogs and browse resource web pages) directly or through a proxy server.
- A free USB drive with enough space (if you want to use the portable version of the program)
If your system meets these requirements, you can safely download the program.
Step 2. Download
The program can be downloaded from the site.
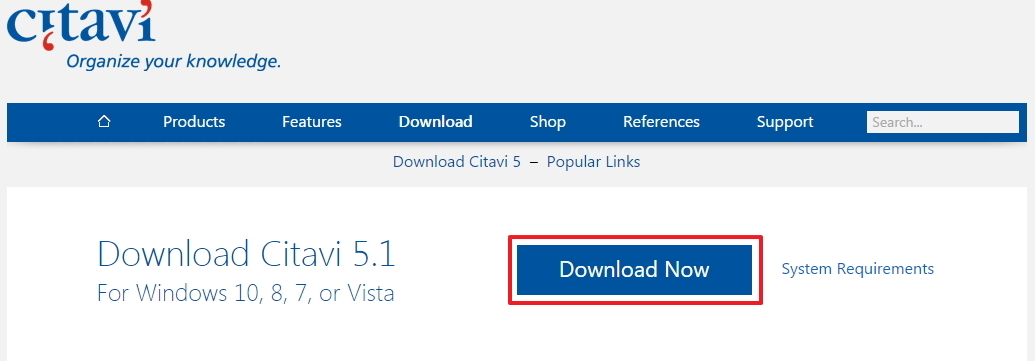
To download, you do not need to register and provide any information.
You can unsubscribe from newsletters.
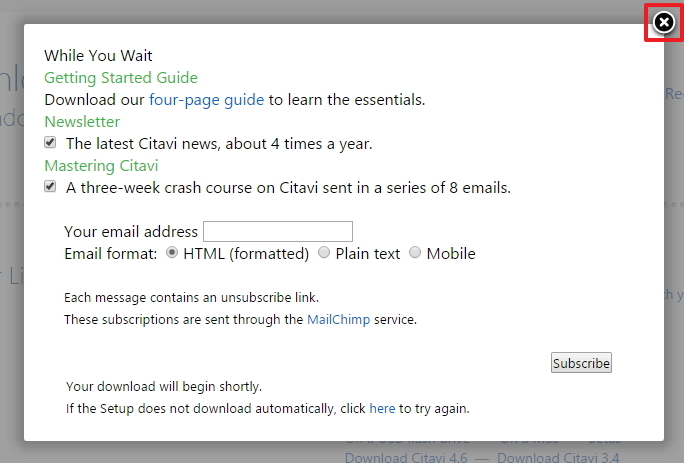
After you have successfully downloaded the program, you can start installing it on your computer.
Step 3. Install
This step is intended for those who are confronted for the first time with the process of installing programs in the Windows environment. If you are a dock in this business, then you can safely move on to the next step.
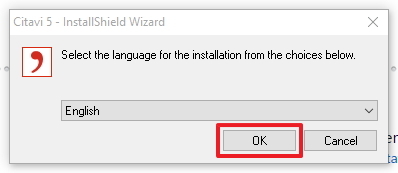
Run the downloaded installer file.
Choose the language of the installation program (there is no Russian!). Choose - English.
We are waiting for the process of checking the system requirements.
The program is ready to install on your computer. Click Next .

We agree with the terms of the license agreement. Click Next .

Select the directory in which you want to put the program (by default - C: \ Program Files \ Citavi 5 \ ). Click Next .
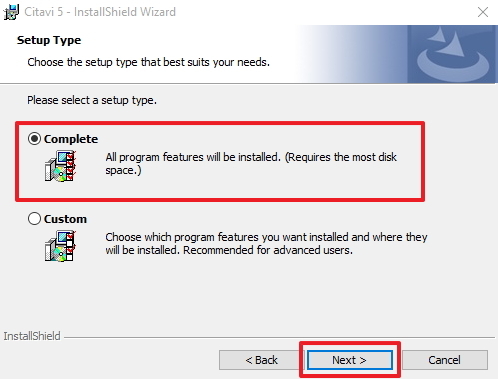
Select the complete installation Complete . Click Next .
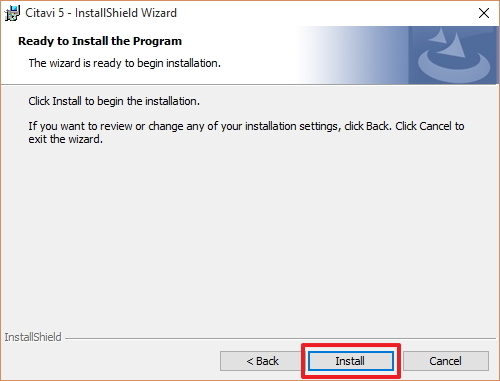
After clicking on the Install button, the program will be installed in the specified folder.
We expect when the installation process is complete.
After successful installation of the program, you can see a window about the successful completion of the installation. Click Finish (End).

The program is successfully installed, you can proceed to its launch.
Step 4. Run
Launch the label Citavi 5
 from the Windows desktop.
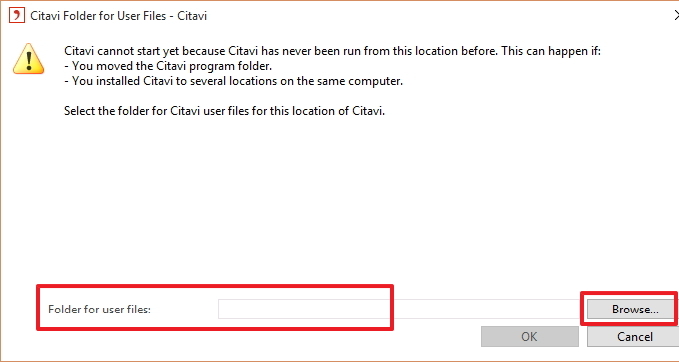
Specify the folder for user files (I usually save to "% USERPROFILE% \ Documents \ Citavi 5"). To navigate through the folder tree, click Browse . After selecting the user folder, click OK .
The project creation window will open.
Since we are creating a new project, we select the New project item. To open an existing project, click Open and select the desired project file.
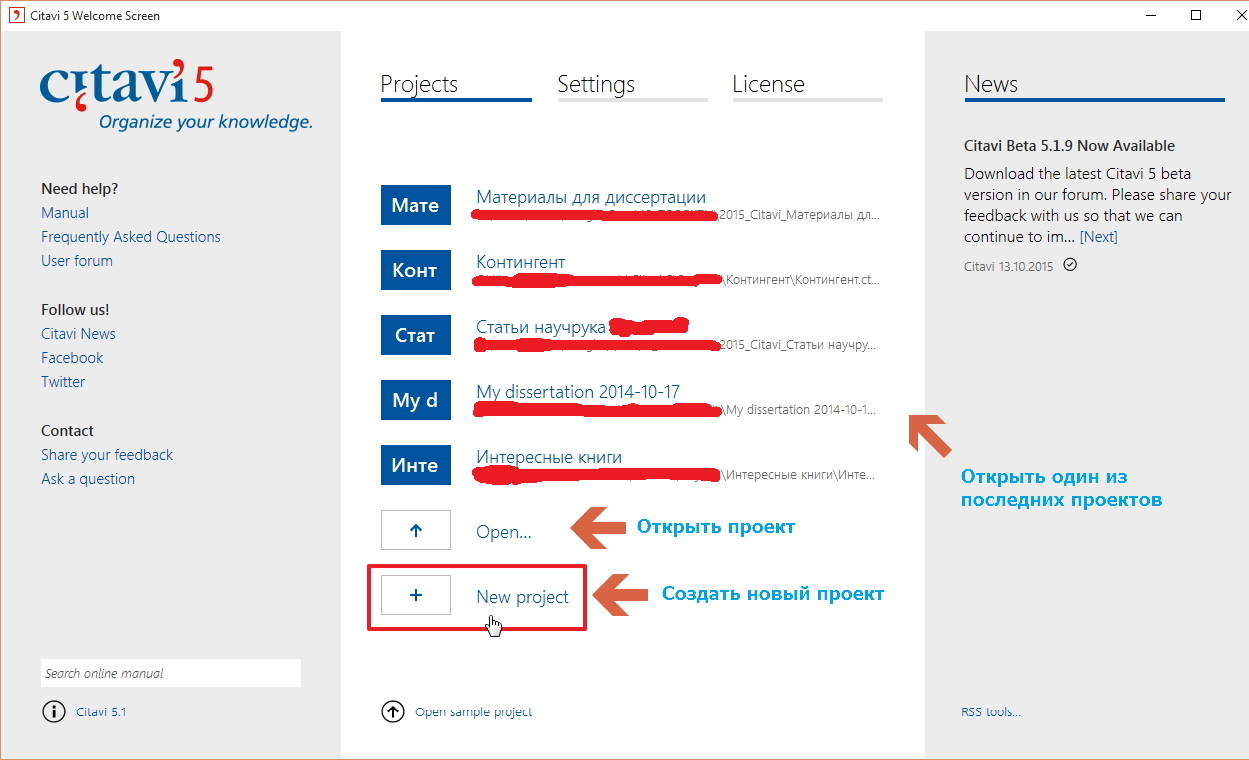
For a new project, in the “Name” field, indicate its name (for example, “My dissertation”). By default, the directory with your project will be created in the Projects folder of the user files folder (I have this "% USERPROFILE% \ Documents \ Citavi 5 \ Projects" with the same directory name as your project.

After creating the project, the program will automatically go into it and the main program window will open.
If you managed to create your project, then proceed to setting it up.
Step 5. Customize
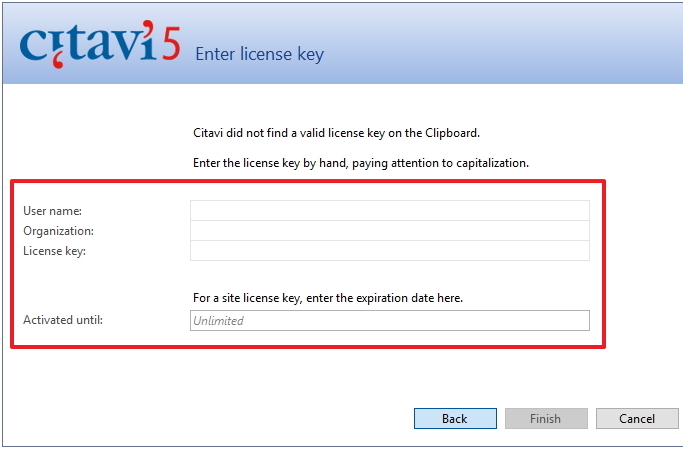
If you are using the Citavi Free version, then the program does not need to be activated. If you are using Citavi under conditions other than Freemium , then for further productive work it is recommended to activate the program (Main menu “Help” - License - Enter a license key), indicating the name, organization and license key number obtained during the purchase, as well as (not for all activation types) subscription end date.
We will continue setting up the program under the license Citavi Free.
The program does not require special settings and is ready to work right out of the box.
For the convenience of further work we will make some simple settings:
Step 5.1. We set the priority for the catalog of the Russian State Library
Unfortunately, in Citavi from the Russian bibliographic catalogs, only the catalog of the Russian State Library (RSL) is presented, so we will determine the correct order for searching bibliographic data (first we search in the Russian State Library, and then in all other foreign catalogs).
Go to the main menu Tools (Tools) - Options (Settings) - Search (Search) .
On the ISBN download tab (Download ISBN), click Add database or catalog (Add database or catalog) to add the required catalog (RSL).
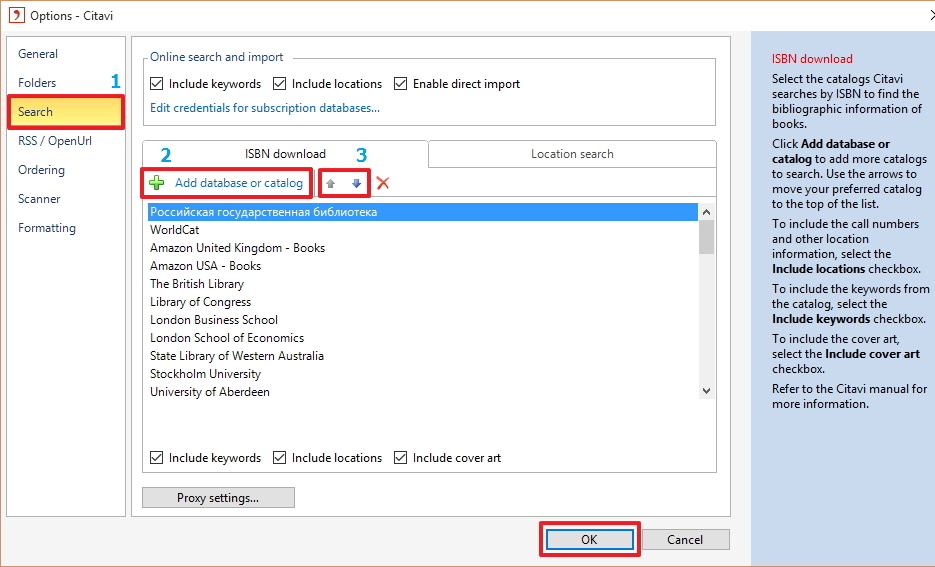
From the drop-down list, select the country Country - Russia (Russia) and check the checkbox "Russian State Library". Then click Add .
Using the up and down arrows, set the catalog of the Russian State Library to the first position (as indicated in the figures). If necessary, you can add other interesting directories and determine the order (from the bottom down) of the search in them.
We perform the same operation for the Location search tab.

Step 5.2. Adding Gostovsky citation styles
Go to the main menu Citation (Citation) - Citation style (Citation style) - Browse citation style (Browse citation styles) .

Click Find and add style , select the citation style language (Language) - Russian (Russian) from the drop-down list and select each of the 3 styles in turn and click Add to add the style to your project. Close the window.
In the Browse citation style window, the three styles you added should appear. Select the desired style to set it as default. I set the style "GOST R 7.0.5-2008 (Reference Numbers)". Close the window by clicking OK .
Now we are ready to enter bibliographic data.
Step 5.3. Configure the proxy server (optional step)
If you access the Internet through a proxy server, you can specify its settings in the Proxy settings section of the Search section of the Tools menu (Options) .
After performing these simple steps, the system is ready for operation.
I will tell you about the work process itself in my next article.
- Citavi on Wikipedia (rus.)
- User ilami_yasna : Citavi: professional organizer of scientific work (rus.)
- Elibrary.ru scientific electronic library: Citavi 5 has been released: a lot (if not everything) that is needed for academic writing (rus.)
- Citavi 5. Getting Started (English, PDF) - link
- Citavi 5. User Guide (English, PDF) - link
- ISBN on Wikipedia (rus.)
- Bibliographic record on Wikipedia (rus.)
Source: https://habr.com/ru/post/295676/
All Articles