Phone scripts without chaos
 While we are preparing the next article about incoming call scripts, we suggest that you familiarize yourself with the functionality of our module and web application. With this solution, we won the chaos at home and really want to help many others.
After active use of text documents, printouts, mind maps, stickers on the monitor, we realized that it was impossible to continue living like this. In the beginning we wrote a module for our CRM. As a result, we made a decision that is sure will make life easier and will raise sales to very many.
At the moment there are three options:
- Application for cloud Bitrix24 (CRM integration is done)
- The module for the boxed version of Bitrix24 (we finish the integration with CRM)
- Separate web application (without CRM)
You can get acquainted with the versions here , each has a free trial period.
So, the manager / telemarketer opens the script he needs:
')
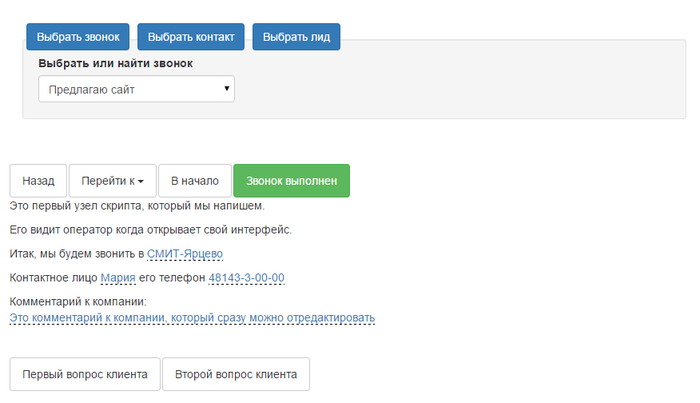
This is the first script node in which he chooses the entity with which he will work (in the screenshot a call is selected from the list scheduled for today) and sees the information he needs to start working with the client.
In the text, the fields from CRM are inserted and the contact data to which the call is assigned and to the company to which the contact belongs is derived
Depending on the development of events, the manager presses the option buttons and proceeds to the following nodes:
A well-thought-out script leads the dialogue manager, not forcing you to think hard. All the necessary information - at the right time before your eyes. All reminders are in their places so that nothing is forgotten.
In versions with CRM, access to customer information and its adjustment is significantly simplified. All changes are made on the fly in CRM.
The interface of the constructor will be discussed immediately using the script creation example:
First of all, going into the module or application must be set up right.
In the cloud version of Bitrix 24, the user who applied to the application will appear in the list, and he will need to set the rights of either the creator, or the editor, or the user of the scripts. In the web application, you must create users and set rights.
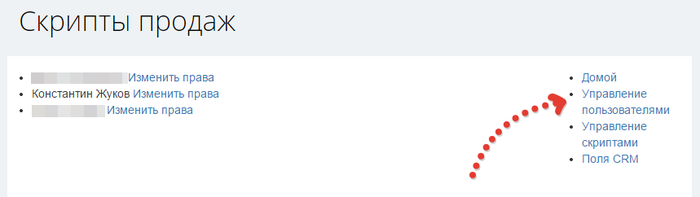
Next in Bitrix24, you need to select the CRM fields that we are going to use in the scripts:

Now we are going to create the scripts themselves:
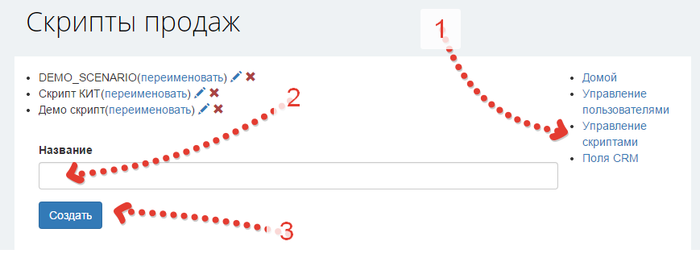
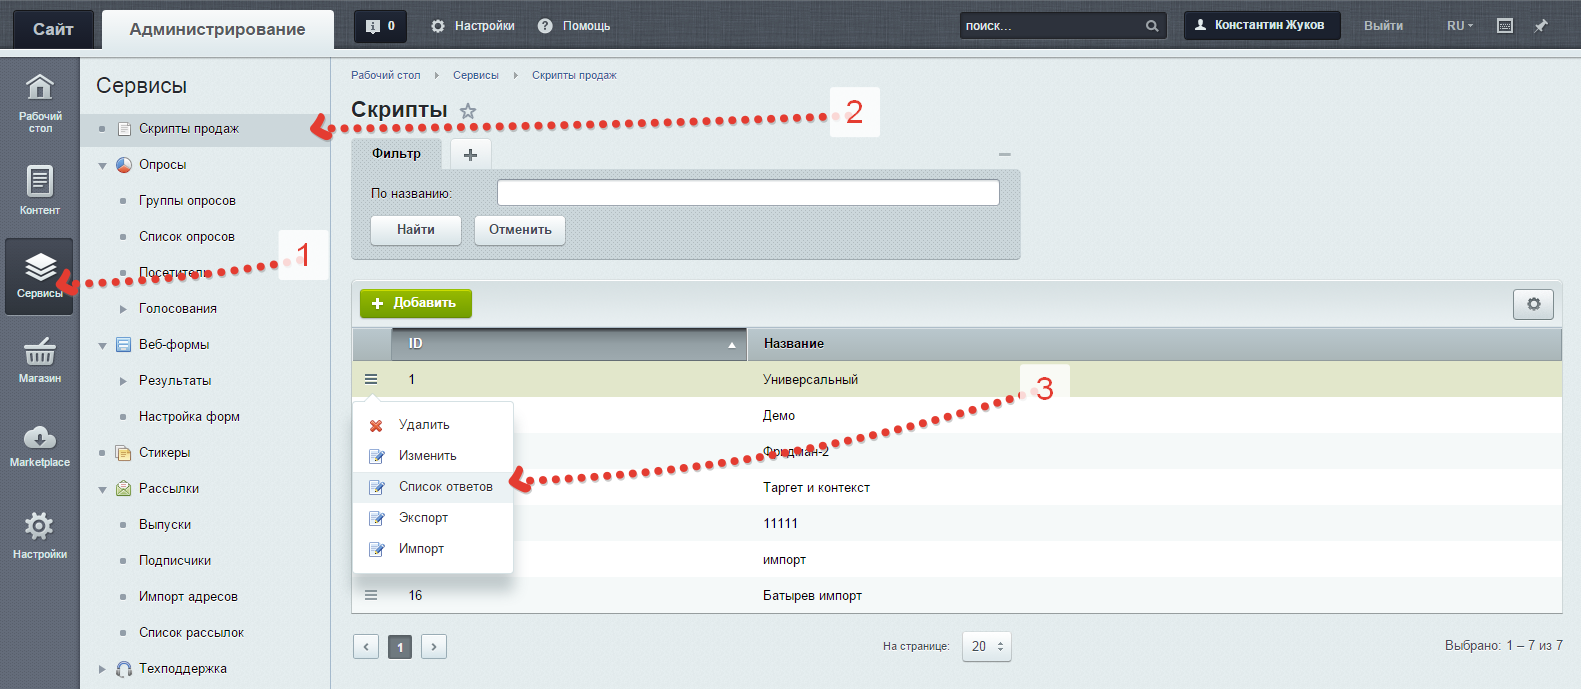
The script appears in the list, it can be renamed (1), edited (2) or deleted (3):
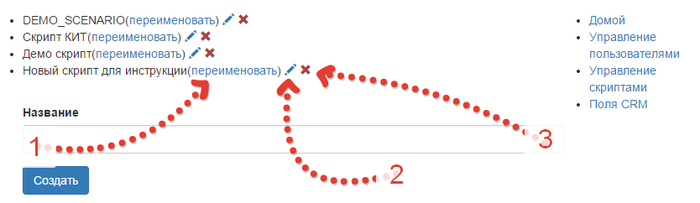
We go into editing:

If you click on the rectangle (1), we will go to the node editing, just the script can be exported (2) and imported (3). When importing, all nodes of the edited script will be replaced.
Click on the first node:
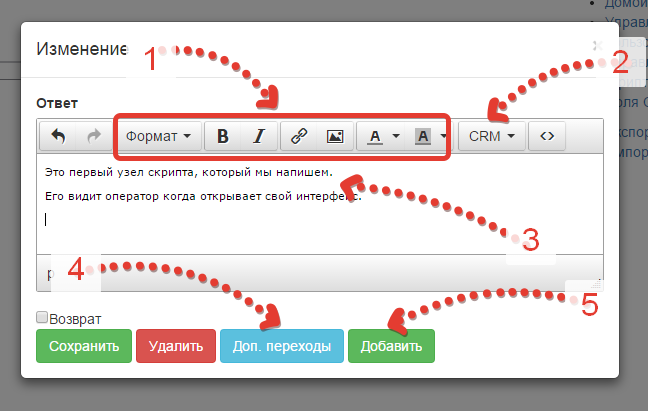
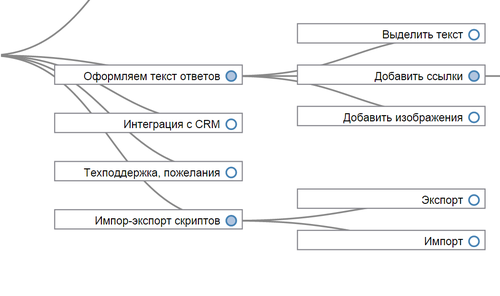
1 - Tools for formatting text, adding links, tables, images.
2 - Menu for inserting elements from CRM (only in Bitrix24)
3 - Field for text manager and CRM elements
4 - Allows you to select additional answers in the manager interface, except those that will be created automatically from the following nodes
5 - Adds an empty node following the editable
Save, open again and click "Add", as a result we get a new empty node in the tree:

Go to edit a new node:
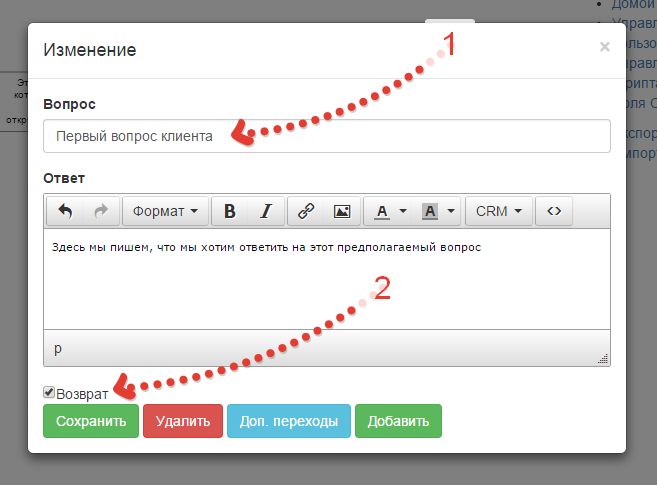
We write the question (1) (briefly and clearly, how the client sets it so that the manager is intuitively clear).
We write the text of the answer, which should be announced by the manager.
In the necessary nodes, check the box “Return” (2) - the manager can quickly go to these nodes from any place using the drop-down list.
We save.
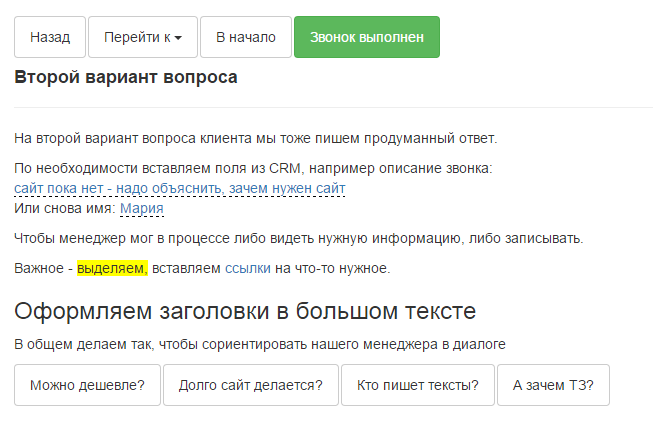
We edit the node with the second variant of the client's question.
Important note:
Currently, nodes cannot be transferred, reattached to each other, cut and copied. The order of nodes is arranged in the order of creation chronology. This must be borne in mind and thought out in advance. In future versions of the application, these inconveniences will be eliminated.
Now we insert into the first node the data from CRM:
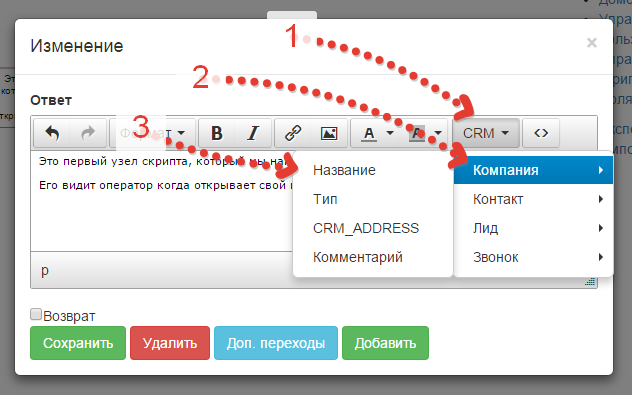
We go in the menu (1), we direct on the entity (2), we click on the field name (3).
The CRM field tag is inserted into the text at the cursor location.
In the menu, the fields selected by the checkboxes in the “CRM Fields” section are available.
Save and go to the manager interface (link "Home"):

Click on the link and open the script:
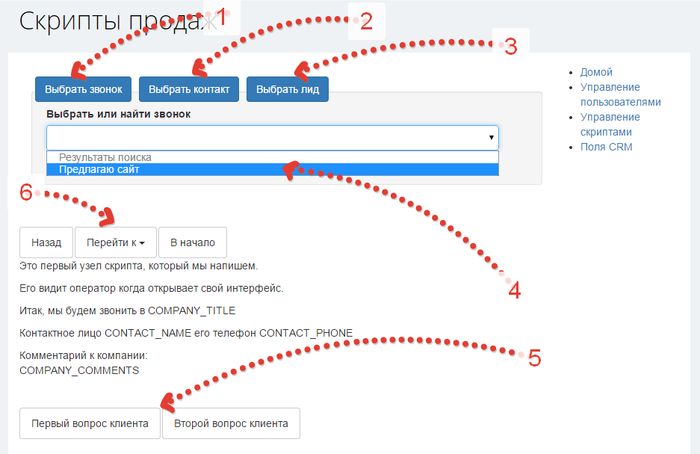
The manager can choose what he will work with - scheduled calls (1), arbitrary contact (2), lead (3).
The list of today's, not completed calls is shown first automatically (4)
Further the manager sees the text, variants of the client’s reaction (5).
6 - drop-down menu for quick access to predefined important nodes.
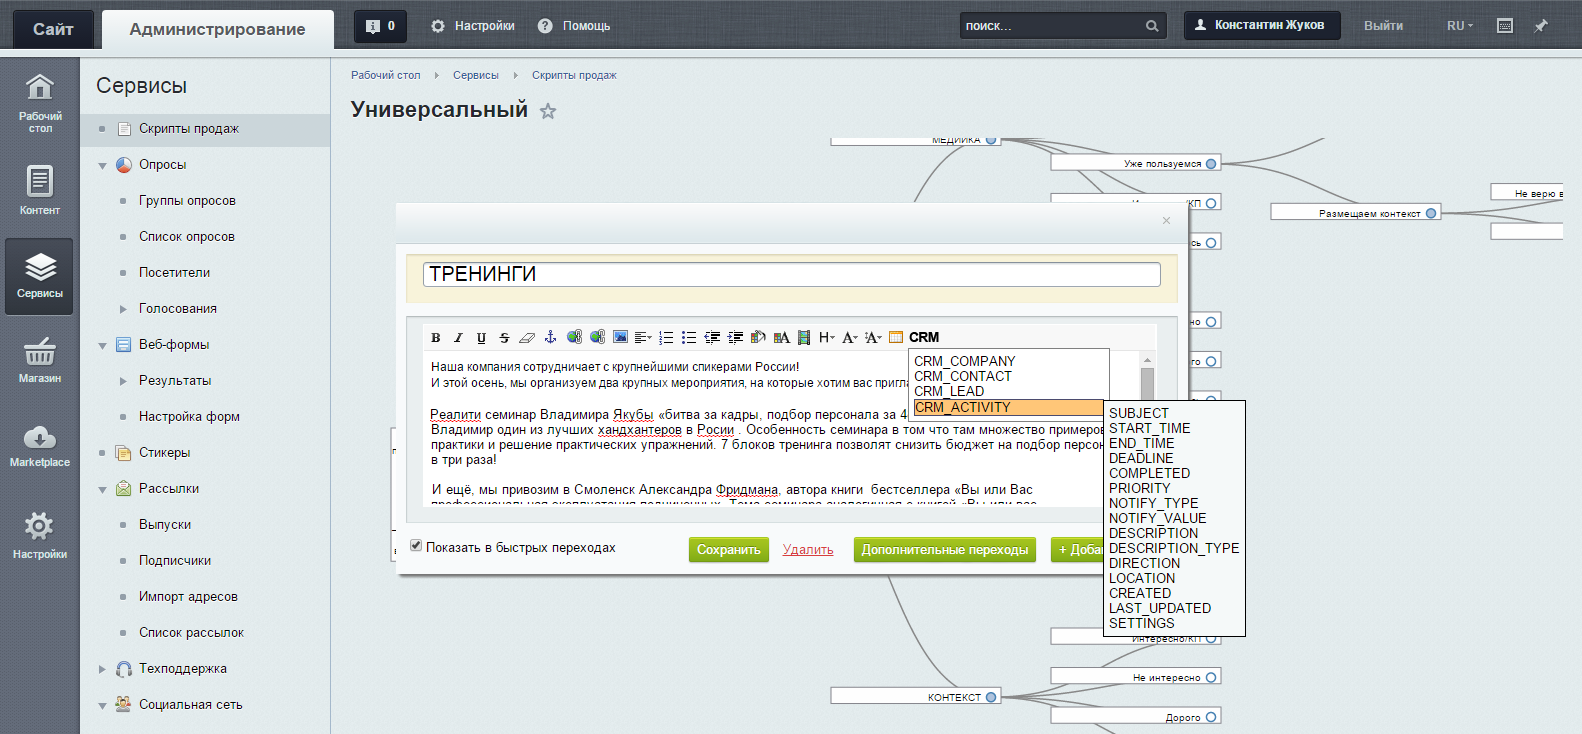
In the boxed version of Bitrix24, creation and management of scripts occurs in the administrator interface:
I can not say that we are completely satisfied with what we have at the moment - there are still inconveniences, unresolved problems with the limitations of the Beatrix API, and many unrealized ideas. Probably there are even outright blunders.
Yes, and we didn’t do the design either, in general, because we decided to get feedback as soon as possible, finish all the functionality and only then apply gloss.
But - we work with this decision ourselves and frankly enjoy the way it solved our problems.
Several other companies that purchased the application of course ask for the functions they need and the finishing work already planned, but nevertheless they are already grateful for solving their problems.
Sure - we will be useful to you, if you are engaged in sales.
And in eliminating chaos and in raising sales, and in improving the process of learning beginners.
Install, register, try .
And be sure to criticize, suggest and ask :) In the comments or by e-mail - we are open for communication.
Source: https://habr.com/ru/post/289914/
All Articles