How to enable Intel AMT, if the manufacturer forgot it
The second laptop supporting Intel AMT has already come into my hands; technology of remote control at the level of iron, but for some reason blocked by the manufacturer. Let's try to fix this little flaw.
The experimental will be a Lenovo t420s laptop with a Core i5-2520M processor and a QM67 chipset, and a Dell Latitude e6450 laptop with a Core i7-4800MQ processor and a QM87 chipset. I deliberately pointed out the chipsets and processors, because both of them must support vPro technology to support AMT.
Intel AMT is based on Intel ME, a subsystem built into modern computer platforms. Its main component, the controller, is built into the chipset, and the controller firmware is in the “BIOS”. And it is this firmware that we will fix to enable AMT.
"Bios" is written in quotes because it is not quite bios. In modern computers, the BIOS chip is the so-called SPI flash. There are many regions in it, in particular, the BIOS region, the one we update most often by downloading it from the manufacturer’s website; and it also has a ME region, one that uses the Intel ME controller, which, in turn, implements the AMT technology.
To access the SPI flash, we will use the flash programming tool, the FPT, which can be found in the Intel ME System Tools package. These tools are the easiest to take on this site win-raid.com . For Lenovo, we download the package “Intel ME System Tools v7.1 r3”, because, as it is “For 6-series systems that come with ME firmware v7.x”, and for Dell we will download “Intel ME System Tools v9.0 r2 ", By the way he" For 8-series systems which come with ME firmware v9.0.x "
In all packages of "Intel ME System Tools" FPT is present in versions for dos, windows, windows 64bit. For those who dislike fun in the form of programming with a “flashing” flash drive with a programmer, in order to minimize risks, it is advisable to use the FPT version for dos, which means you will need to create a bootable USB flash drive with this very DOS. I usually use the HPUSBFW_Special program for this, which is easily googled, and I will need to google a set of dos files. In addition to FPT, to edit the firmware, we need a hex editor, for example, hexit, which, in the case of using a bootable dos flash drive, must be written to this flash drive along with the FPT version for dos.
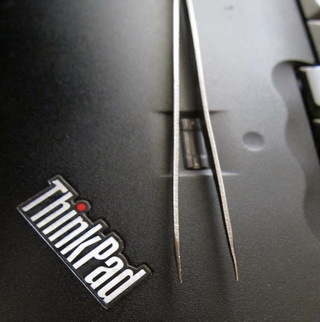
But we still have to work with a screwdriver, but also with sharp tweezers (this is it in the introductory picture), since all SPI flash regions are locked from the factory on our experimental laptops, except for the BIOS region, therefore our first task is to unlock the ME region and read.
For Lenovo, unlocking will be easier. We read the “hardware maintenance manual” for the t420s laptop for removing the keyboard. We unscrew the screws indicated by the keyboard icon: one under the cover covering the memory and the wifi card; another in the battery compartment. Click on the keyboard and shift it away from you. Raise carefully so as not to damage the cable connecting the keyboard with the motherboard. Without disconnecting the cable, we shift the keyboard towards us in order to gain access to two contacts near the chipset.

The above contacts will need to close before turning on the laptop, I do it with sharp tweezers, and then, turning on the laptop and, after waiting for the POST procedure, the contacts can be opened. After downloading the laptop, whoever, and I at dos, run fpt with the keys:
fpt -desc -d len.bin
As a result of the fpt program, we should get the file len.bin. If the program will swear at the impossibility of reading, then you did not close or did not keep closed contacts.
The file len.bin that we received is a region of descriptors, namely it contains bytes that do not allow us to read the SPI flash in normal mode. Let's fix them with hexit:
hexit len.bin
Starting at address 0x60, we need the byte sequence to be 00 00 FF FF 00 00 FF FF:

Edit, save, close hexit and write the region descriptor back to the SPI flash:
fpt -desc -f len.bin
The blocking of reading and writing of SPI flash regions can be considered removed. Turn off the laptop, insert the keyboard back (do not forget to press it when you move yourself to snap).
If you are a happy owner of Dell, then google "Latitude e6540: Remove the Palmrest Assembly site: dell.com" and find the video from the manufacturer, how to remove the top cover of your laptop (I do not provide a link, because it has already changed).

Under the lid, in the upper right corner, near the “audio” connector, you will need to lift the film and detect the audio chip under it. Near it there will be two points (one is the output of the capacitor, and the second on the track going from the fifth output of the audio chip), which will need to be closed as well as on Lenovo.

A further algorithm, namely, read / correct / write the same as we did for the Lenovo laptop above.
For those who are not confident in their abilities, I’ll say that I unlocked two similar Dell’s without having the skills of a repairman, the only thing is to practice working off the laptop with sharp tweezers to close and open the necessary points without touching other elements. Time for disassembly and assembly - 10 minutes. Who does not meet will wash the floors.
After unlocking the reading of the SPI flash regions, we’ll get a full dump or, as it is also called, full flash:
fptw64.exe -d full.bin
Let's open the resulting dump using Flash Image Tool FIT, from the same Intel package that we downloaded at the beginning of the article. If everything was open with Lenovo without a hitch, the FIT cursed Dell several times on the Dell dump, but I ignored errors and vornings. On the screenshot, the dump is open in the required section and we see "Manageability Application Permanently Disabled?" Is set to Yes:

Install it in No and note that at the same time a couple of other parameters we need have changed to the correct values:

It would seem that this is all. But soon only a fairy tale affects, and a region corrected in this way cannot be so easy to take and pour back. The fact is that in the ME region there is both a firmware code and user data, which in turn consist of data recorded during the Intel ME operation process, and data recorded during the first initialization process. We need to make a “clean” ME, that is, without initialization and everything else, because, having changed the parameters in the region, we will need to re-initialize the code.
Let's look in the window of the FIT log and find where it has unpacked the regions. By default, a subfolder is created in the FIT startup folder with the name of the file being opened, and in it there is a DUMP subfolder that contains the “ME Region.bin” we need.
Download ME Analyzer software and repository database from win-raid.com . Unpack, update the database and explore our "ME Region.bin":
MEA.bat "ME Region.bin"

Firmware version of the investigated Lenovo was 7.1.86.1221, it is the latest at the moment and its size is 5 MB. Let's get the original firmware from the already mentioned win-raid . For Lenovo, this will be the “Intel ME 7 Firmware Repository Pack r20” pack, the file we are interested in must include version 7.1.86.1221, be 5MB and end in RGN.bin. Such a file was not found and I, at my own risk and risk, successfully tried 7.1.86.1221_5MB_ALL_PRD_EXTR.bin. But you may not be so successful, because the files with EXTR.bin ending may not be “clean”. For Della, the necessary RGN file was found in the package “Intel ME 9.0 Firmware Repository Pack r10”.
The next step is to open the found firm with FIT (I know that it sounds closer to fomwe). Let's find it unpacked “ME Region.bin” and replace it with “ME Region.bin” in the folder of the regions of full flash, opened by FIT. Obviously, it was necessary to act on the contrary, that is, first to get the ME region of the original frivvari, but then the sequence of the narrative would be broken.
And now we have open full flash in FIT, the necessary values have been changed, the “ME Region.bin” file has been replaced, it remains to go into the Build menu and ... correctly, select “Build Settings” in which to remove the “Generate intermediate build files” checkbox, and then select in the same Build menu or press F5. In the logs we can find where the result of our build was created - the file “outimage.bin”. By default, it is created in the FIT startup folder.
We will not sew the resulting outimage.bin, but open it in FIT, pick up the “ME Region.bin” file from the resulting DUMP folder and sew this region with the help of FPT:
fptw64.exe -me -f "ME Region.bin"
Is done. Reboot. In Dell, click after the F12 post time and in the opened boot menu we see a new line. In Lenovo, click Control-P, then 1 and see a new item in MEBX. The purpose of this article was to unblock the AMT, and working with it is left for self-mastering.
In the end, I would like to thank CodeRush user, who first mentioned that dragons exist, and then "he led me to their lair."
All material is a compilation of the Internet, much has been gleaned from the win-raid website, articles by Nikolay aka CodeRush . Only unlocking of the Lenovo regions is exclusive - at least, right away I didn’t find a valid manual and I had to double disassemble the entire laptop and “ring up” all the way from the sound chip hidden on the back of the board under the pci express slot to two contacts that stuck out in sight around the chipset. Laptop, forgive me for barbarism, but you have a fresh thermal paste on the processor.
Thank you all for your attention!
')
Source: https://habr.com/ru/post/283146/
All Articles