How to hide your real IP address using a VPN server

In this article, we would like to share with you the features of a VPN server deployment using standard Windows Server 2012 R2 tools on your VPS server. About the pros and cons of various tunneling protocols for the organization of VPN in Habré have already been written here . You can read about openVPN on * nix here , here and here . We tried to create the most simple and clear guide, intended primarily for those who would like to hide their real IP address using a VPN server.
Server Tuning
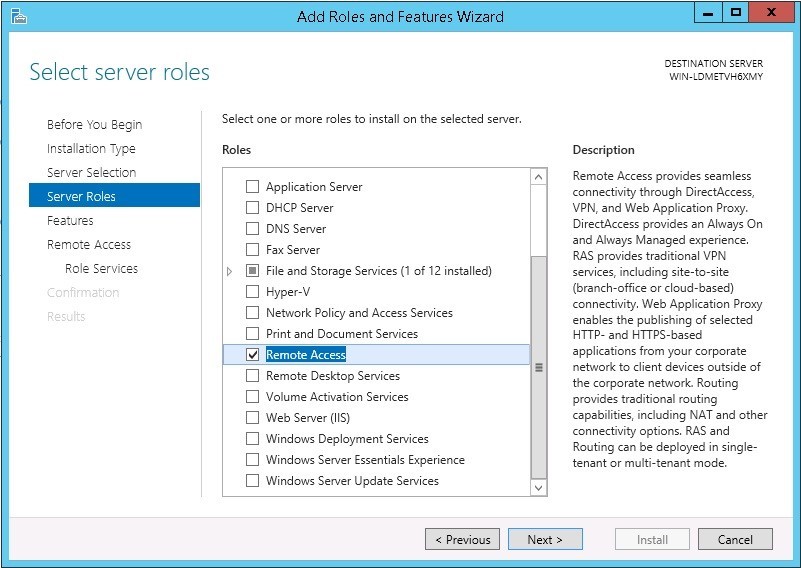
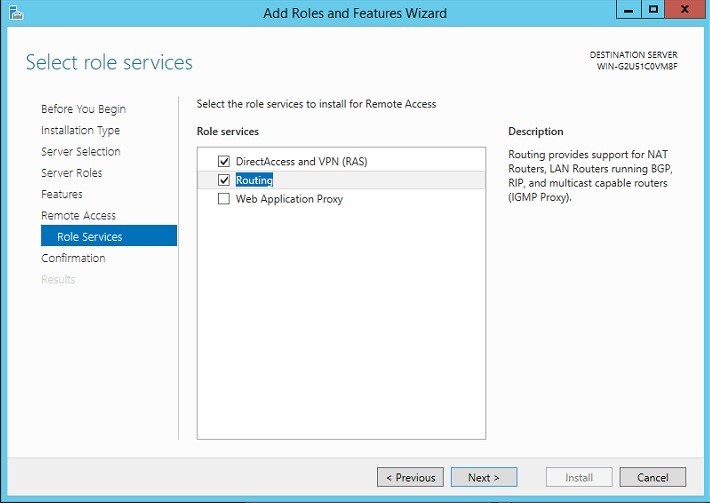
In order to deploy a VPN server based on the Point-to-Point Tunneling Protocol (PPTP) on your VPS running Windows Server 2012 R2, we first need to install the Remote Access component. To do this, use the server management panel (Server Manager).
')

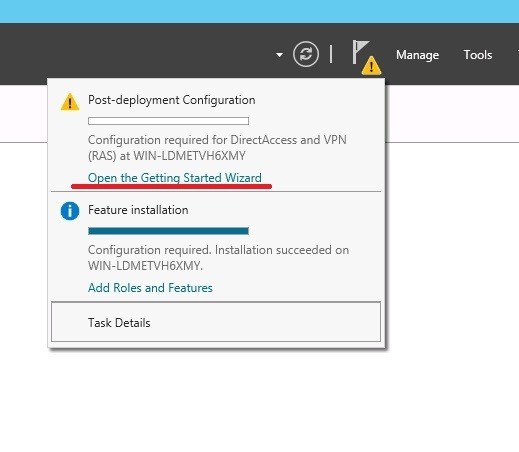
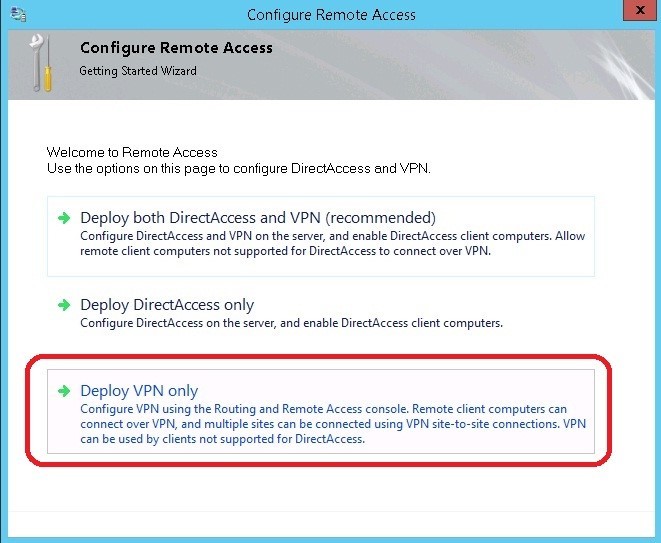
Click next until the installation process is running. Installation is complete, proceed to setup. Open the server control panel and launch the Configuration Wizard, in which we select “Deploy VPN only”
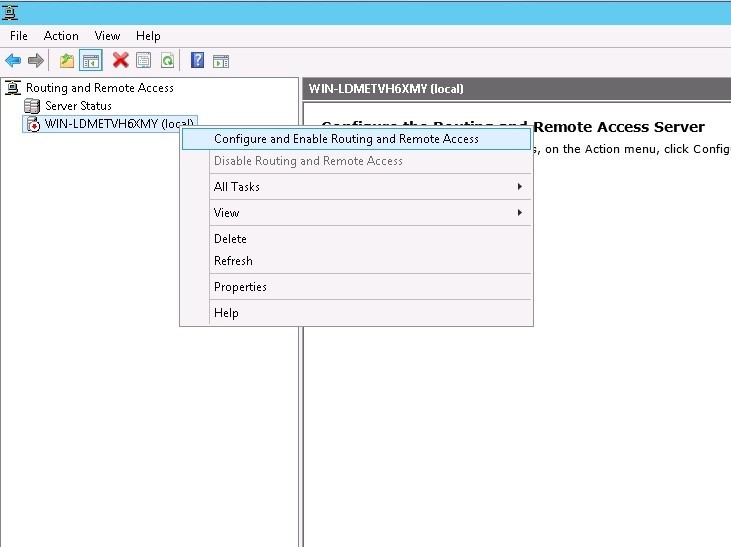
Go ahead. We start the routing configuration wizard and remote access.

Select the item Custom Configuration. This is necessary in order to avoid the error “Less than two interfaces were detected on this machine” (less than two network interfaces were detected on your server):

We mark the points NAT and VPN (we will need NAT in order to use our VPN server to access the Internet) and after the completion of the wizard we start the Routing and Remote Access service.


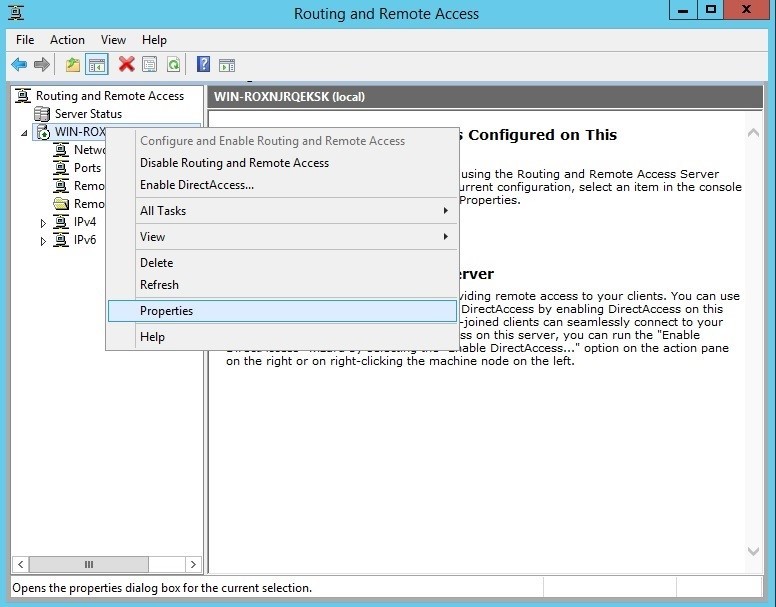
Go to the properties of the server routing and remote access.
In the IPv4 tab, we activate the static address pool.
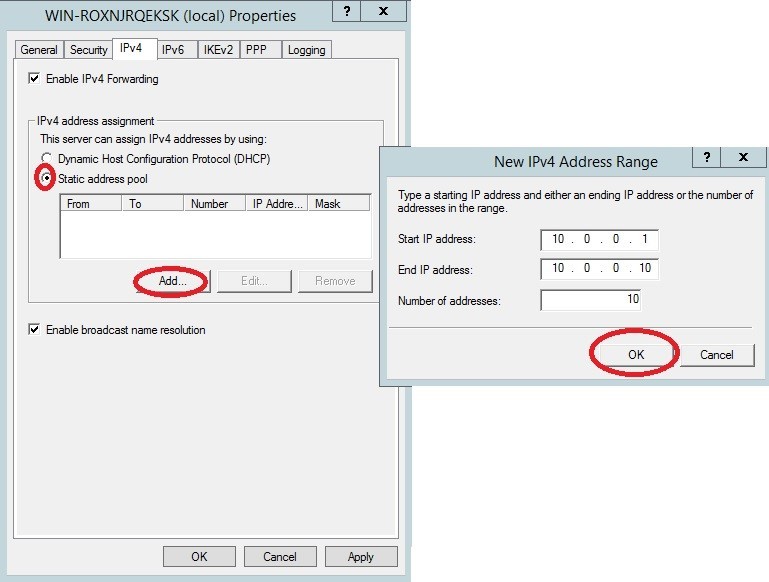
The remaining settings are left as default.
Apply and move on ...
Let's create a new user that we will use to connect to our VPN server.
This can be done using the lusrmgr.msc snap- in . Open the properties of the created user, the Dial-In tab.

By default, each user's access is governed by the network policy of the Network Protection Server (NPS Network Policy). In order to allow connection to our server, open the nps.msc snap- in , expand the Policies / Network policies section and go to the “Connections to Microsoft Routing and Remove Access Server” policy properties
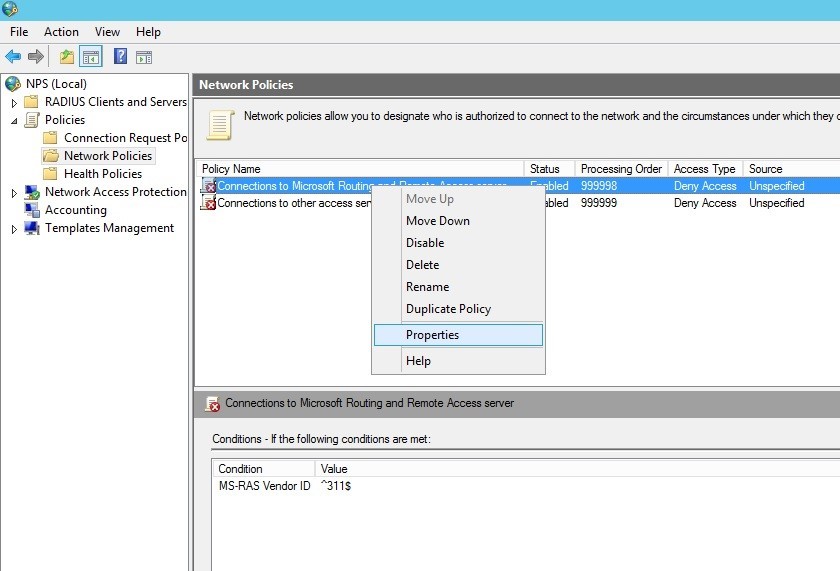

Allow access in case the connection meets the requirements of this policy.
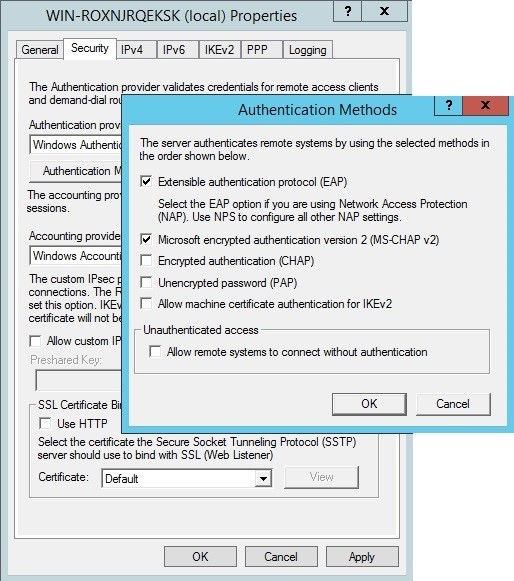
In the Constraints tab, you can choose different authentication methods, set session timeout (Session timeout) and idle timeout (idle timeout), set daily access restrictions (for example, on working days from 8:00 to 17:00) and so on.
In the Settings tab, you can configure the filtering of incoming and outgoing packets for ipv4 / ipv6, restrict access to the network at certain time intervals, configure the parameters of multi-channel connections, configure the rules for assigning IP addresses to clients. We will not dwell on these settings in detail. If any of the points in this manual require additional coverage, please indicate this in the comments.
Now we need to configure NAT so that this server can be used to access the Internet. Add a new interface in the NAT section for IPv4 in the routing and remote access server. In our case, Ethernet 5 is an external interface with a public IP address, on which we should activate NAT.
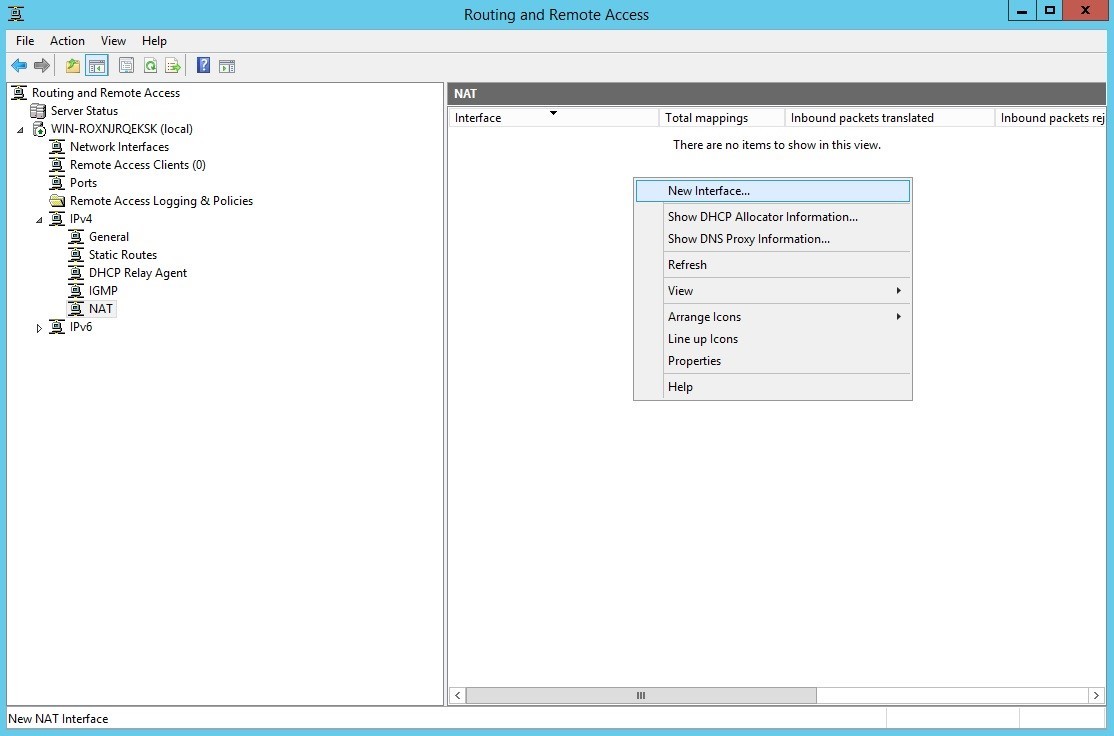
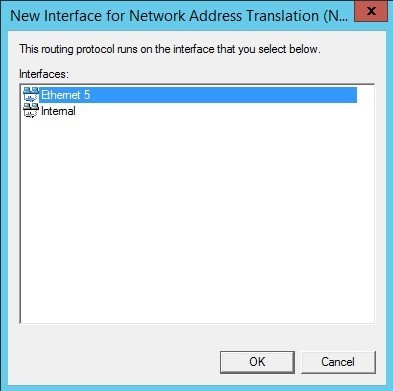
At the final step, we specify the interface type and activate NAT. The server part is ready.

Creating a VPN connection (Windows 8)
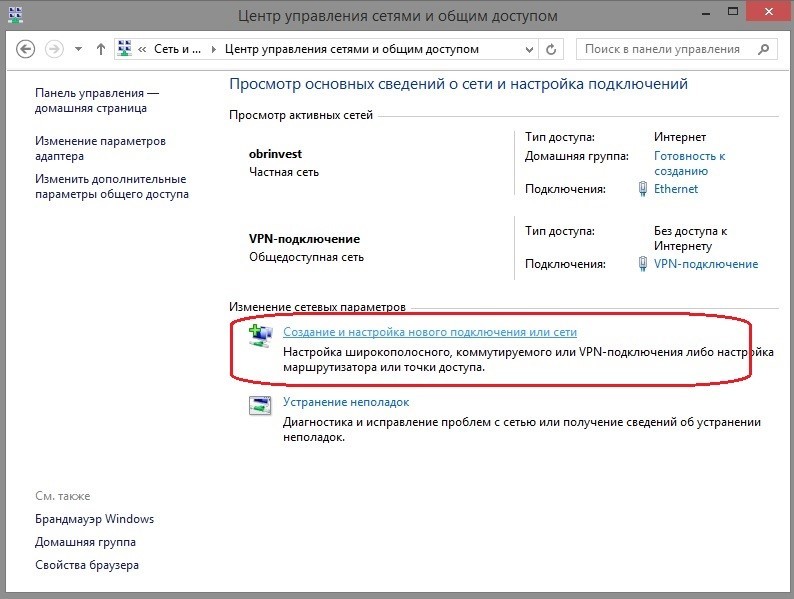
In order to create a VPN connection, go to the Network and Sharing Center in the windows control panel and select the item “Create and configure a new connection”.


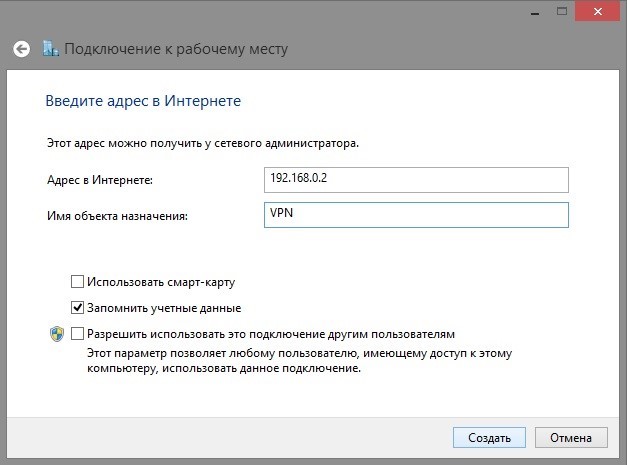
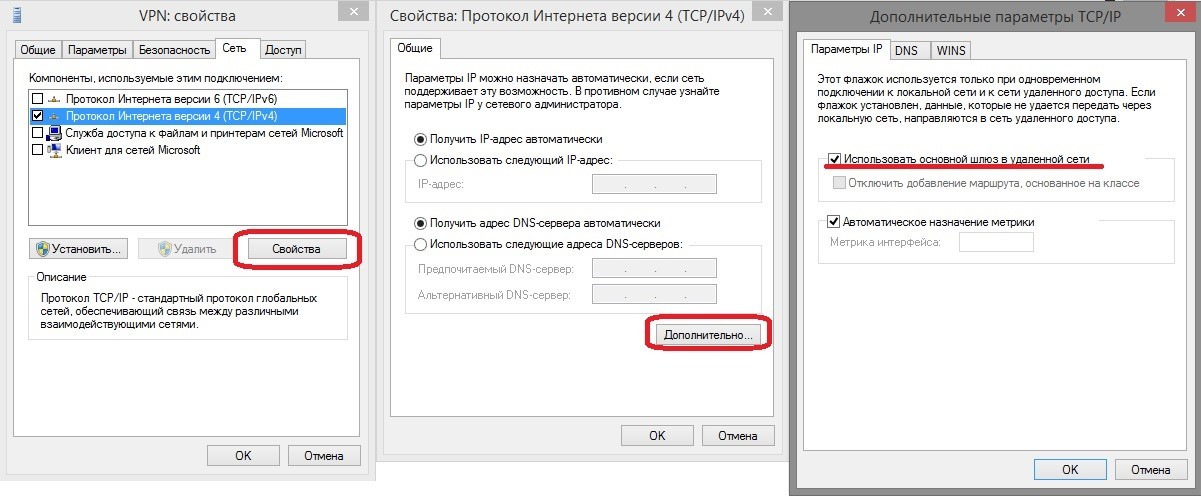
Connection created, proceed to setup. Execute the ncpa.cpl command (windows snap-in for managing network connections). Go to the properties of the created connection and do the following.

Next, go open additional TCP / IP settings. The item “use the main gateway of the remote network” should be checked.
Everything is ready, we try to connect.


Connect!
Run cmd.exe and execute route print -4 :
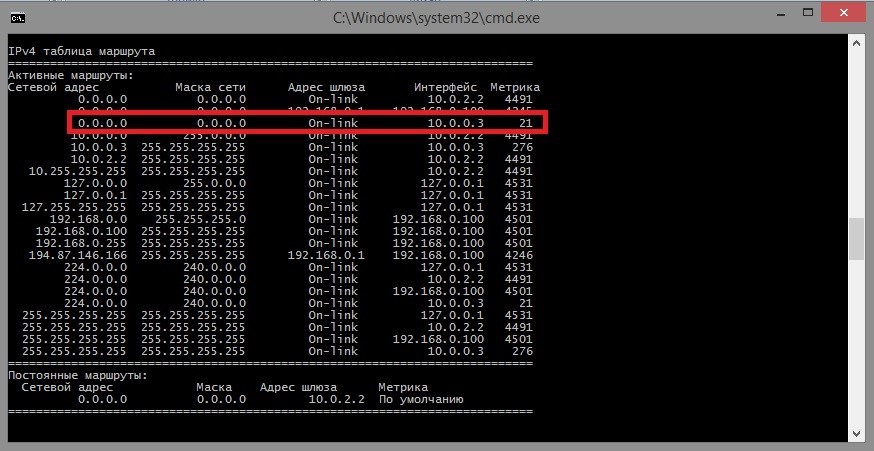
The selected route becomes the most preferable (metric 21 is the smallest), so all our outgoing traffic will be routed through a PPTP tunnel. Next, the NAT component of the routing and remote access server comes in, which further sends traffic through the Internet service provider’s infrastructure of your VPS server, making it possible to hide your public IP address (if provided by your Internet provider).
As a test of the correctness of the server settings and connection on the client, we open the site www.whatismyip.com and see the IP address of your VPN server. Of course, if you did everything right.
We in the company RUVDS constantly improve the quality of the presented material in our corporate blog on habr. After the release of the first articles, we received a number of recommendations that helped us understand the direction of work when publishing subsequent articles. Feedback from our readers is of great importance to us, so if you liked the material or vice versa, if we did not highlight some important points, do not hesitate to share your opinion in the comments.
Source: https://habr.com/ru/post/282996/
All Articles