We send data from Arduino to Azure IoT Hub
Not so long ago, I became the proud owner of Genuino MKR1000 . Resource Hackster.io together with Microsoft held a competition for the best idea. I may not have had time to bring my idea to life and take part in the second part of the competition, but I can share with you information that will help you realize your ideas. Under the cut how to send data from the Arduino to the cloud and how to calculate it if you have a WiFi shield or MKR1000.
Azure setup
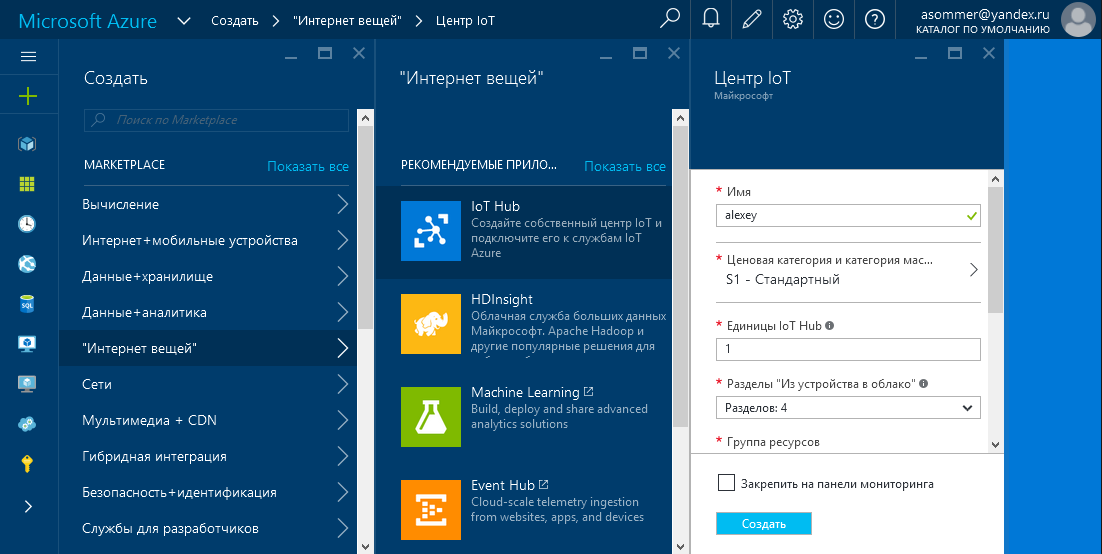
We go to portal.azure.com, click "+", select "Internet of things" - "IoT Hub" and invent the name of our hub. I decided to call the hub simply and modestly - alexey. Price category I chose a free S1 (per device).
')
Actually, the hub configuration is complete on this. You will still need to get the primary key, but this can be done later.
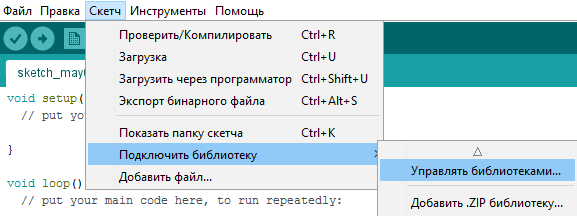
Arduino Setup
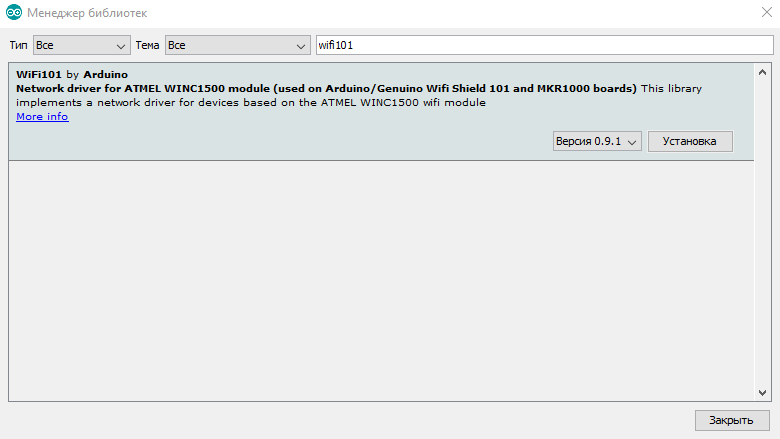
Install the necessary WiFi101 library:
We need a version higher than 0.8, so if you already have an old library installed, update it.
Azure IoT Hub uses SSL for connection security. But since the Arduino does not have enough memory to store an SSL certificate in it, we need to write it to the WiFi chip. To do this, update the firmware version of WiFi101. Download the link file Wifi101_FirmwareUpdater_windows.zip
In the Arduino IDE, open the sketch File - Examples - WiFi101 - FirmwareUpdater. Connect the MRK1000 and load the sketch. Now the Arduino board is ready to receive firmware with a certificate.
Unpack the Wifi101_FirmwareUpdater_windows zip archive, which we recently downloaded and run winc1500-uploader-gui.exe. Enter the node address of our hub.
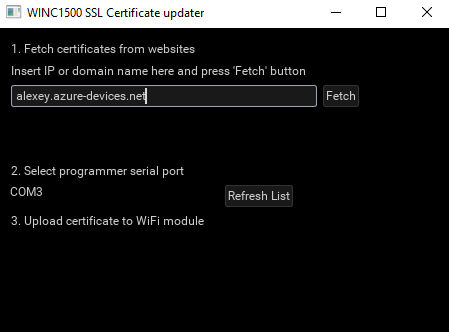
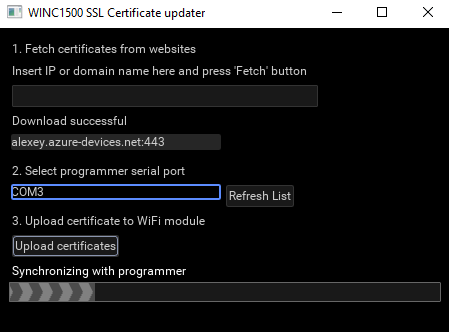
Click and select the COM port, then click "Upload certificate"
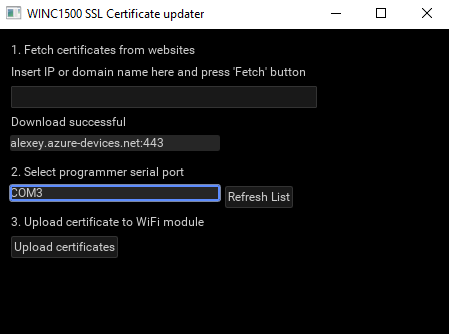
It remains to wait for the certificate to be downloaded.
Microsoft Azure IoT Hub uses Shared Access Signatures .
These are access signatures that can be used to work with an IoT Hub message queue without a password. We need to create a SAS token. In order not to do this in Arduino code, you can use the Device Explorer utility.
Download the link SetupDeviceExplorer.msi file
Install and run. Go to the portal Azure in IoT Hub and click on the key in the upper right corner:
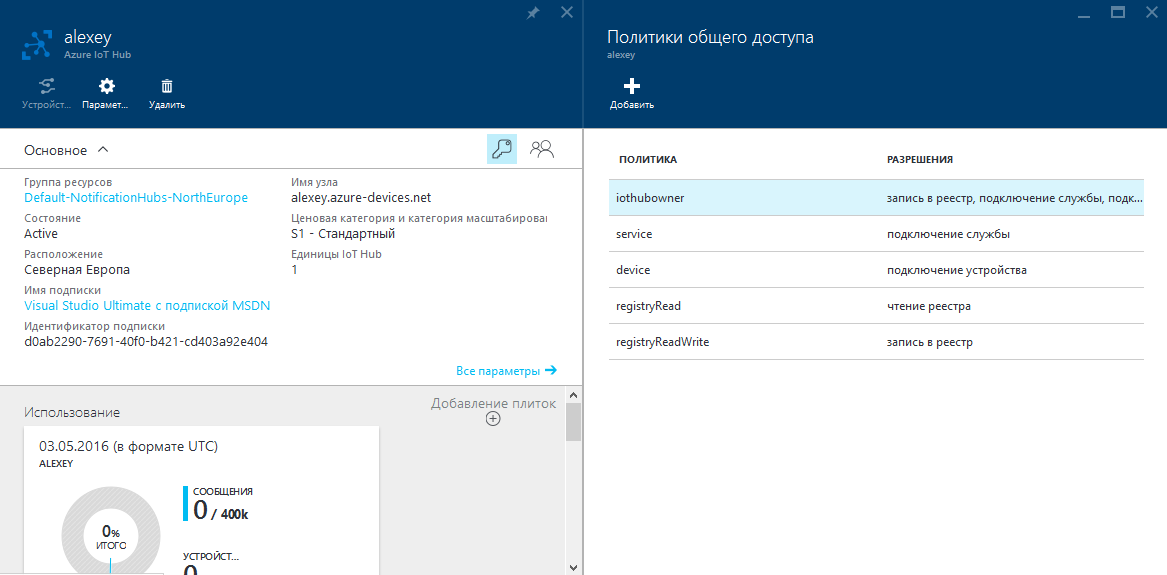
Select iothubowner from the list and copy “Connection string - primary key”
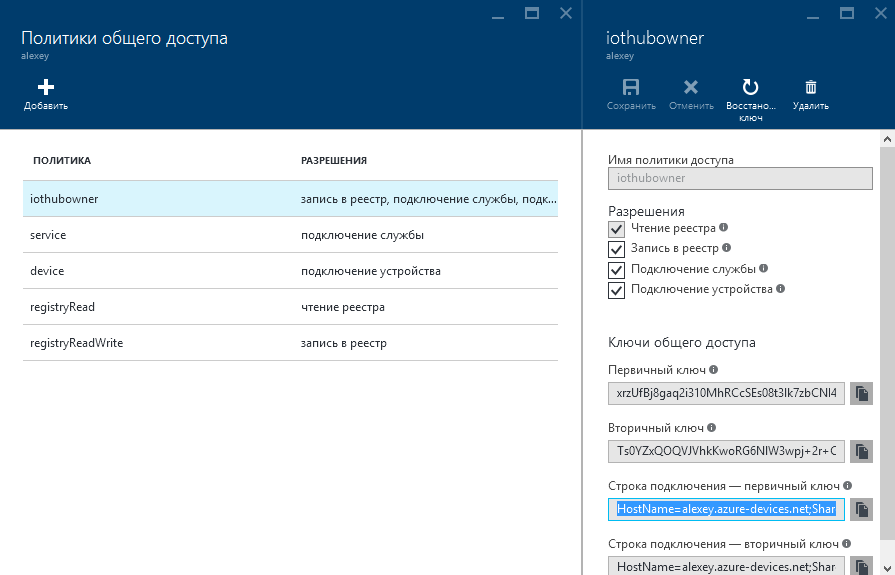
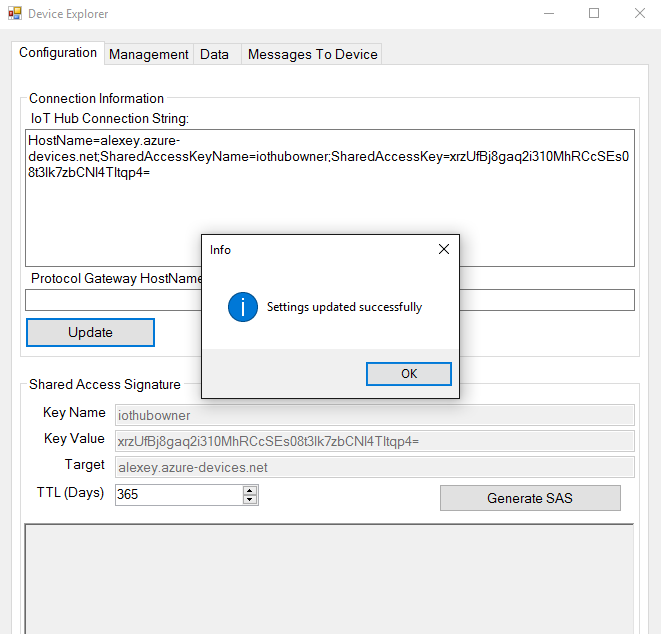
This line is entered into the Configuration tab of the Device Explorer application and click the Update button.
Go to the Management tab. Here we can add a new device. The Create button, create an ID for our device (I named my device myDevice) and click Create.
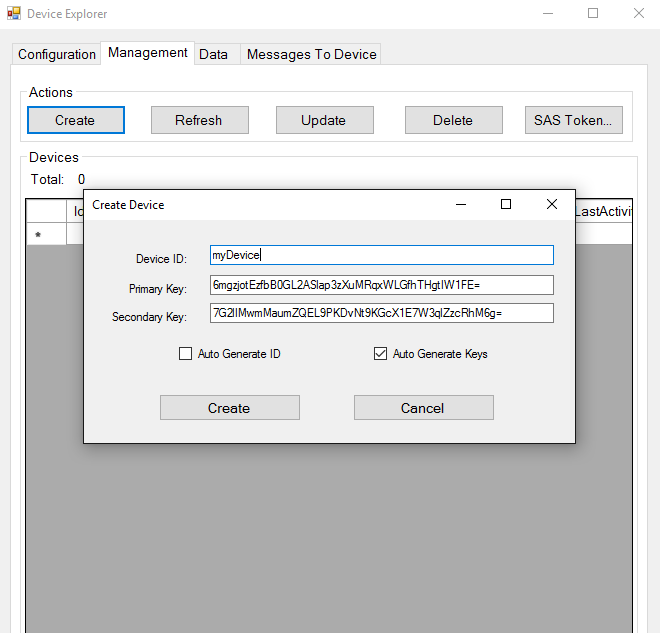
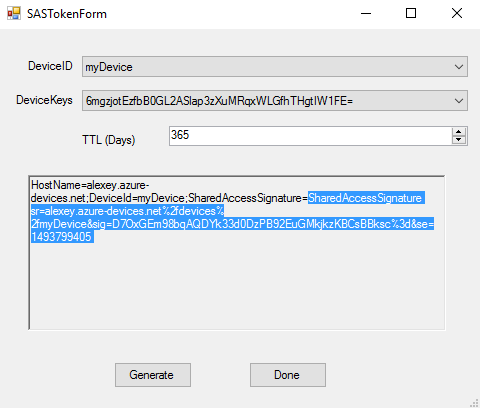
Our device will appear in the list. Select the string with it and click SAS Token ...
Enter the interval of days and click Generate. From the resulting token, we need only the part starting with “SharedAccessSignature sr =” (copy carefully, since the text SharedAccessSignature occurs 2 times in the line)
An English manual on how to use the Device Explorer is here:
How to use Device Explorer for IoT Hub devices
Arduino code
Consider the Arduino code. Our title is:
#include <SPI.h>
#include <WiFi101.h>

char hostname[] = "alexey.azure-devices.net"; // Azure IoT Hub
char authSAS[] = "SharedAccessSignature sr=alexey.azure-devices.net%2fdevices%2fmyDevice&sig=D7OxGEm98bqAQDYk33d0DzPB92EuGMkjkzKBCsBBksc%3d&se=1493799405"; // SAS token, Device Explorer
String deviceName = "myDevice"; // ID
char ssid[] = "myhomenet"; // wi-fi
char pass[] = "password123"; //
String uri = "/devices/myDevice/messages/events?api-version=2016-02-03";
int status = WL_IDLE_STATUS; //
WiFiSSLClient client;
The uri string will be different for sending and receiving data.
If we got the data, the string would be
/ devices / myDevice / messages / devicebound? api-version = 2016-02-03
In addition to sending and receiving, it is possible to complete / reject or reset a message.
In the setup, we only make a standard connection to the Wi-Fi network.
void setup() {
Serial.begin(9600);
Serial.println("Setup begin");
// check for the presence of the shield:
if (WiFi.status() == WL_NO_SHIELD) {
Serial.println(" Arduino WiFi ");
while (true); //
}
// Wifi:
while ( status != WL_CONNECTED) {
Serial.print(" ");
Serial.println(ssid);
status = WiFi.begin(ssid, pass);
delay(10000); // 10
}
Serial.println("Connected to Wi-Fi");
}
We need a method that will send a string of text with a POST HTTP request to our site. I don’t bother and send a string of text, although usually in the examples they generate and send json.
void httpPost(String content)
{
client.stop(); // ,
if (client.connectSSL(hostname, 443)) {
client.print("POST ");
client.print(uri);
client.println(" HTTP/1.1");
client.print("Host: ");
client.println(hostname);
client.print("Authorization: ");
client.println(authSAS);
client.println("Connection: close");
client.print("Content-Type: ");
client.println("text/plain");
client.print("Content-Length: ");
client.println(content.length());
client.println();
client.println(content);
delay(200);
} else {
Serial.println("HTTP POST ");
}
}
Now in order to send a string of text, just call the method
httpPost("Some message from Arduino");
But we also consider the answer to ensure that the data are safely received
httpPost("Some message from Arduino");
String response = "";
char c;
while (client.available()) {
c = client.read();
response.concat(c);
}
if (!response.equals(""))
{
if (response.startsWith("HTTP/1.1 204")) {
Serial.println(" Azure");
} else {
Serial.println("");
Serial.println(response);
}
}
All code you can download from github
Console application that reads data from the IoT Hub message queue
Create a console application.
Open the NuGet Package Manager, look for the WindowsAzure.ServiceBus and install.
Add a pair of namespace:
using Microsoft.ServiceBus.Messaging; using System.Threading; And announcements:
static string connectionString = "HostName=alexey.azure-devices.net;SharedAccessKeyName=iothubowner;SharedAccessKey=xrzUfBj8gaq2i310MhRCcSEs08t3lk7zbCNI4Tltqp4="; static string iotHubD2cEndpoint = "messages/events"; static EventHubClient eventHubClient; Here you can notice that with the connectionString value I entered the value obtained from the Azure portal - this is the "Connection string - primary key". Add the following method:
private static async Task ReceiveMessagesFromDeviceAsync(string partition, CancellationToken ct) { var eventHubReceiver = eventHubClient.GetDefaultConsumerGroup().CreateReceiver(partition, DateTime.UtcNow); while (true) { if (ct.IsCancellationRequested) break; EventData eventData = await eventHubReceiver.ReceiveAsync(); if (eventData == null) continue; string data = Encoding.UTF8.GetString(eventData.GetBytes()); Console.WriteLine("Message received. Partition: {0} Data: '{1}'", partition, data); } } and finally add the code to Main:
Console.WriteLine(" . Ctrl-C .\n"); eventHubClient = EventHubClient.CreateFromConnectionString(connectionString, iotHubD2cEndpoint); var d2cPartitions = eventHubClient.GetRuntimeInformation().PartitionIds; CancellationTokenSource cts = new CancellationTokenSource(); System.Console.CancelKeyPress += (s, e) => { e.Cancel = true; cts.Cancel(); Console.WriteLine("..."); }; var tasks = new List<Task>(); foreach (string partition in d2cPartitions) { tasks.Add(ReceiveMessagesFromDeviceAsync(partition, cts.Token)); } Task.WaitAll(tasks.ToArray()); If you run this console application, you can read messages sent by the included Arduino board.
UPDATE: Since this sending via HTTP is far from ideal, it is better to use the Arduino SDK port called Azure IoT Hub library for Arduino
Useful links:
Get started with Azure IoT using .NET
MKR1000 Azure IoT Hub Interface Using HTTP
MKR1000 Temp and Humidity Sensor
Source: https://habr.com/ru/post/282912/
All Articles