Installing CrashPlan in the Docker container on Synology NAS
Those who love devices from Synology and the excellent backup service CrashPlan have been tumbling for many years trying to configure its reliable and uninterrupted work on the storage. With the advent of Docker to Synology, a light appeared at the end of the tunnel.
Prelude
Synology 's large home-based vaults keep you alert. They seem reliable and reliable. There is a RAID that protects against failed drives. There is a “Time Backup” that perfectly saves file versions and makes them easy to restore. However, the real paranoids who honor Nassim Taleb always remember the rare but unpleasant events that can happen to your data, and the repository itself:
- Fire or theft. The vault disappears entirely, along with your originals and their backup copies on the next section;
- Encrypting viruses. A living example is the SynoLocker virus, which has caused a lot of suffering to users. It penetrated a hole in DSM (the OS from Synology, which manages this network storage). Encrypted all the files there and extorted money. Well, as usual.
- Something else.
Based on this, every paranoid sensible person understands that you need to hide backup copies of all important data (children's photos, for example) away into the clouds. Developers understand this too. DSM has a “Cloud Sync” package that allows you to copy your data to remote cloud storage. Many cloud services are currently supported:
')
- Amazon Cloud Storage, Amazon S3, Cloud Services Compatible with Amazon S3, Baidu Cloud, Box, Dropbox (including Dropbox for Business), Google Cloud Storage, Google Drive (including Google Drive for Work), hicloud S3, HiDrive , hubiC, IBM SoftLayer, Megafon Megadisk, Microsoft OneDrive (including Office 365 and OneDrive for Business), Cloud services compatible with OpenStack Swift, Rackspace, SFR NAS Backup, WebDAV, Yandex Disk.
However, for the reason which is incomprehensible to me and to many users, the cloud service is not specifically supported for backup - CrashPlan . He is loved for his reliability, unlimited and cheap rates . Therefore, for a long time, the community has been screwing this service to Synology
Steps to save the world and launch CrashPlan in a Docker container on Synology
I had to raise my head and look around. By this time, Docker appeared on Synology ( not on all versions ) and now it is possible to launch CrashPlan in a Docker-container, where it will successfully live and update on its own. Its installation and configuration are not quite obvious. I hope that the short instruction below will help you to fill a little less cones than me. It is more likely for dummies, because professional linux admins have already set everything up at home for a long time.
So, the following sequence of actions will allow you to launch and manage your CrashPlan client in a Docker container running on Synology:
1. Create a new shared folder on your storage. For example: "crashplan-symlink". This folder will be seen by CrashPlan from the container. It alone must contain all the data that CrashPlan will process. You can transfer all the important data directly into it, but it is better to create there the subfolders “music-symlink”, “photo-symlink”, “homes-symlink” and define them as symlinks to real storage folders. It works too.
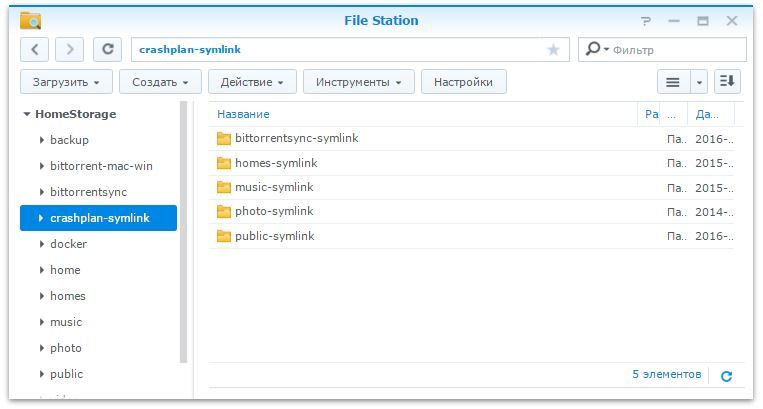
2. Create a new /etc/rc.local file on the repository and put commands into it to mount symlinks from real folders (photos, videos, etc.) to subfolders in our new shared folder. The file “rc.local” must be used because otherwise symlinks do not survive when the storage is rebooted. If there are difficulties, see below “Convenient file management on storage”. Here is what I have now in this file:
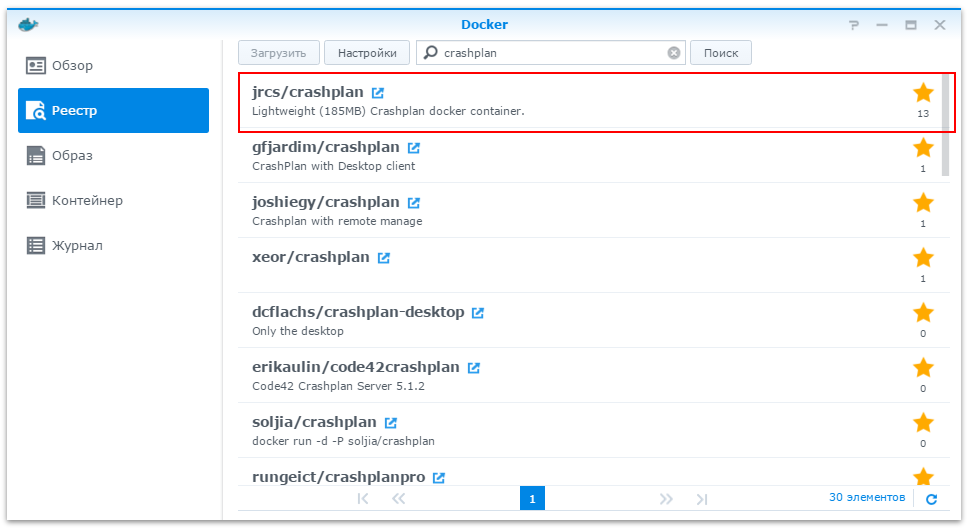
mount --bind /volume1/bittorrentsync /volume1/crashplan-symlink/bittorrentsync-symlink mount --bind /volume1/homes /volume1/crashplan-symlink/homes-symlink mount --bind /volume1/music /volume1/crashplan-symlink/music-symlink mount --bind /volume1/photo /volume1/crashplan-symlink/photo-symlink mount --bind /volume1/public /volume1/crashplan-symlink/public-symlink 3. We put on the Synology package "Docker". Next, run it after installation, look for the crashplan image ("jrcs / crashplan" - hub.docker.com/r/jrcs/crashplan ) in the registry and also install it.
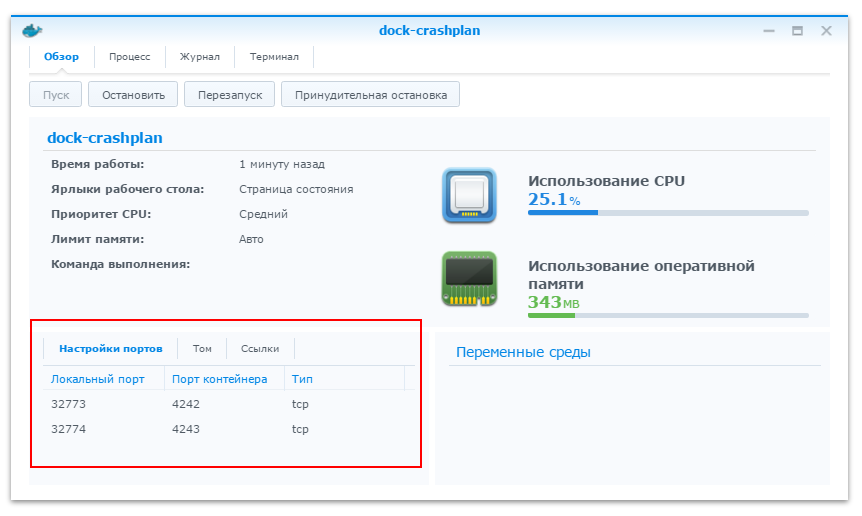
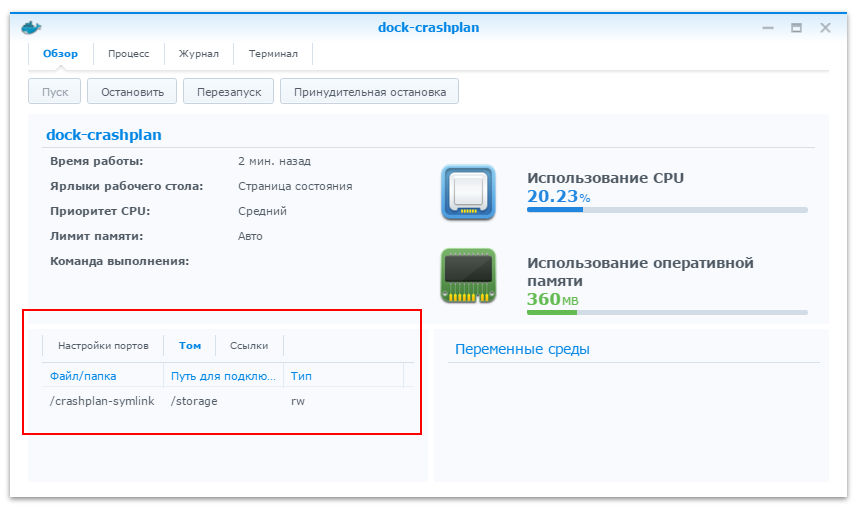
4. During the initial configuration of the jrcs / crashplan container, it is important to remember the proposed port mapping (if we select auto tune) or manually set the mapping of the two ports necessary for operation and control of CrashPlan. For example, like this: assign the port "4243" to "32774", and "4242" to "32773". Open additional container settings and attach our crashplan-symlink shared folder created in the first step. We assign the value "/ storage" to it, so it will be accessible from the docker container.
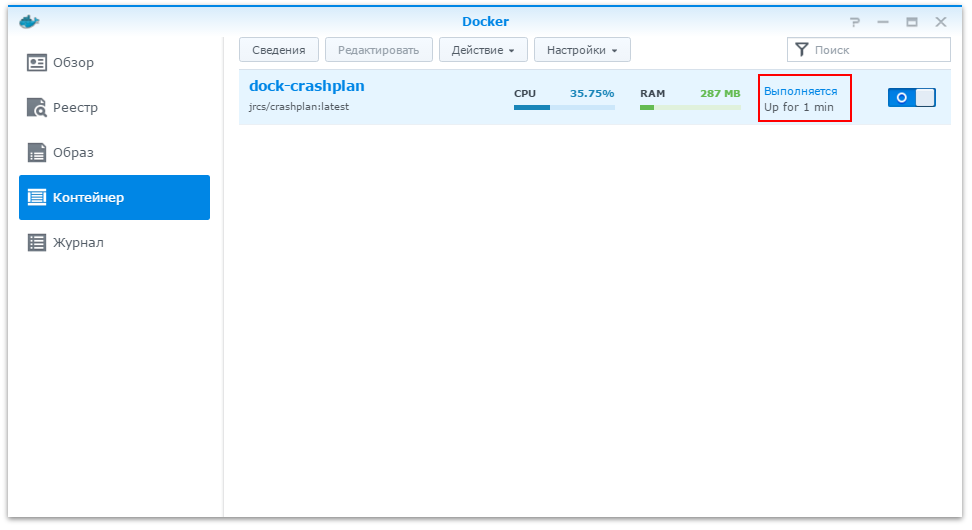
5. Overload the repository. We are convinced that our symlinks in the “crashplan-symlink” folder have survived and are working. We start the jrcs / crashplan package in the docker. If everything is correct, then by this moment we have a launched and working docker-container inside which the client CrashPlan has already been successfully launched and is working. However, the client itself is not yet configured. He needs to say where to get and where to copy, and for this you need to connect to the client through a special application CrashPlan (available for both Win and Linux). However, the application will not be able to simply connect to the client, everything is very safe there, so the quest continues.
6. In order to be able to connect to the CrashPlan client, you need to pull out the string containing the secret key from the special file in the docker container. To do this, we connect to the repository via SSH (for example, with the PuTTY client). Find the file ".ui_info". It lies somewhere along this path "/var/packages/Docker/target/docker/volumes/..../_data/id" (instead of choosing "....", you’ll have to select a specific folder using either the selection method or creation date, there each folder is a separate ID of an existing container). In the file you are looking for there is a text line with a secret (first comes the port address, then the secret we need, then the ip address). So in the example below, we need to take the line: "05bv99x3-36f8-43e6-92c7-4b8776f2edb2".
4243,05bv99x3-36f8-43e6-92c7-4b8776f2edb2,0.0.0.0 7. On the local computer we put the control software from CrashPlan . Then we look for the ".ui_info" file there (for Windows, it lies in the folder "C: \ ProgramData \ CrashPlan") and we edit it using the following rules:
- At the first position in the line goes the port, which in the container “jrcs / crashplan” is assigned to the port “4243”. So, if the settings were specified as in step 4, then we write "32774".
- Next is the secret key that we pulled out of the container in step 6.
- The last value is the ip-address of our repository, where the CrashPlan client is running and running, i.e. which we want to manage. If QuickConnect is running on Synology, then in its settings you can view the external ip-address of the storage (“Control Panel” - “External Access”).
As a result, the line in the local ".ui_info" file should become something like this:
32774,05bv99x3-36f8-43e6-92c7-4b8776f2edb2,192.168.1.100 8. If everything is done correctly, then when you run the control software from CrashPlan on the local computer, it contacts the specified ip-address at the specified storage port (in our example, 192.168.1.100 to port 32774). The storage forwards requests to port 4243 to the “jrcs / crashplan” container, where the headless client CrashPlan runs. If the secret key matches, then everything is OK and the connection is made.
9. In the application, we should see the “storage” folder within which the symlinka subfolders created earlier will be located, and in them all our data. We enter our license, select the necessary data and start backing it up to the CrashPlan cloud. By the way, CrashPlan has good mobile applications that allow you to monitor this process.

CrashPlan Image Update
Sometimes JrCs publishes a new version of the image. This can be found on the GitHub project page and is usually associated with fixing errors or improving the image . So, when upgrading from version 4.7 to 4.8, the automatic update inside the container did not work and a new version of the image was released. In this case, the sequence of actions is as follows:
1. Remove both the current CrashPlan container and the previously loaded “jrcs / crashplan” image.
2. Install all over again. And the image and container according to the instructions above.
3. When connecting to the service by the CrashPlan client, it is necessary to accept the suggested “Adopt”. In this case, after checking the files, only new and changed data will be sent to the CrashPlan servers. If “Adopt” is not used, then all information will be sent again. With a large amount of stored information, this can take a lot of time.
Useful tips
1. During the initial installation and when reinstalling the CrashPlan client in the repository, its GUID changes. If you already have a backup of the data on the CrashPlan servers, then in order to attach to an already existing backup, you need to use the “ADOPT” function (this offer will appear in the client application after a successful connection). Otherwise, backup creation will begin anew and with large volumes it takes a lot of time.
2. Convenient file management on storage. The easiest way is to manage files on Synology through the "Midnight Commander", it can be put on storage. For this you need:
- In the "Package Center" go to "Settings" and add a new source of packages. Name: "synocommunity". Location: “ packages.synocommunity.com ”.
- Go to the “Package Center” in the “Community” category, find the “Midnight Commander” there and install it.
- Download and install PuTTY .
- Enable SSH on Synology (“Control Panel” - “Terminal and SNMP” - “Enable SSH Service”).
- Get the IP address of your repository. If QuickConnect is running on Synology, then in its settings you can see the external ip-address of the vault (“Control Panel” - “External Access”).
- Log into the repository via PuTTY by entering the username 'admin' and the current password. If you need the rights of 'root' and extended access to the file system (our case), then you need to enter the command 'sudo -i' in the terminal and repeat the password ( instructions from Synology ).
- Since we previously installed the Midnight Commander package, the 'mc' command in the terminal will launch it. As a result, we get access to all files on the device.
Useful links:
Source: https://habr.com/ru/post/282580/
All Articles