Cryptodisk synchronization between PC and Android
Previously, we showed different ways to synchronize a cryptodisk between a PC and an Android device. So, in the last article “Delta-synchronization of crypto-disks” it was shown how to implement delta-synchronization of a cryptodisk between a computer and a smartphone.
Recall in brief what was discussed in the last chapter. We took the cryptodisk file, put it in the cloud and installed it on all devices that need to work with this cryptodisk, clients of cloud storage. The zest is that we used only those “clouds” that support delta synchronization. With delta synchronization between devices, not all the changed file is copied at once, but only the changed parts of it, which saves traffic and time.
In this article we will look at a more convenient way to synchronize a cryptodisk. The previous method had three drawbacks. The first drawback is binding to a specific cloud storage. The point is that only Yandex.Disk and Dropbox support delta sync. Consequently, you are tied only to these “clouds” and you cannot use the same Google Drive or MEGA (where you can get 50GB of Nashar right away).
A second drawback follows from the first. Yandex.Disk provides free 10 GB of disk space, and Dropbox - only 2 GB. Yes, you can invite several friends, take part in various promotions and then the disk space will be increased. The only problem is that man is a lazy creature, and he wants, moreover, everything at once. Therefore, Dropbox disappears immediately, only one “cloud” remains - Yandex.Disk. It would seem that 10 GB is enough. But it seems so only at once. As practice shows, 15 GB of space on Google Drive ends very quickly, and there is only 10 GB.
The third drawback is that your files, even inside the cryptodisk, are stored on third-party servers. In terms of security, this is not exactly good.
Therefore, this chapter will show how to synchronize a cryptodisk without being tied to a cloud. As a result, we will not have binding to the cloud storage, there will be no restrictions on disk space. But we will have a delta synchronization of the cryptodisk. Security will also be higher, because our data will only be stored on our devices.
')
The principle of synchronization, which will be discussed now, is very simple. We will need several computers and several smartphones. In extreme cases, one laptop and one smartphone will do. As you may have guessed, the cryptodisk will be synchronized between the laptop and the smartphone.
For synchronization, we will use BitTorrent Sync, which can be downloaded for free from https://www.getsync.com . By the way, prices can be found at https://www.getsync.com/buy/pricing . This link is provided specifically so that you can make sure that the product is absolutely free and that even in the free version there are no restrictions on file size and the number of folders. Install BitTorrent Sync (hereinafter simply Sync) right now - you can download the Windows version from the official site, and the Android version is available from Google Play.

Fig. 1. Installing BitTorrent Sync
The principle of synchronization is very simple - it is the same as that of a regular torrent client. Sync slogan sounds like this: “Device to device. Skip the cloud. He fully describes the essence of synchronization using Sync.
In fact, a torrent network will be created between all your devices (in our case, between a laptop and a smartphone), only your devices will act as peers.
To create a cryptodisk we will use the alpha version of the CyberSafe Disk program, which can be downloaded absolutely free from the developer’s website.
You can also use the CyberSafe Mobile 2 mobile app. In other words, there is no difference where to create a cryptodisk - on a computer or on a smartphone.
Go to the Virtual Safe section and click the New button. Enter the name of the cryptodisk file, select the folder to store it. We will use the C: \ DVF folder, it will also be used as the synchronization folder. Enter the password and specify the size of the safe. Be sure to select the FAT32 file system type — so that the safe is compatible with the CyberSafe Mobile application, which does not support the NTFS file system (Figure 2). Click Accept .
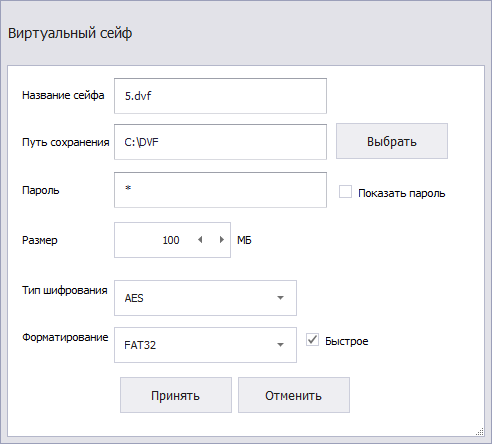
Fig. 2. Creating a safe
After creating a safe, you need to mount it. Select it in the Virtual Safe section, click the Mount button. In the window that appears, enter the safe password specified when creating it, and select the drive letter. In fig. 3 shows that the safe we created was mounted as a H disk.
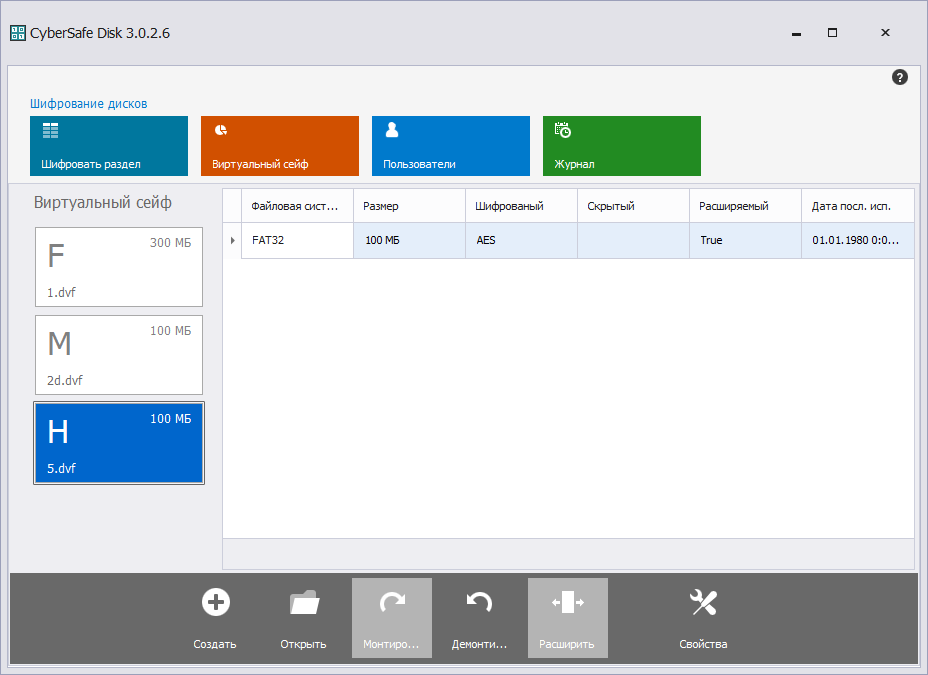
Fig. 3. Created safe mounted
Next open Explorer or any other file manager and copy all the necessary files to the safe (Fig. 4). Return to the CyberSafe Disc program and click the Unmount button to unmount the H drive and proceed with the synchronization setup.

Fig. 4. Files copied
When you first start Sync, you will be asked to set a name that will be displayed when sending and receiving folders - this name will be seen on other devices. The name is set once and you can no longer change it (Fig. 5).

Fig. 5. Choosing a peer name
When synchronizing cryptodisks only between their devices, it makes sense to establish a name like “laptop”, “Computer_in_office”, “smartphone”, “tablet”, etc. If you plan to share cryptodisc files with other users, then the best option is the name of your account (default value).
Then you will see that the list of folders is empty. Fix it is very simple - click the Add Folder button. Select a folder (in our case, this is C: \ DVF), after which Sync will offer to set folder access parameters.
In the window that appears, close the pop-up notification (Fig. 6) so that you can select the Read and Write access rights — they are needed for full-fledged bi-directional synchronization between devices (Fig. 7).

Fig. 6. Close the notification.

Fig. 7. Set permissions to the folder
Then you need to decide how to pass information about the shared folder to another peer. If this is a different user, then the easiest way is to click the E-mail button and send him a link by e-mail, which by default will be valid for three days (the number of days can be changed), see fig. eight.

Fig. 8. Sending a letter with a link
You can also copy to the clipboard and send in a convenient way (for example, via Skype) a special code for accessing the folder. Note: the code is different for different access rights (Fig. 9).
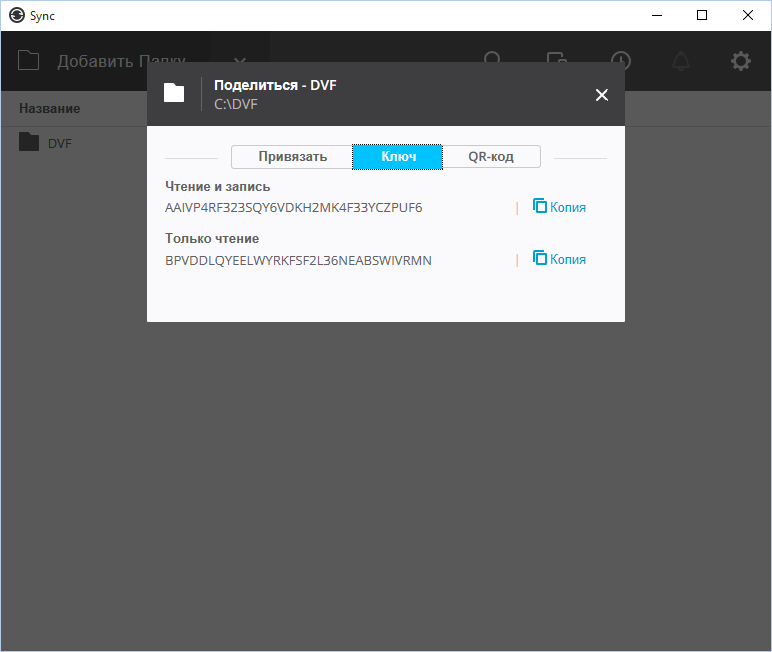
Fig. 9. Code to access the folder
But if you (as expected in our scenario) plan synchronization between your devices, then the easiest way is to use a QR code (Fig. 10). Later it will be shown how to set up synchronization on a smartphone using a QR code.
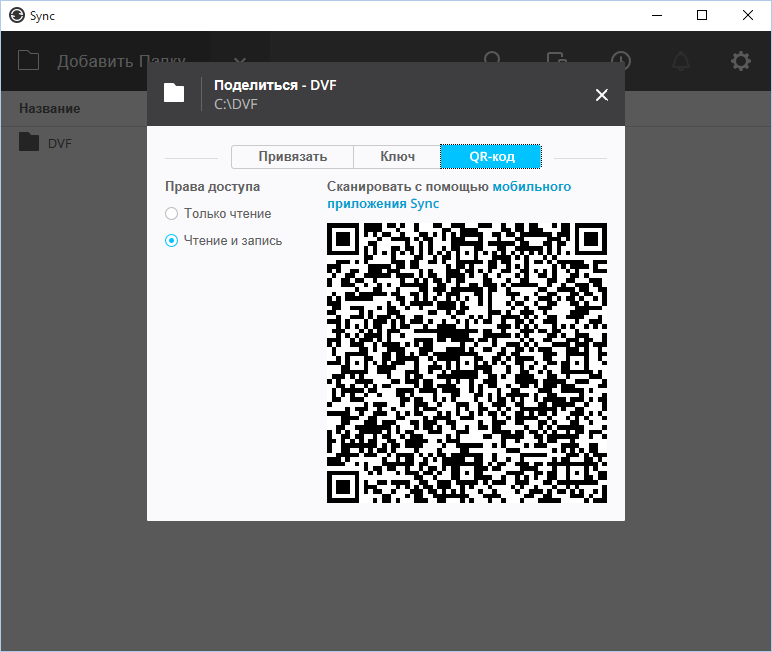
Fig. 10. QR code of access to the folder
You can put other cryptodisks created earlier in the synchronization folder, as shown in Figure. 11. Recall that even the free version of the application does not limit the size of files or the number of synchronization folders.

Fig. 11. Sync folder contents
When you first start you will be asked (as is the case with the Windows version) to set the name of the peer. The name of the feast cannot be changed anymore, so approach your choice with all care (Fig. 12).

Fig. 12. Choosing the name of a feast on a smart
Further, the application will offer to add a synchronization folder by clicking the + button. You do not need to do this, because the folder will be added automatically when you add a peer (your computer).
To add a feast, open the side menu and select the My devices command (fig. 13). You will see the name of your feast (Fig. 14).
Click the add device button (monitor icon with +). The Bind device screen (Fig. 15) will be shown, in the center of which there will be a QR code capture area. Bring the camera of the device so as to remove the QR code shown in fig. 10. However, you already know what to do with it.
After this, the synchronization folder will appear in the Program Folders section (fig. 16). Later, you will learn how to delete folders and manage synchronization.
The contents of the sync folder are shown in fig. 17. Please note: the files 1.dvf and 5.dvf are synchronized - opposite them there is a daw. The 2.dvf file is not yet synchronized.
By default, selective synchronization is enabled in the mobile version of the application. This means that you need to manually specify which files to synchronize. In the desktop version, this feature is only available in the Pro version (it is paid). On a desktop computer, selective synchronization is not so important - usually such a computer is connected to a fast Internet connection. But for the mobile version it is very important - you can synchronize only those files that you need, and not everything in a row. Next, you will be shown how to manage synchronization, but for now just select the file and select Sync from the application menu . (Fig. 18).
Next, you need to agree with the synchronization of the file (the application also displays its size, see Fig. 19) and wait for the synchronization to finish (Fig. 20).
Now let's figure out how to open cryptodisks downloaded from a computer. Launch the CyberSafe Mobile application and click the add cryptodisk button. Go to the folder / storage / sdcard0 / Download / BitTorrent Sync / <name of the synchronization folder> (this path can be changed in the program settings), select the crypto disk and click the Select button (fig. 21).
Then everything is simple - select the Open command, enter the password and view the contents of the cryptodisc (Fig. 22, 23).
Opposite the folder name is the i button. Click it. On the screen that appears, you will find the buttons:
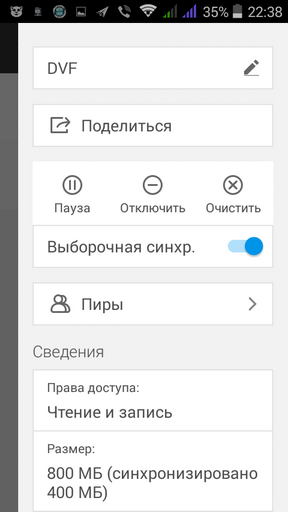
Fig. 24. Synchronization options
Selective sync switch Enables / disables selective sync. Recall that selective synchronization requires you to manually specify which files to synchronize, but it allows you to save traffic. If selective sync is disabled, all files in a row will be synchronized.
The bottom part of the window contains information - peers, access rights, folder size and the amount of synchronized files.
In the desktop version, synchronization management is performed using the context menu of the folder (Fig. 25). The names of the teams are quite clear and do not require any explanation.
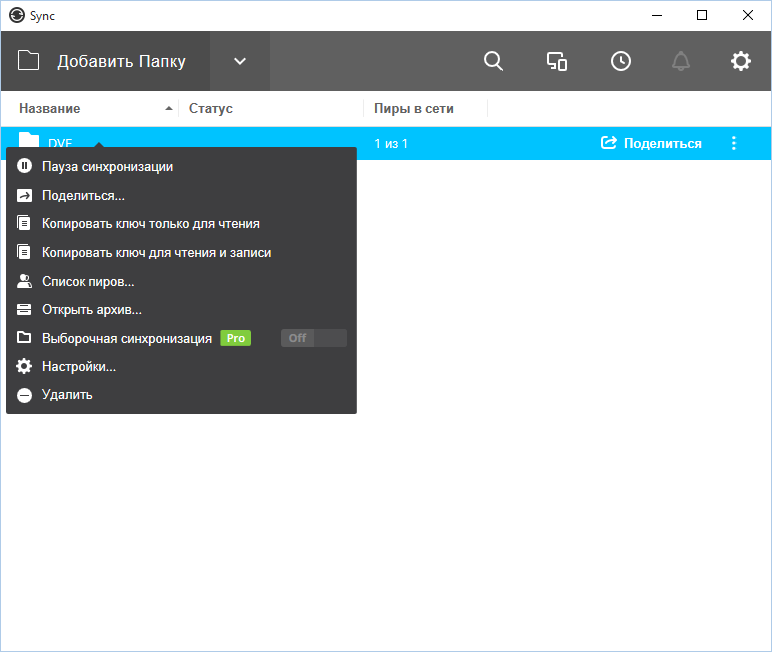
Fig. 25. Synchronization management in the desktop version
This article showed how to synchronize cryptodisc files bypassing the cloud, which not only does not limit the amount of synchronized data, but also increases security. We also recommend reading the following articles:
Recall in brief what was discussed in the last chapter. We took the cryptodisk file, put it in the cloud and installed it on all devices that need to work with this cryptodisk, clients of cloud storage. The zest is that we used only those “clouds” that support delta synchronization. With delta synchronization between devices, not all the changed file is copied at once, but only the changed parts of it, which saves traffic and time.
Cloudless sync
In this article we will look at a more convenient way to synchronize a cryptodisk. The previous method had three drawbacks. The first drawback is binding to a specific cloud storage. The point is that only Yandex.Disk and Dropbox support delta sync. Consequently, you are tied only to these “clouds” and you cannot use the same Google Drive or MEGA (where you can get 50GB of Nashar right away).
A second drawback follows from the first. Yandex.Disk provides free 10 GB of disk space, and Dropbox - only 2 GB. Yes, you can invite several friends, take part in various promotions and then the disk space will be increased. The only problem is that man is a lazy creature, and he wants, moreover, everything at once. Therefore, Dropbox disappears immediately, only one “cloud” remains - Yandex.Disk. It would seem that 10 GB is enough. But it seems so only at once. As practice shows, 15 GB of space on Google Drive ends very quickly, and there is only 10 GB.
The third drawback is that your files, even inside the cryptodisk, are stored on third-party servers. In terms of security, this is not exactly good.
Therefore, this chapter will show how to synchronize a cryptodisk without being tied to a cloud. As a result, we will not have binding to the cloud storage, there will be no restrictions on disk space. But we will have a delta synchronization of the cryptodisk. Security will also be higher, because our data will only be stored on our devices.
')
Synchronization principle
The principle of synchronization, which will be discussed now, is very simple. We will need several computers and several smartphones. In extreme cases, one laptop and one smartphone will do. As you may have guessed, the cryptodisk will be synchronized between the laptop and the smartphone.
For synchronization, we will use BitTorrent Sync, which can be downloaded for free from https://www.getsync.com . By the way, prices can be found at https://www.getsync.com/buy/pricing . This link is provided specifically so that you can make sure that the product is absolutely free and that even in the free version there are no restrictions on file size and the number of folders. Install BitTorrent Sync (hereinafter simply Sync) right now - you can download the Windows version from the official site, and the Android version is available from Google Play.
Fig. 1. Installing BitTorrent Sync
The principle of synchronization is very simple - it is the same as that of a regular torrent client. Sync slogan sounds like this: “Device to device. Skip the cloud. He fully describes the essence of synchronization using Sync.
In fact, a torrent network will be created between all your devices (in our case, between a laptop and a smartphone), only your devices will act as peers.
Cryptodisk creation
To create a cryptodisk we will use the alpha version of the CyberSafe Disk program, which can be downloaded absolutely free from the developer’s website.
You can also use the CyberSafe Mobile 2 mobile app. In other words, there is no difference where to create a cryptodisk - on a computer or on a smartphone.
Go to the Virtual Safe section and click the New button. Enter the name of the cryptodisk file, select the folder to store it. We will use the C: \ DVF folder, it will also be used as the synchronization folder. Enter the password and specify the size of the safe. Be sure to select the FAT32 file system type — so that the safe is compatible with the CyberSafe Mobile application, which does not support the NTFS file system (Figure 2). Click Accept .
Fig. 2. Creating a safe
After creating a safe, you need to mount it. Select it in the Virtual Safe section, click the Mount button. In the window that appears, enter the safe password specified when creating it, and select the drive letter. In fig. 3 shows that the safe we created was mounted as a H disk.
Fig. 3. Created safe mounted
Next open Explorer or any other file manager and copy all the necessary files to the safe (Fig. 4). Return to the CyberSafe Disc program and click the Unmount button to unmount the H drive and proceed with the synchronization setup.
Fig. 4. Files copied
Setting up synchronization on the computer
When you first start Sync, you will be asked to set a name that will be displayed when sending and receiving folders - this name will be seen on other devices. The name is set once and you can no longer change it (Fig. 5).
Fig. 5. Choosing a peer name
When synchronizing cryptodisks only between their devices, it makes sense to establish a name like “laptop”, “Computer_in_office”, “smartphone”, “tablet”, etc. If you plan to share cryptodisc files with other users, then the best option is the name of your account (default value).
Then you will see that the list of folders is empty. Fix it is very simple - click the Add Folder button. Select a folder (in our case, this is C: \ DVF), after which Sync will offer to set folder access parameters.
In the window that appears, close the pop-up notification (Fig. 6) so that you can select the Read and Write access rights — they are needed for full-fledged bi-directional synchronization between devices (Fig. 7).
Fig. 6. Close the notification.
Fig. 7. Set permissions to the folder
Then you need to decide how to pass information about the shared folder to another peer. If this is a different user, then the easiest way is to click the E-mail button and send him a link by e-mail, which by default will be valid for three days (the number of days can be changed), see fig. eight.
Fig. 8. Sending a letter with a link
You can also copy to the clipboard and send in a convenient way (for example, via Skype) a special code for accessing the folder. Note: the code is different for different access rights (Fig. 9).
Fig. 9. Code to access the folder
But if you (as expected in our scenario) plan synchronization between your devices, then the easiest way is to use a QR code (Fig. 10). Later it will be shown how to set up synchronization on a smartphone using a QR code.
Fig. 10. QR code of access to the folder
You can put other cryptodisks created earlier in the synchronization folder, as shown in Figure. 11. Recall that even the free version of the application does not limit the size of files or the number of synchronization folders.
Fig. 11. Sync folder contents
Setting up synchronization on a smartphone
When you first start you will be asked (as is the case with the Windows version) to set the name of the peer. The name of the feast cannot be changed anymore, so approach your choice with all care (Fig. 12).
Fig. 12. Choosing the name of a feast on a smart
Further, the application will offer to add a synchronization folder by clicking the + button. You do not need to do this, because the folder will be added automatically when you add a peer (your computer).
To add a feast, open the side menu and select the My devices command (fig. 13). You will see the name of your feast (Fig. 14).
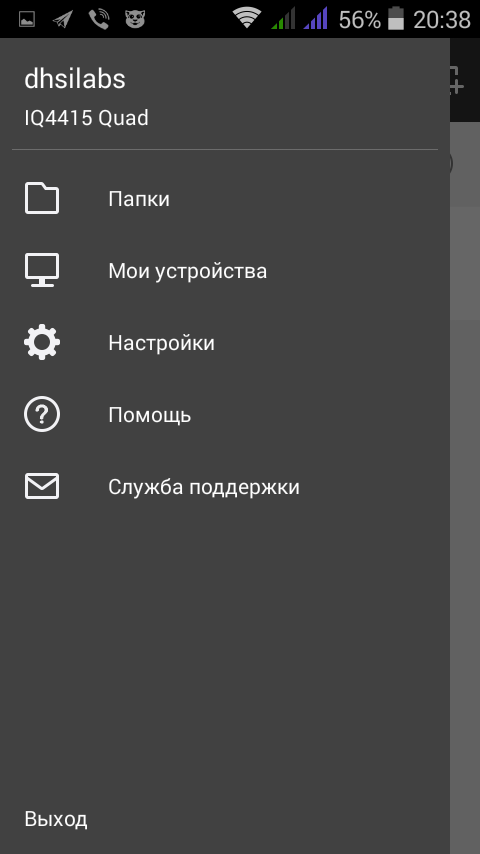 Fig. 13. Side menu |  Fig. 14 List of your devices |
Click the add device button (monitor icon with +). The Bind device screen (Fig. 15) will be shown, in the center of which there will be a QR code capture area. Bring the camera of the device so as to remove the QR code shown in fig. 10. However, you already know what to do with it.
 Fig. 15. Device binding | 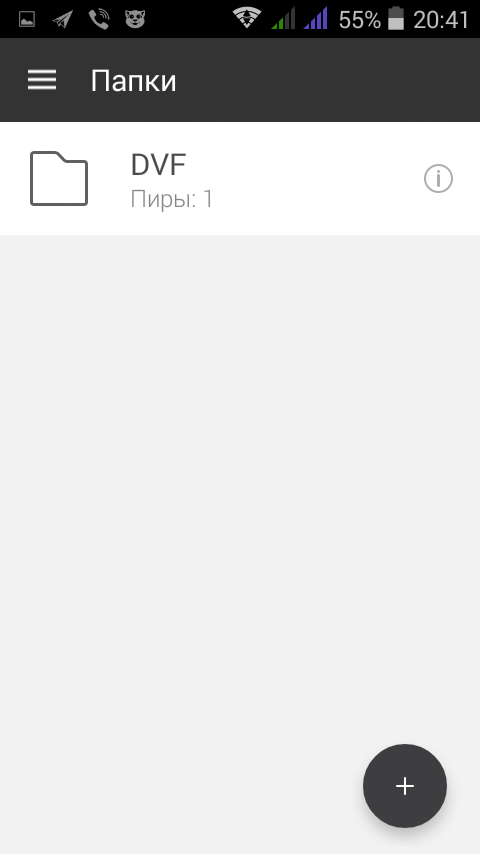 Fig. 16. List of sync folders |
After this, the synchronization folder will appear in the Program Folders section (fig. 16). Later, you will learn how to delete folders and manage synchronization.
The contents of the sync folder are shown in fig. 17. Please note: the files 1.dvf and 5.dvf are synchronized - opposite them there is a daw. The 2.dvf file is not yet synchronized.
By default, selective synchronization is enabled in the mobile version of the application. This means that you need to manually specify which files to synchronize. In the desktop version, this feature is only available in the Pro version (it is paid). On a desktop computer, selective synchronization is not so important - usually such a computer is connected to a fast Internet connection. But for the mobile version it is very important - you can synchronize only those files that you need, and not everything in a row. Next, you will be shown how to manage synchronization, but for now just select the file and select Sync from the application menu . (Fig. 18).
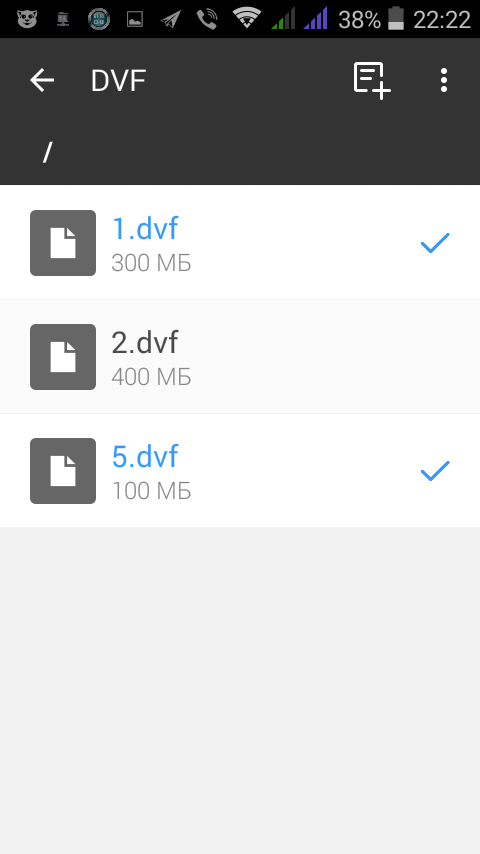 Fig. 17. Sync folder contents |  Fig. 18. Start synchronization of a specific file. |
Next, you need to agree with the synchronization of the file (the application also displays its size, see Fig. 19) and wait for the synchronization to finish (Fig. 20).
 Fig. 19. Synchronize file? | 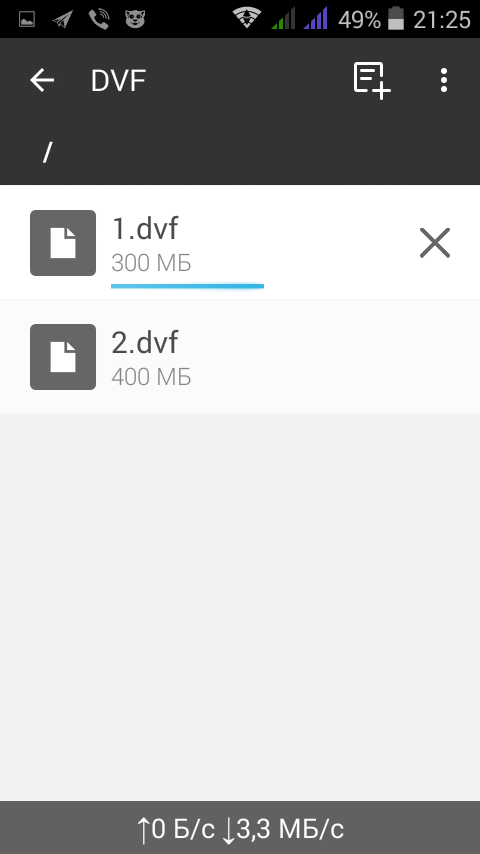 Fig. 20. Synchronization process |
Working with a cryptodisk on a smartphone
Now let's figure out how to open cryptodisks downloaded from a computer. Launch the CyberSafe Mobile application and click the add cryptodisk button. Go to the folder / storage / sdcard0 / Download / BitTorrent Sync / <name of the synchronization folder> (this path can be changed in the program settings), select the crypto disk and click the Select button (fig. 21).
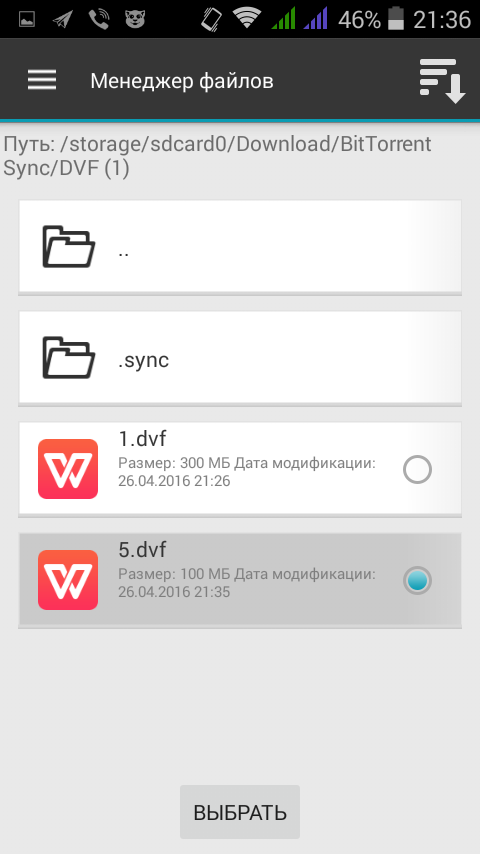 Fig. 21. Choosing a cryptodisk |  Fig. 22. Operations on safes | 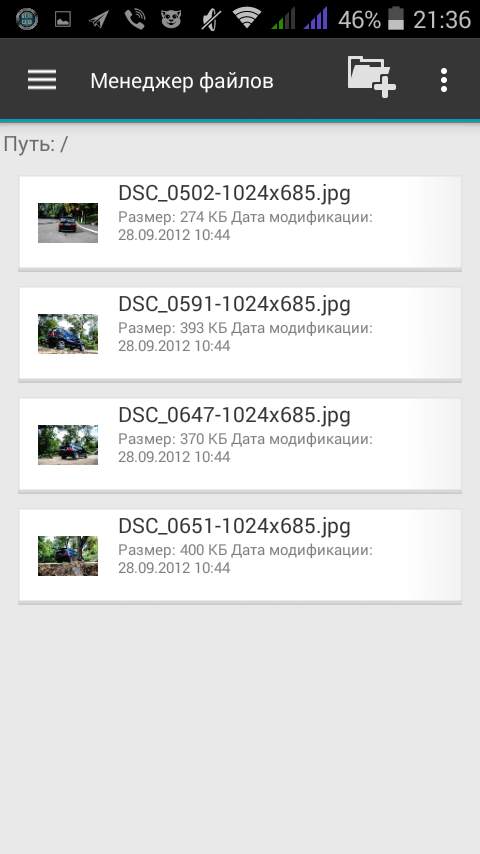 Fig. 23. View the contents of our cryptodisk |
Then everything is simple - select the Open command, enter the password and view the contents of the cryptodisc (Fig. 22, 23).
Timing control
Opposite the folder name is the i button. Click it. On the screen that appears, you will find the buttons:
- Pause - pauses synchronization.
- Disable - disables synchronization. The folder will not be synchronized with other devices, but all its contents will be saved.
- Clear - deletes the folder and its contents.
Fig. 24. Synchronization options
Selective sync switch Enables / disables selective sync. Recall that selective synchronization requires you to manually specify which files to synchronize, but it allows you to save traffic. If selective sync is disabled, all files in a row will be synchronized.
The bottom part of the window contains information - peers, access rights, folder size and the amount of synchronized files.
In the desktop version, synchronization management is performed using the context menu of the folder (Fig. 25). The names of the teams are quite clear and do not require any explanation.
Fig. 25. Synchronization management in the desktop version
Summary
This article showed how to synchronize cryptodisc files bypassing the cloud, which not only does not limit the amount of synchronized data, but also increases security. We also recommend reading the following articles:
Source: https://habr.com/ru/post/282572/
All Articles