PaintCAD Mobile - pixel art on your phone
Today, the Google Play store dazzles with the same rectangles with rounded corners, under each of which there is another touch application, where you have to poke your finger in three buttons, playing games a la tower defense, a la catapult with physics, a la more fancy 3D projects with a top view in isometry, where you crumble with one button of mobs ten pieces per second with a huge sword, and for similar projects with the peaceful construction of buildings every N minutes and donate crystals for which buildings are built faster ...
In the same place, in the far corner of the Google Play, there are Utilities that either collect 300-500 (-700) rubles in anticipation of a buyer, or trimmed demo versions / versions with ads from all sides.
')
But it was not always so. 10 years ago, a fun community of mobile application developers produced tons of useful programs. In those days, there was no Android, but Java 2 Microedition reigned everywhere - a stripped-down version of Java for weak mobile devices.
In those days, it was not 4G LTE Internet, but mostly slow GPRS (2G, 5 kilobytes per second, like a dial-up modem for speed) and the emerging trendy EDGE (2.5G, 30 kilobytes per second!).
In those days, there was no advertising in applications, so applications were made not by those who want to weld on users, inserting advertisements in all places where they need and do not need them, but by those who want to benefit and create fun things that will be useful to people. Of course, applications and games were sold through all sorts of services “send SMS to the number ...”, but there was almost no protection and the executable JAR files of mobile Java applications were lying everywhere on the Internet.
On a small screen like 101x80 or 128x128, and then on 132x176 and 240x320, people used a lot of various utilities. On a phone loaded with applications (with a volume of internal flash drive only about 1-5 MB), it was sure to be:
- email client
- ftp client,
- text / html editor,
- downloading a webpage via GRPS and browsing their html browser (Opera Mini did not exist yet),
- MIDI melodies editor,
- photo editor (for low-power mobile cameras such as 0.3 megapixels or 640x480 pixels, usually a similar native application for editing brightness / contrast / frame overlay in the photo was on the phone with the camera),
- mobile BASIC, it was possible to write programs for the phone in it, and then pack your prog with resources into the executable JAR (ZIP) file of the BASIC so that when you start this JAR, it will immediately start it up. Thus, you could make your programs on your own phone, and then distribute them via the Internet.
Many users made their websites on free hosting, wrote html code, inserted pictures and animations there, then they uploaded ftp client to the hosting via ftp, uploading their own programs on the mobile basic, as well as collections of wallpapers, ringtones, sounds, videos for the phone .
And it was only on the surface level of the user. (Below were the guys who flashed the phones with special firmware and could run programs of a special format right on the phone's processor, of course, they worked faster than Java.)
In this tutorial I will tell you how today you can draw pixel art on one of the dinosaurs from that era of j2me - PaintCAD Mobile. You will need a phone on Android 2.3 or newer. With this program you can draw any pictures, for example, for a mobile / computer site or graphics for the game, make GIF animations for the site, use raster PCF fonts on your pictures (and even make these fonts yourself). In this article we will consider the simplest functions: drawing, tools, palette, some effects.
The Android version of PaintCAD weighs about 600 kilobytes, which looks modest compared to the weight of today's Android apps. At the same time, it contains a lot of possibilities for drawing and image processing, for creating animations and raster fonts.
Start PaintCAD
After launch you will see a stub with the developer's logo. Click anywhere on the screen. When you click on the screen - will be selected from the touch screen control. When you press a key, the control will be selected from a physical keyboard (for Java phones with keys) without displaying a virtual one. Because we have a touch android, then click on the screen.
Further the starting window with a choice of interface language is shown.
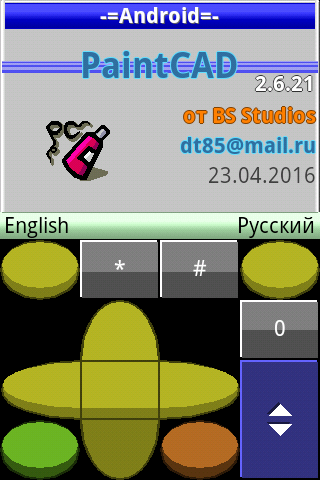
Half-screen takes a virtual keyboard. In the vertical mode, it is displayed below, in the horizontal - on the right.
If you press the big blue button, the keyboard switches between two types - a joystick and arrow numbers:

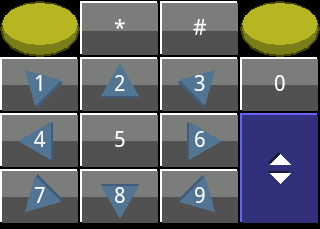
This allows you to turn on the arrow numbers when drawing and quietly drive the cursor over the picture, and switch to the joystick when you need to call a special function (cancel the last action, pipette, etc., more on this below).
Comparison of the telephone keyboard and the virtual keyboard in this video:
The so-called "soft keys" are the two round yellow buttons of the virtual keyboard on the right above and on the left above. They are always at hand and with numbers-arrows, and with the joystick.
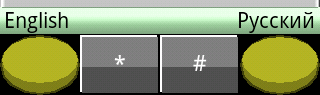
Press the left - there will be “English” interface language. Click the right - there will be “Russian” interface language. We press right. Runs through the download bar and the Council of the Day window appears.
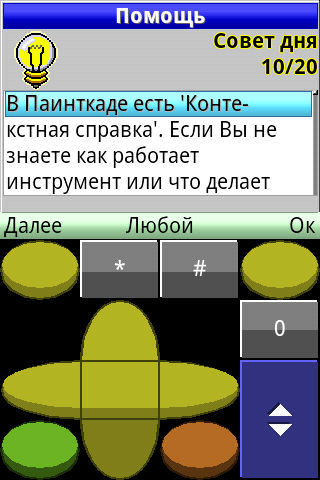
In the window, you can press the left soft ("Next") and read the tips in order, or the center of the joystick ("Any") - and you will be shown random advice. Use the “Up” - “Down” keys to scroll the text of the board. After reading the tips, click the right software "Ok".
The program mode selection window appears.
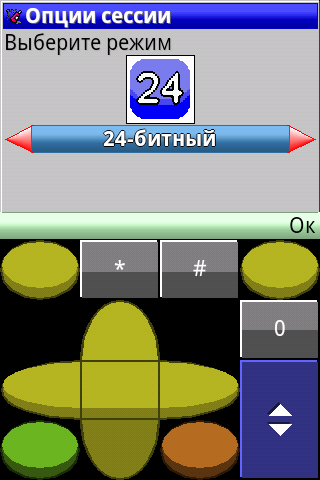
There are three modes:
8 bits per dot is the so-called “256-color mode with an indexed palette”, if in a simple way: you have 256 cans of paint in the palette. You can fill in any jar with any RGB color (i.e. choose one from 16 million colors). And, accordingly, the figure will be only these 256 flowers from cans. In this mode, you can draw GIF files. You can also save to other formats (256-color BMP, for example).
24 bits per pixel is a full-color mode, where each dot in the figure has one of 16 million colors. Used for drawing 24-bit BMPs, usually with a final save in PNG (even with translucency!).
Handler - the mode with the maximum amount of free RAM, for example, allows you to convert a giant image of any format into a BMP drawing smaller in width and height (if this picture is not loaded at all in 8-bit / 24-bit modes due to lack of RAM, and I want to use it in the drawings).
Use the "Right" - "Left" keys to switch the mode. Select "24-bit" and click the right software "OK".
The “Size Limit” window appears.
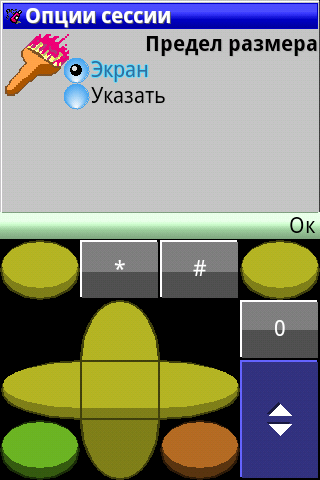
In it we choose the maximum size of the picture horizontally and vertically, which we are going to draw. After that, the memory will be allocated to the necessary buffers so that it is enough anyway.
Using the “Up” - “Down” keys you can select “Screen” (then the maximum size of the picture from the screen) or “Specify” (then you can specify, for example, 1500 x 50 pixels if you need to suddenly draw a picture that is very wide, but not high). We leave selected "Screen" and click the right software "OK".
The Startup Wizard window appears.
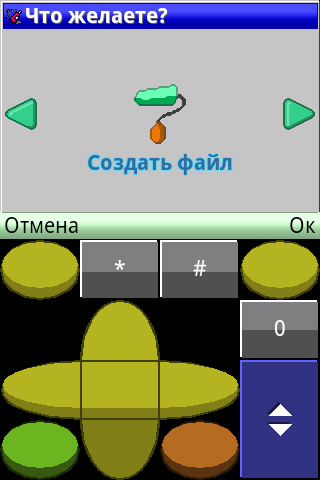
In it you can select with the keys “Right” - “Left”, as in many PC programs, what we are going to do:
Create file - create a new picture of the size you specify (but not more than the size limit selected in the previous window).
Open ??? - open the graphics of any format using the telephone
Open ??? + alpha - open graphics of any format with the help of a telephone with the alpha-channel loading of transparency. Used to open PNG files with translucency. Then the picture is loaded onto the drawing, and the alpha channel is buffered. You can switch between them and draw both a drawing and an alpha channel.
Detailed information for experienced alpha channel artworkers
Open ??? Figure + Buff - open two images at once: one should be placed on a drawing (for example, mypic.bmp), and the other with the CB annotation placed in the buffer (for example, mypicCB.bmp). This is useful when you draw a picture in the image and an alpha channel in the buffer. And now you save your work in two files at once, then you go out for lunch, and then come back, re-run the paintkad and load your two files - drawing and buffer - back into the editor.
Select "Create file" and click the right software "OK".
The “New File” window appears, which asks you for the size of your new image in pixels.
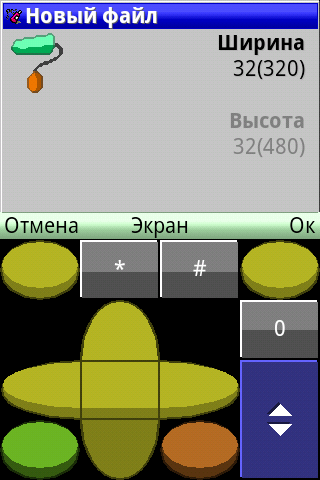
At first 32x32 pixels are offered. The maximum size of the pattern you selected is indicated in brackets (more than which numbers cannot be entered).
To switch between width and height use the joystick keys “Up” - “Down”. To enter numbers, use the arrow keys. To do this, press the big blue button and enter the numbers. The numbers are entered cyclically, added to the end of the already entered number, and with a very long / large number (more than max size) - reset to one digit.
Example for the screen 320x480:
entered "32"
we enter "0" - it became "320",
we introduce another "2" - it became "2" (reset because 3202 - more than max. size),
we introduce another "0" - it became "20"
we introduce another "5" - it became "205",
we introduce another "3" - it became "3" (reset as 2053 - more than max. size),
etc.
If you want to enter a size equal to the screen, then simply press the center of the joystick - and you will immediately enter the width / height equal to the screen, and “Ok” will click.
For this tutorial, I'll leave 32x32 pixels. Click the right software "OK".
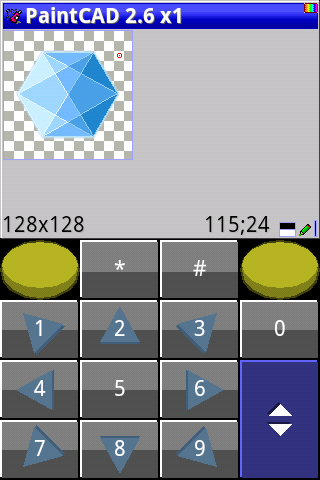
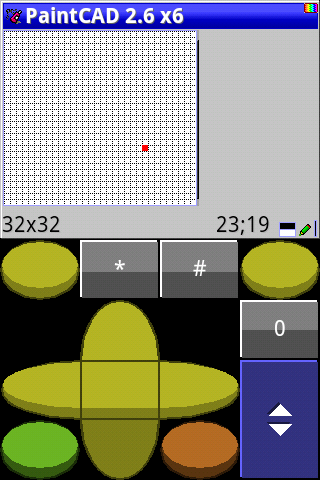
The main editor window appears - the drawing window.
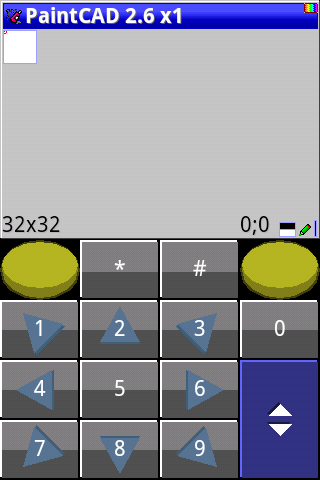
Such a small picture, especially on modern giant screens, is almost invisible. Therefore, we immediately switch to the Joystick keyboard and click “Joy Right”. The "Command Menu" opens.
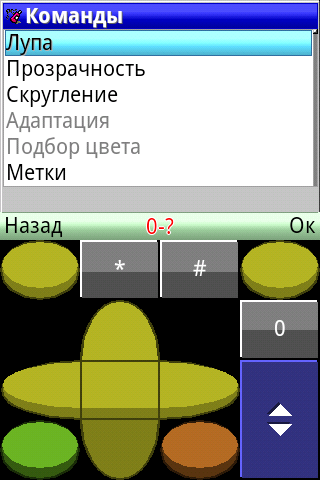
In the command menu you can do a lot, but we will change the scale with the command "Loupe". Make sure who the cursor is on the menu item "Magnifier" and click the right software "Ok." We fall into the window of the choice of scale.
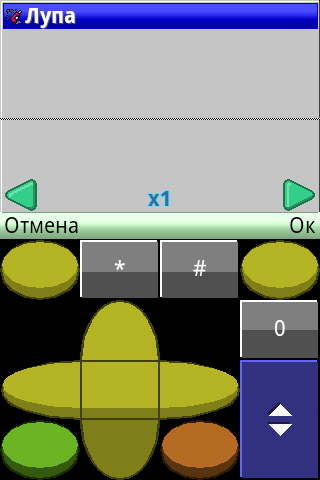
In the window you can use the buttons "Joy Right" - "Joy Left" to change the scale within the pixel size from 1x1 to 50x50. You can also on the numbers-arrows immediately press the number from 1 to 9, selecting the scale from x1 to x9, respectively.
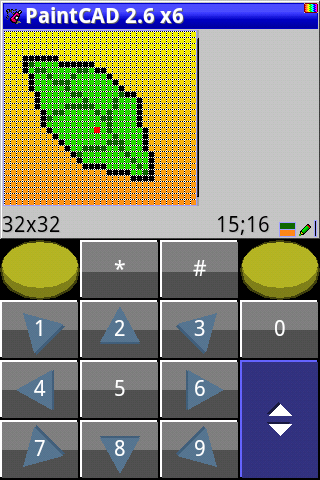
Choose x6, for example. In this case, the chess cell on the screen when you select different scales will immediately display the size of the pixels. You can immediately figure out whether it is pleasant to look at them or to choose even bigger ones.

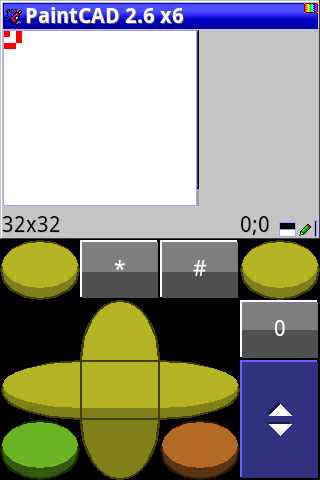
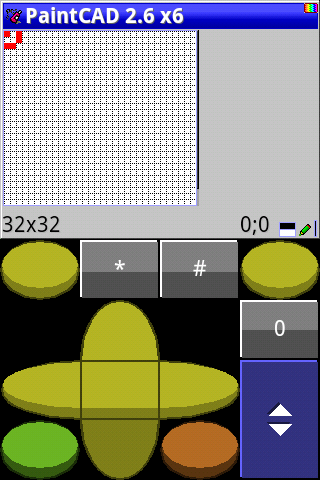
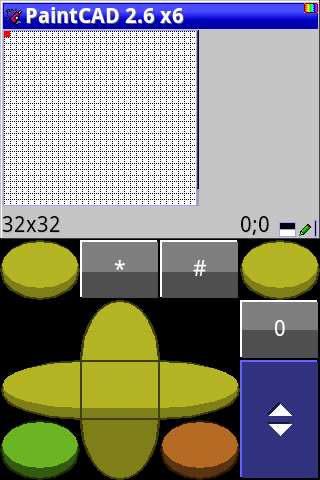
Click the right software "OK", returning to the main window. Figure increased on the screen. A mini scroll bar appeared on the right, showing where we are in the picture.
Many people still like the grid, so that the borders of the pixels are visible. Then turn it on in the main menu. Press "0" (zero), the main menu window appears.
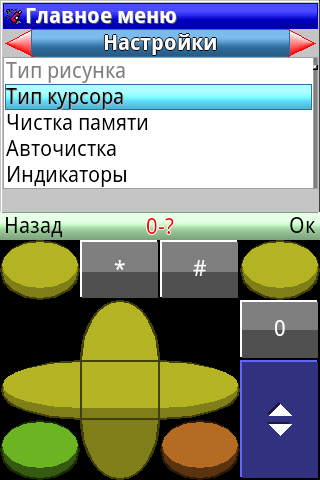
You can use the “Right” - “Left” keys to switch submenus, and use the “Up” - “Down” keys to go inside the submenu using the list of items. Press “Left” twice to get to the “Settings” submenu.
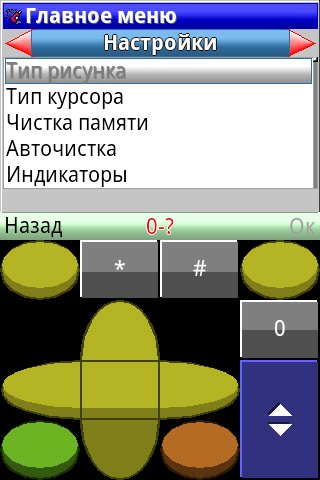
The “Grid” setting is almost at the bottom of the list. Therefore, click "Up" to go through the top down and put the cursor on the "Grid".
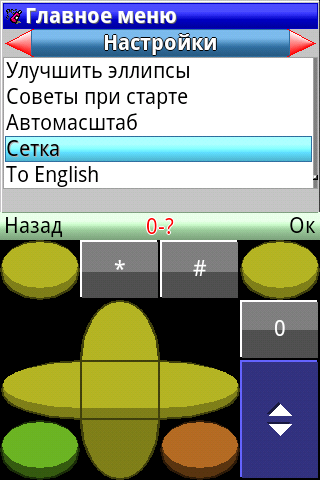
Click the right software “Ok”, the window for changing the grid settings will appear.
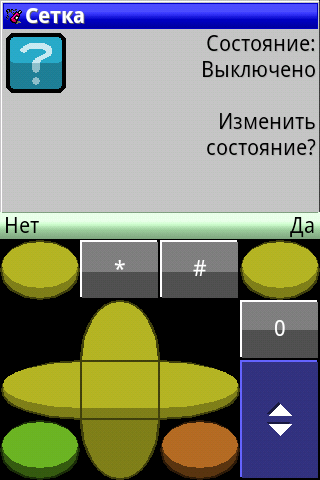
It says that the grid is now turned off and you can either change the state (turn it on) or not touch anything (leave it off). We press the right software "Yes" and we are returned to the main drawing window with the grid turned on.
You can also change the appearance of the cursor to single-pixel, so that the ring around the cursor does not obscure our view when drawing small images. To do this, click "0" and find at the very top of the "Settings" submenu (where there was a "Grid") the item "Cursor type".
Call it and get into the cursor settings window.
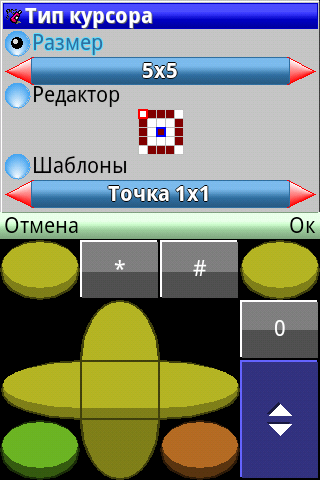
Use the "Joyvniz" button to go down to the "Templates", where the "Point 1x1" required by us has already been selected, but in order for it to load - click "JoyRight" and back "JoyLeft". The cursor in the middle of the screen shows us what the selected cursor will look like.

In this window, if you wish, you can even draw your cursor within a 5x5 square. But for now let's take the sample. Click "OK" and return to the drawing window with a small cursor.
Start drawing
A status bar is displayed below the picture.
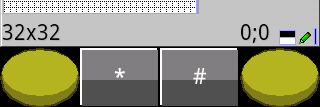
There are indicated:
- current picture size: 32x32,
- current cursor position: 0; 0, in the settings you can turn on the countdown from 1; 1, for those who do not like with 0; 0),
- two colors under each other: top black “Front color” (PC, foreground color, FC), bottom white “Back color” (SC, background color, BC). Colors are usually used as input for effects. For example, you can draw all objects of the color of the PC with the color line of the LC Or draw a fire from the bottom up from the LC to the HRC, and then to the transparency. Etc.
- tool: at the moment "pencil", puts the pixels of the color of the PC by the button "5" in the current position of the cursor.
- type of lines: for tools such as line, ellipse, frame, triangle, this is solid or dashed, switches using the green button on the joystick keyboard.
Use the arrow keys on the numeric keypad to move the cursor, use the 5 key to set the pixels. If you put it past - then click on “JoyLeft”, it will exchange the colors of the HRC and LC in some places, and instead of black you will paint with white (erase the painted black). Then again press “JoyLeft” and black color will again appear in the PC (and white in the LC).
So, this is how the Pencil works.

Now before the next drawing we erase the drawing. In paintkad there is always a selected fragment of the picture. Now it is equal to the whole picture (i.e. the entire 32x32 pixel picture is highlighted). Fill the entire picture with the color of the LC (white), erasing everything that was painted. To do this, press "#" - the "Selection and Clipboard" menu will appear.
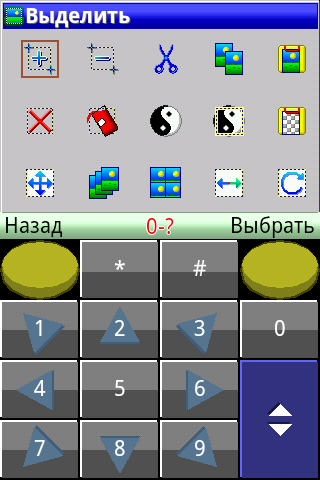
Use the Up-Down-Left-Right keys on the numeric or joystick keyboard to move the cursor to "Clear."
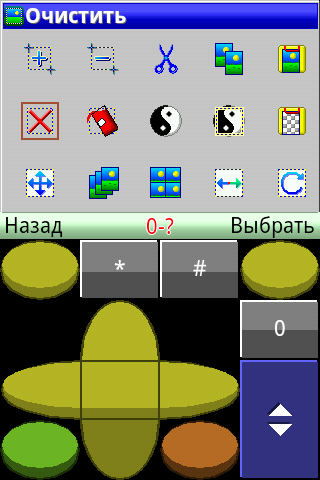
Click "OK" and the picture is clean again (filled with the color of the SC).
Instruments
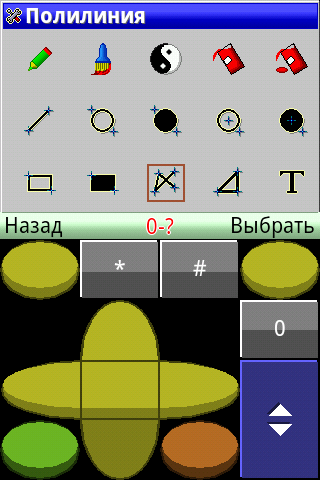
Click the right soft in the drawing window. The tool selection menu appears.

Boring assignment of all 15 tools
Pencil: draws on the button “5” a pixel of the color of the PC under the cursor,
Brush: turns on / off by the button “5”, if enabled, then when moving the cursor leaves behind a trace of the color of the PC.
Inverter: similar to the brush, but leaves behind the cursor the colors that are inverse to those that were in pixels before.
Fill: the usual fill of the “5” button with the color of the PC within the color on which it started to fill,
Fill 2: an unusual shading on the button “5” with the color of the PC, rests only on the dots of the color of the PC, the rest is filled with the color of the PC without parsing,
Line: a straight line in the color of the PC from the first point on the button "5" to the second point on the button "5"
Ellipse: an uncolored ellipse within a rectangle, the two opposite corners of which are selected with the "5" button in turn,
Circle: filled ellipse, similar to the Ellipse tool
Ellipse 2: an empty ellipse within a rectangle, the center of which is the first point on the button "5", and the angle is the second point on the button 5.
Circle 2: shaded ellipse, similar to the Ellipse 2 tool.
Frame: empty rectangle, two opposite corners of which are two points on the button "5".
Quidrat: a filled rectangle, similar to the Frame tool.
Polyline: draws straight lines between the points indicated by the "5" button.
Triangle: draws three straight lines forming a triangle between three points, indicated by the button "5".
Text: prompts for text, then allows you to place the entered text in the image using system fonts or the downloaded external raster PCF font file (if it was loaded into the 0-Fonts menu before).
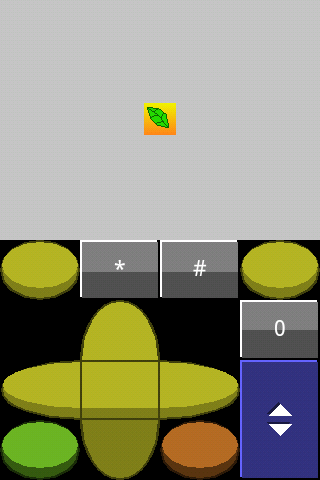
Select the tool "Polyline" and click "Select" (right software).
Turn the cursor to different points of the picture and press the button "5" - the points will be connected by lines. To start a new polyline, you need to double-click the right soft (the first press is to open the Tools menu, the second press is to select the Polyline tool with the break of the previous polyline).
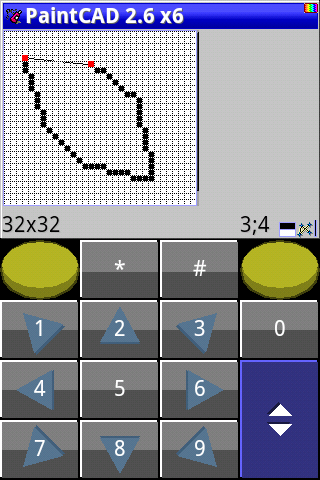
The last press - and drawn a closed loop a la "sheet".
Palette - Grid Mode and Gradient Effect
Click the left soft to go to the palette window. It will open.
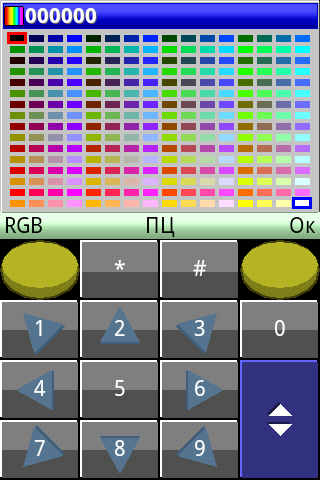
The red frame is the color of the PC. The blue frame is the color of the LC. In 24-bit mode, you can simply select the finished colors from the table. And in the 8-bit mode, this grid is the palette, in it you can not only choose colors, but also edit them.
Switching between the selection of the PCC and the PC color - by the central button of the joystick. But we just choose a different color to fill our pattern. I choose green for the sheet. To do this, on the numeric keypad, press the arrow keys and move the cursor to the green color.
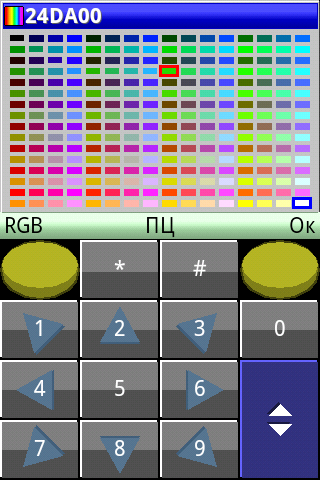
Next, click "OK" and see at the bottom of the window that in the PC now the selected color lies.
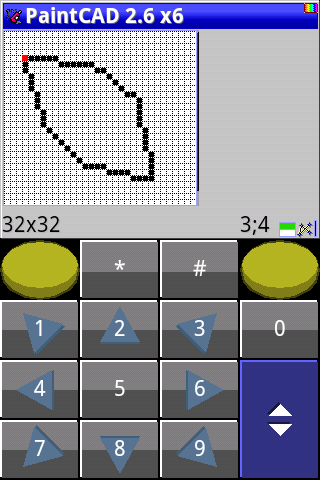
Next, click the right software and select the "Fill" tool.
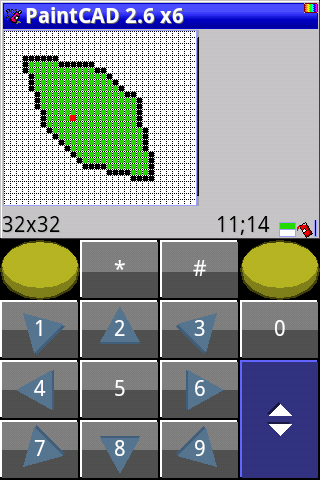
Move the cursor to the closed loop, click "5" and fill pours green color within the black outline of the sheet.
Palette - spectral selection mode
Fill the white background with a gradient. To do this, you need to choose two colors in the colors of the PC and SZ, between which there will be a smooth transition (gradient).
Click the left soft and get into the grid palette.

Now press "Joy Left" and get into spectral selection.
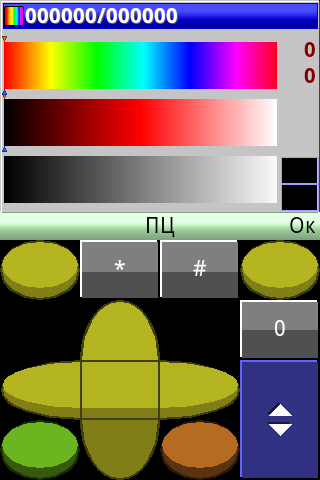
In the spectral selection, you can choose the tone of color (upper band with a rainbow). Press the "1" and "3" keys on the numeric keypad, selecting a tone. The red arrow moves along the top edge of the bar, showing your choice. I will choose a yellow tint.
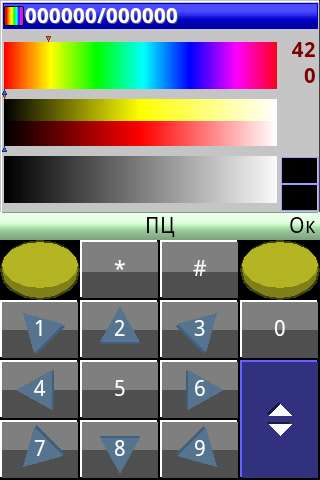
Now, in the middle lane, you need to choose the brightness of the color from dark to bright with the "4" and "6" keys. Choose a yellow medium brightness. It is immediately displayed on the right in the PC color cell.
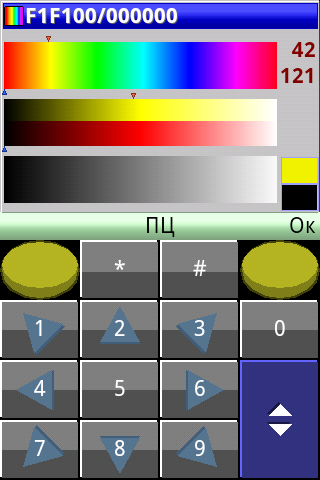
Then press the central joystick key on the joystick keyboard. And the inscription at the bottom of the window will change from "PC" to "PC". So now you rule the color of the ZP.
Use the "1" and "3" keys to also select the tone, then use the "4" and "6" keys to select the brightness. Only now, not the red arrows, but the blue arrows responsible for the LC, move under the stripes. I choose a red shade.

At the bottom right of the window, cells with selected colors of the PC (yellow) and SC (red) are visible. Click the right software (OK). Returning to the main window.

Selected colors appeared at the bottom of the window.
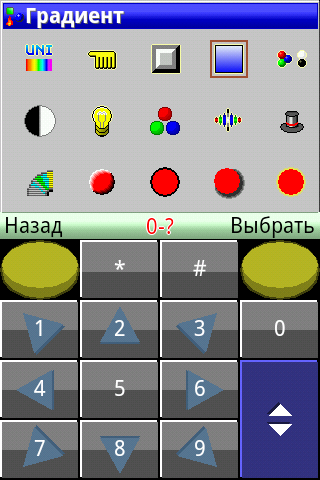
Next, launch the gradient effect in the Effects menu. To do this, click the "*" (asterisk). The Effects menu opens. Move the cursor to the item "Gradient" and select it.
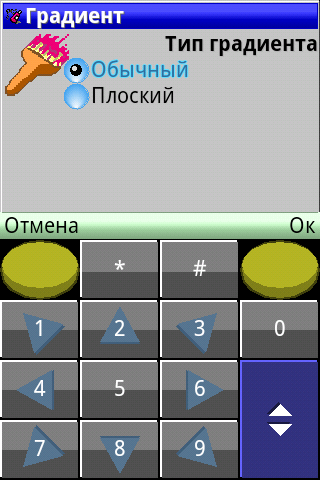
A query of the type of gradient comes out: normal or flat. Flat is a gradient using only two colors of the PC and the ZC without intermediate shades (generated using a mixture of pixels of the color of the PC and the ZC in the required proportions). Select Normal and click the right software "OK".
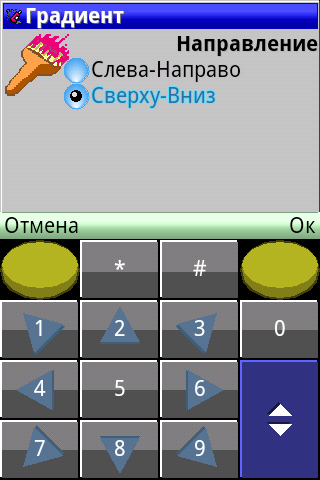
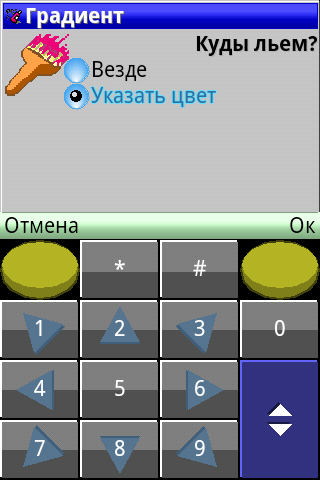
Next, the gradient direction is requested. Select “Top Down” (i.e., vertical gradient).
Further the place of filling is requested: everywhere within the selection or on a specific color. Becausewe need to fill in a white background (i.e., a specific color), then select "Specify color".
In the figure without scaling we roll the cursor with the arrow keys into the white space.
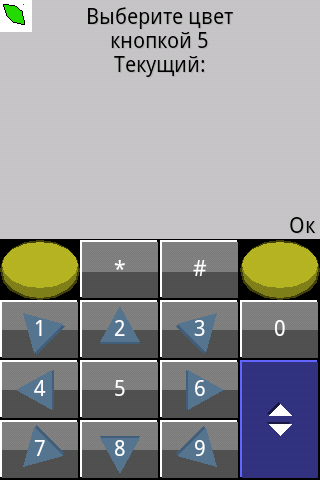
And click "5". Paintpad displays the color that was specified.

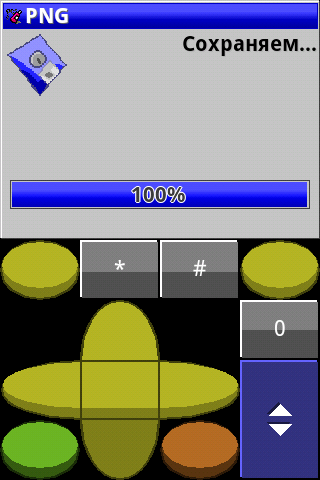
Next, click "OK". A window is displayed with a progress bar and approximately the remaining time until the end of processing.
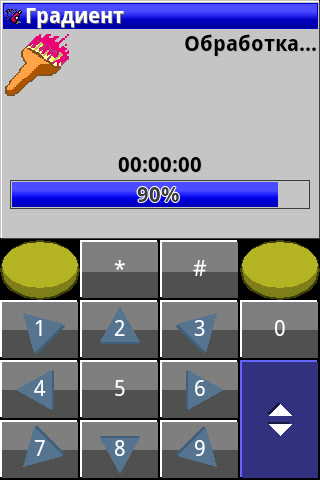
At the end of the processing, a return is made to the main window. Gradient imposed.
Palette - RGB color selection mode
Draw a sheet of dark green streaks. To do this, first put the cursor on the green color of the sheet and click "JoyDown". This will cause Pipette, which will take the color under the cursor in the PC.
Note: if the PC already has a color that is under the cursor, then the pipette simply changes the PC and the DC in some places. This allows you to compare the current color of the HRC and the color under the cursor (equal or not equal). If they are equal, then the HRC and the CC are swapped and you need to press "Joy Left" to change them back. It is quite convenient when drawing and pixel art.

Now we get into the RGB palette mode to darken the color. To do this, click "Left Software". We will return to the spectral selection.
From the spectral selection, you crawled out into the grid palette, as you climbed there - by pressing "Joy Left".
In the grid palette mode, to enter the RGB color editing mode, click Left Soft. An RGB color editing window will appear.

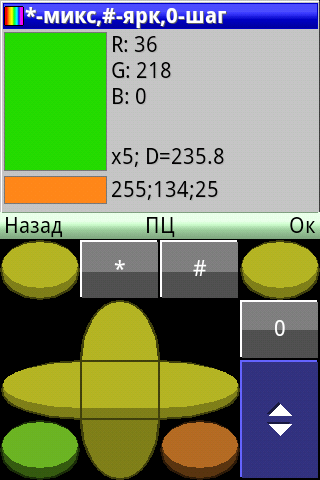
Two cells of colors are drawn in the window: large is the current edited, small is a different color. It also displays the value of the R, G, and B component of the currently edited color (at the top) and the component of a different color (at the bottom).
In the middle, the component change step is displayed (x1 - 1 at a time, x5 - 5 at a time, switches using the "0" button).
As well as the color distance (which is “D = 235.8”) between the PC and the PC — the square root of the sum of the squares of the component differences. The color distance makes it possible to understand how far the two colors are, which makes it possible not to make eye-catching differences in the colors of the pattern with a pixel art.
A boring list of control keys window RGB-color editing
.
«1» «3» R . «2» R .
«4» «6» G . «5» G .
«7» «9» B . «8» B .
* — , .
# — , — .
0 — 1 5.
— .
— .
—
«1» «3» R . «2» R .
«4» «6» G . «5» G .
«7» «9» B . «8» B .
* — , .
# — , — .
0 — 1 5.
— .
— .
—
So, you need to make the green darker.
Click "0" and see in the window in the middle of "x5" instead of "x1" - then the component change step is now equal to five per click.
We press the key "#" (grid) in accordance with the prompt in the header of the window "# -Mark". The window goes into editing mode by brightness.
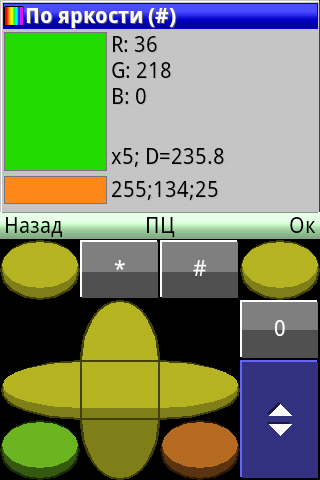
We will reduce the green component G with the “4” key by 5 units per press. And the rest (R, B) will change proportionally. By brief pressing on “4” we reduce G and, as a result, the brightness of the whole green color.
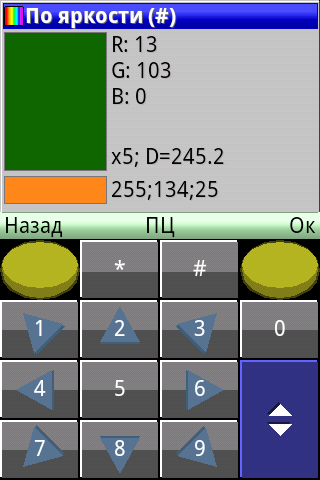
Click "OK" and return to the main window. We see in PCs our newly selected dark green color.

We select the tool, for example, "Pencil"

And pixel-by-pixel we draw veinlets.
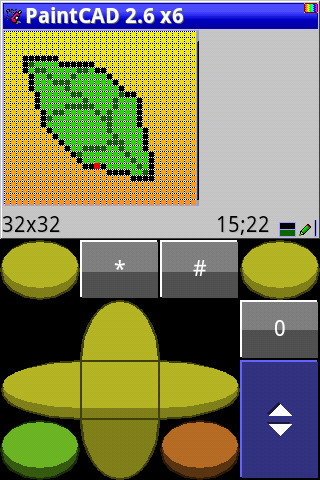
Additional Effect Color Replacement
This effect changes within the selection (and the whole picture is highlighted) all points of the color of the PC per color of the LC.
Let's turn the black outline of a leaf into a dark green outline.
Click "Joy Left" to exchange PCs and SZs in cells.

Now the dark green color descended to the ZP. And in the PC there is an unnecessary red tint that lay there after applying the gradient. Replace it with black.
To do this, move the cursor to any point in the contour and click "Joy Down" (pipette). We will see that in the PC now lies black.
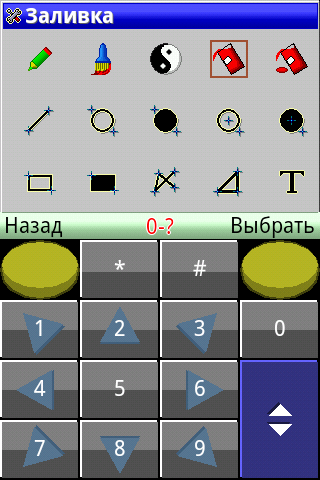
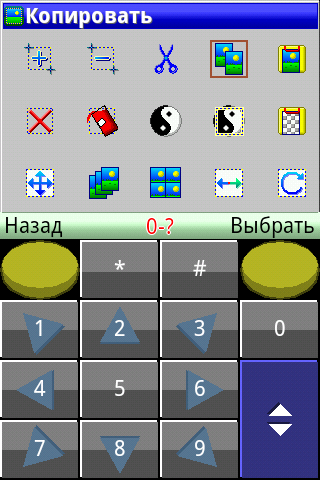
Now call the "Color Change". Press "*" (asterisk) to bring up the Effects menu. And there select on the right the icon of the magic cylinder with a red ribbon called “Extra Effects”.
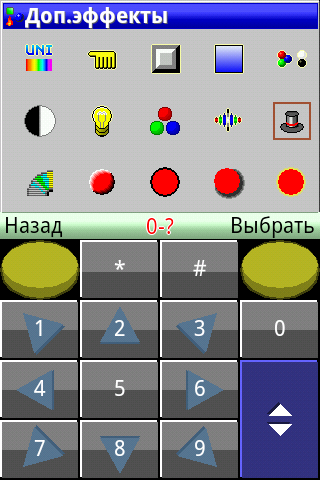
In the Extra Effects menu at the very bottom, find and select the Color Replacement item.
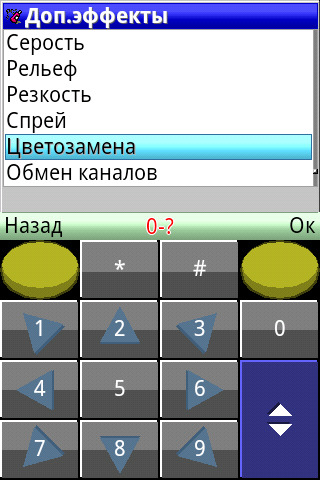
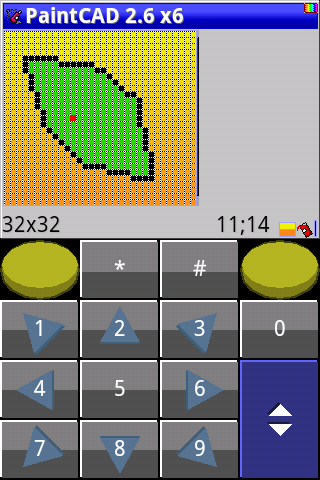
After clicking “Ok” and processing the picture, you will return to the main drawing window.
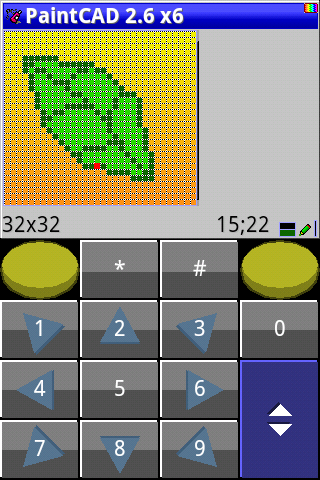
The black outline turned green.
Preview
Press the joystick keyboard with a red round button. And the preview mode opens. Here on a 1x1 scale, you can appreciate the beauty of your creation.
If you click on the upper half of the screen (where there is no virtual keyboard), then the virtual keyboard will disappear. So you can appreciate the large figures.
Click again on any place of the screen - and the virtual keyboard will appear again.
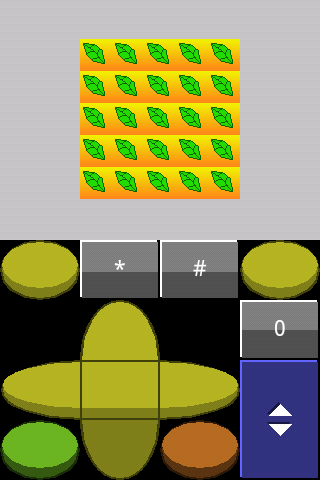
Now press "*" (asterisk) and you can view your drawing as an element (tile) of a mosaic of 5x5 drawings. Conveniently, if you draw textures that dock with themselves, or map elements for a 2D game.
By the “Left Soft” button you can also switch between the preview of the picture and the buffer (if you copied something to the buffer before, but we haven’t copied anything yet).
Press the red round button on the joystick keyboard again to return to the main drawing window.
Save file
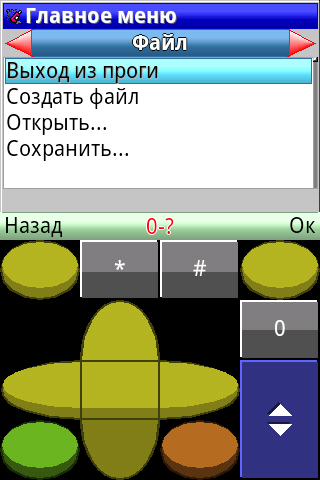
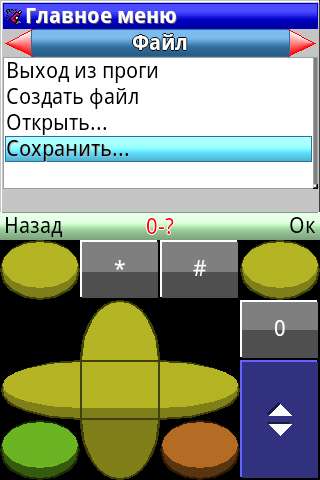
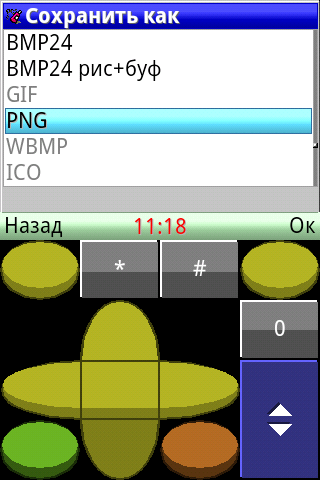
To save the image as a file - click on the "0" in the main window. In the "File" submenu, select "Save ...".
We will save to PNG. Therefore, select the PNG format in the next window. Gray items are not a demo version or for some money, but simply items that work in 8-bit (256 color) drawing mode, and we are now in 24-bit.
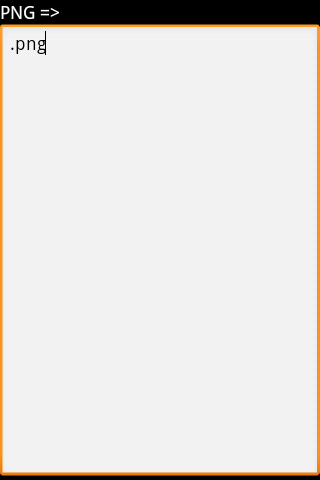
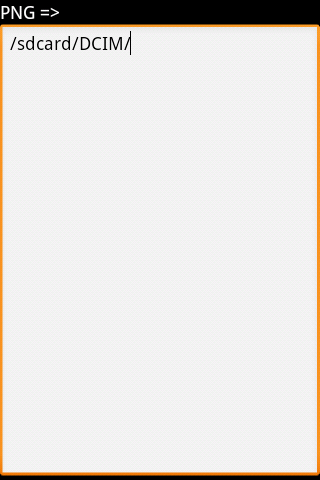
A mysterious window will appear with a text box on the full screen. It waits for you to enter the Path + File Name in it, so the extension ".png" is already entered in it.
In order not to invent a way - we climb into the built-in file manager. To do this, click the "Menu" button, and if you have a new phone and there is no such button, then click on the text field for a long time - the menu will pop up.
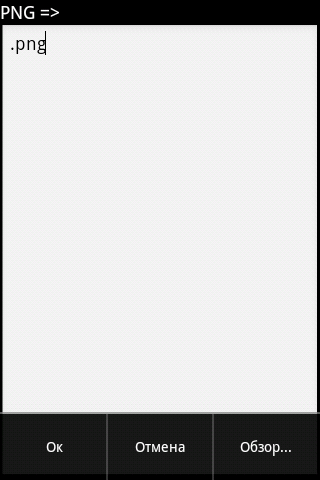
Select "Browse ..." and get into the File Manager.
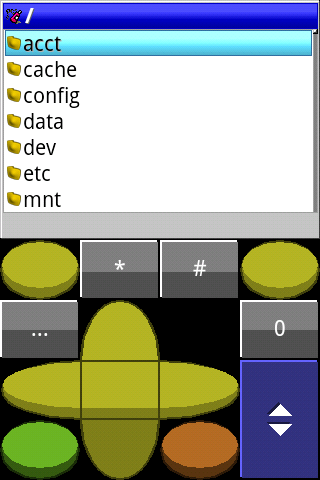
To select disks, you can press "Left" many times and get into the list of disks.
You can also create a new folder, rename a file, etc. To do this, you need to press the "menu" button of your phone or press the "..." button on the virtual keyboard, it is visible at the upper left of the joystick in the screenshot.
We climb into the desired folder, click "..." on the joystick virtklave.
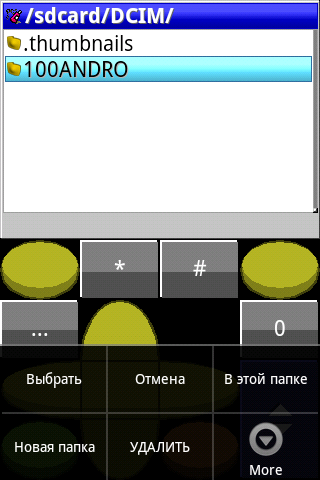
Select the item "In this folder." You will be returned to the path input field + file name, but the path to the selected folder will be entered there.
We add the file name. Click "Menu" or long on the input field to call the menu.
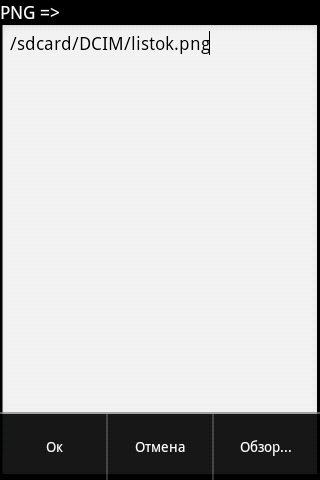
Click "OK". The transparency selection window appears. You can specify “no” for a picture without transparency, or specify a specific fully transparent color, or indicate that you have an alpha channel exactly the same size as the picture in the buffer, then this alpha channel will be used when saving your PNG as a translucency pattern.
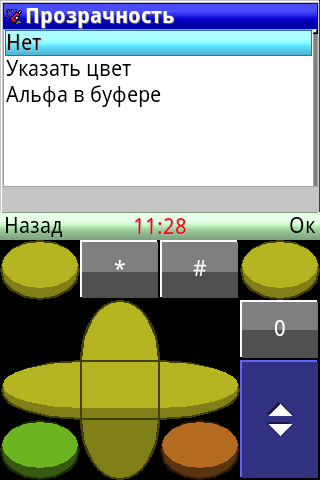
Choose "No". We are waiting for the passage of packing and saving PNG.
View saved files
After saving or the next time you open files, you can view the contents of the pictures directly in the file manager. To do this, call, for example, "0" - "File" - "Open ..." - "???" (for simple opening of the file), in the input field of the path + name, select in the menu "Browse ..." as above did it when saving.
Next, point the cursor at the file.
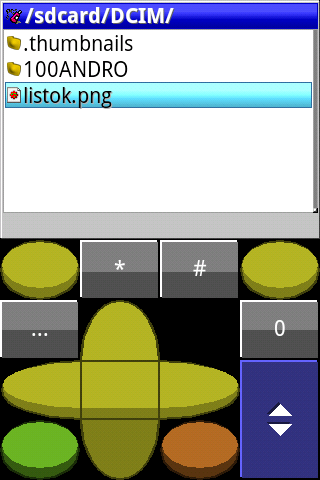
And click "1" on the keyboard of the arrows. Turns on the file viewer. For a picture, the picture itself will be drawn on the screen, and the file name and the size of the picture in pixels will be written below.

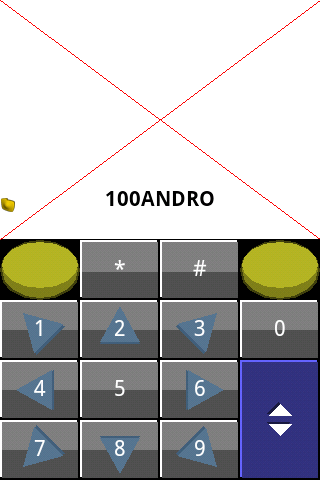
In this case, you can walk with the navigation keys on files and folders. If the cursor on a folder is located or on a file that cannot be opened as a picture, then a screen with red lines is drawn.
Another small video about drawing a simple image.
Conclusion
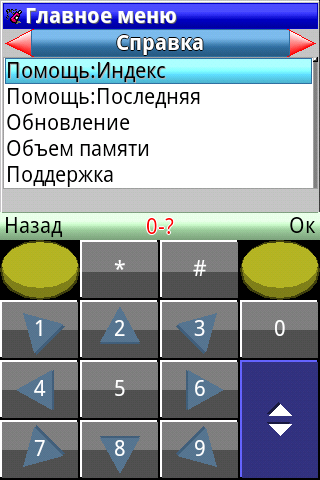
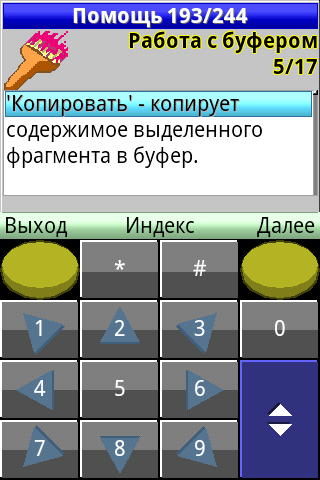
In this training material, only a few of the functions of the mobile paintkad were considered. The description of the functions can be found in the help system’s built-in helppoint in the main menu:
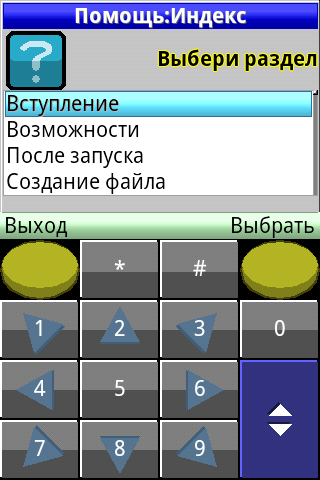
You can also hover the cursor over the function in the menu and press “0” to read the context help for this function.
Resources
Download free PaintCAD Mobile version for Android can be, for example, in Google Play (just type in PaintCAD search) or on the official website paintkada direct link (for those who do not have Google Play on your phone): blackstrip.ru/PaintCAD.apk
For those who have one of the latest j2me-enabled handsets - the j2me version of the paintkad will also work for you: blackstrip.ru/PaintCAD.jar , only it will use the physical keyboard of your phone to control instead of the virtual one.
There is also a gallery of drawings and animations of the users of paintkad: pg.blackstrip.ru
And also - a library of raster PCF fonts: fonts.blackstrip.ru. Load these fonts through “0” - “Fonts” - “Open Font” and then the “Text” tool.
Source: https://habr.com/ru/post/282309/
All Articles